Introduction
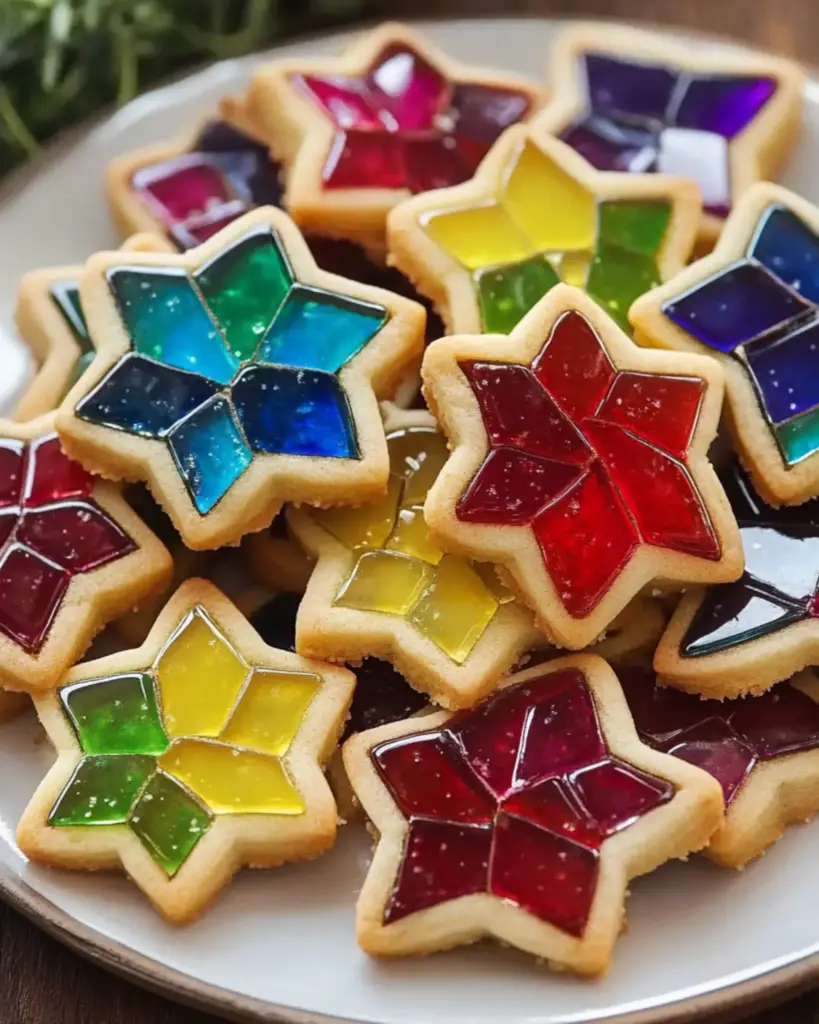
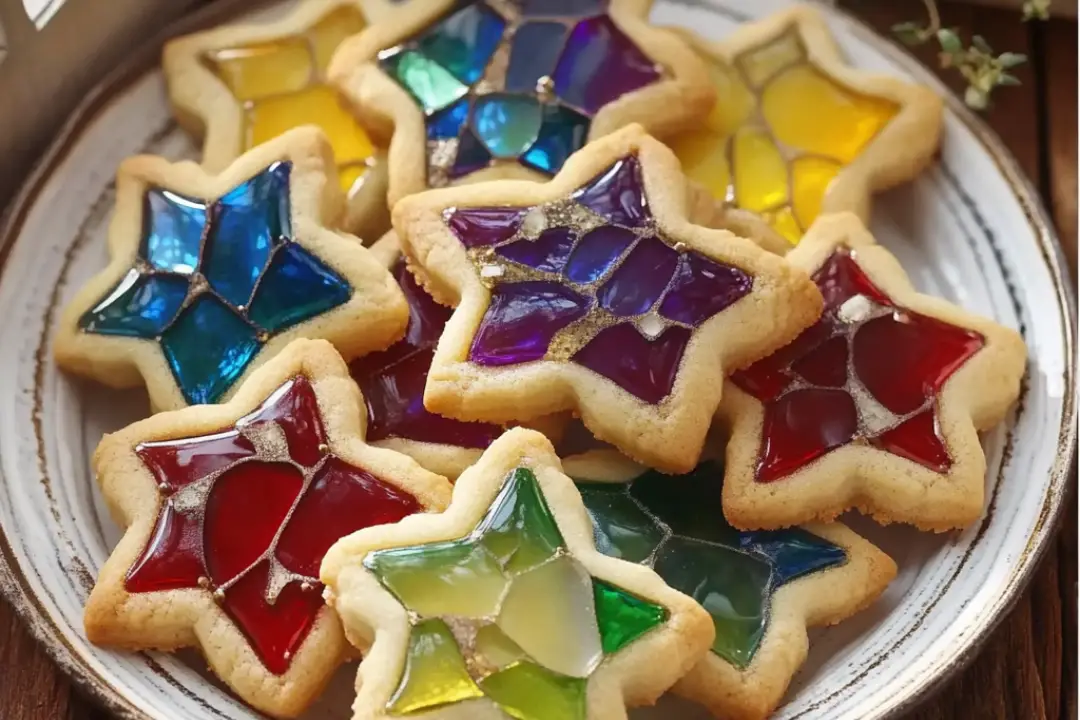
These Stained Glass Cookies are a beautiful and delicious twist on traditional sugar cookies. The vibrant, candy-filled centers make them an instant holiday favorite. I recently made these cookies with my family, and they were a hit! The kids loved the bright colors and the sweet, crunchy candy, while the adults appreciated the buttery, melt-in-your-mouth cookie base. They’re not only a fun baking project, but they also look amazing when displayed on a cookie tray or even hung on the Christmas tree as edible ornaments. Whether you’re making them for a holiday gathering or simply indulging in a sweet treat, these cookies are guaranteed to bring joy to any occasion.
Why You’ll Love Stained Glass Cookies
Stained Glass Cookies are not just cookies—they’re edible art! The combination of buttery, soft sugar cookies with a vibrant, candy-filled center makes these treats stand out. Whether you’re preparing them for the holidays, a birthday party, or just for fun, these cookies are sure to bring smiles. Here’s why you’ll love them:
- Visually Stunning: The candy center looks just like stained glass, adding a beautiful pop of color.
- Deliciously Sweet: The sugar cookie base is rich and buttery, perfectly complemented by the sweet hard candy in the center.
- Perfect for Holiday Baking: These cookies are ideal for Christmas, Easter, or any occasion where a little extra sparkle and fun are needed.
- Easy to Make: With simple ingredients and an easy-to-follow process, these cookies are approachable for bakers of all levels.
- Customizable: You can mix and match candy colors to create a personalized look that fits your theme or occasion.

Disclosure: This post contains affiliate links.If you click and make a purchase, I may earn a small commission at no extra cost to you.
Ingredients
For the Cookies:
- 1 cup unsalted butter, softened
- 1 cup granulated sugar
- 1 large egg
- 1 tsp vanilla extract
- 2 1/2 cups all-purpose flour
- 1/2 tsp baking powder
- 1/4 tsp salt
For the “Stained Glass” Centers:
- 1 cup hard candies (like Jolly Ranchers or Life Savers), assorted colors
Optional Decorations:
- Powdered sugar, for dusting
- Edible glitter or sprinkles
Instructions
Step 1: Prepare the Cookie Dough
- In a large mixing bowl, cream together the softened butter and granulated sugar until the mixture becomes light and fluffy.
- Add the egg and vanilla extract, and continue to beat until smooth.
- In a separate bowl, whisk together the flour, baking powder, and salt.
- Gradually add the dry ingredients to the wet mixture, mixing until a dough forms. The dough should be soft and slightly sticky, but not too wet.
Step 2: Chill the Dough
- Divide the dough into two equal portions. Wrap each portion tightly in plastic wrap and refrigerate for at least 1 hour. Chilling the dough helps prevent the cookies from spreading too much during baking and gives the dough a firmer texture for cutting.
Step 3: Prepare the Candies
- Unwrap the hard candies and sort them by color. Place each color into a zip-top bag and use a rolling pin to crush them into small pieces. You can also pulse the candies in a food processor for a finer consistency. Make sure the crushed candy pieces are small enough to fit in the center of the cookies without overflowing.
Step 4: Roll and Cut the Cookies
- Preheat the oven to 350°F (175°C) and line baking sheets with parchment paper.
- On a lightly floured surface, roll out one portion of dough to about 1/4-inch thickness.
- Use a large cookie cutter (such as a circle or star) to cut out shapes. Then, use a smaller cutter to remove the center of each cookie. The shape in the center will be filled with the crushed candy later.
- Transfer the cookies to the prepared baking sheets, spacing them about 1 inch apart.
Step 5: Add the “Stained Glass” Centers
- Spoon the crushed candy into the center of each cookie, filling it evenly but ensuring you don’t overflow the edges. The candy will melt and form the stained glass center as it bakes.
Step 6: Bake the Cookies
- Bake the cookies for 8-10 minutes, or until the edges are lightly golden and the candy centers have fully melted. Keep an eye on the cookies toward the end of the baking time to prevent the candy from bubbling over.
- Let the cookies cool completely on the baking sheets before removing them. This will help the candy harden and set properly.
Step 7: Decorate (Optional)
- Once the cookies have cooled, you can dust them with powdered sugar or add edible glitter for extra sparkle.
- For a more festive look, sprinkle with colorful sprinkles or drizzle with melted chocolate.
Step 8: Serve and Store
- Serve the cookies immediately, or store them in an airtight container at room temperature for up to 1 week.
Nutrition Facts
(Serving Size: 1 cookie)
- Calories: 120-140
- Fat: 5g
- Saturated Fat: 3g
- Carbohydrates: 18g
- Fiber: 0g
- Sugar: 12g
- Protein: 1g
- Cholesterol: 15mg
- Sodium: 40mg
Note: These nutrition values are approximate and may vary depending on the size of your cookies and the specific ingredients used.
Preparation Time
- Prep Time: 20 minutes
- Chill Time: 1 hour
- Cook Time: 10 minutes
- Total Time: 1 hour 30 minutes
How to Serve
- Holiday Cookie Tray: These cookies are perfect for displaying on a holiday cookie tray. The colorful stained glass centers make them stand out, and they pair well with other festive treats.
- As Ornaments: You can thread a ribbon through the top of the cookies and hang them on your Christmas tree for a fun, edible decoration.
- Gift Giving: Wrap these cookies in cellophane bags with a festive ribbon for a sweet homemade gift.
- Enjoy with a Hot Drink: Pair these cookies with a warm cup of tea, hot chocolate, or coffee to enhance the cozy, festive experience.
Additional Tips
- Chill the Dough: Don’t skip the chilling step! Chilled dough is easier to work with, and it prevents the cookies from spreading too much in the oven.
- Candy Variety: You can use any hard candy you like, but Jolly Ranchers or Life Savers work particularly well because they come in vibrant colors and melt beautifully.
- Use Parchment Paper: Always line your baking sheets with parchment paper to prevent sticking and make cleanup easier.
- Avoid Overflowing Candy: When filling the centers, make sure to leave a little room around the edges to avoid the melted candy spilling over.
- Decorate Creatively: Dust the cookies with powdered sugar, or get creative with edible glitter, sprinkles, or even a drizzle of melted chocolate to add extra flair.
FAQ Section
1. Can I use a different type of candy?
Yes! You can experiment with different types of hard candies, but avoid chewy candies as they won’t melt properly.
2. Can I make these cookies gluten-free?
Yes, you can substitute the all-purpose flour with a gluten-free flour blend, ensuring it’s suitable for baking.
3. How do I store leftover cookies?
Store the cookies in an airtight container at room temperature for up to a week. To keep them fresh longer, you can refrigerate them.
4. Can I freeze these cookies?
Yes! You can freeze the cookie dough for up to 3 months. Just make sure to wrap it tightly in plastic wrap and store it in a zip-top bag.
5. What type of cookie cutters work best?
Large, simple shapes like circles, stars, or hearts work best for stained glass cookies. Avoid intricate cutters as they may make it harder to work with the dough.
6. Can I make the candy filling ahead of time?
Yes, you can crush the candy and store it in a zip-top bag until you’re ready to use it.
7. Can I use sugar-free candy?
Sugar-free candy may not melt the same way as regular candy, so it’s best to test a small batch first before making a large batch.
8. My candy bubbled over the edges; what can I do next time?
Next time, try using less candy or leave a little more space around the edges of the cookie to allow the melted candy to spread without overflowing.
9. Can I use colored sugar instead of candy?
While you can use colored sugar to decorate the top of the cookies, it won’t give you the same stained glass effect as the candy.
10. How can I make these cookies even more festive?
Consider adding edible glitter, colored sprinkles, or even a drizzle of white chocolate to create a more festive and colorful cookie.
Conclusion
These Stained Glass Cookies are a delightful combination of visual appeal and sweet flavor. Whether you’re baking them for the holidays, as a special treat, or as edible ornaments for your Christmas tree, they are sure to impress anyone who sees (and tastes!) them. With their buttery, melt-in-your-mouth
texture and beautiful candy centers, these cookies are not only a treat for the eyes but for the taste buds as well. Don’t be afraid to experiment with different candy colors and decorations, and most importantly—enjoy the process of making these fun, festive cookies with your loved ones!
Print
🍪 Stained Glass Cookies
- Total Time: 30 minutes
- Yield: About 24 cookies
- Diet: Vegetarian
Description
These Stained Glass Cookies are a fun and festive treat, perfect for holidays and special occasions! With their crisp buttery cookie base and colorful candy centers, they not only look amazing but taste delicious too. Whether you’re baking them for a holiday cookie exchange or decorating your Christmas tree, these cookies will be the star of the show!
Ingredients
For the Cookies:
- 1 cup unsalted butter, softened
- 1 cup granulated sugar
- 1 large egg
- 1 tsp vanilla extract
- 2 1/2 cups all-purpose flour
- 1/2 tsp baking powder
- 1/4 tsp salt
For the “Stained Glass” Centers:
- 1 cup hard candies (like Jolly Ranchers or Life Savers), assorted colors
Optional Decorations:
- Powdered sugar, for dusting
- Edible glitter or sprinkles
Instructions
Step 1: Prepare the Cookie Dough
- In a large mixing bowl, cream the softened butter and granulated sugar until light and fluffy.
- Beat in the egg and vanilla extract.
- In a separate bowl, whisk together the flour, baking powder, and salt.
- Gradually add the dry ingredients to the wet ingredients, mixing until a dough forms.
Step 2: Chill the Dough
- Divide the dough in half, wrap each portion in plastic wrap, and refrigerate for 1 hour.
Step 3: Prepare the Candies
- Unwrap the hard candies and separate them by color. Place each color in a zip-top bag and crush them into small pieces using a rolling pin.
Step 4: Roll and Cut the Cookies
- Preheat the oven to 350°F (175°C) and line baking sheets with parchment paper.
- Roll out one portion of dough on a lightly floured surface to about 1/4-inch thickness.
- Use a large cookie cutter to cut out shapes, then use a smaller cutter to remove the center of each cookie. Transfer the cookies to the prepared baking sheets.
Step 5: Add the “Stained Glass” Centers
- Fill the center of each cookie with crushed candy, spreading it evenly but not overflowing the edges.
Step 6: Bake the Cookies
- Bake the cookies for 8-10 minutes, or until the edges are lightly golden and the candy centers are melted.
- Let the cookies cool completely on the baking sheets before removing them.
Step 7: Decorate (Optional)
- Once cooled, dust the cookies with powdered sugar or add edible glitter for extra sparkle.
Step 8: Serve and Store
- Serve immediately or store in an airtight container at room temperature for up to 1 week.
- Prep Time: 20 minutes
- Cook Time: 10 minutes
- Category: Dessert
- Method: Baking
- Cuisine: American
Nutrition
- Serving Size: 1 cookie
- Calories: 140
- Sugar: 12 g
- Sodium: 40mg
- Fat: 7g
- Saturated Fat: 4g
- Unsaturated Fat: 2g
- Trans Fat: 0g
- Carbohydrates: 15g
- Fiber: 1g
- Protein: 1 g
- Cholesterol: 20mg


