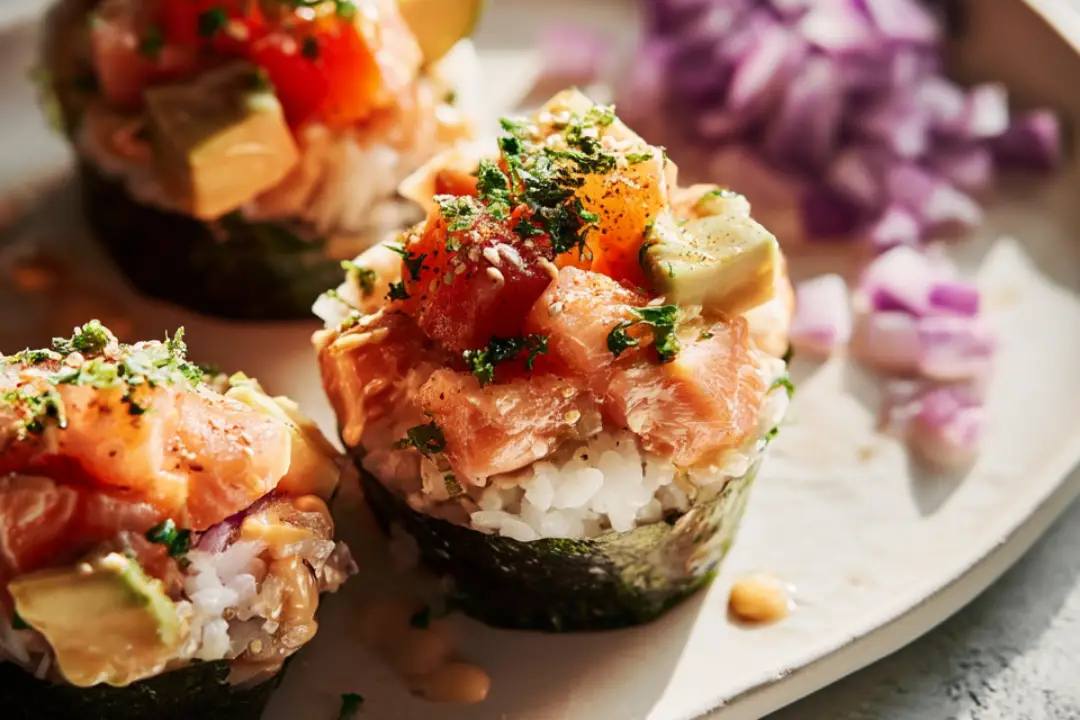
Who says you need a sushi roll to enjoy that sushi goodness? Baked Salmon Sushi Cups are here to shake up your sushi game. Picture this: crispy little cups made from seasoned sushi rice, filled with tender, baked salmon, and topped with all the classic sushi fixings. It’s like sushi, but way easier to eat (and no mat needed). Whether you’re planning a fun appetizer for a party or treating yourself to a unique dinner, these bite-sized sushi cups are about to become your new favorite thing.
Why You’ll Love Baked Salmon Sushi Cups
Trust me, you’re going to be obsessed with these little gems! Here’s why:
Sushi, But Better: These cups are sushi with a twist—everything you love about sushi, served in a perfectly crispy and shareable form.
Easy to Make: No rolling skills required here! These sushi cups are as simple as scooping rice and topping with salmon.
Crowd-Pleaser: Whether it’s a family meal or a dinner party, everyone will be asking for the recipe.
Perfectly Customizable: You can swap the salmon for tuna or shrimp, and top with your favorite veggies or sauces—get creative!
Feel-Good Comfort Food: You get all that sushi flavor without the hassle of handling raw fish. Plus, that crispy rice base? Pure heaven.

Disclosure: This post contains affiliate links.If you click and make a purchase, I may earn a small commission at no extra cost to you.
Ingredients
(Note: Full measurements are listed in the recipe card below.)
Ingredients in Baked Salmon Sushi Cups
Sushi Rice: This is your base! Sticky, slightly sweet, and tangy rice that’s perfect for holding up in those cute little cups.
Cooked Salmon: Salmon fillets baked until tender, seasoned with a little soy sauce and mirin for extra flavor.
Nori Sheets: These bring that classic sushi vibe. Cut into strips or pieces to line your cups.
Cucumber: For a refreshing crunch and light flavor.
Avocado: Creamy and rich, it’s a perfect complement to the salmon.
Soy Sauce: A little drizzle on top for that deep umami flavor.
Sesame Seeds: A little sprinkle to finish off these sushi cups with some extra crunch and flavor.
Green Onions: For that fresh, mild bite and a pop of color.
Optional: Pickled ginger and wasabi for extra sushi authenticity.
Instructions
Ready to dive into these sushi cups? Here’s how to make them:
Cook the Rice: Start by cooking your sushi rice according to package instructions. Once it’s cooked, season it with a mixture of rice vinegar, sugar, and salt. Let it cool slightly.
Prepare the Salmon: While your rice is cooling, bake your salmon. Season the fillets with a little soy sauce and mirin, then bake at 375°F for 12-15 minutes until cooked through and flaky. Flake the salmon into bite-sized pieces.
Prepare the Cups: Lightly grease a muffin tin and press spoonfuls of cooled sushi rice into each cup, making a little indent in the center for your filling.
Assemble the Cups: Place a piece of nori at the bottom of each rice cup, then top with a generous spoonful of the flaked salmon. Add thinly sliced cucumber and avocado on top.
Bake: Place the filled muffin tin into the oven and bake at 375°F for about 10-12 minutes, or until the rice edges are crispy and golden.
Garnish and Serve: Once baked, remove the sushi cups from the tin and drizzle with soy sauce. Sprinkle sesame seeds, chopped green onions, and any other toppings you like, such as pickled ginger or a dash of wasabi.
Serve and Enjoy: Serve warm and enjoy these delicious, bite-sized sushi cups!
Nutrition Facts
Servings: 6
Calories per serving: 280
Preparation Time
Prep Time: 20 minutes
Cook Time: 15 minutes
Total Time: 35 minutes
How to Serve Baked Salmon Sushi Cups
These sushi cups are perfect for so many occasions! Here are a few ways to serve them:
As an Appetizer: Serve these sushi cups on a platter as an appetizer at your next gathering. They’re fun, easy to share, and full of flavor.
For Dinner: Pair with a simple side salad or some miso soup to make it a complete meal.
On-the-Go: Pack them for lunch! They’re easy to transport and can be enjoyed cold or at room temperature.
Sushi Party: Make a bunch and set up a sushi bar with different toppings so everyone can create their own ultimate sushi cup!
Additional Tips
Use Fresh Salmon: For the best flavor, use fresh salmon fillets that are cooked just until tender. Overcooking can dry it out.
Prep the Rice Ahead: If you’re short on time, cook and season the rice ahead of time, and keep it covered in the fridge until you’re ready to assemble.
Make It Your Own: Want to try other fillings like tuna, shrimp, or crab? Go for it! These cups are super customizable.
Crisp It Up: If you love a super crispy rice cup, bake it a little longer until the edges are golden and crunchy.
Don’t Skip the Nori: It’s a small detail, but the nori sheets are what give these sushi cups their authentic sushi taste. Don’t leave it out!
FAQ Section
Q1: Can I use pre-cooked salmon?
A1: Yes! You can definitely use leftover or pre-cooked salmon, just make sure to season it with soy sauce or teriyaki sauce for extra flavor.
Q2: Can I make these ahead of time?
A2: Yes, you can prep everything in advance and store the rice and toppings separately. Assemble and bake them just before serving!
Q3: What if I don’t have a muffin tin?
A3: No problem! You can also shape the rice into small cups by hand and bake them on a sheet tray.
Q4: Can I use other types of fish?
A4: Absolutely! Tuna, shrimp, or even crab would be a great alternative to salmon.
Q5: How do I store leftovers?
A5: Store leftovers in an airtight container in the fridge for up to 2-3 days. These sushi cups can be eaten cold or reheated in the oven for a few minutes to crisp them up.
Q6: Is this recipe gluten-free?
A6: Yes, it’s gluten-free as long as you use gluten-free soy sauce. Double-check your teriyaki sauce if you use that instead.
Q7: Can I make this recipe vegetarian?
A7: Of course! You can swap the salmon for tofu, avocado, or even a variety of sautéed veggies for a vegetarian version.
Q8: What else can I add to the cups?
A8: Try adding some cream cheese for a little extra richness, or top with a drizzle of spicy mayo for an added kick!
Q9: Can I make these crispy rice cups without baking them?
A9: You can, but baking them brings out that crispy texture, which is the best part! If you prefer a no-bake version, just make sure to pan-fry the rice until it crisps up.
Q10: Can I serve these sushi cups as a full meal?
A10: Definitely! Serve with a side salad or some miso soup, and you’ve got a light but satisfying dinner.
Conclusion
And there you have it, folks — Baked Salmon Sushi Cups that bring all the delicious sushi flavors you crave, without the hassle. They’re crispy, savory, and so much fun to make and eat. Perfect for any occasion, and they’ll definitely impress your guests or just treat yourself to something new and exciting! Grab your ingredients, preheat that oven, and get ready for some sushi cup magic!
Print
Baked Salmon Sushi Cups
- Total Time: 35 minutes
- Yield: 12 cups 1x
Description
These Baked Salmon Sushi Cups are a delightful fusion of sushi and baked bites! Flaky salmon, creamy avocado, and sushi rice are wrapped in crispy wonton cups for a fun and easy twist on traditional sushi. Perfect as an appetizer or snack!
Ingredients
- 12 wonton wrappers
- 1 lb fresh salmon fillet, skin removed
- 1 tablespoon olive oil
- Salt and pepper, to taste
- 2 cups cooked sushi rice (cooled)
- 2 tablespoons rice vinegar
- 1 teaspoon sugar
- 1/2 teaspoon salt
- 1 avocado, sliced
- 1/4 cup sliced green onions
- 1 tablespoon sesame seeds
- 1 tablespoon soy sauce
- 1 tablespoon sriracha sauce (optional, for heat)
- Pickled ginger, for garnish (optional)
- Wasabi, for garnish (optional)
Instructions
- Preheat your oven to 375°F (190°C). Lightly grease a muffin tin or line it with paper muffin liners.
- Place a wonton wrapper into each muffin cup, pressing the edges gently to fit. Bake the wrappers for 8-10 minutes or until golden and crispy. Remove from the oven and set aside.
- Season the salmon fillet with olive oil, salt, and pepper. Place it on a baking sheet and bake for 12-15 minutes or until cooked through and flakes easily with a fork. Once cooled, flake the salmon into bite-sized pieces.
- In a small bowl, combine the rice vinegar, sugar, and salt. Stir until dissolved, then mix this dressing into the cooked sushi rice.
- Assemble the sushi cups: Start by spooning a small amount of seasoned sushi rice into each baked wonton cup. Top with flaked salmon, a slice of avocado, and a sprinkle of green onions.
- Drizzle soy sauce and sriracha over the top, then sprinkle with sesame seeds.
- Garnish with pickled ginger and wasabi if desired, then serve immediately!
Notes
- If you prefer, you can use cooked salmon or even tuna for a variation.
- For a more authentic flavor, add a bit of furikake seasoning to the rice before assembling.
- These cups can be served warm or cold, making them a versatile option for meal prep or entertaining.
- Prep Time: 15 minutes
- Cook Time: 20 minutes
- Category: Appetizer, Snack
- Method: Baking, Assembling
- Cuisine: Japanese-Inspired
Nutrition
- Serving Size: 1 cup
- Calories: 150
- Sugar: 1g
- Sodium: 290mg
- Fat: 9g
- Saturated Fat: 1g
- Unsaturated Fat: 8g
- Trans Fat: 0g
- Carbohydrates: 12g
- Fiber: 1g
- Protein: 7g
- Cholesterol: 20mg


