Introduction
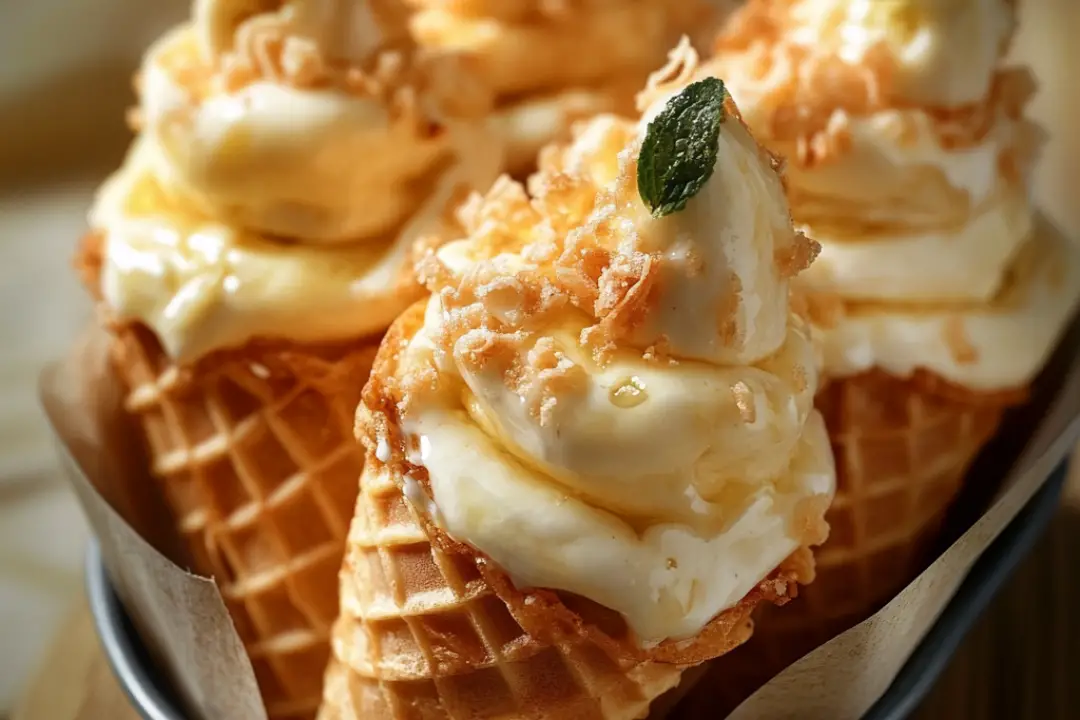
There’s something incredibly satisfying about dessert that combines nostalgia and creativity, and these Banana Pudding Cheesecake Cones do just that! Growing up, banana pudding was a staple at family gatherings, and now, transforming it into a fun and portable dessert has brought a new level of joy to my family gatherings. These cones are not just visually appealing; they pack a delightful punch of flavors that make them perfect for any occasion. Every bite is a delicious blend of creamy cheesecake and sweet banana pudding, all wrapped in a crispy cone and topped with whipped cream and caramel drizzle. My family can’t get enough of them, and I can’t wait to share this recipe with you!
Ingredients
For the Cheesecake Filling:
- 16 oz cream cheese, softened
- 1 cup powdered sugar
- 1/2 cup heavy whipping cream
- 1 tsp vanilla extract
- 1 package (3.4 oz) instant banana pudding mix
- 1 1/2 cups cold milk
For the Cones:
- 10-12 waffle cones or sugar cones
- 1 cup crushed vanilla wafer cookies
- 2 tbsp melted butter
For Garnish:
- Sliced bananas
- Whipped cream
- Crushed vanilla wafer cookies
- Caramel drizzle (optional)
Instructions
Prepare the Cheesecake Filling:
- Beat the Cream Cheese:
- In a large bowl, beat the softened cream cheese and powdered sugar until smooth and creamy.
- Whip the Cream:
- In a separate bowl, whip the heavy whipping cream until soft peaks form, then gently fold it into the cream cheese mixture.
- Prepare the Banana Pudding:
- In another bowl, whisk together the instant banana pudding mix and cold milk until thickened, about 2-3 minutes.
- Combine:
- Gently fold the prepared banana pudding into the cream cheese mixture until fully combined. Refrigerate while preparing the cones.
Prepare the Cones:
- Make the Crushed Cookie Coating:
- In a small bowl, mix the crushed vanilla wafer cookies with melted butter until evenly coated.
- Coat the Cones:
- Dip the top edges of the waffle or sugar cones into the melted butter mixture, then roll in the crushed vanilla wafer cookies to create a cookie rim. Let the cones sit for a few minutes to set.
Assemble the Cheesecake Cones:
- Fill the Cones:
- Spoon or pipe the banana pudding cheesecake filling into the prepared cones, filling them generously.
Garnish and Serve:
- Add Toppings:
- Top each cone with a slice of banana, a dollop of whipped cream, extra crushed vanilla wafers, and a drizzle of caramel if desired.
- Serve Immediately:
- Enjoy your delightful Banana Pudding Cheesecake Cones—a fun and creamy dessert perfect for any occasion! 🍌🍰🍦😋
Nutrition Facts
- Servings: 12 cones
- Calories: Approximately 300 calories per cone
- Sugar: 25g
- Sodium: 150mg
- Fat: 18g
- Saturated Fat: 10g
- Unsaturated Fat: 6g
- Trans Fat: 0g
- Carbohydrates: 30g
- Fiber: 1g
- Protein: 3g
- Cholesterol: 60mg
Preparation Time
- Prep Time: 30 minutes
- Total Time: 30 minutes (plus refrigeration time for the filling)
How to Serve
- Serving Suggestions:
- Serve immediately after assembly to keep the cones crispy.
- Offer a variety of toppings for guests to customize their cones.
- Pair with a refreshing beverage like iced tea or lemonade.
Additional Tips
- Soften Cream Cheese: Ensure your cream cheese is at room temperature for easy mixing.
- Whipping Cream: Do not overbeat the whipping cream; stop when soft peaks form for a light texture.
- Fresh Bananas: Add sliced bananas right before serving to prevent browning.
- Chill the Filling: Refrigerate the cheesecake filling for 30 minutes for better texture.
- Variations: Experiment with other flavored puddings, such as vanilla or chocolate, for different cheesecake flavors.
Recipe Variations
- Chocolate Lovers: Substitute chocolate pudding mix for the banana pudding and add chocolate chips to the filling.
- Fruit Medley: Use a mix of fruits like strawberries and blueberries along with bananas for a fruity twist.
- Nutty Delight: Add crushed nuts, like pecans or walnuts, to the cookie rim for added crunch and flavor.
Serving Suggestions
- Serve at birthday parties, family gatherings, or summer picnics.
- Pair with a scoop of ice cream for an extra indulgent dessert.
- Use as a delightful treat for bridal or baby showers.
Freezing and Storage
- Storage: Store leftover cheesecake filling in an airtight container in the refrigerator for up to 3 days.
- Freezing: While the cones can’t be frozen, you can freeze the filling for up to a month. Thaw in the refrigerator before use.
FAQ Section
- Can I use homemade whipped cream instead of heavy cream?
- Yes, but make sure it is stabilized to hold its shape.
- What can I substitute for vanilla wafers?
- Graham crackers or digestive biscuits can work as alternatives.
- How long can I keep the filled cones?
- It’s best to consume them within a few hours to keep the cones from getting soggy.
- Can I make the cheesecake filling in advance?
- Yes, you can prepare the filling a day ahead and assemble the cones right before serving.
- Is this recipe gluten-free?
- Use gluten-free cones and cookies to make it gluten-free.
- Can I use fresh bananas in the filling?
- Yes, but use them right before serving to avoid browning.
- How do I prevent the bananas from browning?
- Toss the banana slices in a little lemon juice before adding them as a topping.
- What other toppings can I use?
- Consider adding chocolate syrup, sprinkles, or mini marshmallows.
- Can I make these without cones?
- Yes, you can serve the filling in cups or jars if preferred.
- Is it necessary to refrigerate the filling?
- Yes, refrigeration helps set the filling and improves the overall texture.
Conclusion
These Banana Pudding Cheesecake Cones are not just a dessert; they are a delightful experience! With their creamy texture, crunchy cookie rim, and fresh banana topping, they make for an impressive treat that everyone will love. Whether you’re hosting a party or simply indulging in a sweet craving, these cones will surely be a hit. So gather your ingredients, invite some friends over, and enjoy this fun, nostalgic dessert that’s sure to bring smiles all around! 🍌🍰🍦
Print
Banana Pudding Cheesecake Cones 🍌🍰🍦
- Total Time: 15 minutes
- Yield: 10-12 serving
- Diet: Vegetarian
Description
Delight in these fun and creamy Banana Pudding Cheesecake Cones, perfect for any occasion. Each cone is filled with a luscious cheesecake and banana pudding mixture, topped with fresh bananas, whipped cream, and a sprinkle of crushed vanilla wafers.
Ingredients
For the Cheesecake Filling:
- 16 oz cream cheese, softened
- 1 cup powdered sugar
- 1/2 cup heavy whipping cream
- 1 tsp vanilla extract
- 1 package (3.4 oz) instant banana pudding mix
- 1 1/2 cups cold milk
For the Cones:
- 10-12 waffle cones or sugar cones
- 1 cup crushed vanilla wafer cookies
- 2 tbsp melted butter
For Garnish:
- Sliced bananas
- Whipped cream
- Crushed vanilla wafer cookies
- Caramel drizzle (optional)
Instructions
- Prepare the Cheesecake Filling:
- In a large bowl, beat the softened cream cheese and powdered sugar until smooth and creamy.
- In a separate bowl, whip the heavy whipping cream until soft peaks form, then fold it into the cream cheese mixture.
- In another bowl, whisk together the instant banana pudding mix and cold milk until thickened, about 2-3 minutes.
- Gently fold the prepared banana pudding into the cream cheese mixture until fully combined. Refrigerate while preparing the cones.
- Prepare the Cones:
- In a small bowl, mix the crushed vanilla wafer cookies with melted butter until evenly coated.
- Dip the top edges of the waffle or sugar cones into the melted butter mixture, then roll in the crushed vanilla wafer cookies to create a cookie rim. Let the cones sit for a few minutes to set.
- Assemble the Cheesecake Cones:
- Spoon or pipe the banana pudding cheesecake filling into the prepared cones, filling them generously.
- Garnish and Serve:
- Top each cone with a slice of banana, a dollop of whipped cream, extra crushed vanilla wafers, and a drizzle of caramel if desired.
- Serve immediately and enjoy!
Notes
Make sure to serve the cones immediately to keep the cones from getting soggy.
- Prep Time: 15 mins
- Cook Time: 0 minutes
- Category: Dessert
- Method: No-Bake
- Cuisine: American
Nutrition
- Serving Size: 1 cone
- Calories: 250
- Sugar: 20g
- Sodium: 150mg
- Fat: 12g
- Saturated Fat: 6g
- Unsaturated Fat: 4g
- Trans Fat: 0g
- Carbohydrates: 30g
- Fiber: 1g
- Protein: 3g
- Cholesterol: 30mg


