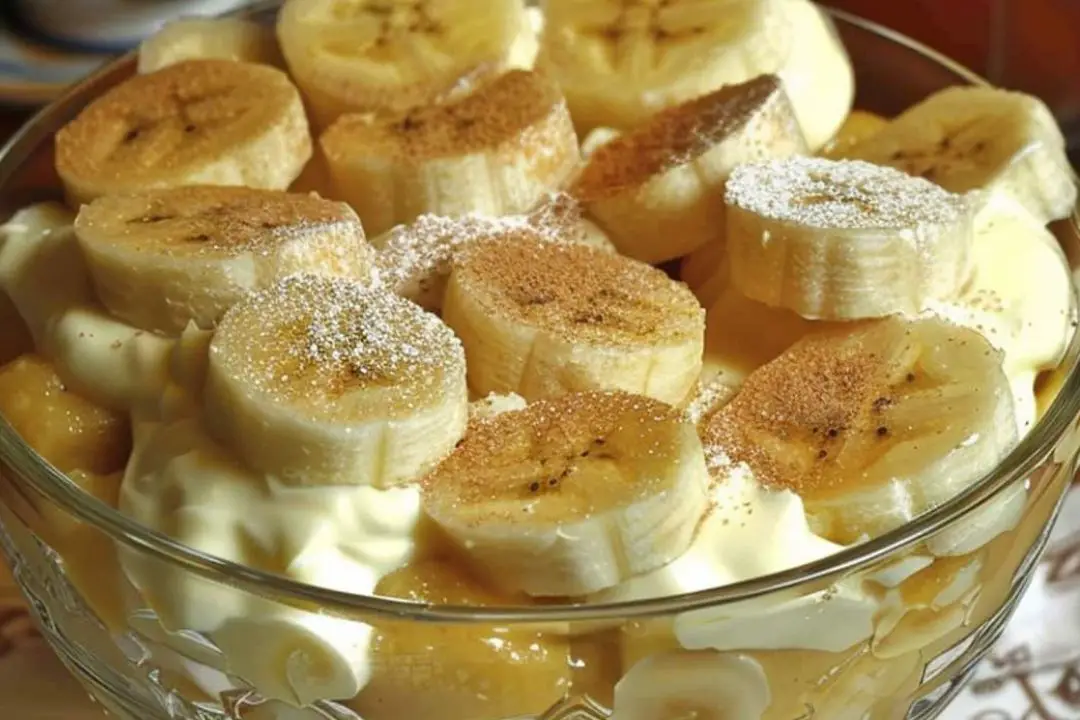
Banana Pudding From Scratch

Introduction:

Banana pudding is a classic dessert that evokes memories of childhood gatherings and comforting flavors. While store-bought versions offer convenience, there’s something special about creating this timeless treat from scratch. Dive into the world of homemade goodness with our step-by-step guide to crafting banana pudding that will tantalize your taste buds and leave you craving more.

Ingredients:

To embark on your homemade banana pudding journey, gather these essential ingredients:

  • Ripe bananas: The star of the show, providing natural sweetness and creamy texture.
  • Egg yolks: Adding richness and depth of flavor to the pudding base.
  • Granulated sugar: Balancing sweetness and enhancing the banana flavor.
  • Cornstarch: Acting as a thickening agent to create a luscious pudding consistency.
  • Whole milk: Providing the creamy base for the pudding.
  • Vanilla extract: Infusing aromatic vanilla notes that complement the bananas beautifully.
  • Nilla wafers: Adding crunch and texture to the layers of pudding.
  • Whipped cream: Crown the pudding with a cloud of fluffy whipped cream for the ultimate decadence.

Instructions:

Follow these simple steps to create your own batch of heavenly banana pudding from scratch:

  1. Begin by slicing ripe bananas into thin rounds and setting them aside.
  2. In a saucepan, whisk together egg yolks, sugar, cornstarch, and a pinch of salt until smooth.
  3. Gradually whisk in whole milk, ensuring no lumps remain in the mixture.
  4. Place the saucepan over medium heat and cook the pudding mixture, stirring constantly, until it thickens and coats the back of a spoon.
  5. Remove the pudding from heat and stir in vanilla extract for a fragrant aroma.
  6. To assemble the pudding, layer Nilla wafers, sliced bananas, and pudding in a serving dish, repeating until all ingredients are used.
  7. Cover the pudding with plastic wrap and refrigerate for several hours or overnight to allow the flavors to meld and the pudding to set.
  8. Before serving, top the chilled pudding with a generous dollop of whipped cream and garnish with additional banana slices or Nilla wafers for an extra touch of elegance.

Serving and Storage Tips:

Serving Tips:

  1. Serve chilled: Banana pudding is best enjoyed when chilled, so be sure to refrigerate it for at least a few hours before serving.
  2. Garnish creatively: Enhance the presentation of your banana pudding by garnishing each serving with a slice of banana, a dusting of cinnamon, or a drizzle of caramel sauce.
  3. Individual servings: Consider serving banana pudding in individual dessert cups or mason jars for a charming presentation at gatherings or parties.
  4. Pairing options: Banana pudding pairs well with a variety of toppings such as fresh berries, chopped nuts, or a dollop of whipped cream. Encourage guests to customize their servings according to their preferences.

Storage Tips:

  1. Refrigerate promptly: After preparing homemade banana pudding, promptly cover it with plastic wrap or transfer it to an airtight container and refrigerate it to maintain its freshness.
  2. Consume within three days: For optimal taste and texture, consume homemade banana pudding within three days of preparation. Discard any leftovers beyond this time frame.
  3. Avoid freezing: Due to its creamy texture, banana pudding does not freeze well and may separate or become watery when thawed. It’s best enjoyed fresh from the refrigerator.
  4. Prevent soggy wafers: To prevent the Nilla wafers from becoming overly soft or soggy, layer them with the pudding just before serving rather than in advance. This ensures they maintain their crunchiness for the perfect texture contrast.

By following these serving and storage tips, you can ensure that your homemade banana pudding remains deliciously fresh and enjoyable for days to come. Whether served as a delightful dessert or a sweet indulgence, homemade banana pudding is sure to delight your taste buds and bring smiles to the faces of all who enjoy it.

Variations of the classic banana pudding recipe:
  1. Chocolate Banana Pudding: Add a layer of chocolate pudding or chocolate ganache between the layers of banana pudding for a decadent twist. You can also sprinkle chocolate shavings or cocoa powder on top for extra richness.
  2. Coconut Banana Pudding: Incorporate coconut milk or coconut cream into the pudding mixture for a tropical flavor. Top with toasted coconut flakes for added texture and coconut aroma.
  3. Peanut Butter Banana Pudding: Swirl creamy peanut butter into the pudding mixture or layer it between the bananas and pudding for a delightful combination of flavors. Garnish with crushed peanuts or peanut butter chips for extra crunch.
  4. Strawberry Banana Pudding: Layer sliced strawberries with the bananas and pudding for a refreshing and fruity variation. You can also add strawberry preserves or strawberry sauce for an extra burst of flavor.
  5. Vanilla Wafer Crust: Instead of layering Nilla wafers within the pudding, crush them and use them as a crunchy crust for the bottom of the dish. This adds a delightful texture to each bite.
  6. Caramelized Banana Topping: Instead of using fresh banana slices, caramelize them in a skillet with butter and brown sugar until golden and caramelized. Use these caramelized bananas as a topping for the pudding for a rich and indulgent treat.
  7. Rum-Flavored Banana Pudding: Add a splash of rum extract or rum liqueur to the pudding mixture for a boozy twist. You can also soak the Nilla wafers in rum before layering them in the dish for an extra kick.
  8. Vegan Banana Pudding: Substitute dairy-free alternatives such as almond milk, coconut cream, and vegan cream cheese for the dairy ingredients in the pudding. Use vegan-friendly vanilla wafers or homemade cookies for the layers.
  9. Layered Banana Trifle: Instead of assembling the pudding in a dish, layer the pudding, bananas, and Nilla wafers in individual glasses or jars for a visually stunning dessert presentation.
  10. Frozen Banana Pudding Bars: Freeze the banana pudding mixture in a pan lined with parchment paper to create frozen pudding bars. Slice them into squares or bars for a refreshing frozen treat on hot days.

FAQs:

  1. Can I make banana pudding ahead of time?
    • Yes, banana pudding can be made ahead of time. Assemble the layers in a dish and refrigerate until ready to serve.
  2. How long does banana pudding last in the refrigerator?
    • Banana pudding will last for up to 2-3 days in the refrigerator when stored in an airtight container.
  3. Can I freeze banana pudding?
    • While you can freeze banana pudding, the texture may change slightly upon thawing due to the moisture content in the bananas.
  4. Can I use instant pudding mix for banana pudding?
    • Yes, instant pudding mix can be used to make banana pudding. Follow the instructions on the pudding mix package.
  5. Can I use ripe or overripe bananas for banana pudding?
    • Ripe bananas are ideal for banana pudding as they have a sweeter flavor and softer texture.
  6. Can I make banana pudding without Nilla wafers?
    • Yes, you can substitute Nilla wafers with other types of cookies or omit them altogether.
  7. Can I use homemade whipped cream for banana pudding?
    • Yes, homemade whipped cream can be used instead of store-bought whipped topping.
  8. Can I add other fruits to banana pudding?
    • Yes, you can customize banana pudding by adding fruits like strawberries, blueberries, or pineapple.
  9. Can I make banana pudding without eggs?
    • Yes, you can make egg-free banana pudding using a pudding mix that doesn’t require eggs or a homemade egg-free pudding recipe.
  10. Can I serve banana pudding warm?
    • While banana pudding is typically served chilled, you can serve it warm if desired by skipping the refrigeration step.

Conclusion:

Crafting banana pudding from scratch is a labor of love that yields deliciously rewarding results. Whether enjoyed as a comforting dessert or shared with loved ones at gatherings, homemade banana pudding offers a taste of nostalgia and culinary satisfaction like no other. Embrace the joy of homemade goodness and savor every spoonful of this timeless treat.

Leave a Comment