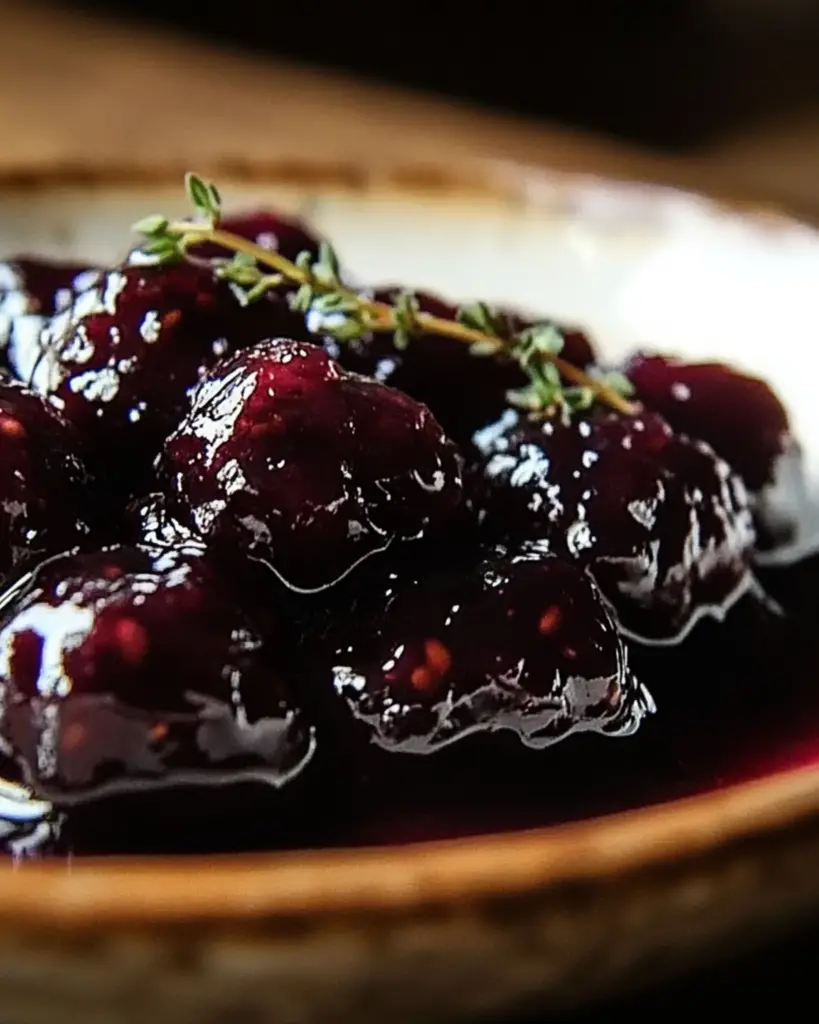
There’s something magical about homemade jam, and this Blackberry Jam is no exception. Imagine the vibrant, deep purple hue and the sweet-tart burst of blackberry flavor, preserved perfectly in a jar. This jam is like a little jar of summer, waiting for you to spread it on toast, swirl it into yogurt, or spoon it over ice cream. Whether you’re making it to enjoy now or for a special gift, trust me, this is one jam you’ll keep making again and again. It’s easy, rewarding, and most importantly—delicious! Plus, you can savor that fresh berry taste long after blackberry season has passed. Let’s dive into the sweet world of blackberry jam!
Why You’ll Love Blackberry Jam
There are so many reasons this homemade blackberry jam is a must-make:
Fresh, Bright Flavor
The flavor is pure and vibrant—sweet but with a bit of tang, just the way you want it. This jam captures all the essence of ripe blackberries and brings it to life in every spoonful.
Simple Ingredients
No need for fancy ingredients! This jam comes together with just a few basic items you probably already have in your kitchen. Fresh blackberries, sugar, and lemon juice—easy, right?
Versatile
You’ll find so many ways to enjoy this jam. Spread it on toast, swirl it into oatmeal, drizzle it on pancakes, or just eat it straight from the jar. It’s also an amazing addition to desserts, like cheesecakes or tarts.
No Pectin Needed
This recipe doesn’t require store-bought pectin, as the blackberries and sugar naturally thicken the jam as it cooks. You’ll be amazed by how simple it is to make jam without any special ingredients.
Great for Gifting
Homemade jam makes a beautiful gift. Just pour it into pretty jars, add a cute label, and you’ve got a perfect homemade present for friends or family.

Disclosure: This post contains affiliate links.If you click and make a purchase, I may earn a small commission at no extra cost to you.
Ingredients
Here’s what you’ll need to make this delicious Blackberry Jam:
- Fresh Blackberries: You’ll need fresh, ripe blackberries—sweet and slightly tart.
- Sugar: Granulated sugar is used to help preserve the berries and thicken the jam. You can adjust the sugar depending on how sweet your berries are.
- Lemon Juice: A little lemon juice helps balance the sweetness and acts as a natural preservative, enhancing the flavor.
- Optional (Cinnamon or Vanilla Extract): If you want to add a little extra depth of flavor, a pinch of cinnamon or a splash of vanilla extract can make this jam feel extra special. But the blackberry flavor shines just fine on its own!
Instructions
Let’s get cooking! Making blackberry jam is a lot easier than you might think:
Step 1: Prepare the Berries
Wash the blackberries thoroughly, discarding any stems or leaves. Place them in a large saucepan and mash them lightly with a potato masher or fork. You can leave it a bit chunky if you prefer some texture in your jam.
Step 2: Add Sugar and Lemon Juice
Add the sugar and lemon juice to the mashed berries. Stir everything together and let the mixture sit for about 10-15 minutes. This will help draw out the juices from the blackberries and get everything started.
Step 3: Cook the Jam
Place the saucepan over medium heat and bring the mixture to a simmer. Stir occasionally to prevent the jam from sticking to the bottom of the pan. As it heats up, the berries will break down, and the sugar will dissolve into a syrup.
Step 4: Boil and Thicken
Continue to cook the mixture, stirring frequently, for about 20-30 minutes. The jam will begin to thicken and reduce as the water evaporates. Keep a close eye on it to avoid burning, and don’t be afraid to scrape the sides of the pot to incorporate any sugary syrup that might be sticking there.
Step 5: Test the Jam’s Consistency
To test the jam’s consistency, place a spoonful on a chilled plate. Let it cool for a minute, then run your finger through it. If the jam wrinkles and holds its shape, it’s ready. If it’s still too runny, continue to cook for another 5-10 minutes and test again.
Step 6: Sterilize Jars and Pour the Jam
While your jam is simmering, sterilize your jars by washing them in hot, soapy water and then placing them in a hot oven (around 200°F/93°C) for about 10 minutes. Alternatively, you can place the jars in boiling water for a few minutes. Once the jars are hot, carefully pour the jam into them, leaving a little space at the top. Wipe the rims clean with a cloth before sealing.
Step 7: Let it Set and Store
Let the jars cool to room temperature, and as they cool, you’ll likely hear a satisfying pop as the seals on the lids form. Store the jam in the refrigerator for up to 2-3 weeks, or process the jars for long-term storage (see tips below).
Nutrition Facts
Servings: 10-12 (depending on jar size)
Calories per serving: ~50-60 calories (for 1 tablespoon)
Preparation Time
Prep Time: 10 minutes
Cook Time: 30-40 minutes
Total Time: 40-50 minutes
How to Serve Blackberry Jam
Here are a few ideas for enjoying your freshly made Blackberry Jam:
- Toast: Spread it on warm, buttered toast for the ultimate breakfast or snack.
- PB&J Sandwich: Upgrade your classic peanut butter and jelly sandwich with this homemade blackberry jam.
- Yogurt: Swirl it into plain or Greek yogurt for a fruity breakfast or snack.
- Cheese: It pairs wonderfully with cheeses like brie or goat cheese for a savory-sweet treat.
- Desserts: Drizzle it over ice cream, cheesecake, or use it as a filling for cakes or tarts.
Additional Tips
- For Thicker Jam: If you prefer your jam extra thick, you can cook it a bit longer, but be sure to watch it carefully to avoid burning.
- For Sweeter Jam: Taste the jam as it’s cooking. If it’s too tart for your liking, you can add a little extra sugar until you reach your desired sweetness.
- Preserving Tips: If you want to store your jam long-term, you can process the jars in a boiling water bath for 10 minutes to ensure they’re sealed. This will allow the jam to last for up to a year in a cool, dark place.
- Mix with Other Berries: Feel free to mix in other berries like raspberries or blueberries to create a unique berry blend!
FAQ Section
Q1: Can I use frozen blackberries for this recipe?
A1: Yes, frozen blackberries work just as well! Just be sure to thaw them completely before using them in the recipe.
Q2: How do I know when the jam is ready?
A2: To check the consistency, put a spoonful of jam on a cold plate, let it cool for a minute, then run your finger through it. If it wrinkles and holds its shape, it’s done. If it’s still too runny, cook it a bit longer and test again.
Q3: Can I use honey or other sweeteners instead of sugar?
A3: You can use honey or maple syrup as an alternative sweetener, but keep in mind it may affect the consistency slightly. You might need to cook it a bit longer to achieve the right thickness.
Q4: How long does homemade blackberry jam last?
A4: If stored in the fridge, your jam will last for about 2-3 weeks. If you process the jars in a water bath, the jam can last up to a year when stored in a cool, dark place.
Q5: Can I double or triple this recipe?
A5: Absolutely! Just be sure to use a larger pot and stir more frequently to prevent burning. You may need to adjust the cooking time slightly if you’re making a bigger batch.
Q6: Can I can this jam for longer storage?
A6: Yes! After filling your sterilized jars with jam, process them in a boiling water bath for 10 minutes. This will create a vacuum seal and allow the jam to last for up to a year in your pantry.
Q7: Can I make the jam without lemon juice?
A7: The lemon juice helps with setting the jam and balances the sweetness, but if you don’t have it, you can leave it out. The jam will still taste great, though it may be a bit sweeter.
Q8: How do I store leftover jam?
A8: Keep leftover jam in an airtight jar in the fridge for up to 3 weeks. You can also freeze it for longer storage, just make sure to leave some space at the top of the jar for expansion.
Q9: Can I add other flavorings, like vanilla or cinnamon?
A9: Yes! A splash of vanilla extract or a pinch of cinnamon can add a unique flavor to your blackberry jam. Add them during the cooking process for subtle flavor infusion.
Q10: Can I make this jam with other fruits?
A10: Absolutely! You can swap blackberries for raspberries, blueberries, strawberries, or even a mix of different fruits. Just keep the proportions of fruit to sugar the same for the best consistency.
Conclusion
Making homemade Blackberry Jam is a simple, satisfying experience that will fill your kitchen with the sweet smell of fresh fruit. The end result is a versatile, flavorful jam that will bring a little joy to your mornings, snacks, and desserts. Whether you’re a seasoned jam maker or trying it for the first time, this recipe is easy to follow and delivers fantastic results. Enjoy!
Print
Blackberry Jam Recipe
- Total Time: 40 minutes
- Yield: 2-3 jars (depending on jar size)
- Diet: Vegetarian
Description
This Homemade Blackberry Jam is a sweet, tangy treat that captures the essence of fresh blackberries in every spoonful. Made with just a few simple ingredients and no pectin, it’s the perfect way to preserve the summer fruit for the months ahead. Spread it on toast, swirl it into yogurt, or use it as a topping for your favorite desserts. This easy, small-batch recipe is a must-try for berry lovers!
Ingredients
- 4 cups fresh blackberries (or frozen if fresh is unavailable)
- 2 cups granulated sugar
- 1 tablespoon lemon juice
- 1/2 teaspoon vanilla extract (optional for extra flavor)
- 1/4 teaspoon ground cinnamon (optional for added warmth)
Instructions
- Prepare the Fruit:
- Rinse the blackberries thoroughly under cool water, then place them in a large saucepan or pot.
- Use a potato masher or a fork to crush the blackberries, releasing their juices. If you prefer a smoother jam, you can blend the berries with an immersion blender before cooking.
- Cook the Jam:
- Add the sugar, lemon juice, and optional vanilla extract and cinnamon to the mashed blackberries.
- Stir everything together and bring to a simmer over medium heat.
- Once simmering, reduce the heat to low and let the jam cook for 25-30 minutes, stirring frequently. As it cooks, the mixture will thicken. To check if it’s ready, drop a small spoonful of jam on a cold plate and run your finger through it—if it wrinkles and holds its shape, it’s ready.
- Adjust Consistency:
- If the jam seems too runny, continue to cook for another 5-10 minutes. If it becomes too thick, you can add a little water to thin it out.
- Can or Store:
- Once the jam has reached your desired consistency, remove it from the heat.
- Let it cool for about 10 minutes, then transfer it into sterilized jars. You can either store the jam in the refrigerator for up to 3 weeks or process the jars in a water bath for long-term storage. For water bath canning, process jars for 10 minutes and allow them to cool completely before storing.
- Serve:
- Once the jam has cooled and set, enjoy it on toast, in desserts, or as a topping for yogurt, pancakes, or cakes!
Notes
- If you like your jam a little smoother, you can run the mashed berries through a fine mesh strainer to remove the seeds.
- You can adjust the sweetness of your jam by reducing or increasing the sugar, depending on the sweetness of the berries.
- For a more robust flavor, consider adding a pinch of ginger or a few mint leaves during the cooking process, then removing them before storing.
- This recipe works well with other berries, such as raspberries or blackberries mixed with blueberries.
- Prep Time: 10 minutes
- Cook Time: 30 minutes
- Category: Preserves, Jam, Canning
- Method: Stovetop
- Cuisine: American
Nutrition
- Serving Size: 1 tablespoon
- Calories: 50
- Sugar: 12 g
- Sodium: 0mg
- Fat: 0g
- Saturated Fat: 0g
- Unsaturated Fat: 0g
- Trans Fat: 0g
- Carbohydrates: 13g
- Fiber: 1g
- Protein: 0g
- Cholesterol: 0g


