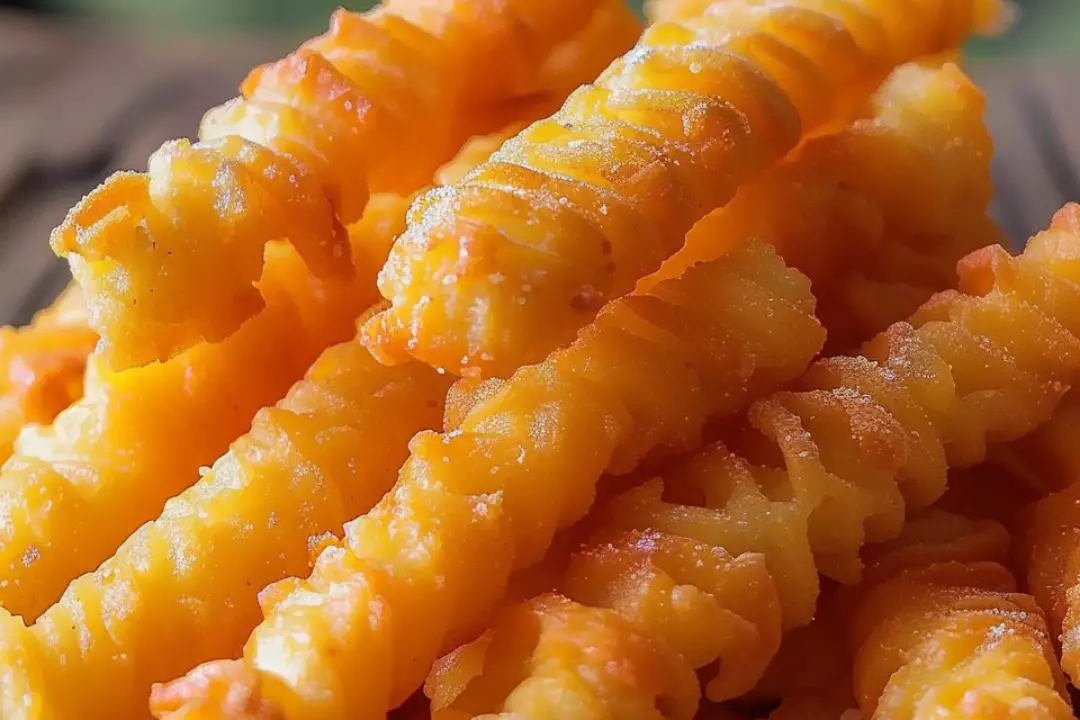
If you’re craving something crunchy, cheesy, and totally irresistible, then you need to make these cheese straws! They’re buttery, flaky, and packed with cheesy goodness in every bite. Perfect as an appetizer, snack, or party treat, these little straws will disappear faster than you can say “cheese.” Trust me, once you try them, you’ll find yourself reaching for more. Plus, they’re so simple to make—let’s dive right in!
Why You’ll Love Cheese Straws
Addictive Flavor
The combination of sharp cheese, buttery dough, and a hint of spice makes these cheese straws incredibly addictive. They’re the kind of snack that you’ll find yourself munching on without realizing how many you’ve eaten. Each bite is packed with savory goodness.
Perfect for Any Occasion
Whether you’re hosting a party, enjoying a family dinner, or just need a quick snack to satisfy your cravings, these cheese straws fit any occasion. They’re fancy enough to impress guests but easy enough to whip up whenever you want something delicious.
So Easy to Make
Don’t be intimidated by the word “straws”—this recipe is incredibly simple. With just a few ingredients and easy steps, you’ll have a batch of golden, crispy cheese straws in no time. It’s perfect for both beginners and experienced bakers.
Customizable
Feel free to get creative with your cheese straws! Add a little cayenne pepper for a spicy kick, or experiment with different cheeses for a unique twist. The options are endless, so you can tailor them to your exact taste.
Make Ahead and Freeze
You can make these cheese straws ahead of time and freeze them for later! Just bake them, let them cool, and freeze them in a single layer. When you’re ready to eat, simply heat them in the oven for a few minutes to bring them back to life.

Disclosure: This post contains affiliate links.If you click and make a purchase, I may earn a small commission at no extra cost to you.
Ingredients in Cheese Straws
Here’s the magic of this recipe—it uses a few simple ingredients that you likely already have in your pantry:
Cheddar Cheese
The star of the show! Use sharp cheddar cheese for maximum flavor. Grate it yourself for the best texture and taste. If you’re feeling adventurous, mix in a little Parmesan for extra richness.
Flour
All-purpose flour is what you’ll need to create the dough. It helps hold everything together and gives the straws that satisfying crunch.
Butter
The butter makes the dough rich and flaky, giving the cheese straws that melt-in-your-mouth texture.
Baking Powder
A little baking powder helps give the cheese straws that light and crispy texture, so they don’t end up too dense.
Salt
Just a pinch of salt enhances the flavor of the cheese and balances out the richness of the butter.
Cayenne Pepper (Optional)
A dash of cayenne pepper adds a bit of heat and gives these cheese straws a subtle kick. It’s optional, but highly recommended if you like a little spice.
Note: The full ingredient list, including measurements, is provided in the recipe card directly below.
Instructions
Preheat the Oven
Start by preheating your oven to 350°F (175°C). This ensures your cheese straws bake evenly and come out perfectly crispy.
Prepare the Dough
In a large bowl, combine the grated cheddar cheese, flour, baking powder, salt, and cayenne pepper (if using). Add the cold butter and work it into the mixture using a pastry cutter or your fingers. You want the mixture to resemble coarse crumbs.
Add Liquid and Form the Dough
Slowly add a tablespoon of ice-cold water at a time, mixing until the dough starts to come together. You may need around 3-4 tablespoons of water. Once the dough forms, knead it gently on a floured surface until smooth. Don’t overwork it!
Roll Out the Dough
Roll the dough out to about 1/8-inch thickness. The thinner the dough, the crispier your cheese straws will be. Use a sharp knife or a pizza cutter to cut the dough into strips, about 1/2 inch wide and 4-5 inches long.
Twist the Straws
Take each strip of dough and twist it gently into a spiral shape. You can make them as tight or loose as you like, but the tighter the twist, the crispier the result.
Bake the Cheese Straws
Place the twisted cheese straws onto a baking sheet lined with parchment paper. Bake them for 12-15 minutes, or until they’re golden brown and crispy. Keep an eye on them—every oven is different, and you don’t want them to burn!
Cool and Serve
Once the cheese straws are baked to perfection, remove them from the oven and let them cool on a wire rack. Serve them warm, or store them in an airtight container for later. These cheese straws are best enjoyed fresh, but they’ll keep for a few days!
Nutrition Facts
Servings: 12
Calories per serving: ~180-220 (calories may vary depending on specific ingredients used)
Preparation Time
Prep Time: 15 minutes
Cook Time: 12-15 minutes
Total Time: 30 minutes
How to Serve Cheese Straws
Cheese straws are perfect for snacking, but they can also be paired with various dishes to make a delicious spread:
As an Appetizer
Serve them with a tangy dipping sauce like ranch or spicy mustard for an extra flavor kick.
With a Charcuterie Board
Add these cheese straws to a charcuterie board with cured meats, olives, and fresh fruit. They add a perfect crunch and savory flavor to the spread.
With Soups or Salads
Use them as a crunchy accompaniment to soups like tomato bisque or a light salad. They add texture and a cheesy flair to any meal.
For a Simple Snack
Sometimes, cheese straws are best enjoyed on their own, with a nice cup of tea or coffee.
Additional Tips
Grate Your Own Cheese
Pre-grated cheese often contains additives that can affect the texture of the dough. Grating your own cheese ensures the best texture and flavor.
Make Them Smaller or Bigger
Feel free to adjust the size of your cheese straws! Smaller ones are great for appetizers, while larger ones are perfect for a heartier snack.
Spice Variations
Experiment with different spices to add some variety. A little smoked paprika or even a pinch of garlic powder can elevate the flavor.
Freezing Cheese Straws
To freeze, place the unbaked cheese straws on a baking sheet and freeze them in a single layer. Once frozen solid, transfer them to a freezer-safe bag or container. Bake them directly from the freezer at 350°F for about 15-18 minutes.
For Extra Cheese
If you love a cheesy bite, you can sprinkle some additional grated cheese on top of the cheese straws before baking.
FAQ Section
Q1: Can I make these cheese straws ahead of time?
A1: Yes! You can make the dough ahead of time and store it in the fridge for up to 24 hours. Just roll and twist the dough right before baking.
Q2: Can I use a different type of cheese?
A2: Absolutely! You can experiment with different cheeses like Monterey Jack, Gouda, or Gruyère for a different flavor profile.
Q3: Can I use store-bought puff pastry for these?
A3: You can! Puff pastry will give you a flakier result, but it might be a bit more delicate. Just roll it out and cut it into strips as you would with regular dough.
Q4: Can I make these cheese straws without butter?
A4: The butter is key for the flakiness and richness of the dough, but if you want to make it dairy-free, try using a plant-based butter substitute.
Q5: Can I add more spice to these cheese straws?
A5: Yes! If you like things spicy, feel free to add more cayenne pepper, or even add chili powder or crushed red pepper flakes.
Q6: How do I store leftover cheese straws?
A6: Store leftover cheese straws in an airtight container at room temperature for up to 3 days. You can also freeze them for up to 3 months.
Q7: Can I make these cheese straws gluten-free?
A7: Yes, you can substitute the all-purpose flour with a gluten-free flour blend. Just make sure to check that the baking powder is gluten-free as well.
Q8: How can I make these cheese straws more cheesy?
A8: You can add a little extra cheese to the dough or sprinkle more grated cheese on top before baking for a cheesier crust.
Q9: Can I bake these cheese straws on a baking rack?
A9: Yes! Using a baking rack will allow air to circulate around the straws, giving them a crispier texture.
Q10: How long do I bake cheese straws?
A10: Bake cheese straws for 12-15 minutes, or until they are golden brown and crispy. Keep an eye on them to avoid overbaking.
Conclusion
Cheese straws are the perfect snack to satisfy your cheesy cravings. With their crunchy texture, buttery dough, and bold cheese flavor, they’re sure to be a hit at any gathering or just as a cozy snack for yourself. Plus, with how easy they are to make, you’ll be whipping up batches of these again and again! Enjoy!
Print
Cheese Straws Recipe
- Total Time: 30 minutes
- Yield: 24 cheese straws 1x
- Diet: Vegetarian
Description
Cheese Straws are savory, crispy, and cheesy treats that are perfect as appetizers, party snacks, or a light bite with a drink. Made with a buttery dough and filled with sharp cheddar cheese, they’re easy to make and irresistible!
Ingredients
- 2 cups all-purpose flour
- 1/4 teaspoon salt
- 1/4 teaspoon cayenne pepper (optional, for a spicy kick)
- 1 cup sharp cheddar cheese, grated
- 1/2 cup unsalted butter, cold and cut into cubes
- 1/4 cup cold water (or as needed)
- 1 egg (for egg wash, optional)
Instructions
- Preheat your oven to 375°F (190°C). Line a baking sheet with parchment paper or lightly grease it.
- In a large mixing bowl, combine the flour, salt, and cayenne pepper (if using).
- Add the cold butter cubes to the flour mixture and use a pastry cutter or your hands to work the butter into the flour until the mixture resembles coarse crumbs.
- Stir in the grated cheese until well distributed.
- Slowly add cold water, one tablespoon at a time, mixing gently until the dough comes together. Be careful not to overwork it.
- On a lightly floured surface, roll the dough out to about 1/8 inch thickness. Using a sharp knife or pizza cutter, cut the dough into strips, about 1/2 inch wide and 3-4 inches long.
- Place the cheese straws onto the prepared baking sheet, making sure they aren’t too close together.
- If desired, brush the tops of the straws with a little beaten egg for a golden finish.
- Bake for 12-15 minutes, or until the cheese straws are golden and crisp.
- Allow the cheese straws to cool on a wire rack before serving. Enjoy!
Notes
- For extra flavor, try adding a pinch of garlic powder or onion powder to the dough mixture.
- These can be stored in an airtight container at room temperature for up to 5 days or frozen for longer storage.
- If you prefer a milder flavor, you can use a mild cheddar cheese or a blend of cheeses like mozzarella and cheddar.
- Prep Time: 15 minutes
- Cook Time: 12-15 minutes
- Category: Appetizer
- Method: Baking
- Cuisine: Southern
Nutrition
- Serving Size: 1 cheese straw
- Calories: 100 kcal
- Sugar: 1g
- Sodium: 150mg
- Fat: 8g
- Saturated Fat: 5g
- Unsaturated Fat: 3g
- Trans Fat: 0g
- Carbohydrates: 4g
- Fiber: 0g
- Protein: 3g
- Cholesterol: 25mg


