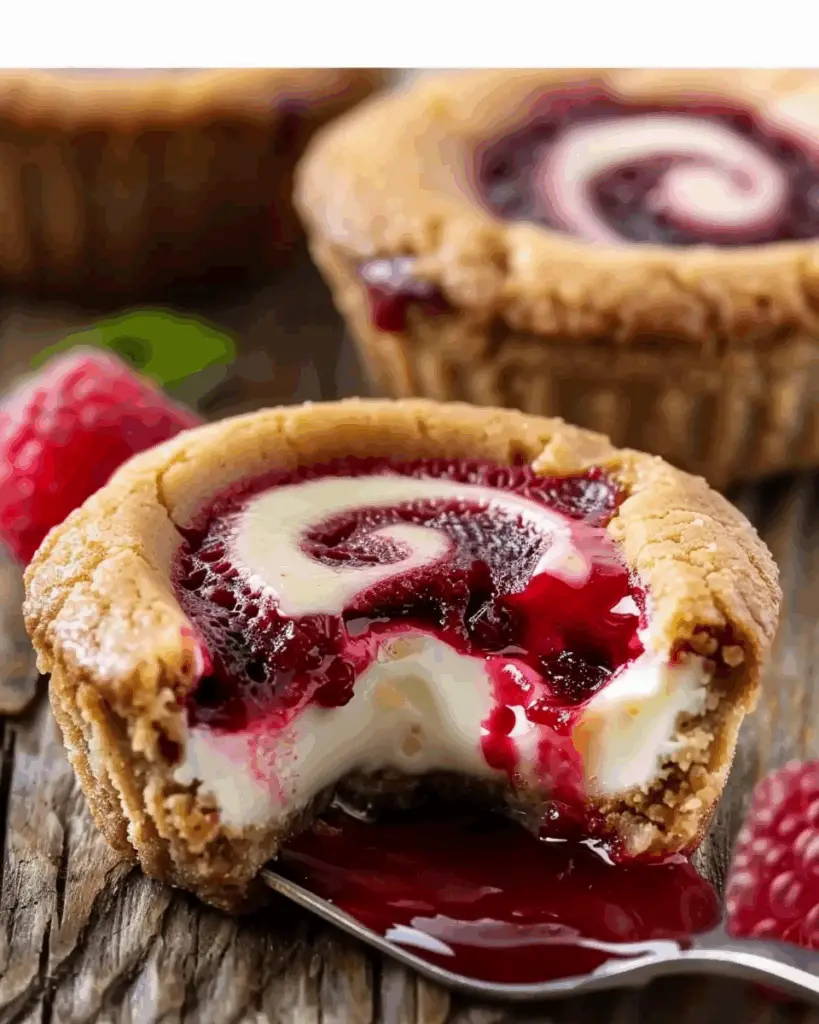
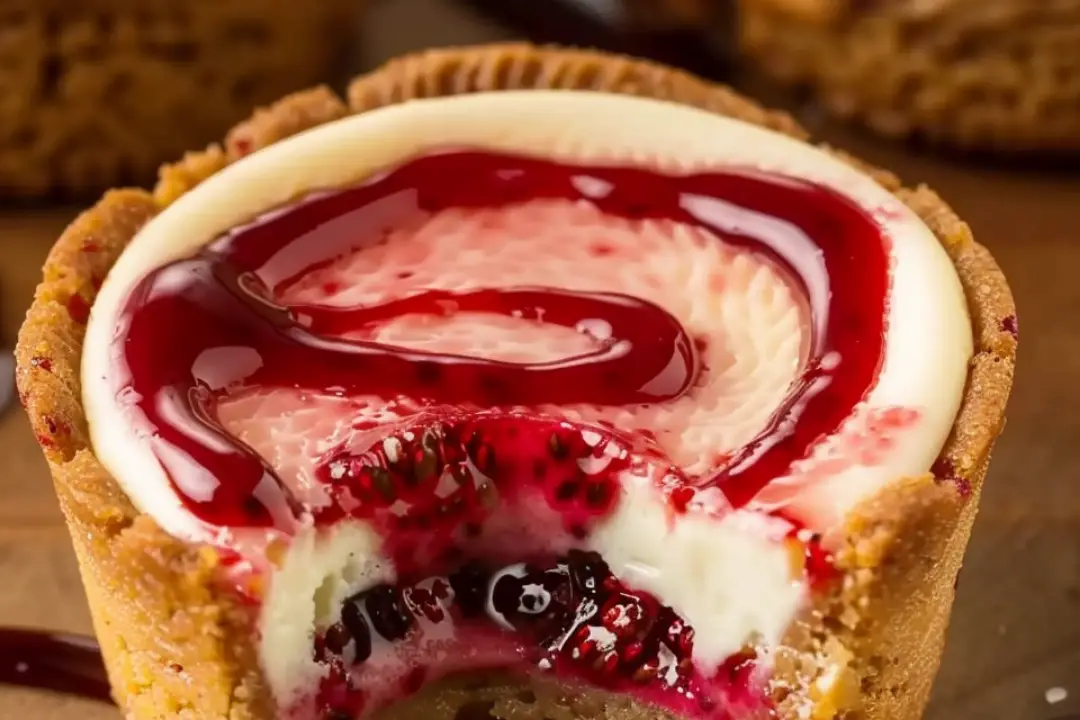
Okay, friend—imagine this: buttery cookie cups filled with rich, creamy cheesecake, then swirled with a bright, fruity jam that melts into every bite. Sound dreamy? That’s exactly what you get with these Cheesecake Cookie Cups with Fruity Swirls! They’re part cookie, part cheesecake, and 100% irresistible. Whether you’re baking for a party, a picnic, or just to treat yourself on a random Tuesday (highly recommend), these little bites of bliss are simple to make and seriously impressive.
Why You’ll Love Cheesecake Cookie Cups with Fruity Swirls
Mini Size, Major Flavor: These are bite-sized treats, but don’t let their size fool you—they pack a punch of flavor and texture in every little cup.
Perfect Balance: The soft, slightly chewy cookie base contrasts beautifully with the creamy cheesecake center and the sweet, tangy fruit swirl on top. It’s the kind of balance that keeps you going back for “just one more.”
Totally Customizable: Choose your favorite fruity swirl—raspberry, strawberry, blueberry, or even lemon curd. The flavor possibilities are endless!
No Fussy Water Baths: You get all the cheesecake satisfaction without the hassle. These are easy-bake and beginner-friendly.
Party-Perfect: These are made to impress! They’re cute, easy to grab, and even easier to devour. Bake them for brunches, showers, holidays, or just because.

Disclosure: This post contains affiliate links.If you click and make a purchase, I may earn a small commission at no extra cost to you.
Ingredients in Cheesecake Cookie Cups with Fruity Swirls
Here’s what makes the magic happen:
Cookie Dough
This is your base! You can use homemade sugar cookie dough for that extra love, or take a shortcut with refrigerated dough if you’re in a pinch.
Cream Cheese
The heart of the cheesecake filling. It’s rich, smooth, and gives that classic tangy bite we all crave.
Granulated Sugar
Sweetens the cheesecake filling just the right amount—without overpowering it.
Egg
Helps the cheesecake set perfectly in each cup so it’s creamy but holds its shape.
Vanilla Extract
A splash of vanilla gives warmth and depth to the cheesecake flavor. Don’t skip it—it makes a big difference!
Fruit Jam or Preserves
Here’s where the swirl comes in! Raspberry, strawberry, or blackberry jam all work beautifully. You want something fruity and slightly tart to contrast the sweet, creamy filling.
Optional: Fresh Fruit or Mint
For topping and extra flair! A single berry or a tiny mint leaf makes these cups look bakery-worthy.
Instructions
Let’s get baking!
Preheat the Oven:
Set your oven to 350°F (175°C) and grease a mini muffin tin or line with mini paper liners.
Prep the Cookie Base:
Roll cookie dough into small balls and press them into the bottom of each muffin cup. Use your fingers or a spoon to gently press down and slightly up the sides, creating a little “nest” for the filling.
Make the Cheesecake Filling:
In a medium bowl, beat the softened cream cheese with sugar until smooth. Add the egg and vanilla extract and mix until everything is creamy and well combined.
Assemble the Cups:
Spoon a small amount of cheesecake filling into each cookie cup, filling them about ¾ full. Add a small dollop of fruit jam on top, then use a toothpick to gently swirl it into the cheesecake mixture.
Bake:
Pop the tray in the oven and bake for 15–18 minutes, or until the cheesecake is set and the cookie edges are lightly golden. Don’t overbake—they’ll set more as they cool.
Cool and Chill:
Let the cups cool in the pan for 10 minutes, then transfer to a wire rack. Chill in the fridge for at least 1 hour before serving to let that cheesecake filling fully set.
Serve and Enjoy!
Garnish with a fresh berry or mint leaf if you’re feeling fancy. Then dig in!
Nutrition Facts
Servings: About 24 mini cups
Calories per serving: ~120–150 (depending on ingredients used)
Preparation Time
Prep Time: 15 minutes
Cook Time: 15–18 minutes
Chill Time: 1 hour
Total Time: About 1.5 hours (mostly chill time!)
How to Serve Cheesecake Cookie Cups
As a Dessert Platter Star: Arrange them on a pretty serving tray alongside chocolate truffles, fruit, and mini tarts.
With Coffee or Tea: These pair beautifully with a cozy cup of coffee or a bright herbal tea.
Chilled and Refreshing: Serve them straight from the fridge on a hot day—they’re cool, creamy, and oh-so-satisfying.
Add a Dusting of Powdered Sugar: For that bakery finish, a light dusting of powdered sugar before serving adds a touch of elegance.
Additional Tips
Use Room Temperature Ingredients: This helps your cheesecake filling come together smoothly with no lumps.
Don’t Overfill: Leave a little space at the top of each cookie cup—cheesecake expands slightly while baking.
Get Creative with Swirls: Use a mix of jams for a rainbow of fruity flavors. You can even try Nutella or caramel if you’re feeling decadent!
Make Ahead: These are perfect make-ahead treats. Store them in the fridge in an airtight container for up to 4 days.
FAQ Section
Q1: Can I use store-bought cookie dough?
A1: Absolutely! It’s a great time-saver. Sugar cookie or even chocolate chip cookie dough both work well.
Q2: Can I freeze these?
A2: Yes! Freeze them in a single layer, then store in an airtight container. Thaw in the fridge overnight before serving.
Q3: What kind of fruit jam is best?
A3: Raspberry, strawberry, blueberry, or even apricot. Just make sure it’s thick enough to swirl without sinking into the filling.
Q4: Can I use a regular muffin tin?
A4: You can, but the baking time may increase slightly. Keep an eye on them after the 18-minute mark.
Q5: Do I need to chill them before serving?
A5: Yes—it helps the cheesecake set and makes the texture just right.
Q6: Can I make them gluten-free?
A6: Totally! Use your favorite gluten-free cookie dough and you’re good to go.
Q7: How long do they last?
A7: Up to 4 days in the fridge. Just keep them covered to prevent drying out.
Q8: Can I make a chocolate version?
A8: Oh yes—try using chocolate cookie dough and swirling in raspberry jam for a rich twist!
Q9: Can I use a piping bag for the filling?
A9: Definitely—it makes it easier (and neater) to fill each cookie cup quickly.
Q10: Do they need to be served cold?
A10: They’re best chilled, but can sit at room temp for up to 2 hours if serving at a party.
Conclusion
Cheesecake Cookie Cups with Fruity Swirls are everything you want in a dessert—cute, creamy, colorful, and downright delicious. Whether you’re making them for a gathering or a personal treat (no judgment!), they’re the kind of sweet bite that always hits the spot. So grab your jam, get swirling, and prepare to wow everyone who takes a bite.
Print
Cheesecake Cookie Cups with Fruity Swirls
- Total Time: 1 hour 30 minutes (including chilling)
- Yield: 24 mini cookie cups
- Diet: Vegetarian
Description
Cheesecake Cookie Cups with Fruity Swirls are the perfect bite-sized treat—featuring a soft cookie base, creamy cheesecake center, and vibrant fruity jam swirled on top. Great for parties, holidays, or whenever you’re craving a fun and easy dessert.
Ingredients
- 1 roll (16.5 oz) refrigerated sugar cookie dough
- 8 oz cream cheese, softened
- 1/4 cup granulated sugar
- 1 egg
- 1/2 teaspoon vanilla extract
- 2–3 tablespoons fruit jam or preserves (strawberry, raspberry, or blueberry)
Instructions
- Preheat oven to 350°F (175°C). Grease a mini muffin tin or line with paper liners.
- Slice the sugar cookie dough into 24 equal pieces. Press each piece into the bottom and slightly up the sides of each muffin cup to form a shallow well.
- In a mixing bowl, beat the cream cheese, sugar, egg, and vanilla extract until smooth and creamy.
- Spoon about 1 tablespoon of the cream cheese mixture into each cookie cup.
- Add a small drop (1/4 teaspoon) of jam onto the center of each cup and use a toothpick or skewer to swirl it into the cheesecake layer.
- Bake for 15–18 minutes, or until the cheesecake is set and the edges of the cookie cups are lightly golden.
- Cool in the pan for 10 minutes, then carefully transfer to a wire rack to cool completely. Chill in the refrigerator for at least 1 hour before serving for best texture.
Notes
- You can use any flavor of jam—try mixing it up with different varieties for a colorful dessert tray.
- Let the cookie cups cool completely before removing from the pan to avoid breaking the edges.
- Store in an airtight container in the fridge for up to 5 days.
- Prep Time: 10 minutes
- Cook Time: 18 minutes
- Category: Dessert
- Method: Baking
- Cuisine: American
Nutrition
- Serving Size: 1 cookie cup
- Calories: 140
- Sugar: 10g
- Sodium: 90mg
- Fat: 7g
- Saturated Fat: 4g
- Unsaturated Fat: 2g
- Trans Fat: 0g
- Carbohydrates: 16g
- Fiber: 0g
- Protein: 2g
- Cholesterol: 25mg


