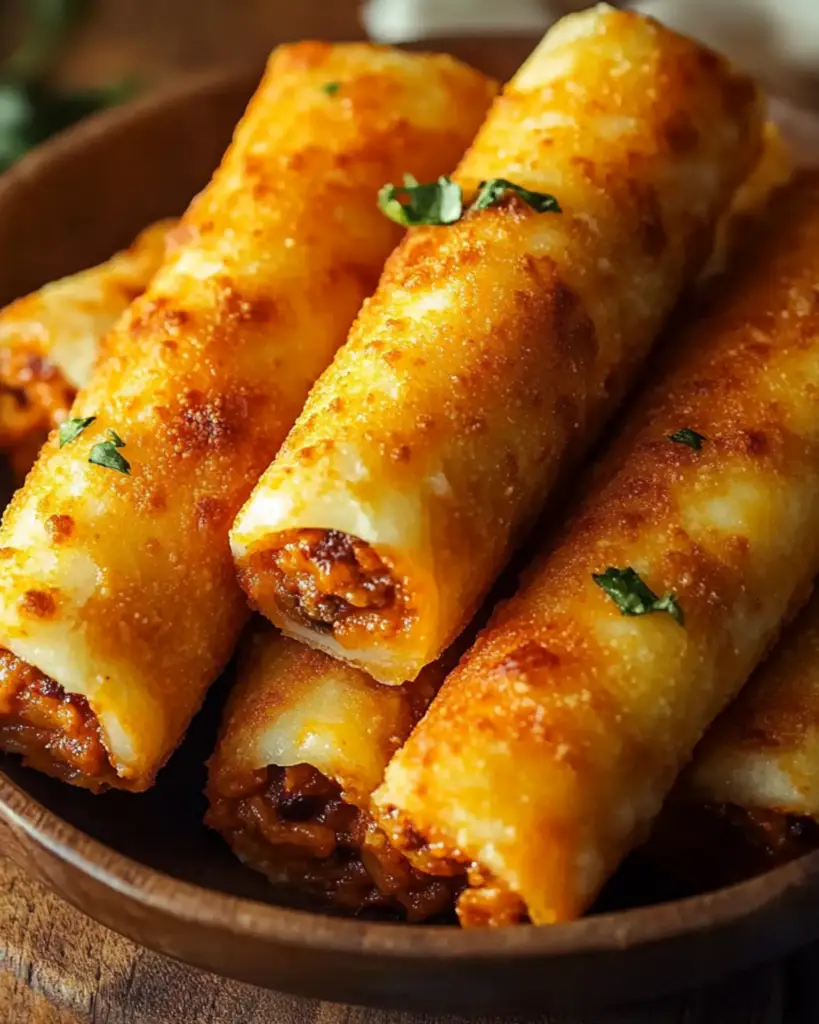
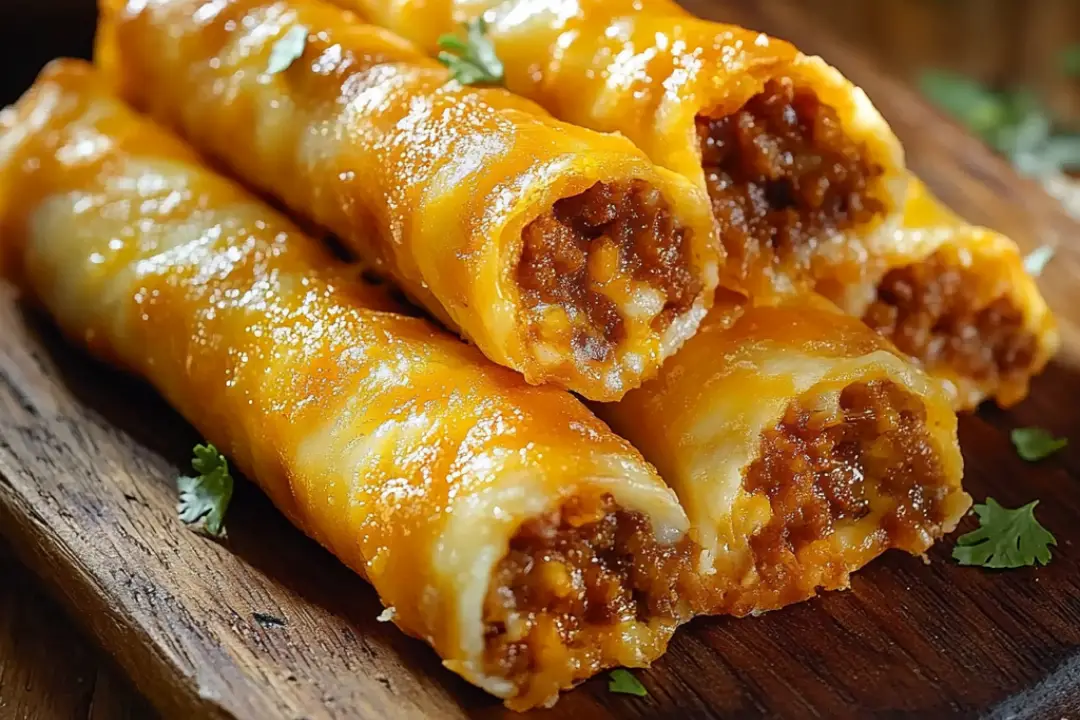
Get ready to sink your teeth into something truly delicious! These Cheesy Taco Sticks are the perfect fusion of savory taco flavors wrapped up in a golden, crispy dough. Imagine a warm, cheesy filling with all the zesty taco seasoning you love, all wrapped up in a soft, pillowy dough that gets perfectly crisp on the outside. Every bite is bursting with flavor, and it’s like enjoying tacos, but in a fun, new way! Whether you’re serving them for dinner, snacks, or game day, these Cheesy Taco Sticks are bound to steal the show. Trust me, you’re going to love these!
Why You’ll Love Cheesy Taco Sticks
These Cheesy Taco Sticks are everything you crave in one tasty package. Here’s why they’ll be your new favorite:
Easy and Fun to Make
Who doesn’t love a recipe that’s fun to make and eat? These cheesy taco sticks are easy to put together and a hit with both kids and adults. It’s a great way to make taco night a little more exciting!
Flavor Explosion in Every Bite
With the perfect combination of taco-seasoned beef (or chicken), melted cheese, and that golden, crispy crust, each bite is packed with flavor. It’s comfort food at its finest!
Perfect for Any Occasion
Whether it’s a weeknight dinner, a fun snack for the kids, or a party appetizer, these taco sticks are perfect for any time you want something that’s quick, easy, and full of flavor.
Customizable
You can easily adjust these taco sticks to fit your taste. Want to make them spicier? Add some jalapeños or a few dashes of hot sauce. Prefer a meatless version? Swap in beans or veggies for a tasty alternative.
Great for Meal Prep
These taco sticks are perfect for making ahead! You can prepare them in advance and simply bake them when you’re ready to eat. Great for busy nights or when you want to have something delicious on hand.

Disclosure: This post contains affiliate links.If you click and make a purchase, I may earn a small commission at no extra cost to you.
Ingredients
These taco sticks come together with just a few simple ingredients that you probably already have in your kitchen!
Ground Beef (or Chicken)
This is the protein base that gives these taco sticks their rich, hearty flavor. Ground beef is classic, but ground chicken or turkey works well too!
Taco Seasoning
The taco seasoning brings all the zesty flavors that make taco night so special. You can use a store-bought packet or make your own blend with chili powder, cumin, garlic powder, and paprika.
Shredded Cheese
Cheddar cheese is the ultimate melty cheese for this recipe. It gets gooey and bubbly inside the taco stick, making each bite cheesy and satisfying.
Pizza Dough (or Crescent Roll Dough)
You need something to wrap everything up, and pizza dough or crescent roll dough is the perfect choice. It bakes up golden and crispy, adding the perfect texture.
Optional Toppings and Dips
You can add extras like salsa, sour cream, guacamole, or even jalapeños for a little extra kick.
(Note: Full ingredient measurements provided in the recipe card above!)
Instructions
Ready to make these cheesy, crispy delights? Let’s get started!
Cook the Meat
In a skillet over medium heat, cook the ground beef (or chicken) until browned, breaking it up into small pieces as it cooks. Drain any excess fat.
Season the Meat
Add the taco seasoning to the cooked meat and follow the instructions on the seasoning packet (or use your homemade taco seasoning). Stir in a bit of water, and let the meat simmer for a few minutes until the flavors meld together.
Prepare the Dough
While the meat is simmering, roll out the pizza dough or crescent roll dough on a lightly floured surface. If you’re using pizza dough, cut it into rectangles or squares.
Assemble the Taco Sticks
Spoon a portion of the seasoned meat mixture onto the center of each piece of dough. Sprinkle generously with shredded cheese. Then, carefully fold the dough over the filling and pinch the edges to seal, forming a stick shape.
Bake to Golden Perfection
Place the taco sticks on a baking sheet lined with parchment paper, and bake in a preheated oven at 375°F (190°C) for about 12-15 minutes or until the dough is golden brown and crispy.
Serve and Enjoy
Remove from the oven and allow the taco sticks to cool slightly before serving. You can serve them with your favorite dipping sauces, like salsa, sour cream, or guacamole. Enjoy!
Nutrition Facts
Servings: 6
Calories per serving: 300
Total Fat: 16g
Saturated Fat: 8g
Cholesterol: 40mg
Sodium: 600mg
Carbohydrates: 28g
Fiber: 2g
Sugar: 3g
Protein: 18g
Preparation Time
Prep Time: 10 minutes
Cook Time: 20 minutes
Total Time: 30 minutes
How to Serve Cheesy Taco Sticks
These cheesy taco sticks are delicious on their own, but here are a few ways to elevate your meal:
With Dipping Sauces
Serve with salsa, sour cream, or guacamole for dipping. The creamy and tangy dips perfectly complement the cheesy taco sticks.
With a Side Salad
Pair them with a fresh green salad topped with avocado, tomatoes, and a light dressing for a well-rounded meal.
As Appetizers
These taco sticks make an awesome appetizer for parties, game nights, or any casual gathering. They’re easy to eat and perfect for sharing!
With Mexican Rice
Serve these taco sticks with a side of Mexican rice for a complete taco-inspired meal.
Garnished with Fresh Cilantro
Sprinkle some freshly chopped cilantro on top for a burst of color and flavor that complements the richness of the taco sticks.
Additional Tips
Use Store-Bought Dough
If you’re short on time, you can always use store-bought dough like pizza dough or crescent rolls to save some effort. It’s quick and easy!
Add Veggies to the Filling
Feel free to toss in some diced onions, bell peppers, or corn for a little extra texture and flavor in the filling. It’s a great way to sneak in some veggies!
Make Them Spicy
For a spicy kick, add chopped jalapeños to the meat filling or sprinkle some red pepper flakes in the taco seasoning.
Freeze for Later
These taco sticks freeze beautifully! After baking, allow them to cool, then wrap in foil or plastic wrap and freeze for up to 3 months. Reheat in the oven when you’re ready to enjoy!
Leftover Storage
Store any leftover taco sticks in an airtight container in the fridge for up to 3 days. Reheat in the oven at 350°F (175°C) for 10-15 minutes to keep them crispy.
FAQ Section
Q1: Can I use ground turkey instead of beef?
A1: Yes! Ground turkey is a great lighter alternative. It’ll still be full of flavor with the taco seasoning.
Q2: Can I make these vegetarian?
A2: Absolutely! You can swap the meat for beans, tofu, or a veggie filling like sautéed mushrooms and bell peppers.
Q3: Can I use a different kind of cheese?
A3: Yes, you can use mozzarella, Monterey Jack, or any cheese that melts well. A blend of cheeses also works great!
Q4: Can I make these taco sticks in advance?
A4: Yes! You can assemble them ahead of time and refrigerate them. Just pop them in the oven when you’re ready to bake.
Q5: How can I make these spicier?
A5: Add diced jalapeños to the filling, sprinkle some chili flakes, or use a spicier taco seasoning for an extra kick.
Q6: Can I use crescent roll dough instead of pizza dough?
A6: Yes, crescent roll dough will make these taco sticks extra flaky and delicious! Just unroll the dough and follow the same assembly instructions.
Q7: How do I store leftovers?
A7: Store any leftover taco sticks in an airtight container in the fridge for up to 3 days. Reheat in the oven for the best texture.
Q8: Can I freeze these taco sticks?
A8: Yes! After baking and cooling, wrap the taco sticks tightly in plastic wrap or foil and freeze for up to 3 months.
Q9: What can I serve with these taco sticks?
A9: Serve with salsa, sour cream, guacamole, or a simple side salad. Mexican rice is also a great pairing.
Q10: Can I make these without meat?
A10: Yes! You can use beans, veggies, or even quinoa as a base for a delicious meatless option.
Conclusion
These Cheesy Taco Sticks are the perfect combination of cheesy, savory, and crispy goodness. Whether you’re serving them as a fun snack, appetizer, or dinner, they’re sure to be a hit every time. With easy-to-find ingredients and endless customization options, you’ll want to make these over and over again! Enjoy the cheesy, taco-filled magic!
Print
Cheesy Taco Sticks Recipe
- Total Time: 25 minutes
- Yield: Approximately 10 taco sticks
Description
Enjoy these delicious cheesy taco sticks, a perfect combination of seasoned ground beef and gooey cheese wrapped in crispy pizza dough. Ideal for snacks, appetizers, or a fun family dinner!
Ingredients
- 1 lb. ground beef
- 1 packet taco seasoning mix
- 1 tube Pillsbury Pizza Dough
- 5 colby jack and cheddar cheese sticks, halved
- 4 tbsp butter, melted
- 1 tsp garlic powder
- 1 tsp dried parsley
Instructions
- Preheat your oven to 400°F (200°C) and line a baking sheet with parchment paper.
- In a skillet, cook the ground beef over medium heat until browned. Drain any excess fat.
- Add the taco seasoning to the beef, following the instructions on the packet. Stir well and set aside.
- Roll out the Pillsbury Pizza Dough on a floured surface and cut it into 10 equal rectangles.
- Spoon some of the seasoned ground beef onto each rectangle, then place a halved cheese stick on top.
- Roll the dough around the beef and cheese, pinching the edges to seal. Place the taco sticks on the prepared baking sheet.
- In a small bowl, mix the melted butter with garlic powder and dried parsley. Brush the mixture over each taco stick.
- Bake for 12-15 minutes, or until the dough is golden brown and cooked through.
- Allow the cheesy taco sticks to cool slightly before serving.
Notes
For extra flavor, consider adding jalapeños or diced bell peppers to the beef mixture.
- Prep Time: 10 mins
- Cook Time: 15 mins
- Category: Appetizer
- Method: Baking
- Cuisine: Tex-Mex
Nutrition
- Serving Size: 1 taco stick
- Calories: 210
- Sugar: 1g
- Sodium: 350mg
- Fat: 12g
- Saturated Fat: 6g
- Unsaturated Fat: 5g
- Trans Fat: 0g
- Carbohydrates: 18g
- Fiber: 1g
- Protein: 9g
- Cholesterol: 30mg


