
Introduction
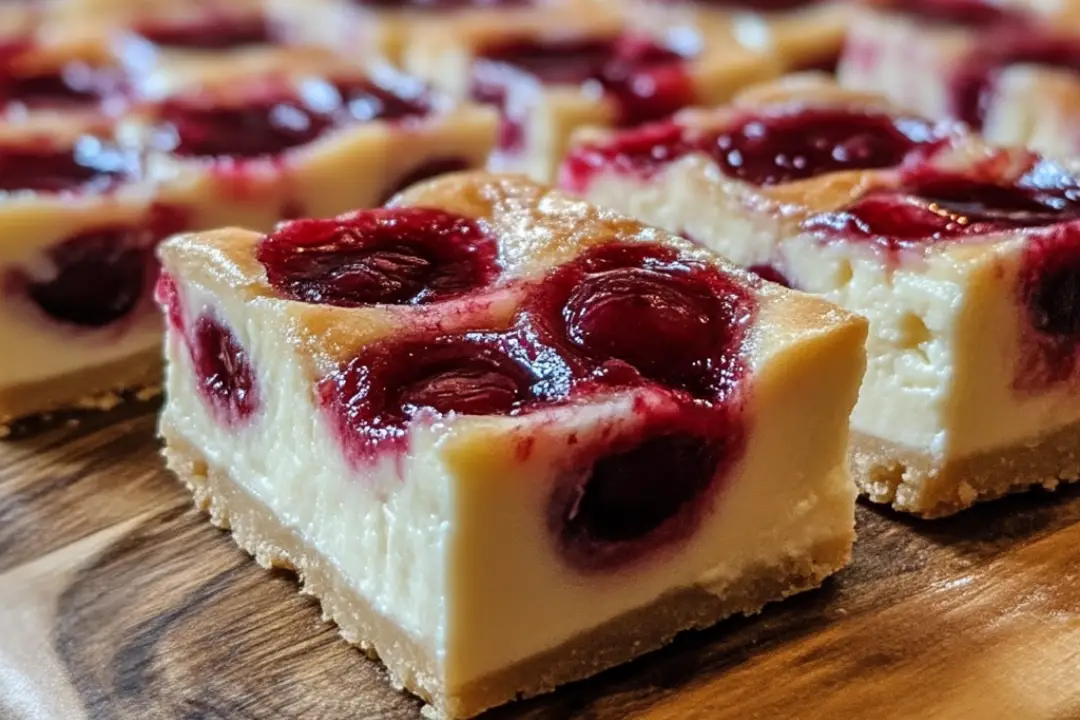
There’s something incredibly satisfying about a dessert that combines creamy cheesecake with the tartness of cherries, all neatly packaged in bar form. When I first made these Cherry Cheesecake Bars for a family gathering, I was met with nothing short of rave reviews. Everyone from the youngest kids to the grandparents loved them. The creamy filling paired with the sweet cherry topping was a hit, and I could hardly keep them on the table before they disappeared! These bars not only look beautiful but also taste heavenly, making them the perfect dessert for any occasion.
Ingredients
For the Crust:
- 2 cups graham cracker crumbs (about 16 full sheets)
- 1/4 cup granulated sugar
- 1/2 cup (1 stick) unsalted butter, melted
For the Cheesecake Filling:
- 16 oz (2 blocks) cream cheese, softened to room temperature
- 2/3 cup granulated sugar
- 2 large eggs
- 2 teaspoons vanilla extract
- 1/4 teaspoon salt
For the Cherry Topping:
- 1 can (21 oz) cherry pie filling
Instructions
Preheat the Oven
Preheat your oven to 325°F (165°C). Prepare a 9×13-inch baking pan by lining it with parchment paper, leaving an overhang on the sides for easy removal later.
Make the Crust
In a medium bowl, combine the graham cracker crumbs, granulated sugar, and melted butter. Mix until the crumbs are evenly moistened. Press this mixture firmly and evenly into the bottom of the prepared pan. Bake for 10 minutes, then set aside to cool.
Prepare the Cheesecake Filling
In a large bowl, use an electric mixer to beat the softened cream cheese and granulated sugar together until smooth and creamy, about 2 minutes. Add the eggs one at a time, mixing on low speed after each addition until just combined. Add the vanilla extract and salt, mixing until everything is incorporated. Be careful not to overmix.
Add the Filling
Pour the cheesecake filling over the cooled crust, spreading it out evenly.
Bake the Cheesecake
Place the pan in the preheated oven and bake for 35-40 minutes, until the edges are set but the center still jiggles slightly. Remove from the oven and let it cool completely at room temperature.
Chill the Cheesecake
Once the cheesecake has cooled, refrigerate it for at least 4 hours or overnight to allow it to set properly.
Add the Cherry Topping
Before serving, spread the cherry pie filling evenly over the chilled cheesecake layer.
Serve
Use the parchment paper overhang to lift the cheesecake out of the pan. Cut into squares and serve chilled. Enjoy every delicious bite!
Nutrition Facts
- Servings: 24 servings
- Calories per serving: 220 kcal (approximate)
Nutrition Information per Serving:
- Sugar: 14g
- Sodium: 180mg
- Fat: 10g
- Saturated Fat: 6g
- Unsaturated Fat: 4g
- Trans Fat: 0g
- Carbohydrates: 28g
- Fiber: 0g
- Protein: 3g
- Cholesterol: 50mg
Preparation Time
- Prep Time: 10 minutes
- Cooking Time: 50 minutes
- Chill Time: 4 hours (or overnight)
- Total Time: 5 hours (including chilling)
How to Serve
- Slice: Use a sharp knife to cut into even squares.
- Plate: Arrange on a serving platter for a beautiful presentation.
- Garnish: Consider adding fresh cherries or mint leaves for an extra touch.
- Pair: Serve with a dollop of whipped cream or a scoop of vanilla ice cream.
- Beverage: These bars pair wonderfully with a glass of iced tea or a refreshing lemonade.
Additional Tips
- Room Temperature Ingredients: Make sure your cream cheese is softened to room temperature for easy mixing.
- Avoid Overmixing: When adding eggs, mix just until combined to maintain the cheesecake’s creamy texture.
- Chill Overnight: For the best results, let the cheesecake bars chill overnight to fully set.
- Use Quality Ingredients: Opt for high-quality cream cheese and vanilla extract for a richer flavor.
- Customize Toppings: Feel free to use other fruit toppings, like blueberries or strawberries, for a different flavor profile.
Recipe Variations
- Chocolate Cherry Bars: Add cocoa powder to the crust for a chocolatey twist.
- Lemon Cheesecake Bars: Incorporate lemon zest and juice into the filling for a citrusy flavor.
- Nut Crust: Substitute graham crackers with crushed nuts for a gluten-free option.
- Swirled Filling: Swirl some of the cherry pie filling into the cheesecake mixture before baking for a marbled effect.
- Mini Cheesecake Cups: Use a muffin tin to make individual servings of cheesecake bars.
Serving Suggestions
- Serve these Cherry Cheesecake Bars at birthday parties, potlucks, or holiday gatherings.
- They also make a great dessert for summer barbecues or picnics.
- Pack them for lunchboxes as a sweet treat for kids.
Freezing and Storage
- Storage: Keep leftovers in an airtight container in the refrigerator for up to 5 days.
- Freezing: To freeze, wrap individual bars tightly in plastic wrap and place them in a freezer-safe container. They can be frozen for up to 3 months.
- Thawing: Thaw in the refrigerator overnight before serving.
FAQ Section
- Can I use low-fat cream cheese?
Yes, but the texture may be slightly different. - Can I substitute the cherry pie filling?
Absolutely! You can use any pie filling you prefer, such as blueberry or apple. - Is it necessary to chill the bars?
Yes, chilling allows the cheesecake to set properly for the best texture. - Can I use fresh cherries instead of pie filling?
Yes, you can use fresh cherries; just cook them down with some sugar and cornstarch to create a topping. - What should I do if my cheesecake cracks?
It’s best to avoid overbaking. If it cracks, cover it with the cherry topping! - Can I make this recipe gluten-free?
Yes, substitute the graham crackers with gluten-free options. - How do I know when the cheesecake is done?
The edges should be set, and the center should jiggle slightly when you gently shake the pan. - Can I make these bars ahead of time?
Yes, they can be made a day or two in advance, and they freeze well. - What can I serve with these bars?
They go well with whipped cream, ice cream, or a scoop of yogurt. - How do I cut the bars evenly?
Use a hot knife (dipped in hot water) to slice through the bars for cleaner cuts.
Conclusion
Cherry Cheesecake Bars are a delightful combination of creamy, tangy, and sweet flavors that are sure to please any crowd. Whether you’re serving them for a special occasion or simply treating yourself, these bars are a perfect dessert option. With easy-to-follow steps and simple ingredients, you’ll find yourself making these delicious treats time and again. Enjoy your cherry cheesecake bars, and watch as they quickly become a favorite in your household!
Print


Cherry Cheesecake Bars: A Sweet Delight
- Total Time: 1 hour
- Yield: 24 serving 1x
- Diet: Vegetarian
Description
Indulge in these creamy Cherry Cheesecake Bars, featuring a buttery graham cracker crust topped with smooth cheesecake and luscious cherry filling. Perfect for gatherings, these bars are easy to make and deliciously refreshing!
Ingredients
For the Crust:
- 2 cups graham cracker crumbs (about 16 full sheets)
- 1/4 cup granulated sugar
- 1/2 cup (1 stick) unsalted butter, melted
For the Cheesecake Filling:
- 16 oz (2 blocks) cream cheese, softened to room temperature
- 2/3 cup granulated sugar
- 2 large eggs
- 2 teaspoons vanilla extract
- 1/4 teaspoon salt
For the Cherry Topping:
- 1 can (21 oz) cherry pie filling
Instructions
- Preheat the Oven: Preheat the oven to 325°F (165°C). Line a 9×13-inch baking pan with parchment paper, leaving an overhang on the sides for easy removal.
- Make the Crust: In a medium bowl, combine the graham cracker crumbs, granulated sugar, and melted butter. Mix until the crumbs are evenly moistened. Press the mixture firmly and evenly into the bottom of the prepared pan. Bake for 10 minutes, then set aside to cool.
- Prepare the Cheesecake Filling: In a large bowl, use an electric mixer to beat the softened cream cheese and granulated sugar together until smooth and creamy, about 2 minutes. Add the eggs one at a time, mixing on low speed after each addition until just combined. Add the vanilla extract and salt, mixing until incorporated. Do not overmix.
- Add the Filling: Pour the cheesecake filling over the cooled crust, spreading it out evenly.
- Bake the Cheesecake: Bake in the preheated oven for 35-40 minutes, until the edges are set but the center still jiggles slightly. Remove from the oven and let it cool completely at room temperature.
- Chill the Cheesecake: Once the cheesecake has cooled, refrigerate it for at least 4 hours or overnight to set.
- Add the Cherry Topping: Before serving, spread the cherry pie filling evenly over the chilled cheesecake layer.
- Serve: Use the parchment paper overhang to lift the cheesecake out of the pan. Cut into squares and serve chilled. Enjoy!
Notes
For best results, allow the cheesecake to chill overnight for optimal texture and flavor.
- Prep Time: 10 minutes
- Cook Time: 50 minutes
- Category: Dessert
- Method: Baking
- Cuisine: American
Nutrition
- Serving Size: 1 bar
- Calories: 250
- Sugar: 16g
- Sodium: 150mg
- Fat: 15g
- Saturated Fat: 9g
- Unsaturated Fat: 4g
- Trans Fat: 0g
- Carbohydrates: 26g
- Fiber: 1g
- Protein: 4g
- Cholesterol: 60mg