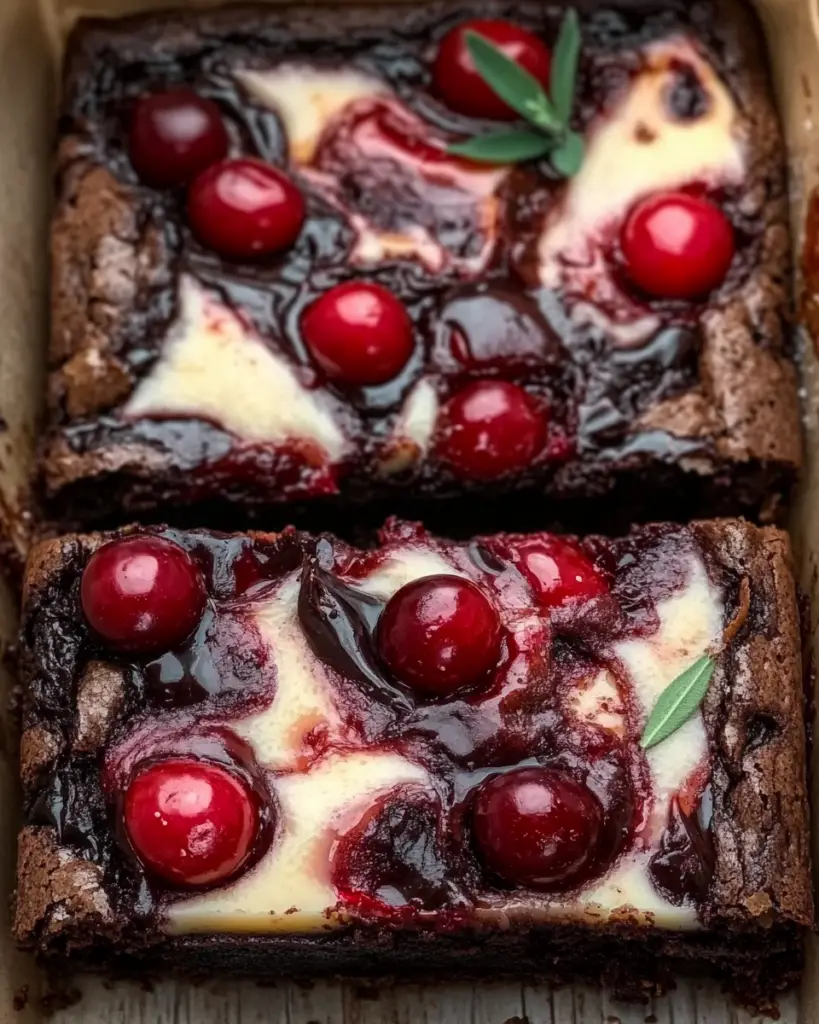
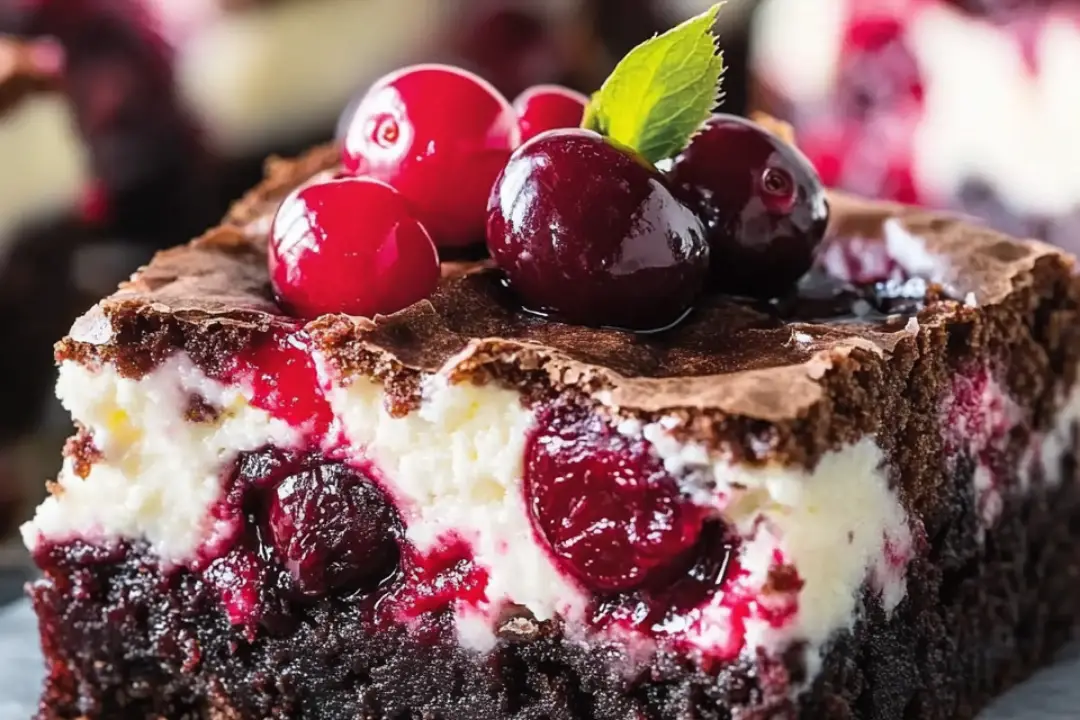
Get ready to treat yourself to something seriously decadent with these Cherry Cheesecake Brownies. Think of it as the best of both worlds—rich, fudgy brownies topped with a creamy, tangy cheesecake layer and finished off with a sweet, juicy cherry topping. Every bite feels like a little bite of heaven, balancing chocolate, cheesecake, and fruit all in one delightful dessert. Whether you’re making them for a special occasion or just to satisfy your sweet tooth, these brownies will be the star of any gathering. Trust me, they’re too good to pass up!
Why You’ll Love Cherry Cheesecake Brownies
These Cherry Cheesecake Brownies are a real crowd-pleaser. Here’s why they’re bound to become your new favorite dessert:
Perfect Combination of Flavors:
The fudgy chocolate brownie base pairs perfectly with the creamy, slightly tangy cheesecake filling, and the sweet cherry topping brings it all together. It’s an irresistible mix of textures and flavors!
Easy to Make:
No need to be intimidated—this recipe is actually super simple. There’s just a few steps involved, and you’ll have a dessert that looks and tastes like you spent hours in the kitchen.
Gorgeous & Impressive:
They’re not only delicious but also stunning to look at. The contrast of the rich brownie, the creamy cheesecake, and the vibrant red cherries makes them a real showstopper at any event.
Versatile:
Perfect for holidays, family get-togethers, or just a weekend treat. They’re also a great option for gifting to someone special!
Customizable:
Feel free to tweak the topping to your liking—add a drizzle of chocolate ganache, sprinkle with crushed graham crackers for a cheesecake-crust feel, or top with fresh berries for an extra fruity touch.

Disclosure: This post contains affiliate links.If you click and make a purchase, I may earn a small commission at no extra cost to you.
Ingredients
To make these mouthwatering Cherry Cheesecake Brownies, you’ll need the following:
For the Brownie Base:
- Butter: For a rich, fudgy texture.
- Sugar: Adds sweetness and balances the richness of the butter.
- Eggs: Help bind everything together while adding moisture.
- Vanilla extract: For that warm, comforting flavor.
- All-purpose flour: Forms the structure of the brownies.
- Cocoa powder: For that deep chocolate flavor that’s essential in brownies.
- Baking powder: A touch of leavening to give the brownies a light texture.
- Salt: Enhances the sweetness and balances the flavors.
For the Cheesecake Layer:
- Cream cheese: The star of the cheesecake layer. Make sure it’s softened for smooth mixing.
- Sugar: Sweetens the cheesecake layer.
- Egg: Helps set the cheesecake layer.
- Vanilla extract: Adds extra flavor to the cheesecake.
- Sour cream: Gives the cheesecake layer a creamy, slightly tangy flavor.
For the Cherry Topping:
- Cherry pie filling: You can use store-bought for convenience, or homemade if you’re feeling extra fancy.
(Note: Full ingredient measurements are provided in the recipe card above!)
Instructions
Now, let’s make these show-stopping brownies:
Step 1: Preheat & Prepare
Preheat your oven to 350°F (175°C) and grease or line an 8×8-inch baking pan with parchment paper. This makes it so much easier to remove the brownies later on.
Step 2: Make the Brownie Base
Melt the butter and sugar together in a microwave-safe bowl or over low heat on the stovetop. Stir until it’s nice and smooth. Let it cool for a minute or two, then whisk in the eggs and vanilla extract. Add the cocoa powder, flour, baking powder, and salt, mixing until the batter is smooth. Spread the brownie batter evenly into the prepared pan, pressing it down to create an even base.
Step 3: Make the Cheesecake Layer
In a separate bowl, beat the softened cream cheese and sugar together until creamy and smooth. Add in the egg, vanilla, and sour cream, and beat until everything is fully combined and fluffy. Spoon the cheesecake mixture over the brownie layer in the pan and gently spread it out with a spatula.
Step 4: Swirl It All Together
Using a knife or a skewer, swirl the cheesecake layer into the brownie base to create a marbled effect. Don’t overdo it—just a few swirls are enough to make it look beautiful and to get the flavors mixing together.
Step 5: Bake
Bake the brownies for 35-40 minutes, or until the center is set and a toothpick inserted into the center comes out with just a few crumbs. The cheesecake should be firm but slightly jiggly in the middle.
Step 6: Cool & Add the Cherry Topping
Let the brownies cool in the pan for at least 30 minutes, then refrigerate them for at least 2 hours to allow the cheesecake to fully set. Once chilled, spread a generous layer of cherry pie filling on top.
Step 7: Slice & Serve
Slice the brownies into squares and serve chilled. The combination of fudgy brownie, creamy cheesecake, and sweet cherries is absolutely irresistible. Enjoy!
Nutrition Facts
Servings: 12-16
Calories per serving: [Calories per serving]
Preparation Time: 20 minutes
Cook Time: 35-40 minutes
Total Time: 3 hours (including chilling time)
How to Serve Cherry Cheesecake Brownies
These brownies are delicious on their own, but here are some ideas to make them even more special:
Serve with Whipped Cream:
A dollop of freshly whipped cream on top adds a light, airy element that complements the rich brownies.
Pair with Ice Cream:
For an indulgent dessert experience, serve with a scoop of vanilla or cherry ice cream on the side.
Add Extra Toppings:
Feel free to drizzle some chocolate syrup or sprinkle crushed nuts on top for a little crunch!
Perfect for Parties:
These brownies are great for a party dessert table. They’re easy to cut into small squares and serve to a crowd.
Additional Tips
Here are some extra tips for making your Cherry Cheesecake Brownies even better:
Don’t Overbake:
To keep the brownies fudgy and the cheesecake layer creamy, make sure not to overbake them. Check them at the 35-minute mark to avoid drying them out.
Let Them Chill:
Chilling the brownies after baking gives the cheesecake layer time to set, making it easier to slice them neatly. Patience is key here!
Make it Your Own:
You can swap out the cherry topping for other fruits—blueberries, raspberries, or strawberries would all be delicious choices.
Homemade Cherry Pie Filling:
If you want to take this to the next level, consider making your own cherry pie filling with fresh or frozen cherries. It’s a great way to elevate the dish and add a personal touch.
Use a Toothpick for Swirling:
For the perfect swirl effect between the brownie and cheesecake layers, use a toothpick or skewer. Just dip it into the batter and move it around gently to create a beautiful marbled look.
FAQ Section
Q1: Can I use a different fruit topping instead of cherries?
A1: Absolutely! You can swap the cherry topping for any fruit topping you like. Blueberries, raspberries, or even mixed berries would work perfectly.
Q2: Can I make these brownies ahead of time?
A2: Yes, you can make them a day in advance. Just store them in the refrigerator to keep the cheesecake layer nice and firm.
Q3: Can I freeze Cherry Cheesecake Brownies?
A3: Yes! You can freeze them for up to 2 months. Just make sure they’re wrapped tightly in plastic wrap or stored in an airtight container. Thaw in the fridge before serving.
Q4: Can I use store-bought cheesecake filling?
A4: While homemade cheesecake filling is best, you can use store-bought filling in a pinch. Just make sure it’s creamy and not too thick.
Q5: How do I store leftovers?
A5: Store leftover brownies in an airtight container in the fridge for up to 5 days. They’re best served chilled!
Q6: Can I make these gluten-free?
A6: Yes! You can substitute the flour for a gluten-free all-purpose flour blend. Just make sure it’s suitable for baking.
Q7: What kind of pan should I use?
A7: An 8×8-inch square baking pan works best for this recipe. If you use a different size, the baking time may vary.
Q8: Can I use a different kind of pie filling?
A8: Yes, you can use other types of pie fillings like blueberry, peach, or even apple, depending on your preference.
Q9: How do I prevent the cheesecake layer from cracking?
A9: Make sure to bake the brownies at the right temperature, and allow them to cool slowly. Avoid opening the oven door too often while baking.
Q10: Can I double the recipe?
A10: Yes! You can double the recipe and bake it in a 9×13-inch pan. Just be sure to increase the baking time by 10-15 minutes.
Conclusion
These Cherry Cheesecake Brownies are the perfect balance of indulgent chocolate, creamy cheesecake, and sweet fruit. Whether you’re looking to wow your guests or simply treat yourself to something delicious, these brownies are a surefire winner. Easy to make, gorgeous to look at, and absolutely delicious to eat—what more could you ask for? Go ahead, treat yourself to a batch and enjoy every decadent bite!
Print
Cherry Cheesecake Brownies Recipe
- Total Time: 50 minutes
- Yield: 16 brownies
Description
These Cherry Cheesecake Brownies are a perfect combination of rich, fudgy brownies and creamy cheesecake, topped with sweet cherry pie filling. They’re an indulgent treat that’s perfect for any occasion, from family gatherings to special celebrations!
Ingredients
- For the Brownie Base:
- 1 box brownie mix (or your favorite homemade brownie recipe)
- Ingredients called for on the brownie mix box (typically eggs, oil, and water)
- For the Cheesecake Layer:
- 8 oz cream cheese, softened
- ¼ cup granulated sugar
- 1 teaspoon vanilla extract
- 1 large egg
- 2 tablespoons sour cream
- For the Cherry Topping:
- 1 can (21 oz) cherry pie filling
Instructions
- Preheat the Oven:
- Preheat your oven to 350°F (175°C). Grease or line a 9×9-inch baking pan with parchment paper for easy removal.
- Prepare the Brownie Layer:
- Prepare the brownie mix according to the package instructions, typically combining the mix with eggs, oil, and water.
- Pour the brownie batter into the prepared baking pan, spreading it out into an even layer.
- Make the Cheesecake Layer:
- In a medium bowl, beat the softened cream cheese and granulated sugar until smooth and creamy.
- Add the vanilla extract, egg, and sour cream, and beat until everything is fully combined and smooth.
- Assemble the Brownies:
- Drop spoonfuls of the cheesecake mixture over the brownie batter. Use a knife or toothpick to swirl the cheesecake batter into the brownie batter to create a marble effect.
- Bake the Brownies:
- Bake in the preheated oven for 30-35 minutes, or until a toothpick inserted into the brownie portion comes out clean (the cheesecake layer may still appear slightly soft).
- Let the brownies cool in the pan on a wire rack for about 15 minutes, then transfer them to the refrigerator and chill for at least 1 hour.
- Add the Cherry Topping:
- Once the brownies have chilled and set, top them with the cherry pie filling, spreading it evenly over the cheesecake layer.
- Serve:
- Cut into squares and serve. Enjoy!
Notes
- For extra flavor, you can add a teaspoon of almond extract to the cheesecake mixture for a slight nutty twist.
- If you prefer, you can use blueberry or strawberry pie filling instead of cherry for a different topping.
- These brownies can be stored in the fridge for up to 3-4 days, making them a great make-ahead treat.
- Prep Time: 15 minutes
- Cook Time: 35 minutes
- Category: Dessert
- Method: Baking
- Cuisine: American
Nutrition
- Serving Size: 1 brownie
- Calories: 250
- Sugar: 28g
- Sodium: 150mg
- Fat: 13g
- Saturated Fat: 8g
- Unsaturated Fat: 3g
- Trans Fat: 0g
- Carbohydrates: 32g
- Fiber: 1g
- Protein: 4g
- Cholesterol: 55mg


