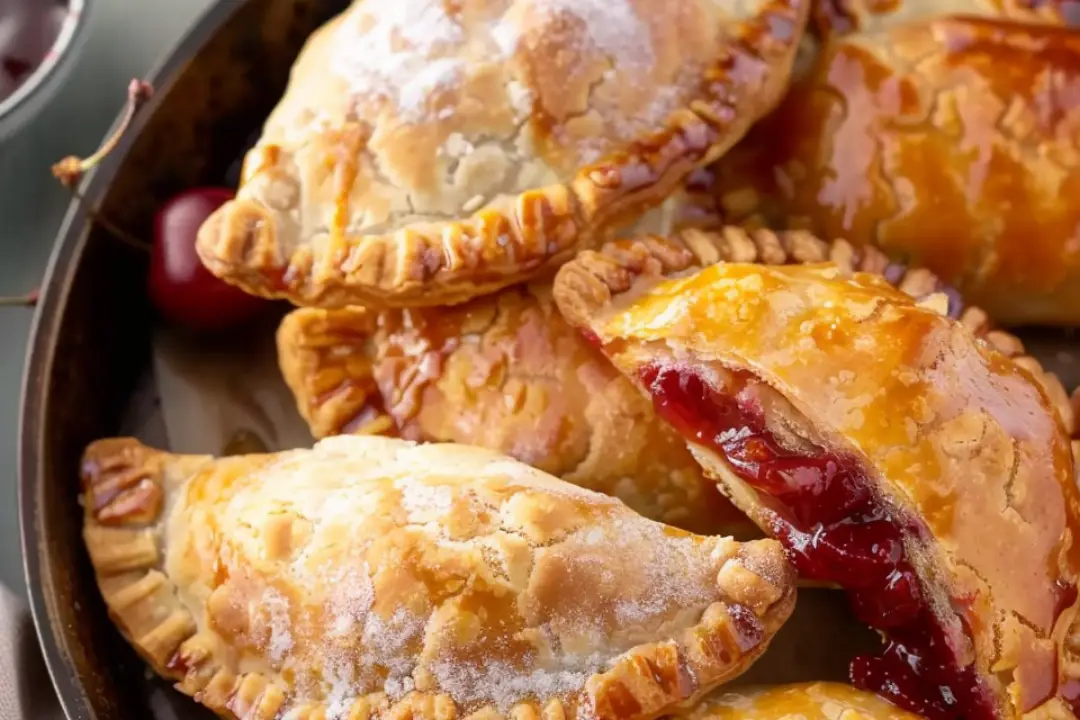
Do you ever find yourself in the mood for something sweet, but you want it to be portable, easy to eat, and downright delicious? Enter Cherry Hand Pies. These little pockets of heaven are like mini desserts that are as fun to make as they are to eat. The sweet, tart cherry filling wrapped in a buttery, flaky crust is everything you could want in a hand pie—and then some.
Baking these beauties fills the house with the most irresistible aroma—think fresh fruit, vanilla, and a hint of cinnamon. Whether you’re making them for a picnic, a weekend treat, or as a bite-sized dessert for a family gathering, Cherry Hand Pies are sure to steal the show. They’re perfect for that nostalgic comfort food feeling but with a twist that’ll keep everyone coming back for more.
Why You’ll Love Cherry Hand Pies
These hand pies aren’t just delicious; they’re also super practical and versatile.
Portable: These pies are perfect for on-the-go, whether you’re packing a lunch or heading to a picnic.
Customizable: Switch up the filling! Try blueberry, apple, or even a combo of fruits for different flavors.
Quick and Easy: With store-bought pie dough, these come together in no time and bake up golden brown and crisp.
Perfectly Sweet and Tart: The cherry filling is the perfect balance of sweetness with a slight tart kick that makes every bite refreshing and satisfying.
Crowd-Pleasing: Whether you’re serving them at a party or just indulging on a lazy afternoon, these little hand pies are sure to win hearts.

Disclosure: This post contains affiliate links.If you click and make a purchase, I may earn a small commission at no extra cost to you.
Ingredients in Cherry Hand Pies
The magic of these hand pies lies in their simplicity. You don’t need anything fancy, just a few key ingredients:
Pie Crust: Use pre-made pie dough for ease, or make your own if you’re feeling ambitious. Either way, you’ll get that flaky, buttery base we all crave.
Fresh or Frozen Cherries: Fresh cherries work great when in season, but frozen cherries will also do the trick when fresh ones aren’t available.
Sugar: Adds the right amount of sweetness to balance the tartness of the cherries.
Cornstarch: Thickens the filling, ensuring it doesn’t ooze out during baking.
Lemon Juice: A splash adds brightness and helps balance the sweetness.
Vanilla Extract: A little splash of vanilla enhances the flavor and rounds everything out.
Ground Cinnamon: Adds a warm, cozy note to the filling.
Egg Wash (Egg + Water): This will give the pies a golden, shiny finish when baked.
Instructions
Let’s get into the steps to create these adorable little pies:
Make the Cherry Filling:
In a medium saucepan, combine the cherries, sugar, cornstarch, lemon juice, and cinnamon. Cook over medium heat, stirring occasionally, until the mixture thickens and the cherries release their juices (about 5-7 minutes). Once thickened, remove from heat and stir in vanilla extract. Let it cool while you prepare the dough.
Prepare the Pie Dough:
Roll out your pie dough on a floured surface. Using a round cutter (a glass or cup works well), cut out circles of dough. You’ll need two circles for each hand pie—one for the bottom and one for the top. Aim for about 4-5 inches in diameter.
Assemble the Pies:
Spoon a heaping tablespoon of the cherry filling onto the center of one of your dough circles. Be careful not to overfill! Top with the second dough circle, then crimp the edges with a fork to seal them. Make a small slit on top of each hand pie to allow steam to escape while baking.
Bake the Hand Pies:
Preheat your oven to 375°F (190°C). Place the hand pies on a baking sheet lined with parchment paper. Brush the tops with the egg wash for a golden finish. Bake for 25-30 minutes, or until the crust is golden brown and the filling is bubbling.
Cool and Serve:
Let the pies cool for a few minutes before serving. They’re perfect while still warm, but can be enjoyed at room temperature too.
Nutrition Facts
Servings: 8 hand pies
Calories per serving: 280
Total Fat: 14g
Saturated Fat: 5g
Cholesterol: 30mg
Sodium: 90mg
Total Carbohydrates: 38g
Dietary Fiber: 2g
Sugars: 19g
Protein: 2g
Preparation Time
Prep Time: 15 minutes
Cook Time: 25-30 minutes
Total Time: 45 minutes
How to Serve Cherry Hand Pies
These little pies are perfect all on their own, but here are a few ways to elevate your serving experience:
With Ice Cream: Serve warm with a scoop of vanilla or cinnamon ice cream for a dessert that feels extra indulgent.
With Whipped Cream: A dollop of fresh whipped cream is the perfect pairing.
With Coffee or Tea: These pies are great as an afternoon snack, and they pair wonderfully with a hot beverage.
For a Party: Make them bite-sized for a fun and interactive dessert option. They’ll be the talk of your next gathering!
Additional Tips
Use Frozen Cherries: If fresh cherries aren’t in season, frozen cherries work just as well. Just make sure to thaw and drain them to avoid excess liquid in the filling.
Don’t Overfill: Be careful not to overfill the pies—leaving a little space at the edges will help them seal properly.
Make-Ahead: You can make the filling and dough ahead of time, store them in the fridge, and assemble the hand pies the next day.
Use a Fork to Crimp: If you don’t have a crimping tool, a fork works perfectly to seal the edges and create a nice decorative pattern.
Golden Finish: Brush the tops with an egg wash before baking to get that beautiful, golden, glossy finish.
FAQ Section
Q1: Can I make these pies ahead of time?
A1: Yes! You can prepare the hand pies ahead of time and refrigerate them before baking. Just be sure to let them come to room temperature before baking.
Q2: Can I use a different fruit for the filling?
A2: Absolutely! Blueberries, raspberries, or even apples work wonderfully in these hand pies. Just make sure to adjust the sugar and cornstarch accordingly.
Q3: Can I freeze the hand pies?
A3: Yes! Freeze them after assembling, but before baking. When you’re ready to bake, just pop them in the oven straight from the freezer, adding an extra 5 minutes to the bake time.
Q4: Can I make these pies with a store-bought pie crust?
A4: Of course! Pre-made pie crusts save time, and they work just as well in this recipe.
Q5: How do I store leftovers?
A5: Store any leftover hand pies in an airtight container at room temperature for up to 2 days. Reheat them in the oven for a crispy finish.
Q6: Can I make these mini-sized?
A6: Yes, absolutely! Simply use a smaller cutter and adjust the baking time as needed—mini pies usually bake faster.
Q7: Can I add a glaze on top?
A7: Yes! A simple glaze made from powdered sugar and a little milk or lemon juice would be a great addition for a sweet touch.
Q8: How do I make the crust extra flaky?
A8: Make sure your dough is cold before baking, and be careful not to overwork it. You can also chill the assembled hand pies before baking for an extra flaky crust.
Q9: How do I prevent the filling from spilling out during baking?
A9: Make sure to crimp the edges tightly and cut a small slit in the top to allow steam to escape. This helps prevent bursting.
Q10: Can I use a different thickener instead of cornstarch?
A10: Yes, you can use flour or arrowroot powder as an alternative thickener, though cornstarch is preferred for a smooth filling.
Conclusion
These Cherry Hand Pies are the perfect way to indulge in something sweet without all the fuss. With their buttery, flaky crust and sweet-tart cherry filling, they’re sure to become a favorite treat. Whether you’re baking for a crowd or just making a special snack for yourself, these hand pies will never disappoint.
So grab your cherries, roll out that dough, and get ready for a sweet little slice of happiness in every bite!
Print
Cherry Hand Pies
- Total Time: 45 minutes
- Yield: 6 servings
Description
- These homemade Cherry Hand Pies are the perfect handheld dessert — flaky, golden crust filled with sweet, tart cherry filling. They’re a great on-the-go treat, perfect for picnics, parties, or a simple snack!
Ingredients
-
For the Pies:
-
2 cups fresh or frozen cherries, pitted and chopped
-
1/2 cup granulated sugar
-
1 tablespoon cornstarch
-
1 tablespoon lemon juice
-
1/2 teaspoon vanilla extract
-
1 package refrigerated pie crusts (or homemade pie dough)
-
1 egg, beaten (for egg wash)
-
1 tablespoon coarse sugar (for sprinkling on top)
-
Instructions
-
Preheat the Oven:
Preheat the oven to 375°F (190°C). Line a baking sheet with parchment paper. -
Prepare the Cherry Filling:
In a medium saucepan, combine the cherries, granulated sugar, cornstarch, lemon juice, and vanilla extract. Cook over medium heat, stirring frequently, until the mixture thickens (about 5–7 minutes). Remove from heat and let cool to room temperature. -
Prepare the Pie Crusts:
Roll out the pie crusts on a lightly floured surface. Using a round cutter or a cup, cut out 4–6 circles, depending on the size you prefer for your hand pies. -
Assemble the Hand Pies:
Spoon a small amount of the cherry filling onto the center of each pie crust circle (about 1–2 tablespoons). Fold the dough over to form a half-moon shape and press the edges together to seal. Use a fork to crimp the edges for a decorative look and extra sealing. -
Egg Wash and Bake:
Brush the tops of the hand pies with the beaten egg and sprinkle with coarse sugar. Place the pies on the prepared baking sheet. Bake for 20–25 minutes, or until the crust is golden brown and the filling is bubbling. -
Cool and Serve:
Allow the hand pies to cool for a few minutes before serving. Enjoy!
Notes
-
If using frozen cherries, make sure to thaw them and drain any excess liquid to avoid a soggy crust.
-
For extra flavor, you can add a pinch of cinnamon or almond extract to the cherry filling.
-
You can freeze the assembled hand pies for later baking. Just freeze them before brushing with the egg wash and bake from frozen for 25–30 minutes.
- Prep Time: 20 minutes
- Cook Time: 25 minutes
- Category: Dessert
- Method: Baking
- Cuisine: American
Nutrition
- Serving Size: 1 serving
- Calories: 250
- Sugar: 20g
- Sodium: 180mg
- Fat: 12g
- Saturated Fat: 3g
- Unsaturated Fat: 9g
- Trans Fat: 0g
- Carbohydrates: 35g
- Fiber: 2g
- Protein: 2g
- Cholesterol: 50mg


