Cherry pie recipe lovers, rejoice — you’ve just found the one dessert you’ll make again and again. At RecipesTasteful, we’ve spent years in our kitchen testing and tweaking, searching for the perfect balance of flaky crust, juicy filling, and that nostalgic, old-fashioned flavor you remember from childhood. Our story began as a small blog sharing family recipes, and today, we’re proud to be the trusted source for home bakers who crave reliable, delicious results. This cherry pie recipe isn’t just another dessert — it’s a tribute to our roots and the countless readers who’ve baked alongside us.
What makes this the best homemade cherry pie recipe you’ll ever try? It’s the combination of a buttery, golden crust and a filling that bursts with fresh cherry flavor, whether you’re using hand-picked fruit, frozen cherries from the off-season, or even a quick canned cherry pie recipe when time is tight. Unlike store-bought pies, which often lean too sweet or rubbery, this one delivers a balance of tart and sweet with a natural fruit taste that doesn’t get lost in sugar. And thanks to our step-by-step process, it’s approachable for beginners while still impressive enough for seasoned bakers.
Many readers ask if this qualifies as an easy cherry pie recipe, and the answer is yes — especially if you’re using a pre-made crust. But for those who love to go the extra mile, our all-butter homemade crust adds depth and richness that makes this pie truly special. The filling is the real star: juicy, glossy, and thickened just right so every slice holds together without spilling across your plate. And if you’re craving a nostalgic flavor, our tweaks will give you that old-fashioned cherry pie recipe feel without any complicated techniques.
This isn’t just another recipe you’ll pin and forget. It’s the kind you’ll bake for birthdays, holidays, and casual weekends because it’s adaptable, foolproof, and a guaranteed crowd-pleaser. And unlike some versions you’ll find online, this one uses simple ingredients and a few pro tips (like reducing the cherry juices on the stove) so your pie stays flavorful, not watery. In the following sections, we’ll walk through the ingredients, the cherry pie filling method, and pro-level baking tricks so you can master it from start to finish.
So, whether you’re searching for the best cherry pie recipe with canned cherries to whip up in a hurry, or dreaming of a tart cherry pie recipe for a tangy bite, you’re in the right place. This recipe covers it all — and by the time you’re done, you’ll know why readers keep calling it the only cherry pie recipe they’ll ever need.
Table of Contents
Table of Contents
Ingredients You’ll Need for the Perfect Cherry Pie Recipe
Print
Cherry Pie
- Total Time: 1 hour 20 minutes
- Yield: 8 servings
Description
This Cherry Pie is the ultimate dessert for any cherry lover! With a homemade flaky crust and a rich, sweet cherry filling, it’s the perfect balance of tart and sweet. This classic pie is sure to impress at any gathering or family dinner.
Ingredients
For the Crust:
- 2 1/2 cups all-purpose flour
- 1 teaspoon salt
- 1 tablespoon sugar
- 1 cup (2 sticks) unsalted butter, cold and cut into cubes
- 1/4 cup ice water (more if needed)
For the Filling:
- 4 cups fresh or frozen cherries (pitted)
- 3/4 cup granulated sugar (adjust based on cherry sweetness)
- 2 tablespoons cornstarch
- 1 tablespoon lemon juice
- 1/4 teaspoon almond extract (optional, but adds great flavor)
- 1/4 teaspoon vanilla extract
- Pinch of salt
For the Topping (if making a lattice crust):
- 1 tablespoon heavy cream or milk
- 1 tablespoon coarse sugar (for sprinkling on top)
Instructions
-
Make the Pie Crust:
- In a large bowl, mix the flour, salt, and sugar together. Add the cold, cubed butter and use a pastry cutter or your fingers to work the butter into the flour mixture until it resembles coarse crumbs.
- Gradually add ice water, one tablespoon at a time, mixing with a fork until the dough begins to come together. You may need more water depending on the humidity. Be careful not to overwork the dough.
- Divide the dough into two equal portions, shape them into discs, and wrap them tightly in plastic wrap. Chill the dough in the refrigerator for at least 30 minutes before using.
-
Make the Cherry Filling:
- In a medium saucepan, combine the cherries, sugar, cornstarch, lemon juice, almond extract, vanilla extract, and a pinch of salt. Stir to combine.
- Cook the mixture over medium heat, stirring constantly, until the cherries release their juices and the mixture thickens, about 5-7 minutes.
- Once thickened, remove from heat and let it cool while you roll out the dough.
-
Assemble the Pie:
- Preheat the oven to 375°F (190°C).
- Roll out one of the dough discs on a lightly floured surface into a circle that fits your 9-inch pie dish. Place the rolled dough into the pie dish, pressing it gently into the bottom and up the sides.
- Pour the cooled cherry filling into the pie crust, spreading it out evenly.
- If you’re making a lattice crust, roll out the second dough disc and cut it into strips. Arrange the strips in a criss-cross pattern over the top of the pie. Trim the excess dough and crimp the edges together to seal the pie. If you’re using a full top crust, place the second dough disc over the filling, cut a few slits for steam to escape, and crimp the edges.
- Brush the top of the crust with heavy cream or milk, and sprinkle with coarse sugar.
-
Bake the Pie:
- Place the pie on a baking sheet to catch any drips and bake it in the preheated oven for 45-55 minutes, or until the crust is golden brown and the filling is bubbling through the lattice.
- If the edges of the crust start to brown too quickly, cover them with aluminum foil to prevent burning.
-
Cool and Serve:
- Let the pie cool for at least 2 hours before slicing to allow the filling to set. Serve as is, or with a scoop of vanilla ice cream or a dollop of whipped cream.
Notes
- If you’re using frozen cherries, make sure to thaw and drain them before adding them to the filling mixture to avoid excess liquid.
- You can also add a tablespoon of butter to the filling before baking for extra richness.
- If you prefer a smoother filling, you can mash a portion of the cherries before cooking them.
- Prep Time: 30 minutes
- Cook Time: 50 minutes
- Category: Dessert
- Method: Baking
- Cuisine: American
Nutrition
- Serving Size: 1 slice
- Calories: 350 kcal
- Sugar: 35g
- Sodium: 180mg
- Fat: 16g
- Saturated Fat: 10g
- Unsaturated Fat: 6g
- Trans Fat: 0g
- Carbohydrates: 49g
- Fiber: 3g
- Protein: 3g
- Cholesterol: 35mg
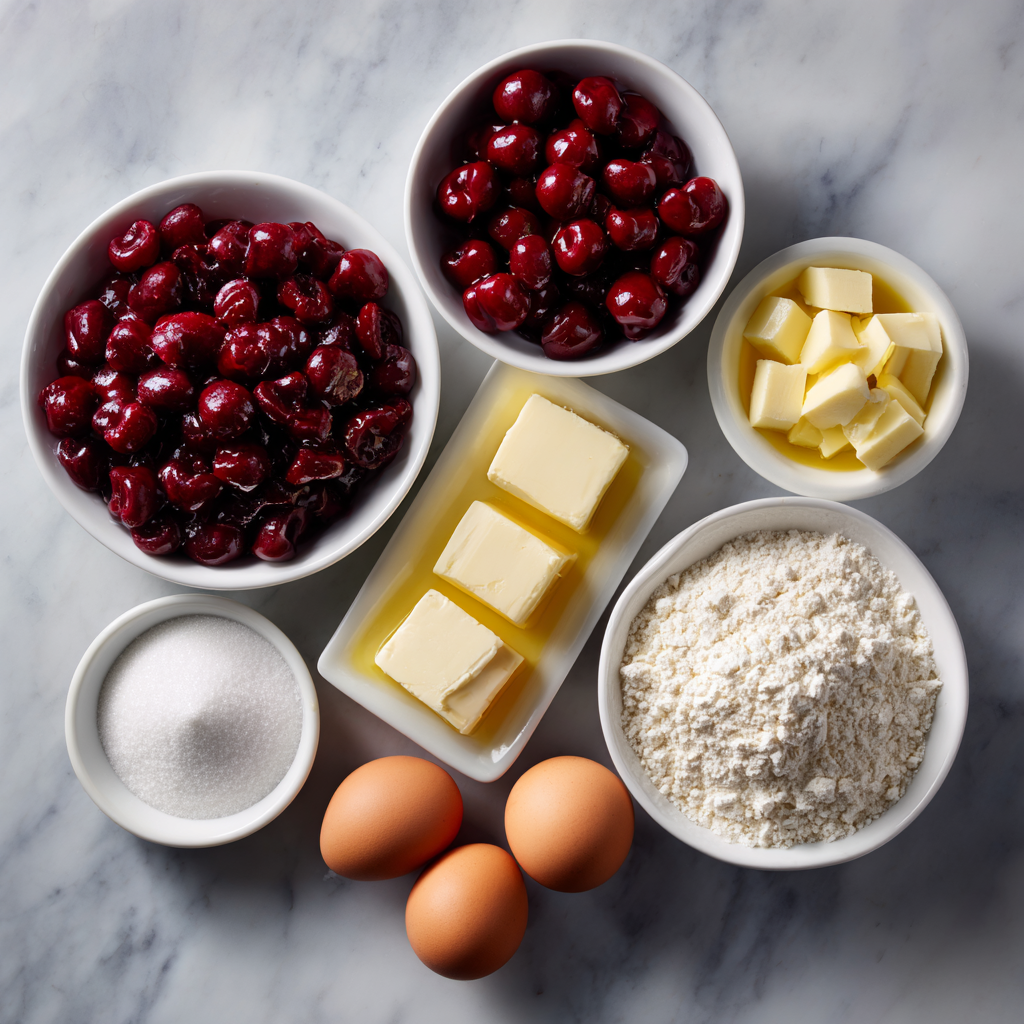
When it comes to making the perfect cherry pie recipe, your choice of ingredients can turn a simple dessert into something unforgettable. Whether you’re aiming for a canned cherry pie recipe to save time, baking with frozen cherries when fresh fruit isn’t in season, or going all-in with hand-picked summer cherries, knowing what works best will make all the difference.
Fresh, Frozen, or Canned Cherries — Which Should You Use?
The heart of this pie is, of course, the cherries. Fresh cherries are the gold standard, especially during the summer when their natural sweetness and juiciness shine. Look for firm, ripe cherries, either sweet varieties like Bing for a softer flavor or tart Montmorency for a tart cherry pie recipe with that classic tang. If you’re using fresh cherries, make sure they’re pitted and halved or quartered to release their juices.
When cherries are out of season, frozen fruit is the next best thing. Frozen cherries hold up beautifully in pies, especially if you thaw them slightly and drain any excess liquid before using. They make a cherry pie recipe with frozen cherries taste just as satisfying as fresh.
For bakers in a hurry, a canned cherry pie recipe is your lifesaver. Choose unsweetened canned cherries when possible, so you can control the sugar levels in your filling. If you must use sweetened canned cherries, reduce the sugar in the recipe to keep the pie balanced and avoid cloying sweetness.
The Flavor Boosters That Make This Pie Stand Out
Beyond the cherries, two simple additions take this cherry pie recipe from good to unforgettable: almond extract and lemon juice. Almond extract adds a subtle, nutty aroma that enhances the natural cherry flavor, while a splash of lemon juice brightens the filling, keeping it from tasting flat or overly heavy. Together, they bring that “bakery-fresh” flavor you expect from the best cherry pie recipe.
Cornstarch is another key ingredient, serving as the thickener that keeps your pie from becoming runny. Unlike flour, which can make a filling cloudy and heavy, cornstarch creates a glossy, rich texture that makes every slice picture-perfect.
Crust Choices: Homemade vs. Store-Bought
No cherry pie recipe is complete without a buttery, flaky crust. Our all-butter crust is the house favorite — it’s sturdy enough to hold a generous filling but tender enough to melt in your mouth. It requires chilling time (at least two hours) but rewards you with flavor and texture that no store-bought crust can match.
That said, if you’re making an easy cherry pie recipe on a weeknight, a high-quality store-bought crust will do the job. Just make sure to brush the top with an egg wash for that golden bakery look and sprinkle coarse sugar for crunch.
For those who love experimenting with desserts beyond pies, you can also check out this Chocolate Chip Cookie Cake. It’s another crowd-pleaser that’s easy to bake alongside your favorite cherry pie, giving guests a choice between fruity and chocolaty indulgence.
Step-by-Step Guide to Making the Cherry Pie Filling
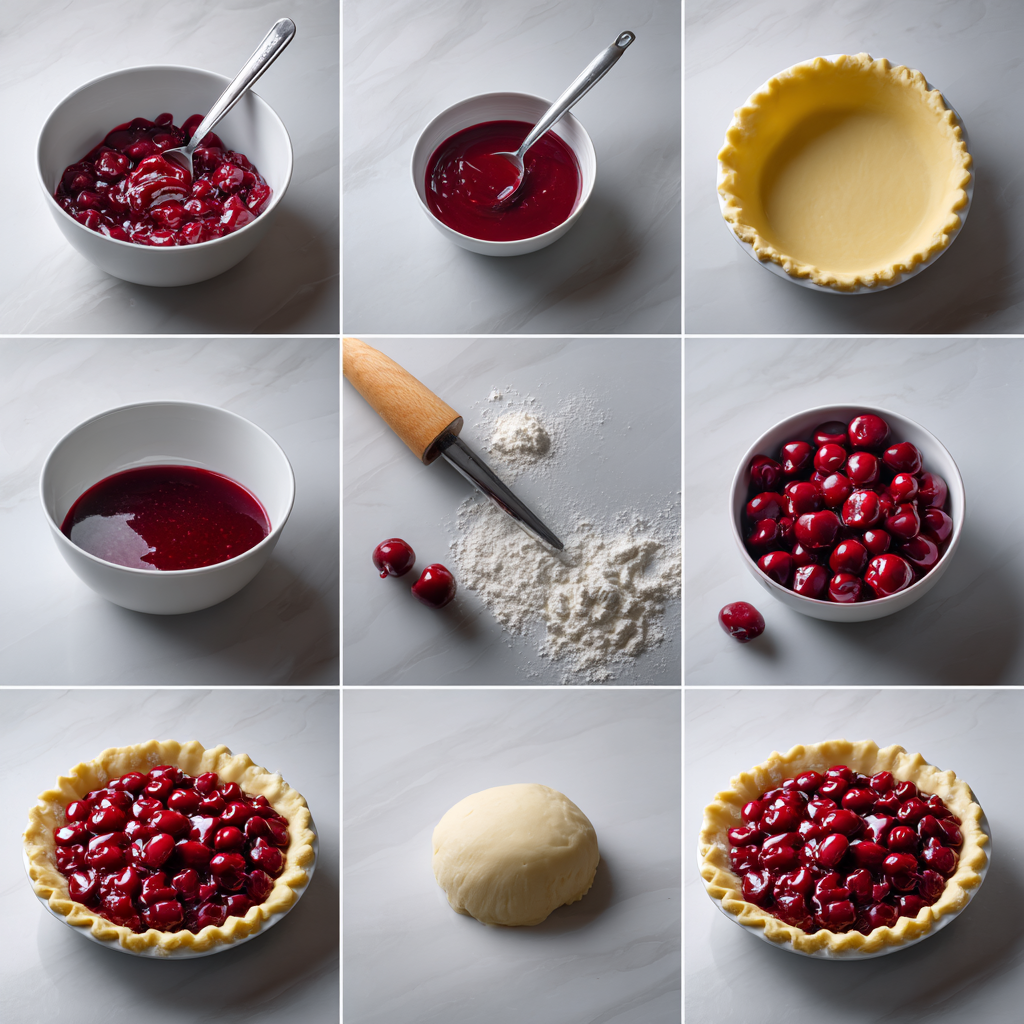
The heart of any great cherry pie recipe isn’t just the crust — it’s the filling. A perfect cherry filling is glossy, thick, and bursting with real fruit flavor, not overly sweet or runny. This section walks you through how to make a foolproof cherry pie filling recipe that works with fresh, frozen, or canned cherries and gives you that homemade, old fashioned cherry pie recipe vibe everyone craves.
Balancing Sweetness and Tartness for Perfect Flavor
One of the biggest challenges in making a cherry pie is striking the right balance between sweet and tart. Fresh cherries vary a lot — Bing cherries can be naturally sweet, while sour cherries like Montmorency bring a punch of tartness. If you’re using canned or frozen fruit, it’s even trickier because some come pre-sweetened. To keep your cherry pie filling recipe balanced:
- Taste your cherries first and adjust the sugar (use the full 2/3 cup for sour varieties, less for sweet ones).
- Add the tablespoon of lemon juice — it brightens the flavor and cuts through heaviness.
- Almond extract, while optional, deepens the fruitiness and adds a hint of complexity without overpowering the cherries.
These adjustments make this cherry pie recipe taste vibrant and balanced, no matter what fruit you start with.
The Secret to a Thick, Glossy Cherry Filling
A watery pie is every baker’s nightmare. That’s why cornstarch is your best friend here — it thickens the filling without making it heavy or cloudy, unlike flour. Start by tossing your cherries with sugar, cornstarch, lemon juice, and extracts, then let the mixture sit while you prep your crust. The fruit will release some juices, which is exactly what you want.
Instead of dumping everything into the crust at once, use this trick: pour the leftover juices into a saucepan and simmer them gently until they reduce and thicken slightly, about three to four minutes. Cool for a few minutes, then pour the reduction over the cherries and gently toss. This step locks in flavor and keeps the pie from leaking too much as it bakes, giving you clean slices every time.
Why This Filling Feels Old-Fashioned (In a Good Way)
Many home bakers want their pies to taste like the ones their grandparents made, and this filling nails that old fashioned cherry pie recipe quality without any complicated steps. The method of reducing juices, using real fruit, and adding subtle flavor enhancers gives the pie a homemade, nostalgic taste while still being sturdy and picture-perfect for modern presentation.
Once your filling is ready, it’s time to move on to rolling out your crust and assembling your pie — where we’ll cover lattice work, sealing the edges, and getting that golden finish.
Crafting the Perfect Pie Crust
A great cherry pie recipe lives or dies by its crust. While the filling delivers flavor, the crust delivers texture — flaky, buttery layers that contrast with the juicy cherries inside. Whether you’re making our all-butter pie crust from scratch or using a pre-made version for a faster bake, getting the crust right is what takes this dessert from good to unforgettable.
Rolling Out Chilled Dough Without Cracks
The secret to a perfect crust starts with cold ingredients and a chilled dough. Our crust needs at least two hours in the fridge to firm up, which keeps the butter cold and prevents a tough texture. When rolling, dust your surface lightly with flour and work quickly, rotating the dough a quarter turn after every few rolls. This method keeps the circle even and prevents sticking.
If cracks appear, don’t panic — pinch them back together or patch with scraps. It won’t affect the final pie once it’s baked. For beginners, this step makes even a homemade crust feel manageable.
Mastering the Lattice Crust Technique
The lattice top isn’t just for looks — it allows steam to escape, keeping the crust crisp while the filling thickens. After rolling out your second disc of dough, use a pastry wheel or sharp knife to cut strips. For a classic pattern, weave four wide strips with four narrow ones, overlapping them over and under as you go. If you’ve never done it before, it’s easier than it looks — just pull back every other strip as you weave the next one.
This woven top makes your cherry pie recipe look bakery-quality, even if you’re new to decorative crusts. And don’t forget to press the edges of the strips into the bottom crust so nothing separates while baking.
Egg Wash for That Golden, Bakery-Style Finish
An egg wash (one beaten egg mixed with a tablespoon of milk) is the simplest way to make your pie shine. Brush it lightly over the crust, making sure to hit all the lattice strips and edges, then sprinkle coarse sugar for sparkle and crunch. This trick is what gives your pie that irresistible golden sheen that catches everyone’s eye.
In the next section, we’ll move to the oven — learning how to bake your pie evenly, avoid over-browning, and get that bubbling filling without a soggy bottom crust.
If you’re hosting a summer gathering, pair this pie with something light and fresh, like this Easy Homemade Strawberry Shortcake. The combination of berries, cream, and buttery cake makes a perfect complement to the rich, juicy flavors of your cherry pie.
Baking the Cherry Pie to Golden Perfection
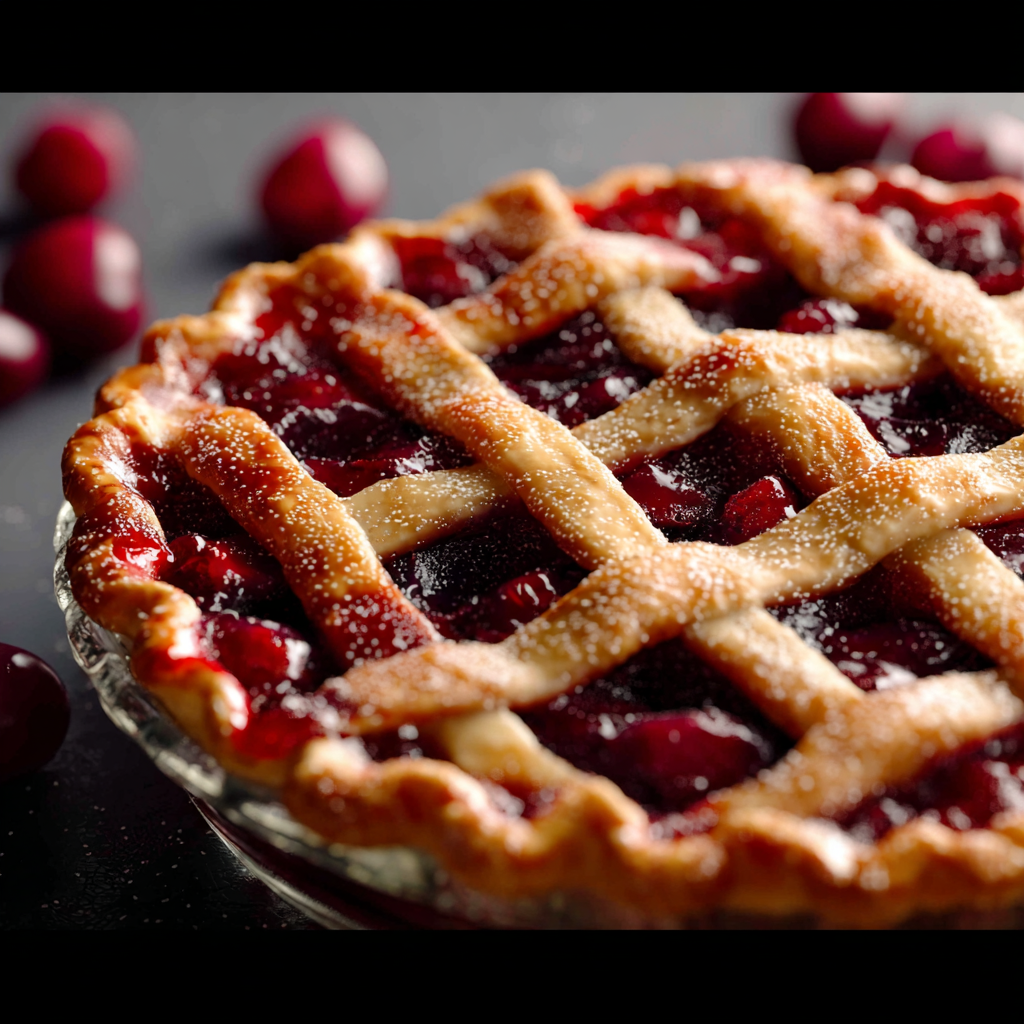
After all the careful prep, baking is where this cherry pie recipe comes to life. The right oven temperature, timing, and a few pro tricks will keep your crust perfectly golden and your filling bubbling without turning watery or overcooked. Whether you’re working with fresh fruit, frozen cherries, or even making the best cherry pie recipe with canned cherries, these steps ensure every slice is picture-perfect.
Ideal Baking Temperatures and Times
Start by preheating your oven to 400°F (204°C). Place the assembled pie on a baking sheet lined with parchment to catch any bubbling juices. Bake for 20 minutes at this temperature — the high heat helps set the crust quickly so it doesn’t get soggy underneath.
After the first 20 minutes, lower the oven temperature to 375°F (190°C) and bake for another 30–40 minutes. You’ll know it’s ready when the lattice crust is a deep golden brown and the filling is bubbling vigorously through the vents or lattice gaps for at least five minutes. This bubbling means the cornstarch has activated fully, thickening the juices so the pie slices cleanly once cooled.
How to Avoid Over-Browning
The edges of your crust will brown faster than the center, especially if you’ve brushed it with egg wash. To keep them from burning, cover the rim with a pie crust shield (or gently crimp strips of aluminum foil around the edges) after the first 20 minutes of baking. This keeps the crust golden without turning too dark.
Preventing a Soggy Bottom
One of the most common complaints about fruit pies is a soft, undercooked bottom crust. To avoid this:
- Bake your pie on a lower oven rack so the heat hits the bottom crust directly.
- Preheat a baking stone or heavy sheet pan in the oven and set your pie dish on top for extra heat.
- Make sure your filling is reduced (as explained in Part 3) so excess liquid doesn’t soak into the bottom crust.
These tricks work whether you’re making a pie with fresh cherries, a cherry pie recipe with frozen cherries, or even using canned cherries. They’re the reason this pie stands out — every bite has that flaky, crisp foundation, even under a juicy filling.
The Cooling Step You Can’t Skip
Once your pie is out of the oven, place it on a cooling rack and resist the urge to slice too soon. Let it rest for at least three to four hours. Cutting into it early will cause the filling to run, no matter how well it was thickened. Cooling lets everything set so you can cut clean, bakery-style wedges.
In the next section, we’ll explore creative variations — from easy cherry pie recipes for beginners to tart cherry pies for a tangier bite — so you can adapt this dessert for any occasion or craving.
Variations of This Cherry Pie Recipe
One of the reasons this cherry pie recipe has become a staple for so many bakers is how adaptable it is. Whether you want a shortcut for busy nights, a nostalgic old fashioned cherry pie recipe, or a tangy twist with sour fruit, there’s a version here for every craving and occasion.
Easy Cherry Pie Recipe (For Busy Weeknights)
If you’re short on time, skip the homemade crust and use a high-quality store-bought version. Pre-made pie dough saves at least two hours of chilling time without sacrificing too much flavor. Use canned cherries to cut prep even further, adjusting sugar based on whether they’re sweetened or not. This method still delivers a delicious cherry pie recipe in a fraction of the time — perfect for weeknight desserts or last-minute gatherings.
Canned Cherry Pie Recipe (The Quick Fix)
For those who don’t want to pit cherries, this is the go-to. Use unsweetened canned cherries if you can find them; they give you better control over the final sweetness. If all you have is sweetened, reduce the sugar in the filling to avoid a cloying taste. This method is the best cherry pie recipe with canned cherries when you want convenience without losing that classic, juicy flavor.
Cherry Pie Recipe with Frozen Cherries
Frozen cherries make this pie possible year-round. Thaw them slightly, drain excess liquid, and follow the filling steps exactly. Since frozen cherries tend to release more water as they bake, don’t skip the juice-reduction trick from Part 3 — it keeps the filling thick and prevents sogginess. This variation tastes almost identical to fresh, so you can enjoy the best cherry pie recipe even in the dead of winter.
Tart Cherry Pie Recipe (For a Tangy Twist)
If you’re after a punchier flavor, go with sour cherries like Montmorency. They bring that sharp, bright tang that pairs beautifully with a buttery crust. To balance the acidity, stick to the full 2/3 cup sugar and don’t skip the almond extract — it softens the bite of the tartness while enhancing the fruit’s natural flavor. This tart cherry pie recipe is especially popular for summer picnics when sweet desserts can feel too heavy.
Old Fashioned Cherry Pie Recipe (Nostalgic Style)
For those chasing that “just like Grandma made” vibe, keep things classic: use fresh sour cherries, a full lattice top, and no extra spices beyond almond and vanilla extract. The flavor is simple, fruit-forward, and deeply satisfying — the kind of pie you imagine cooling on a windowsill.
No matter which variation you choose, each of these approaches still uses the same core technique: balancing flavor, reducing juices, and baking until the filling bubbles through the crust. The result is always a cherry pie recipe worth sharing, whether it’s your first bake or your fiftieth.
Serving and Storing Your Homemade Cherry Pie
Baking a cherry pie recipe to perfection is only half the journey — knowing how to serve and store it can make the difference between a pie that wows at the table and one that falls flat the next day. Whether you’re serving it fresh out of the oven or savoring leftovers, these tips keep every slice as delicious as the first.
The Best Ways to Serve Cherry Pie
A warm slice of this homemade cherry pie recipe is a treat on its own, but pairing it with the right toppings can take it to another level. Here are some classic and creative serving ideas:
- With vanilla ice cream – The cool creaminess balances the warm, tart-sweet filling.
- Whipped cream swirl – Light and airy, it keeps the pie feeling indulgent without being too heavy.
- Drizzle of chocolate or caramel sauce – A modern twist that pairs beautifully with the cherries’ natural tang.
- Sprinkle of toasted almonds – For a subtle crunch and flavor boost that complements the almond extract in the filling.
For a bakery-style presentation, serve slices slightly warm, reheated gently in a low oven (about 300°F for 10–15 minutes) to keep the crust crisp.
How to Store Cherry Pie for Freshness
Once baked, your cherry pie recipe can sit at room temperature, loosely covered, for up to two days. If you need to store it longer, wrap it tightly in plastic wrap or foil and refrigerate for up to five days. Keep in mind that refrigeration can soften the crust slightly, so always reheat slices in the oven rather than the microwave to restore some crispness.
Reheating Tips for Leftovers
To make leftovers taste fresh, avoid the microwave whenever possible. Instead, place slices on a baking sheet in a 300°F oven for 10–12 minutes, or until warmed through. This gentle heat keeps the crust flaky and prevents the filling from becoming rubbery. For whole pies, warm at 325°F for 15–20 minutes before serving.
Freezing for Later Enjoyment
This cherry pie recipe also freezes well. To freeze a baked pie, let it cool completely, then wrap it in a double layer of plastic wrap and aluminum foil. Store for up to two months. To reheat, thaw in the refrigerator overnight, then bake at 325°F until warmed through.
Why This Will Be Your Go-To Cherry Pie Recipe
This cherry pie recipe isn’t just another dessert you’ll try once and forget — it’s the kind of pie that becomes a signature dish in your kitchen. With a buttery crust, a filling that balances tart and sweet, and flexible options for fresh, frozen, or canned cherries, it’s easy enough for beginners yet elegant enough for holidays and celebrations.
If you’re looking for more ways to sweeten your table after trying this pie, discover great ideas like Kool-Aid Pie for a quick, no-bake treat, or don’t miss our Chocolate-Covered Cherry Brownie Bombs for a decadent twist on cherry desserts.
Bake it once, and you’ll understand why readers call this the best homemade cherry pie recipe they’ve ever tried — and why it’s destined to be your go-to dessert for years to come.
People Also Search For — Your Cherry Pie Questions Answered
Cherry pie recipe NYT vs. traditional recipes — what’s the difference?
The New York Times version leans toward a minimalist, slightly modern take, often using less sugar and emphasizing tart cherries for a sharper flavor. This cherry pie recipe, while traditional, balances sweet and tart while staying versatile — it can be made with fresh, frozen, or canned cherries without losing that classic, homemade taste.
How do I make cherry pie filling from scratch (without canned)?
To make a cherry pie filling recipe completely from scratch, use fresh or thawed frozen cherries, sugar, cornstarch, lemon juice, and almond extract. Simmer the cherry juices separately (as we cover in Part 3) before combining with the fruit. This method ensures a thick, glossy filling without relying on store-bought fillings or artificial thickeners.
How can I keep the bottom crust from getting soggy?
The key is in the prep and baking method. Reduce the cherry juices first, bake the pie on a lower oven rack, and use a preheated baking stone or heavy sheet pan to direct heat to the bottom crust. These tricks ensure this cherry pie recipe stays crisp underneath, even with juicy fillings.
Can I freeze cherry pie before or after baking?
Yes, both options work. For unbaked pies, assemble the pie, wrap tightly in plastic and foil, and freeze for up to three months. When ready to bake, go straight from freezer to oven, adding about 15 extra minutes to the bake time. For baked pies, cool completely, double-wrap, and freeze for up to two months. Thaw overnight in the fridge and warm in the oven before serving.



Very useful tips! I’m excited to implement them soon.
What I really liked is how easy this was to follow. Even for someone who’s not super tech-savvy, it made perfect sense.