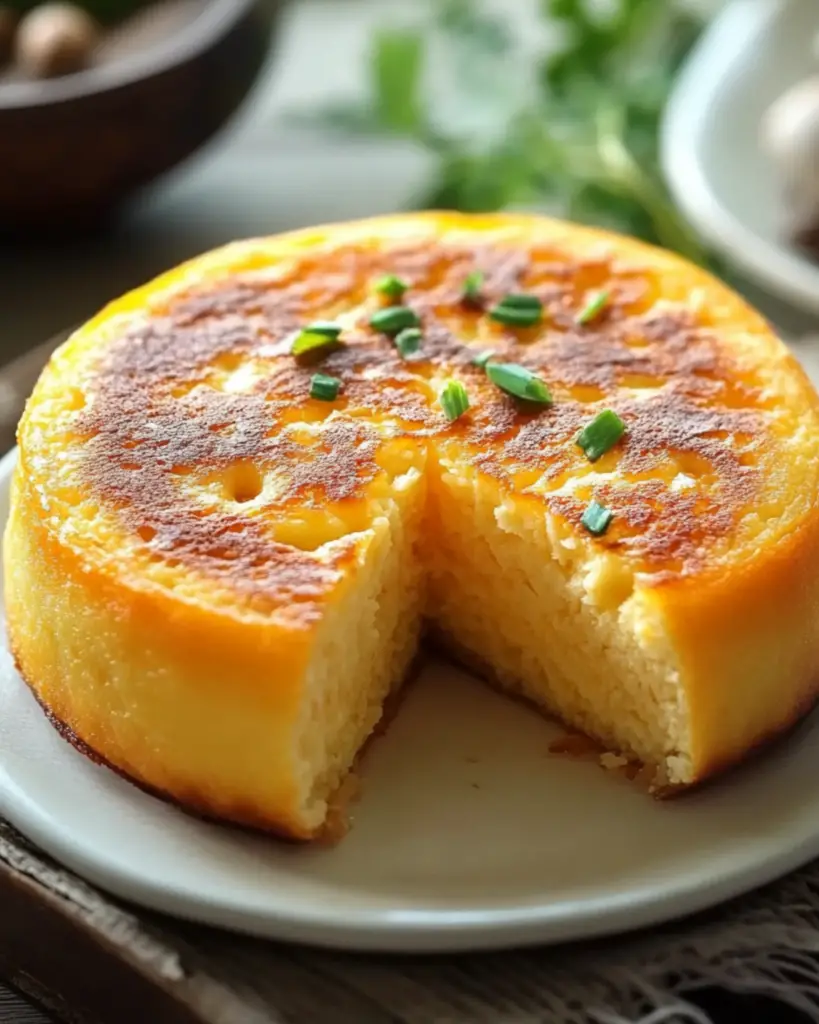
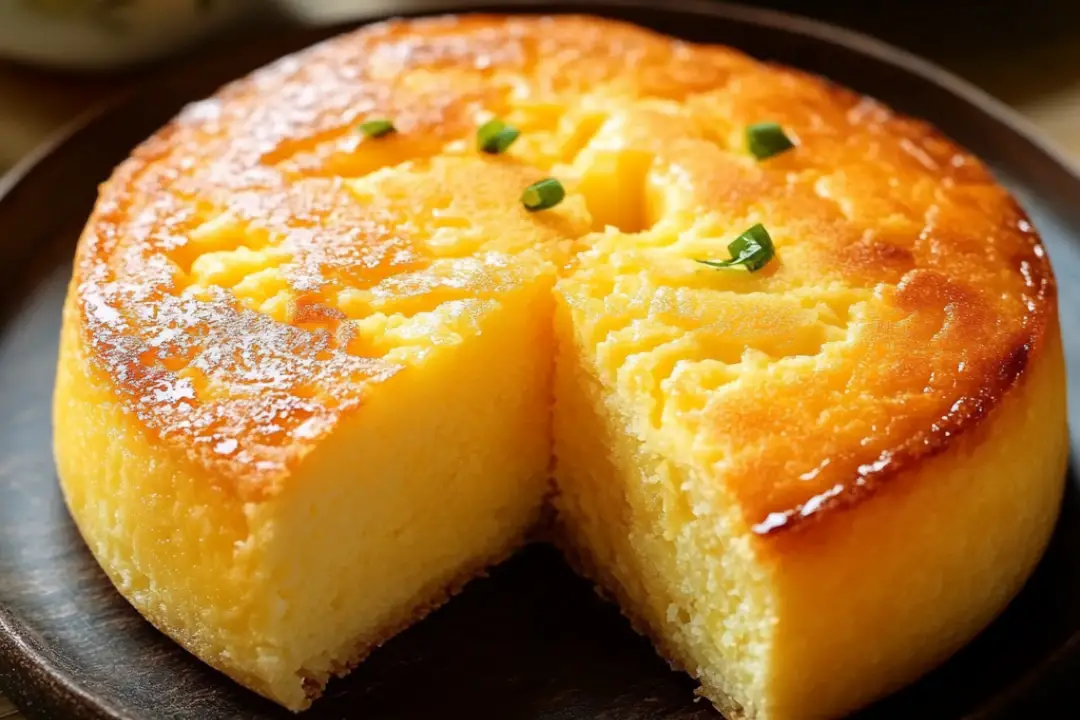
If you’ve ever had the pleasure of sinking your teeth into a Chinese egg cake, you know it’s like a little slice of heaven. Soft, fluffy, and with the perfect balance of sweetness and richness, these cakes are a nostalgic treat for many. Whether you’re looking to recreate a classic from a bakery or you’ve just discovered them and want to try making your own, this Chinese Egg Cake recipe is all you need. Trust me, once you try these, you’ll be hooked!
Why You’ll Love Chinese Egg Cakes
This recipe brings all the magic of these delicious, light cakes straight to your kitchen. Here’s why you’re going to fall in love with it:
Super Fluffy Texture:
The texture is absolutely key to these egg cakes. They’re light as a cloud, soft and pillowy with just the right amount of tenderness. It’s like a mini cake that melts in your mouth.
Simple Ingredients:
The beauty of this recipe is how simple the ingredients are. You don’t need any fancy baking tools or hard-to-find items—just eggs, sugar, flour, and a few pantry staples.
Sweet and Subtle Flavor:
These cakes have a subtle sweetness that makes them the perfect afternoon snack or dessert. It’s not overpowering, just the right amount of sweetness to satisfy a craving.
Quick to Make:
No need to spend hours in the kitchen—these egg cakes come together quickly, so you can enjoy them in no time. They’re perfect when you need a little sweet treat but don’t want to commit to a long baking process.
Versatile:
Enjoy them on their own, pair them with a cup of tea, or even serve them at a party. These cakes are incredibly versatile and can be dressed up with fillings or toppings of your choice.

Disclosure: This post contains affiliate links.If you click and make a purchase, I may earn a small commission at no extra cost to you.
Ingredients in Chinese Egg Cake
Here’s what you need to make these irresistibly soft and fluffy egg cakes:
- Eggs
- Granulated Sugar
- All-Purpose Flour
- Baking Powder
- Butter (melted)
- Vanilla Extract
- Milk
- Salt
(Note: The full ingredients list, including measurements, is provided in the recipe card directly below.)
Instructions
Let’s dive into making these delicious little cakes! Follow the simple steps, and you’ll have soft, sweet egg cakes in no time.
1. Preheat Your Oven:
Start by preheating your oven to 350°F (175°C). Lightly grease your muffin tin or line it with paper liners. This will prevent the cakes from sticking and make cleanup easier.
2. Beat the Eggs and Sugar:
In a large mixing bowl, whisk together the eggs and granulated sugar until the mixture becomes pale and fluffy. This process is key to creating that airy texture in the egg cakes. You can use an electric mixer to make this faster.
3. Add Wet Ingredients:
Once the egg mixture is fluffy, stir in the melted butter, milk, and vanilla extract. Mix everything together until smooth.
4. Combine Dry Ingredients:
In a separate bowl, sift together the all-purpose flour, baking powder, and salt. Sifting helps prevent any lumps in the batter and ensures the cake comes out light.
5. Mix the Wet and Dry Ingredients:
Gradually add the dry ingredients to the wet ingredients. Gently fold the flour mixture into the wet ingredients with a spatula until just combined. Be careful not to overmix, or you’ll lose the fluffy texture.
6. Pour and Bake:
Pour the batter evenly into the prepared muffin tin, filling each cup about 2/3 full. Bake in the preheated oven for about 12-15 minutes, or until the cakes are golden brown on top and a toothpick inserted comes out clean.
7. Cool and Serve:
Let the egg cakes cool in the tin for a few minutes before transferring them to a wire rack to cool completely. Serve them warm or at room temperature. Enjoy them as-is, or drizzle with a little powdered sugar for a sweet touch.
Nutrition Facts
Servings: [Number of servings]
Calories per serving: [Calorie count per serving]
Preparation Time
Prep Time: [Time to prepare ingredients]
Cook Time: [Time to cook or bake]
Total Time: [Total time needed]
How to Serve Chinese Egg Cakes
These fluffy little cakes can be enjoyed in several different ways:
Afternoon Snack:
Serve them with a cup of hot tea for a delightful afternoon snack. The mild sweetness of the egg cakes pairs beautifully with a variety of teas.
Light Dessert:
If you’re looking for a lighter dessert option, these egg cakes are perfect. They’re not as heavy as traditional cakes but still satisfy your sweet tooth.
Party Treat:
These egg cakes make a wonderful addition to any dessert table at a party or gathering. You can even try filling them with fresh cream or fruit preserves for an extra burst of flavor.
Topped with Whipped Cream:
For an indulgent twist, top them with whipped cream and a few fresh berries. It’s a simple yet delicious way to elevate the flavors.
Additional Tips
Make Ahead:
You can make these egg cakes ahead of time and store them in an airtight container for up to 2 days. They’re perfect for prepping in advance for gatherings or snacks throughout the week.
Customize the Flavor:
Feel free to add a little extra flavor by mixing in citrus zest, such as lemon or orange, or even a bit of matcha powder for a unique twist. You could also add a handful of chocolate chips for an extra indulgent treat!
Experiment with Fillings:
If you’re feeling adventurous, cut the egg cakes in half and stuff them with whipped cream, fruit, or a chocolate ganache filling for an added surprise.
FAQ Section
Q1: Can I make these without an electric mixer?
A1: Absolutely! While an electric mixer helps, you can also whisk the eggs and sugar by hand using a balloon whisk. Just be sure to whisk until the mixture is light and fluffy.
Q2: Can I make this recipe without milk?
A2: Yes! You can substitute milk with a dairy-free alternative like almond milk or oat milk. The flavor will be slightly different but still delicious.
Q3: How do I store leftover egg cakes?
A3: Store any leftover egg cakes in an airtight container at room temperature for up to 2 days. They can also be frozen for longer storage—just make sure to wrap them tightly before freezing.
Q4: Can I use a different sweetener?
A4: You can experiment with other sweeteners like honey or maple syrup, but keep in mind that it may alter the texture or flavor slightly. You may also need to adjust the liquid content in the recipe.
Q5: Can I add a filling to these egg cakes?
A5: Yes! You can cut the cakes in half and fill them with whipped cream, jam, or fresh fruit for a more indulgent treat.
These Chinese Egg Cakes are a simple yet satisfying treat that can be enjoyed at any time of day. Their fluffy texture and delicate sweetness make them a favorite for many, and now you can make them right at home! Try them out and watch them disappear in no time!
Print
Chinese Egg Cake Recipe
- Total Time: 0 hours
- Yield: 4 servings
- Diet: Gluten Free
Description
This Creamy Asiago Chicken is a rich and flavorful dish that’s sure to impress. Tender chicken breasts are smothered in a creamy asiago cheese sauce, creating the perfect balance of savory and indulgent. Ideal for a weeknight dinner or special occasion!
Ingredients
- 4 boneless, skinless chicken breasts
- 1 tablespoon olive oil
- 1 teaspoon garlic powder
- 1 teaspoon onion powder
- 1 teaspoon Italian seasoning
- Salt and pepper to taste
- 2 tablespoons butter
- 3 cloves garlic, minced
- 1 cup heavy cream
- 1 cup chicken broth
- 1 cup asiago cheese, grated
- 1 tablespoon freshly chopped parsley (for garnish)
Instructions
- Heat olive oil in a large skillet over medium-high heat. Season chicken breasts with garlic powder, onion powder, Italian seasoning, salt, and pepper.
- Cook the chicken in the skillet for 6-7 minutes per side, or until golden brown and cooked through. Remove the chicken from the skillet and set it aside.
- In the same skillet, melt the butter over medium heat. Add the minced garlic and cook for about 1 minute until fragrant.
- Pour in the heavy cream and chicken broth, stirring to combine. Bring to a simmer and cook for 3-4 minutes, allowing the sauce to thicken slightly.
- Stir in the grated asiago cheese and cook until the cheese has melted and the sauce is smooth.
- Return the chicken breasts to the skillet, spooning some of the creamy sauce over the top. Simmer for another 2-3 minutes to reheat the chicken.
- Garnish with freshly chopped parsley and serve the creamy asiago chicken over pasta, rice, or with a side of vegetables. Enjoy!
Notes
- ou can substitute the heavy cream with half-and-half for a lighter version, though it will be less rich.
- If you prefer a thicker sauce, let it simmer longer to reduce, or add a cornstarch slurry (cornstarch mixed with water).
- This dish pairs wonderfully with garlic bread, steamed vegetables, or mashed potatoes.
- Prep Time: 10 minutes
- Cook Time: 15-20 minutes
- Category: Dinner
- Method: Pan-frying
- Cuisine: American
Nutrition
- Serving Size: 1 chicken breast with sauce
- Calories: 450 kcal
- Sugar: 3g
- Sodium: 650mg
- Fat: 30g
- Saturated Fat: 14g
- Unsaturated Fat: 12g
- Trans Fat: 0g
- Carbohydrates: 4g
- Fiber: 1g
- Protein: 41g
- Cholesterol: 30mg


