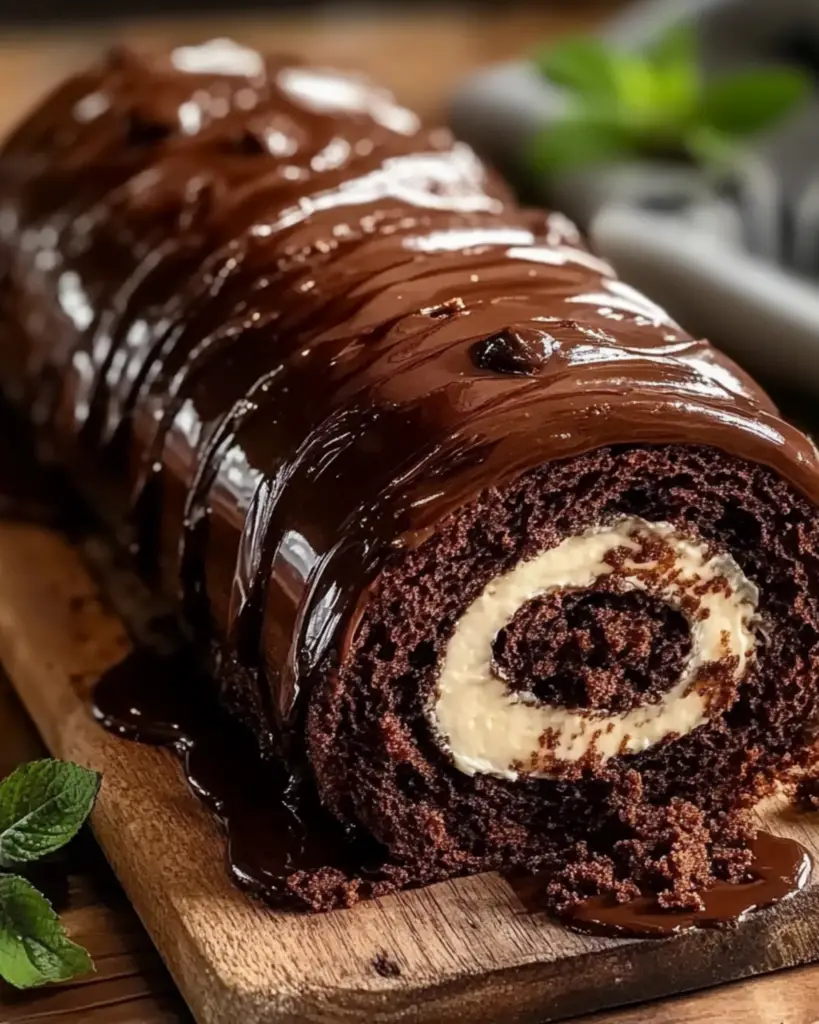
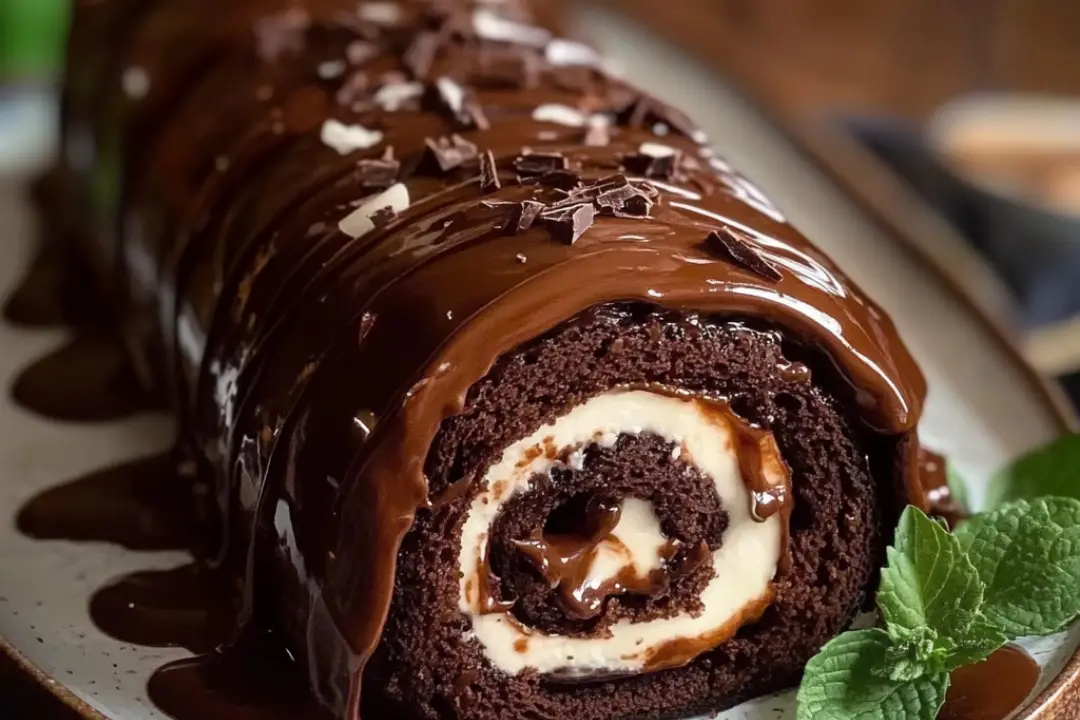
If you’ve ever been mesmerized by those beautifully rolled cakes in bakeries, you know there’s something magical about a Chocolate Cake Roll. Imagine a soft, tender chocolate cake wrapped around a sweet, velvety filling, creating the perfect combination of flavors and textures. It’s indulgent, yet light, and absolutely delicious. Whether you’re celebrating a special occasion or just satisfying a chocolate craving, this cake roll is sure to impress. It looks fancy but is surprisingly easy to make, and trust me, once you try it, you’ll be hooked!
Why You’ll Love Chocolate Cake Roll
Showstopper Dessert
This cake roll has the wow factor. With its beautiful spiral shape and rich, chocolatey flavor, it’s a dessert that’s sure to turn heads at any gathering.
Easy to Make
Although it looks impressive, this chocolate cake roll is simpler to make than you might think! The cake is incredibly forgiving, and once you get the rolling technique down, it’s smooth sailing.
Perfect for Any Occasion
From birthday parties to holiday dinners, this cake is versatile enough to be the star of any event. It’s a great way to add a little extra sweetness to your celebration.
Customizable Fillings
While this recipe features a classic whipped cream filling, you can mix it up with different fillings like chocolate ganache, vanilla frosting, or even a light mousse for a twist on the traditional.

Disclosure: This post contains affiliate links.If you click and make a purchase, I may earn a small commission at no extra cost to you.
Ingredients in Chocolate Cake Roll
Here’s what you’ll need to make this decadent chocolate cake roll:
- Eggs: The base of the cake, giving it lightness and structure.
- Sugar: To sweeten the cake, making it perfectly balanced.
- All-purpose flour: This forms the body of the cake.
- Cocoa powder: The essential ingredient for that rich, chocolatey flavor.
- Baking powder: To help the cake rise and become light and fluffy.
- Vanilla extract: A touch of warmth that enhances the cake’s flavor.
- Salt: A pinch of salt to balance the sweetness.
- Whipping cream: For the light, fluffy filling that gives the cake its creamy texture.
- Powdered sugar: To sweeten the filling without making it too heavy.
- Vanilla extract (for filling): To add a smooth, subtle flavor to the whipped cream.
(Note: Full ingredient measurements are provided in the recipe card below.)
Nutrition Facts
Here’s an approximate breakdown per slice (1/12th of the cake):
- Calories: 250
- Fat: 17g
- Saturated Fat: 10g
- Carbohydrates: 26g
- Fiber: 2g
- Sugars: 18g
- Protein: 4g
- Cholesterol: 70mg
- Sodium: 60mg
- Potassium: 150mg
- Calcium: 4% DV
- Iron: 6% DV
(Note: Nutritional values may vary depending on ingredient brands and portion sizes.)
Preparation Time
- Prep Time: 20 minutes
- Cook Time: 12-15 minutes
- Total Time: 35 minutes
Instructions
Step 1: Preheat Your Oven
Preheat the oven to 350°F (175°C). Line a 15×10-inch jelly roll pan with parchment paper and lightly grease the paper to ensure the cake doesn’t stick.
Step 2: Prepare the Cake Batter
In a large mixing bowl, beat the eggs and sugar together using an electric mixer until pale and fluffy, about 3-5 minutes. Add the cocoa powder, flour, baking powder, salt, and vanilla extract. Mix until just combined—be careful not to overmix!
Step 3: Bake the Cake
Pour the cake batter into the prepared pan, spreading it evenly with a spatula. Bake for 12-15 minutes, or until the cake springs back when lightly touched. You’ll know it’s done when the edges begin to pull away from the sides of the pan.
Step 4: Roll the Cake
Once the cake is done, remove it from the oven and immediately turn it out onto a clean kitchen towel that’s been sprinkled with powdered sugar. Carefully peel off the parchment paper and, starting from one edge, gently roll the cake up with the towel inside. Let the cake cool completely in the towel, which will help it retain its shape.
Step 5: Make the Filling
While the cake cools, whip the cream, powdered sugar, and vanilla extract together in a large bowl until stiff peaks form. You want the cream to be light, fluffy, and smooth.
Step 6: Unroll and Fill the Cake
Once the cake is fully cooled, carefully unroll it. Spread the whipped cream filling evenly over the surface of the cake, leaving a small border around the edges.
Step 7: Roll It Up
Gently roll the cake back up without the towel, making sure the seam is on the bottom. If it cracks a little, don’t worry—that’s totally normal!
Step 8: Chill and Serve
Place the rolled cake seam side down on a serving platter and refrigerate for at least 30 minutes to help it set. Before serving, dust with powdered sugar for that classic cake roll look. Slice into generous pieces and enjoy!
How to Serve Chocolate Cake Roll
With Fresh Berries
Serve your chocolate cake roll with a handful of fresh berries like raspberries or strawberries to cut through the richness and add a pop of color.
Topped with Whipped Cream
If you love even more creaminess, top each slice with a dollop of freshly whipped cream or a scoop of vanilla ice cream for an indulgent treat.
As Part of a Dessert Platter
Slice the cake into smaller pieces and serve alongside other desserts on a dessert platter for a sweet variety. It’s perfect for a holiday gathering or party.
Additional Tips
Roll the Cake Gently
When rolling the cake, be gentle to avoid cracking. Let it cool completely in the towel before unrolling to ensure it doesn’t break apart.
Experiment with Fillings
While whipped cream is classic, you can get creative with fillings! Try a chocolate mousse or a simple vanilla buttercream for a twist on this classic dessert.
Make It Ahead of Time
This cake roll can be made the day before and stored in the fridge. Just be sure to cover it tightly to keep it fresh. The flavors develop even more after a few hours of chilling!
Don’t Skip the Powdered Sugar on the Towel
Sprinkling powdered sugar on the towel before rolling helps prevent the cake from sticking and makes it easier to unroll later.
FAQ Section
Q1: Can I make this cake roll in advance?
A1: Yes! This cake roll can be made up to a day ahead of time. Just store it in the fridge, covered, until you’re ready to serve.
Q2: Can I use something other than whipping cream for the filling?
A2: Absolutely! You can use a chocolate ganache, vanilla buttercream, or even a flavored mousse for the filling. Get creative!
Q3: What if my cake cracks while rolling it?
A3: A little cracking is normal! If it cracks, just be gentle when rolling, and it will still taste amazing. Plus, dusting with powdered sugar will hide any imperfections.
Q4: Can I make this gluten-free?
A4: Yes! You can substitute the all-purpose flour with a gluten-free flour blend to make it gluten-free.
Q5: How long can I store the chocolate cake roll?
A5: Store the cake roll in the fridge for up to 3 days. Be sure to cover it tightly with plastic wrap or foil to keep it fresh.
Q6: How do I know when the cake is done baking?
A6: The cake is done when it springs back lightly when touched and the edges pull away from the pan. You can also check by inserting a toothpick—it should come out clean.
Q7: Can I freeze the chocolate cake roll?
A7: Yes, you can freeze the whole cake roll or individual slices. Just wrap it tightly in plastic wrap and foil before freezing. Thaw in the fridge before serving.
Q8: Can I use other fillings like fruit?
A8: Yes! You can fill the cake with whipped cream and fresh fruit like raspberries, strawberries, or even a fruit compote for a delicious twist.
Q9: What size pan should I use?
A9: Use a 15×10-inch jelly roll pan for the best results. This will ensure the cake is thin enough to roll without cracking.
Q10: Can I add frosting to the outside of the cake roll?
A10: Yes, you can frost the outside of the cake with chocolate or vanilla frosting if you want extra richness and decoration.
Conclusion
Chocolate Cake Roll is the kind of dessert that makes any occasion feel a little more special. Soft, spongy chocolate cake rolled up with a light, fluffy filling—what’s not to love? It’s easy to make, fun to eat, and, most importantly, absolutely delicious. Whether you’re a seasoned baker or a beginner, this recipe is perfect for any chocolate lov
Print
Chocolate Cake Roll
- Total Time: 0 hours
- Yield: 8–10 servings 1x
Description
This Chocolate Cake Roll is a delightful dessert with a soft, fluffy chocolate sponge cake filled with a rich and creamy whipped filling. It’s a show-stopping treat perfect for holidays, special occasions, or just a sweet indulgence!
Ingredients
For the Cake:
- 3 large eggs, room temperature
- 1 cup (200g) granulated sugar
- 1 teaspoon vanilla extract
- 1/2 cup (60g) all-purpose flour
- 1/3 cup (40g) unsweetened cocoa powder
- 1 teaspoon baking powder
- 1/4 teaspoon salt
- Powdered sugar, for dusting
For the Filling:
- 1 cup (240ml) heavy cream
- 1/4 cup (30g) powdered sugar
- 1 teaspoon vanilla extract
- 4 oz (115g) cream cheese, softened
- 1/2 cup (120g) mascarpone cheese or ricotta cheese (optional for richer filling)
Instructions
- For the Cake:
- Preheat the oven to 350°F (175°C). Grease a 10×15-inch jelly roll pan and line it with parchment paper. Grease the parchment paper lightly.
- In a medium bowl, sift together the flour, cocoa powder, baking powder, and salt. Set aside.
- In a large mixing bowl, beat the eggs and granulated sugar with an electric mixer until light and fluffy, about 5-7 minutes. Add the vanilla extract and mix to combine.
- Gradually fold in the sifted dry ingredients using a spatula or spoon. Be gentle to maintain the airiness of the batter.
- Pour the batter into the prepared jelly roll pan and spread it evenly.
- Bake for 10-12 minutes or until a toothpick inserted into the center comes out clean.
- As soon as the cake is done, dust a clean kitchen towel with powdered sugar. Turn the cake out onto the towel and remove the parchment paper. Roll the cake with the towel while it’s still hot (this helps prevent cracking) and let it cool completely.
For the Filling:
- In a large mixing bowl, beat the heavy cream with powdered sugar and vanilla extract until stiff peaks form. Set aside.
- In another bowl, beat the cream cheese and mascarpone (if using) until smooth and creamy.
- Gently fold the whipped cream into the cream cheese mixture until combined and smooth.
Assembling the Cake Roll:
- Once the cake has cooled completely, gently unroll it from the towel.
- Spread the whipped filling evenly over the entire surface of the cake.
- Carefully roll the cake back up, starting from one short end.
- Dust with powdered sugar and, if desired, decorate with chocolate shavings or whipped cream.
- Refrigerate the cake roll for 30 minutes to set before slicing and serving.
Notes
- You can make the cake ahead of time and refrigerate it, but it’s best served within 1-2 days for the freshest flavor.
- If you prefer a stronger chocolate flavor, you can add a tablespoon of espresso powder to the batter.
- For an extra indulgent touch, drizzle with chocolate ganache before serving.
- Prep Time: 20 minutes
- Cook Time: 12-15 minutes (depending on the method and size of the tails)
- Category: Dessert
- Method: Baking
- Cuisine: American
Nutrition
- Serving Size: 1 slice (based on 10 servings)
- Calories: 230
- Sugar: 23g9
- Sodium: 90 mg
- Fat: 14g
- Saturated Fat: 8g
- Unsaturated Fat: 4g
- Trans Fat: 0g
- Carbohydrates: 23g
- Fiber: 2g
- Protein: 3g
- Cholesterol: 80mg


