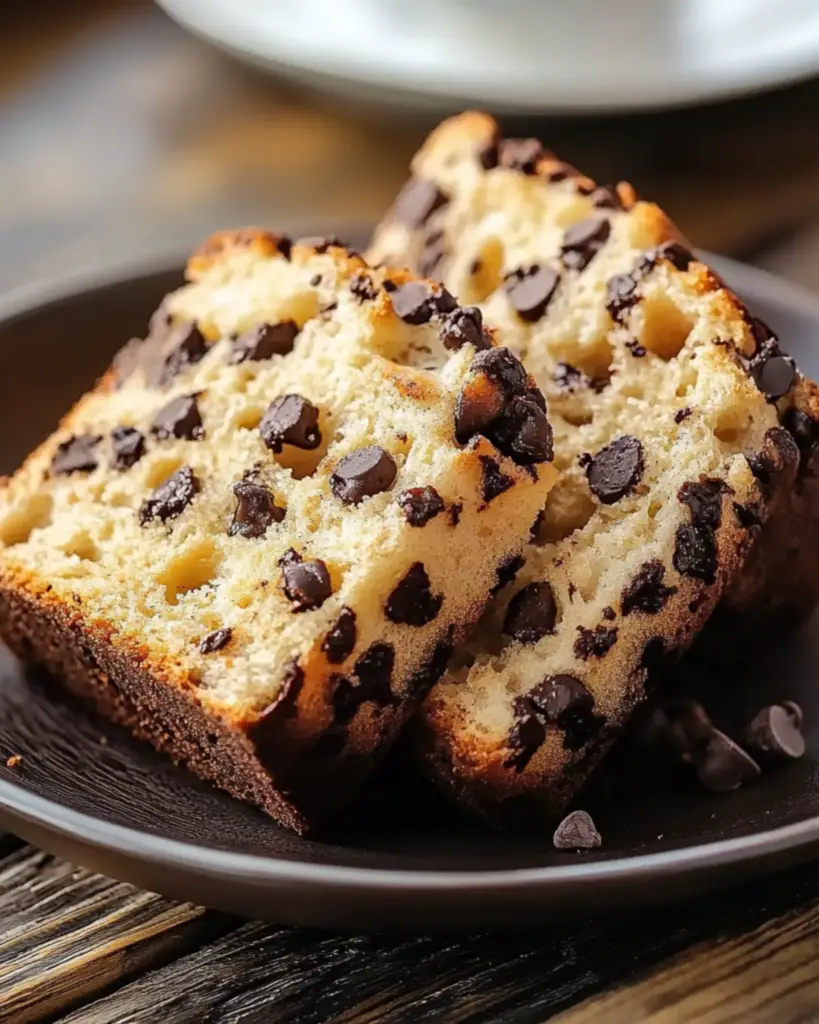
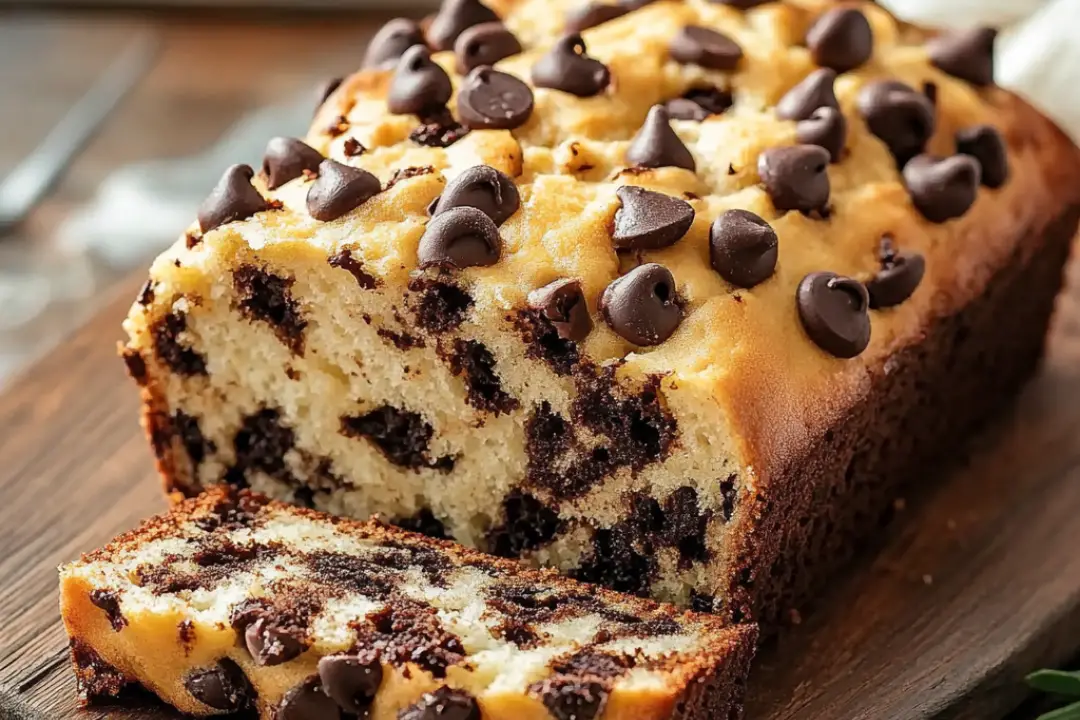
You know those moments when you’re craving something sweet but also want the comfort of fresh bread? Well, Chocolate Chip Pop Bread is the answer! This is not your average loaf; it’s a delightful marriage between the pillowy softness of a quick bread and the gooey goodness of chocolate chips. Imagine sinking your teeth into a slice of perfectly baked bread, only to find pockets of melty chocolate chips that make every bite feel like a little indulgence. Trust me, you’re going to want to bake this one—and maybe even double the batch because it won’t last long!
Why You’ll Love Chocolate Chip Pop Bread
There’s something magical about the combination of fluffy bread and chocolate. It’s the perfect balance of sweet, warm, and comforting—kind of like a hug in the form of food. Here’s why this recipe will quickly become a favorite:
Sweet and Chocolatey:
This bread is loaded with gooey chocolate chips, so every bite feels like you’re eating a chocolate chip cookie… but in bread form!
Quick and Easy:
No complicated steps here! This is a one-bowl, simple-to-make recipe that’s perfect for beginner bakers or anyone who just wants something quick and delicious.
Perfect for Any Time of Day:
Whether you’re enjoying it for breakfast with a cup of coffee, as a midday snack, or as a dessert, this bread is versatile enough to be enjoyed anytime.
Great for Sharing:
Bake this for your next get-together, and it’ll disappear in no time. This bread is great for family gatherings, brunches, or just sharing with friends.
Budget-Friendly:
Made with pantry staples, this bread is easy on the wallet, but it doesn’t skimp on flavor. Chocolatey goodness doesn’t have to break the bank!

Disclosure: This post contains affiliate links.If you click and make a purchase, I may earn a small commission at no extra cost to you.
Ingredients
Let’s talk about the ingredients! These simple items come together to create a delicious, comforting loaf of chocolate chip pop bread.
All-Purpose Flour:
This is the base of your bread, giving it structure and fluffiness. It works perfectly to balance the richness of the chocolate chips.
Baking Powder:
This is what gives the bread its light, airy texture, allowing it to rise beautifully in the oven.
Salt:
Just a pinch! It enhances the flavors and balances the sweetness of the bread.
Butter:
Rich, creamy butter adds moisture and flavor to the bread, making it soft and tender.
Sugar:
A little sweetness goes a long way here, giving the bread that perfect sugary flavor without being overwhelming.
Eggs:
Eggs help bind everything together and add structure, giving the bread its tender crumb.
Milk:
Milk adds moisture, creating a soft, delicious crumb throughout the bread.
Vanilla Extract:
This little addition enhances the sweetness and brings out the best in the chocolate chips.
Chocolate Chips:
The star of the show! Whether you use semi-sweet, milk chocolate, or even a mix of both, these chips melt into the bread to create pockets of chocolatey goodness in every bite.
(Note: the full ingredients list, including measurements, is provided in the recipe card directly below.)
Instructions
Now that we’ve got the ingredients ready, let’s dive into how to make this irresistible Chocolate Chip Pop Bread!
1. Preheat Your Oven:
Preheat your oven to 350°F (175°C) and grease a loaf pan (or line it with parchment paper) to ensure your bread doesn’t stick.
2. Mix the Dry Ingredients:
In a large bowl, whisk together your flour, baking powder, and salt. This will help distribute the baking powder evenly throughout the flour, ensuring your bread rises perfectly.
3. Combine the Wet Ingredients:
In a separate bowl, whisk together the melted butter, sugar, eggs, milk, and vanilla extract. Make sure everything is well combined and smooth.
4. Fold in the Dry Ingredients:
Gradually add the dry ingredients to the wet ingredients, stirring gently until everything is just combined. Be careful not to overmix; you want the dough to stay tender and light.
5. Add the Chocolate Chips:
Now comes the fun part—fold in the chocolate chips! The more the merrier when it comes to chocolate, so be sure to add a generous amount.
6. Pour Into the Pan:
Transfer your batter into the prepared loaf pan, smoothing the top with a spatula. It doesn’t need to be perfect—this bread is meant to have a rustic, homemade feel.
7. Bake to Perfection:
Bake the bread in the preheated oven for about 55-60 minutes, or until a toothpick inserted into the center comes out clean (except for a few chocolatey crumbs, of course!). If the top is browning too quickly, you can cover it loosely with foil to prevent overbaking.
8. Cool and Serve:
Let the bread cool in the pan for about 10 minutes, then transfer it to a wire rack to cool completely. Slice it up and enjoy the warm, gooey chocolate goodness inside!
How to Serve Chocolate Chip Pop Bread
Chocolate Chip Pop Bread is great on its own, but here are some ideas to elevate the experience:
- With a Cup of Coffee or Tea: This bread pairs perfectly with a hot beverage, making it an ideal treat for breakfast or an afternoon snack.
- With a Scoop of Ice Cream: For a decadent dessert, warm up a slice and top it with a scoop of vanilla or chocolate ice cream.
- Toast It: For an extra crispy and melty version, slice and toast a piece of the bread, then spread a little butter or jam on top.
- Serve with Fresh Berries: Add a side of fresh berries for a refreshing contrast to the sweetness of the bread.
Additional Tips
- Use Room Temperature Ingredients: Make sure your eggs, butter, and milk are at room temperature for the best texture.
- Don’t Overmix: Stir the batter just until everything is combined—overmixing can lead to a dense loaf.
- Customize with Add-Ins: If you’re feeling adventurous, try adding nuts like walnuts or pecans, or even a handful of dried fruit like cranberries.
- Check for Doneness: Ovens vary, so check the bread with a toothpick toward the end of baking time. If it comes out clean (aside from some melted chocolate), it’s ready!
FAQ Section
Q1: Can I use a different type of chocolate?
A1: Absolutely! You can use milk chocolate, dark chocolate, or even white chocolate chips—whatever you prefer.
Q2: Can I make this recipe gluten-free?
A2: Yes! You can substitute the all-purpose flour with a 1:1 gluten-free flour blend to make it gluten-free.
Q3: Can I add other flavorings to the bread?
A3: Yes! You can add a teaspoon of cinnamon or even a dash of coffee for a richer flavor. Get creative!
Q4: How do I store leftovers?
A4: Store the bread in an airtight container at room temperature for up to 3 days. You can also freeze it for longer storage—just slice it first and wrap it tightly.
Q5: Can I make mini loaves?
A5: Yes! This recipe works great as mini loaves. Just reduce the baking time to about 25-30 minutes, depending on the size of your pans.
Q6: Can I use almond milk or another dairy-free milk?
A6: Definitely! Any non-dairy milk will work just fine in this recipe.
Q7: Can I double the recipe?
A7: Yes! If you want to make more, simply double the ingredients and bake in two pans. You may need to adjust the baking time slightly.
Q8: Can I make this ahead of time?
A8: Yes! You can make it a day ahead and store it at room temperature. It actually tastes even better the next day as the flavors settle.
Q9: What if my bread is too crumbly?
A9: If your bread is too crumbly, try adding a little more milk or butter next time. This will help the bread stay moist and soft.
Q10: Can I make this recipe into muffins?
A10: Yes! Divide the batter into muffin tins and bake at 350°F (175°C) for about 20-25 minutes, or until a toothpick comes out clean.
Conclusion
And there you have it—Chocolate Chip Pop Bread, a warm, sweet treat that’s sure to bring smiles to everyone around you. Whether you’re enjoying it fresh out of the oven or savoring a slice later in the day, this bread is the perfect combination of comfort and indulgence. So go ahead, whip up a batch and let the magic of chocolate-filled bread make your day just a little bit sweeter!
Print
Chocolate Chip Pop Bread
- Total Time: 1 hour 5 minutes
- Yield: 1 serving
Description
This Chocolate Chip Pop Bread is a fun and indulgent twist on traditional bread! With a soft, fluffy texture and pockets of melty chocolate chips, this bread makes for the perfect treat with coffee or tea. It’s easy to make and will satisfy your sweet cravings in no time.
Ingredients
- 2 1/2 cups all-purpose flour
- 1/2 cup granulated sugar
- 2 1/2 tsp baking powder
- 1/2 tsp salt
- 1/2 cup unsalted butter, softened
- 2 large eggs
- 1 tsp vanilla extract
- 1 cup whole milk
- 1 1/2 cups chocolate chips (semi-sweet or milk chocolate)
- 1/4 cup brown sugar (optional, for topping)
Instructions
-
Preheat Oven and Prepare Pan:
- Preheat the oven to 350°F (175°C). Grease a 9×5-inch loaf pan with butter or non-stick spray, or line it with parchment paper.
-
Mix Dry Ingredients:
- In a medium bowl, whisk together the flour, sugar, baking powder, and salt.
-
Mix Wet Ingredients:
- In a separate bowl, beat together the softened butter, eggs, and vanilla extract until smooth and creamy.
- Gradually add the milk to the wet mixture and stir until well combined.
-
Combine Wet and Dry Ingredients:
- Add the dry ingredients to the wet ingredients, mixing until just combined. Do not overmix—it’s okay if the batter is slightly lumpy.
-
Add Chocolate Chips:
- Fold in the chocolate chips, making sure they are evenly distributed throughout the batter.
-
Bake:
- Pour the batter into the prepared loaf pan and smooth the top with a spatula.
- (Optional) Sprinkle the brown sugar over the top for a slightly caramelized topping.
- Bake for 55-60 minutes, or until a toothpick inserted into the center of the bread comes out clean or with just a few crumbs.
-
Cool and Serve:
- Let the bread cool in the pan for about 10 minutes, then transfer it to a wire rack to cool completely before slicing.
- Serve warm or at room temperature, and enjoy!
Notes
- Chocolate Chips: You can use semi-sweet, milk, or dark chocolate chips depending on your preference.
- Add-ins: Try adding a handful of chopped nuts, such as walnuts or pecans, for extra texture.
- Make it Sweeter: If you prefer a sweeter loaf, add an extra 1/4 cup of sugar to the batter.
- Storage: Store leftovers in an airtight container at room temperature for up to 3 days. You can also freeze individual slices for later enjoyment.
- Prep Time: 10 minutes
- Cook Time: 55 minutes
- Category: Breakfast
- Method: Baking
- Cuisine: American
Nutrition
- Serving Size: 1 slice (1/10 of the recipe)
- Calories: 280 kcal
- Sugar: 20g
- Sodium: 150mg
- Fat: 12g
- Saturated Fat: 7g
- Unsaturated Fat: 5g
- Trans Fat: 0 g
- Carbohydrates: 40g
- Fiber: 2g
- Protein: 4 g
- Cholesterol: 55mg


