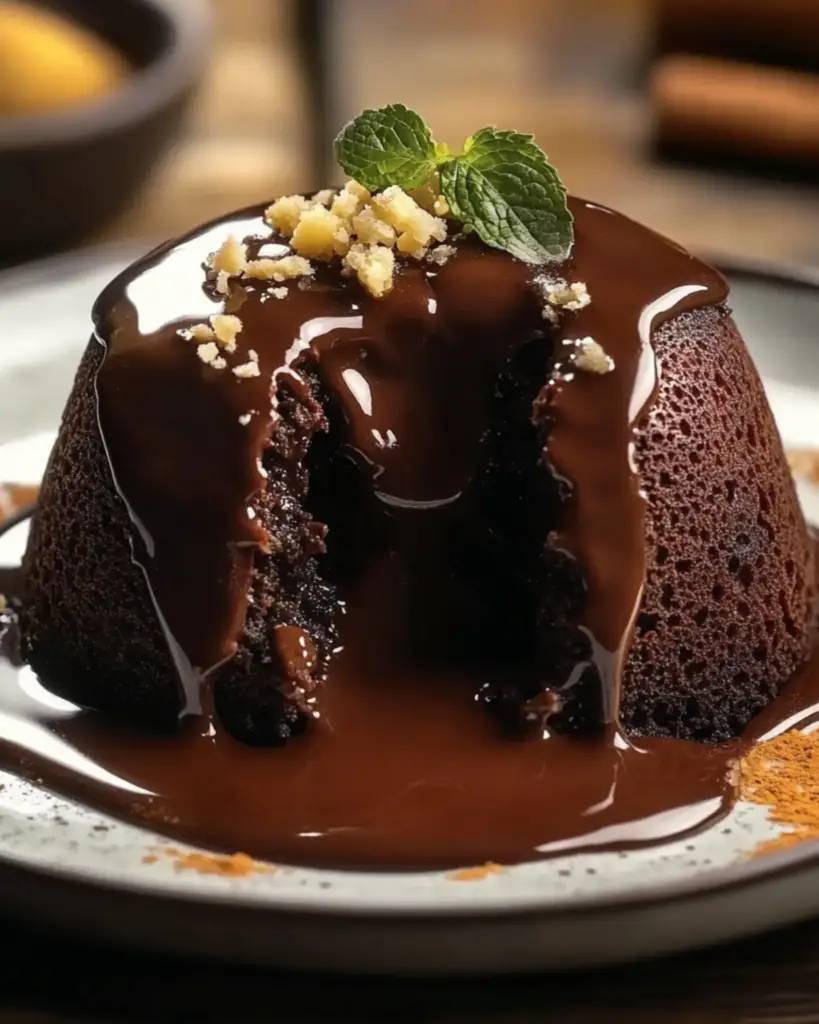
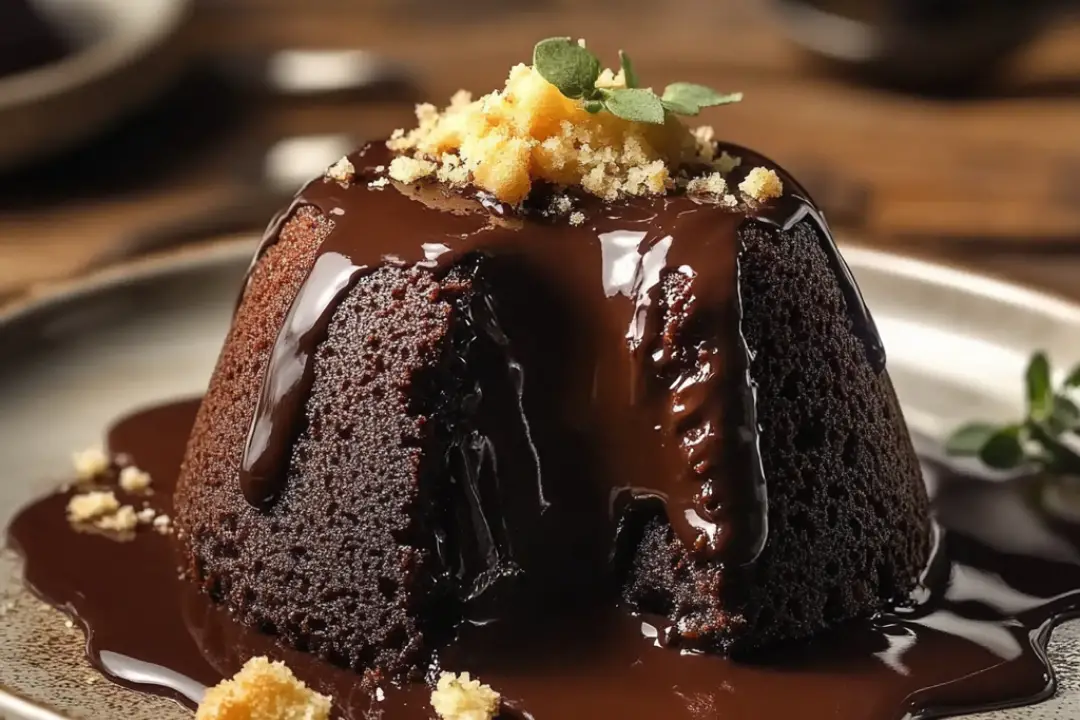
Let me tell you—if you’re a chocolate lover, this Chocolate Lava Cake Extravaganza is about to take your dessert game to a whole new level. Imagine the perfect, warm, gooey center that oozes out as soon as you cut into it, surrounded by a decadent, soft chocolate cake exterior. It’s rich, indulgent, and everything your sweet tooth has ever dreamed of. Whether it’s a special occasion or you just need something to satisfy that chocolate craving, this dessert is the answer. Trust me, you’re going to want to make this again and again.
Why You’ll Love Chocolate Lava Cake Extravaganza
This recipe isn’t just about making a dessert—it’s about creating a moment. Picture yourself cutting into the cake and watching that molten lava of chocolate spill out, ready to be savored. Here’s why this cake will quickly become your go-to:
Decadent and Indulgent: The warm, gooey center of molten chocolate is the ultimate treat for any chocolate lover. It’s pure bliss in every bite.
Impressive Yet Easy: Don’t be fooled by how fancy it looks—this dessert is surprisingly simple to make! In just a few steps, you’ll have a restaurant-worthy dessert at home.
Individual Servings: The individual portions make it feel extra special, like you’re being served at a fancy restaurant. Plus, it’s easy to customize the size for your needs.
Quick and Satisfying: Ready in just 20 minutes, you can enjoy this indulgence in no time. It’s perfect for when you want to wow your guests or treat yourself to something special without hours of baking.
Perfect for Sharing: This is one of those desserts you can’t wait to share with others. The “wow” factor is off the charts, and everyone will be impressed by how it’s both rich and perfectly portioned.

Disclosure: This post contains affiliate links.If you click and make a purchase, I may earn a small commission at no extra cost to you.
Ingredients
Here’s what you’ll need for this indulgent treat:
Dark Chocolate: The star of the show! Use high-quality dark chocolate for that deep, intense flavor. It makes all the difference in this dessert.
Butter: Rich butter helps create that melt-in-your-mouth texture and adds a silky smoothness to the batter.
Eggs: They provide structure while allowing the cake to be soft and tender. The yolks also contribute to the rich flavor.
Sugar: Adds the perfect level of sweetness to balance the richness of the chocolate.
Flour: Just a small amount creates that perfect cake texture. It helps set the outer layer while leaving the inside gooey.
Vanilla Extract: A little touch of vanilla enhances the chocolate flavor and adds depth to the cake.
Pinch of Salt: A pinch of salt enhances all the sweet flavors and balances the richness of the chocolate.
Optional: Powdered Sugar: For dusting on top for a pretty finishing touch.
(Note: the full ingredient list, including measurements, is provided in the recipe card directly below.)
Instructions
Ready to make your very own lava cake? Here’s how:
Prep the Ramekins: Start by greasing and lightly flouring your ramekins. This will help your lava cakes pop right out once they’re baked.
Melt the Chocolate and Butter: In a microwave-safe bowl, melt the butter and dark chocolate together in 20-30 second bursts, stirring in between until smooth. This is the secret to that beautiful gooey center.
Whisk the Eggs and Sugar: In a separate bowl, whisk together the eggs, sugar, and vanilla extract until it’s light and frothy. The sugar helps the eggs form the structure of the cake while still allowing the center to stay soft.
Combine Wet and Dry Ingredients: Gently fold the melted chocolate and butter mixture into the egg and sugar mixture. Add the flour and a pinch of salt, and stir until everything is well combined. The batter should be smooth and glossy.
Pour into Ramekins: Divide the batter evenly among your prepared ramekins, filling them about 3/4 full. You can also place a piece of chocolate or a few chocolate chips in the center for an extra gooey surprise.
Bake: Place the ramekins on a baking sheet and bake in a preheated oven at 425°F (220°C) for about 12-14 minutes. The edges should be set, but the center will still look slightly soft—perfect for that molten lava effect!
Serve: Let the cakes rest for 1-2 minutes before running a knife around the edges. Carefully flip each ramekin onto a plate and gently lift it off. Dust with powdered sugar and add a scoop of vanilla ice cream or whipped cream for the ultimate indulgence.
Nutrition Facts
Servings: 4
Calories per serving: 400-450
Fat: 25g
Carbs: 40g
Protein: 5g
Fiber: 3g
Sugar: 35g
Preparation Time
Prep Time: 10 minutes
Cook Time: 12-14 minutes
Total Time: 20-25 minutes
How to Serve Chocolate Lava Cake Extravaganza
While this dessert is spectacular on its own, here are a few ways to take it to the next level:
Vanilla Ice Cream: Serve your lava cakes with a scoop of vanilla ice cream on top. The creamy cold ice cream paired with the warm, molten cake is a match made in dessert heaven.
Whipped Cream: A dollop of freshly whipped cream adds a light and fluffy contrast to the rich chocolate.
Fresh Berries: Berries like raspberries, strawberries, or blueberries add a fresh, tart element to balance out the sweetness of the cake.
Powdered Sugar: A light dusting of powdered sugar makes these lava cakes look like they came straight from a bakery.
Additional Tips
Here are some tips to ensure your lava cakes come out perfectly:
Don’t Overbake: The key to getting the molten center is to underbake just slightly. Keep an eye on your cakes, and if in doubt, check them a minute early. The center should still jiggle a little when gently shaken.
Use High-Quality Chocolate: The better the chocolate, the better your lava cake will taste. Use at least 60-70% dark chocolate for that rich, deep flavor.
Make Ahead: You can prepare the batter up to a day ahead of time. Simply cover the ramekins and store them in the fridge. When you’re ready to bake, let them sit at room temperature for about 10 minutes before popping them into the oven.
Adjust for Different Ramekin Sizes: If your ramekins are larger or smaller than the standard size, adjust the baking time accordingly. Smaller ramekins will bake faster, so keep an eye on them.
FAQ Section
Q1: Can I use milk chocolate instead of dark chocolate?
A1: Yes, you can use milk chocolate, but the flavor will be sweeter and less intense. Dark chocolate is recommended for that deep, rich flavor.
Q2: Can I make this recipe gluten-free?
A2: Yes! Simply swap the regular flour for a gluten-free flour blend, and your lava cakes will still come out deliciously gooey.
Q3: Can I freeze the lava cakes?
A3: Yes! You can freeze the unbaked lava cakes. Just wrap the ramekins in plastic wrap and freeze them for up to 3 months. When you’re ready to bake, add a few extra minutes to the baking time.
Q4: How do I know when the cakes are done?
A4: The edges should be set, and the center should look slightly soft and jiggly when you tap the ramekin. It’s okay if it looks a little undercooked—that’s what creates the molten center.
Q5: Can I add flavors like coffee or liqueur to the cake?
A5: Absolutely! A splash of espresso or a little dash of your favorite liqueur (like Baileys or Grand Marnier) can add a lovely depth of flavor to the cake.
Conclusion
There’s something magical about cutting into a Chocolate Lava Cake Extravaganza and watching that rich, molten chocolate pour out. It’s indulgent, decadent, and the ultimate chocolate lover’s dream come true. Whether you’re celebrating a special occasion or just treating yourself to something sweet, this dessert delivers all the wow factor you need. With minimal ingredients and only a little bit of time, you can create a restaurant-worthy dessert right at home. So go ahead, grab those ramekins, and get ready for the most delicious chocolate experience ever!
Print
Chocolate Lava Cake Extravaganza
- Total Time: 27 minutes
- Yield: 4 servings 1x
- Diet: Vegetarian
Description
Indulge in this delightful Chocolate Lava Cake, where a delicate exterior encases a molten chocolate center. Perfect for special occasions or a sweet treat at home!
Ingredients
- For the Cake:
- 150g dark chocolate, finely chopped
- 100g unsalted butter, plus extra for greasing
- 2 large eggs
- 2 egg yolks
- 50g granulated sugar
- 30g all-purpose flour
- 1 tsp vanilla extract
- Pinch of salt
- 4 marshmallows
- 50g crushed graham crackers
- For the Topping:
- Whipped cream
- Extra dark chocolate, melted
- More crushed graham crackers
Instructions
- Prepare Chocolate Mixture: In a double boiler, melt the dark chocolate and butter together until smooth. Remove from heat and let cool slightly.
- Mix Eggs and Sugar: In a separate bowl, whisk together the eggs, egg yolks, and granulated sugar until pale and fluffy.
- Combine and Bake: Gently fold the melted chocolate mixture into the egg mixture. Add flour, vanilla extract, and a pinch of salt; fold until just combined. Grease ramekins with butter and fill with batter up to ¾ full. Push a marshmallow into the center of each ramekin.
- Bake: Bake in a preheated oven at 200°C (392°F) for 10-12 minutes, until the edges are firm but the center is soft.
- Serve with Toppings: Let sit for 1-2 minutes, then invert onto a plate. Top with whipped cream, drizzle with melted chocolate, and sprinkle with crushed graham crackers.
Notes
- Be careful not to overbake; the center should remain gooey for the lava effect.
- Experiment with different toppings or add flavored marshmallows for a twist!
- Prep Time: 15 minutes
- Cook Time: 12 minutes
- Category: Dessert
- Method: Baking
- Cuisine: American
Nutrition
- Serving Size: 1 lava cake
- Calories: 350 kcal
- Sugar: 18g
- Sodium: 200mg
- Fat: 25 g
- Saturated Fat: 15 g
- Unsaturated Fat: 8 g
- Trans Fat: 0 g
- Carbohydrates: 32 g
- Fiber: 2 g
- Protein: 5 g
- Cholesterol: 120 mg


