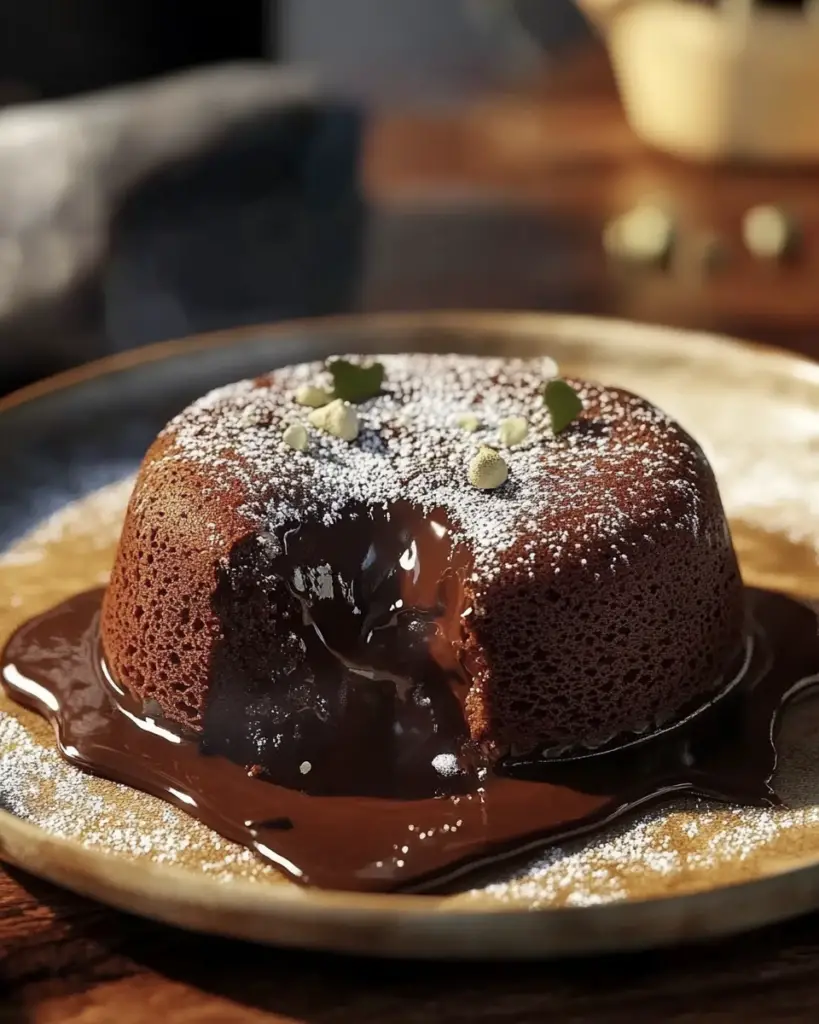
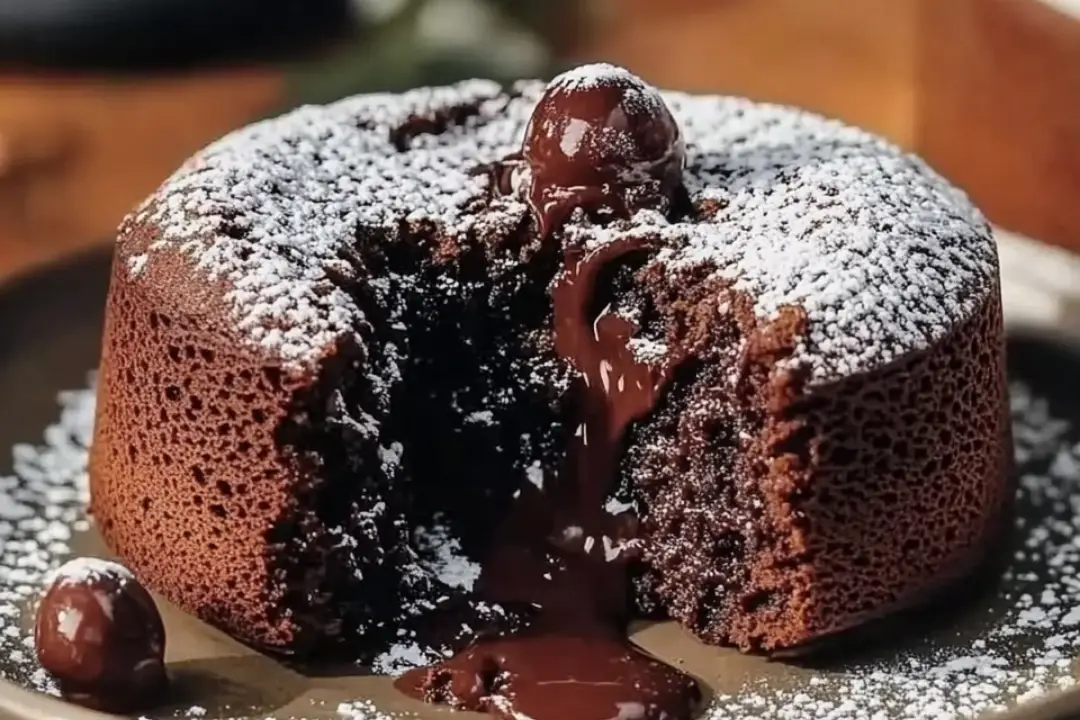
If you’re looking to impress someone (or treat yourself—because you totally deserve it), these Chocolate Lava Cakes are the way to go. Imagine cutting into a warm, delicate chocolate cake, and instead of a crumbly interior, out pours a river of gooey, molten chocolate. It’s like a mini chocolate volcano on your plate, and it’s just as magical as it sounds. Trust me, you’ll be the hero of any dinner party, or at least get a few “Wow!” moments at the dinner table when these little beauties come out of the oven. Ready to indulge in something decadently chocolatey? Let’s dive in!
Why You’ll Love Chocolate Lava Cakes
This recipe isn’t just about the dessert—it’s about the experience. Picture the looks on your friends’ faces when they break into that perfect lava flow, and you’ll know exactly why these cakes are a favorite. Here’s why they’ll become your go-to indulgence:
- Impressive Yet Easy: The name sounds fancy, but the truth is, these cakes are surprisingly simple to make. You don’t need to be a pastry chef to pull off this dessert, and it’s sure to leave everyone thinking you’re a professional baker.
- Perfect for Special Occasions: Whether it’s a romantic dinner, a celebration, or just a cozy night in, lava cakes make any moment feel extra special.
- Gooey Chocolate Heaven: The warm, molten center is what makes this dessert next-level. It’s the perfect amount of indulgence without being overwhelming.
- Customizable: You can make them with different fillings, like caramel or raspberry, or add a scoop of vanilla ice cream on the side. They’re a great base for experimenting with flavors.
- Impress Your Guests: There’s something magical about cutting into that soft chocolate cake to reveal the flowing lava inside. It’s a guaranteed crowd-pleaser.

Disclosure: This post contains affiliate links.If you click and make a purchase, I may earn a small commission at no extra cost to you.
Ingredients
You don’t need a ton of fancy ingredients for this recipe—just some good-quality chocolate and a few staples you probably already have in your kitchen. Let’s take a look at the essentials:
Dark Chocolate
Rich, dark chocolate is the key to a luxurious molten center. It melts perfectly into that silky lava filling. Choose a high-quality chocolate with a good percentage of cocoa for the best flavor.
Butter
Butter is your best friend in this recipe. It creates a rich, tender cake, and helps make that molten center possible.
Eggs
The eggs give the cakes structure, making them firm enough to hold together while still letting that gooey chocolate escape when cut.
Sugar
Sugar adds sweetness and helps the cakes form a crispy exterior while keeping the inside tender and soft.
Flour
A little bit of flour goes a long way in helping the cakes rise and stay intact, while still letting that lava flow freely when you cut in.
Vanilla Extract
A splash of vanilla enhances the chocolate flavor and rounds out the richness of the cake.
Pinch of Salt
A touch of salt is the secret ingredient that brings out the full depth of the chocolate’s flavor. It helps balance the sweetness perfectly.
(Note: Full ingredient measurements are provided in the recipe card above.)
Instructions
Now, let’s get down to the fun part—making these irresistible Chocolate Lava Cakes!
Preheat Your Oven
Start by preheating your oven to 425°F (220°C). A hot oven is essential to cook the cakes quickly, creating that perfect molten center.
Prepare the Ramekins
Butter and flour your ramekins (small oven-safe bowls). This will help the cakes come out easily after baking, with no mess. Alternatively, you can line them with parchment paper for extra ease.
Melt the Chocolate and Butter
In a microwave-safe bowl, melt the dark chocolate and butter together in 20-second intervals, stirring in between until smooth and fully melted. The result should be a silky chocolate mixture.
Mix the Eggs, Sugar, and Vanilla
In a separate bowl, whisk together the eggs, sugar, and vanilla extract until smooth. You want it to be light and slightly frothy—this creates a fluffy texture for the outer cake.
Combine the Mixtures
Slowly pour the melted chocolate and butter mixture into the egg and sugar mixture, stirring gently until combined. Add in the flour and salt, and mix until just incorporated. Be careful not to overmix!
Fill the Ramekins
Divide the batter evenly among your prepared ramekins, filling them about 3/4 of the way full. If you want to get extra fancy, you can place a small piece of chocolate in the center of each ramekin before filling with the batter. This creates an even gooier center!
Bake
Place the ramekins on a baking sheet and bake for 12-14 minutes. The edges of the cakes should be set, but the center will still look a little soft. That’s what we want—the lava!
Let Them Rest
Let the cakes cool in the ramekins for 1-2 minutes. This gives the molten center a moment to settle just enough to ensure it doesn’t completely ooze out when you cut into it.
Serve and Enjoy
Carefully run a knife around the edges of the ramekins to loosen the cakes. Place a plate over each ramekin, then flip to release the lava cake onto the plate. Serve immediately with a dusting of powdered sugar, fresh berries, or a scoop of vanilla ice cream. Watch as your guests’ faces light up when they dig in!
Nutrition Facts
Servings: [Number of servings]
Calories per serving: [Calorie count per serving]
Preparation Time
Prep Time: [Time to prepare ingredients]
Cook Time: [Time to cook or bake]
Total Time: [Total time needed]
How to Serve Chocolate Lava Cakes
These decadent cakes are a treat on their own, but here are a few ideas to take them to the next level:
- Vanilla Ice Cream: A scoop of creamy vanilla ice cream complements the warm chocolate perfectly and adds a cool contrast to the molten center.
- Fresh Berries: Top with a handful of raspberries or strawberries for a tart, fruity burst that balances the richness of the cake.
- Whipped Cream: A dollop of fresh whipped cream is always a good idea—it’s light, airy, and the perfect creamy addition.
- Chocolate Sauce: If you’re a true chocolate lover, drizzle some extra chocolate sauce over the top for that extra indulgence.
Additional Tips
Here are a few tips to ensure your lava cakes come out perfectly every time:
- Don’t Overbake: The key to molten lava cakes is to bake them just long enough. Keep an eye on them, and remember that the center should still be soft when you take them out.
- Make-Ahead Option: You can prepare the batter and refrigerate the filled ramekins ahead of time. When you’re ready to bake, just pop them in the oven and bake as directed.
- Serving Tip: If you’re serving these for a special occasion, garnish with a few fresh mint leaves for a pop of color and a refreshing contrast to the rich chocolate.
- Try Different Fillings: Get creative by adding a little caramel or peanut butter in the center of the cake before baking. A surprise center adds a fun twist!
FAQ Section
Q1: Can I make these ahead of time?
A1: Yes! Prepare the batter and fill the ramekins, then store them in the fridge until you’re ready to bake. Just bake them directly from the fridge.
Q2: How do I know when they’re done?
A2: The edges should be set and the center should still look soft. If you overbake them, the molten center will cook through and you’ll lose that gooey chocolate goodness.
Q3: Can I make these in a muffin tin?
A3: Yes! You can use a muffin tin, but be sure to reduce the baking time. Start checking for doneness at around 10 minutes.
Q4: Can I freeze the lava cakes?
A4: Yes, you can freeze the unbaked cakes. Once they’re assembled, cover and freeze them. When you’re ready to bake, just pop them in the oven straight from the freezer, adding a few extra minutes to the cooking time.
Q5: Can I use milk chocolate instead of dark chocolate?
A5: Yes, you can! Milk chocolate will give the cakes a sweeter, creamier flavor, but the lava filling may be a bit less rich compared to dark chocolate.
Q6: Can I make these without eggs?
A6: You can try using an egg substitute like a flax egg or applesauce, but it may alter the texture slightly. The eggs are key to creating the structure and soft texture of the cake.
Q7: How can I make the cakes extra gooey?
A7: Underbake them slightly! If you take them out when they’re still a little jiggly in the center, the lava will flow out when you cut into them.
Q8: How do I store leftovers?
A8: Store leftover lava cakes in the fridge in an airtight container for up to 2 days. Reheat in the microwave for a few seconds to warm up the molten center.
Q9: Can I add a different filling to the center?
A9: Absolutely! You can add caramel, peanut butter, or even Nutella for a fun twist on the classic.
Q10: What’s the best way to reheat these cakes?
A10: To reheat, microwave the cakes for 20-30 seconds. Be careful not to overheat them, or the lava filling may set.
Conclusion
These Chocolate Lava Cakes are the ultimate indulgence. Rich, decadent, and gooey, they’re everything you want in a dessert. Whether you’re celebrating something special or just treating yourself to a little luxury, these cakes will never disappoint. Ready to wow your friends and family with molten chocolate magic? You’ve got this!
Print
Chocolate Lava Cakes
- Total Time: 27 minutes
- Yield: 4 servings 1x
- Diet: Vegetarian
Description
Indulge in these decadent Chocolate Lava Cakes with a warm, gooey center that oozes rich chocolate when you dig in. Perfect for a special dessert or to satisfy any chocolate craving, these cakes are surprisingly easy to make and will impress any guest!
Ingredients
- 1/2 cup unsalted butter
- 6 oz semi-sweet chocolate chips
- 1 cup powdered sugar
- 2 large eggs
- 2 large egg yolks
- 1/2 cup all-purpose flour
- 1 tsp vanilla extract
- Pinch of salt
- Cooking spray or extra butter for greasing
- Optional: vanilla ice cream or whipped cream for serving
Instructions
- Preheat your oven to 425°F (220°C). Grease four 6-ounce ramekins with cooking spray or butter and place them on a baking sheet.
- In a microwave-safe bowl, melt the butter and chocolate chips together in 30-second intervals, stirring after each until smooth.
- Stir in the powdered sugar until well combined.
- Add the eggs and egg yolks to the chocolate mixture, mixing thoroughly.
- Stir in the vanilla extract and salt.
- Gently fold in the flour until just combined. Do not overmix.
- Divide the batter evenly among the prepared ramekins.
- Bake for 12–14 minutes, or until the edges are firm but the center is still soft.
- Remove from the oven and let the cakes rest for 1 minute. Carefully run a knife around the edges to loosen them.
- Invert each cake onto a dessert plate. Serve immediately with a scoop of vanilla ice cream or a dollop of whipped cream.
Notes
- Allow the cakes to cool for about a minute before inverting to ensure they maintain their shape.
- For an added touch, sprinkle with powdered sugar or serve with fresh berries.
- Prep Time: 15 minutes
- Cook Time: 12 minutes
- Category: Dessert
- Method: Baking
- Cuisine: American
Nutrition
- Serving Size: 1 slice
- Calories: 320 kcal
- Sugar: 32 g
- Sodium: 120 mg
- Fat: 19g
- Saturated Fat: 11 g
- Unsaturated Fat: 8 g
- Trans Fat: 0 g
- Carbohydrates: 37 g
- Fiber: 1 g
- Protein: 5 g
- Cholesterol: 130 mg


