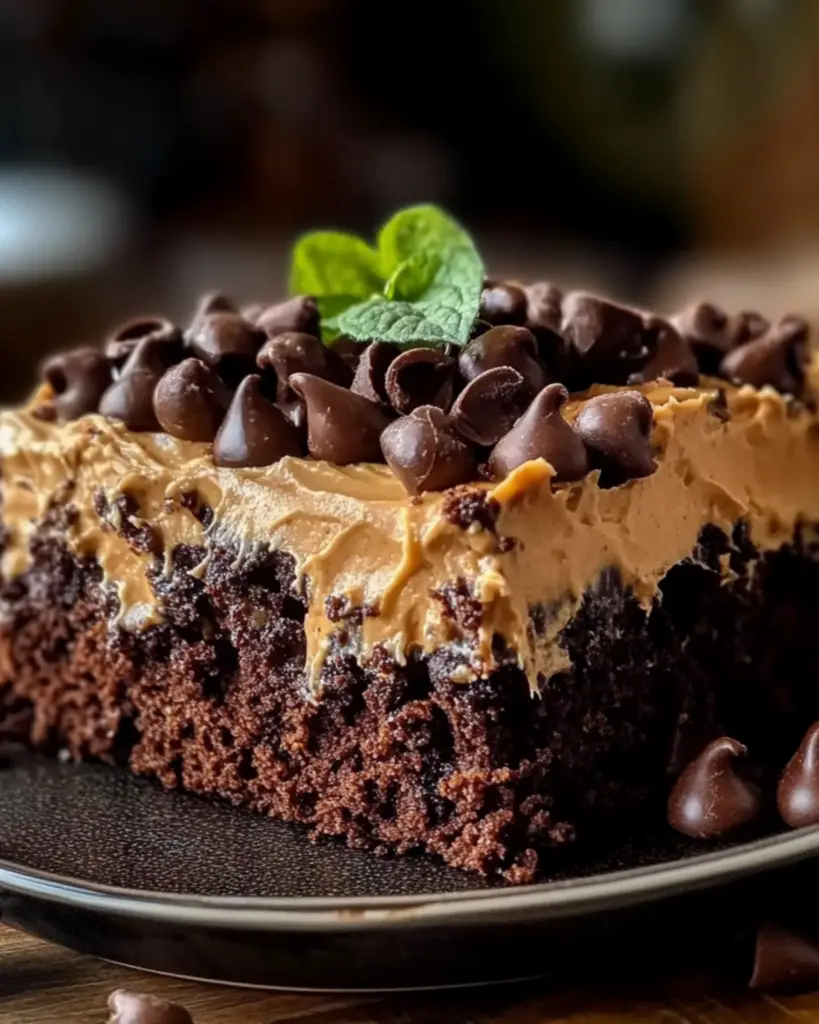
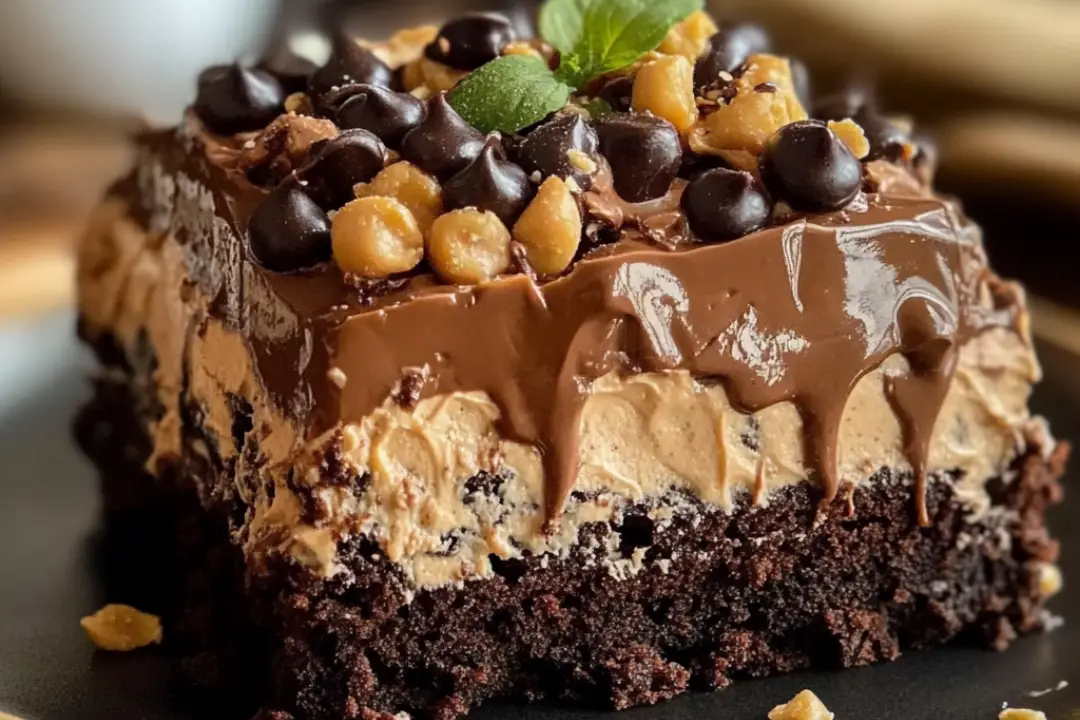
Imagine this: a rich, moist chocolate cake, pierced with holes and drenched in a creamy, dreamy peanut butter filling. Then, just when you think it can’t get any better, it’s topped with a luscious layer of whipped cream. Trust me, you’re going to love this Chocolate Peanut Butter Poke Cake. It’s like a big, soft hug in dessert form, perfect for anyone who loves the sweet combo of chocolate and peanut butter. Whether you’re hosting a party, craving something sweet after dinner, or simply indulging in a homemade treat, this cake is guaranteed to hit the spot.
Every bite of this cake is like the perfect balance of flavors and textures. The cake is incredibly moist, thanks to all the goodness that soaks in from the peanut butter filling. And let’s not forget about that topping—fluffy, cool, and smooth. This recipe is a total showstopper, and it’s surprisingly easy to make. Get ready to be the hero at your next gathering!
Why You’ll Love Chocolate Peanut Butter Poke Cake
This cake isn’t just about satisfying your sweet tooth—it’s about making memories. Here’s why it’s a favorite:
- Versatile: Perfect for every occasion. Whether it’s a weeknight treat or a special dessert for a celebration, this poke cake is always a crowd-pleaser. Imagine the looks on your friends’ faces when you bring this beauty to the table.
- Budget-Friendly: No need to go hunting for expensive ingredients. You probably have most of what you need already sitting in your pantry. Simple ingredients, big-time flavor.
- Quick and Easy: Don’t let the indulgent look of this cake fool you—it’s super easy to make! It’s got straightforward steps that anyone can follow, even if you’re not a seasoned baker.
- Customizable: You can tweak this cake to your heart’s desire! If you’re craving a little extra chocolate, go ahead and throw in some mini chocolate chips. Or maybe top it with crushed peanuts for an added crunch. The possibilities are endless!
- Crowd-Pleasing: Everyone will love this cake—kids, adults, chocoholics, and peanut butter lovers alike. It’s the kind of dessert that makes everyone gather around for seconds.

Disclosure: This post contains affiliate links.If you click and make a purchase, I may earn a small commission at no extra cost to you.
Ingredients
Here’s the magic of this cake—it’s made with a few simple ingredients that come together to create something utterly irresistible:
- Chocolate Cake Mix: The base of this cake is a moist, rich chocolate cake mix. It’s easy to work with and forms the perfect sponge for all the delicious filling.
- Eggs: These help make the cake light and fluffy while adding that rich, baked flavor we all love.
- Milk: Adds moisture and helps the cake mix come together beautifully. Plus, it’s a key ingredient for making the cake soft and tender.
- Peanut Butter: The star of the filling! It gives the cake its signature creamy, nutty flavor. Be sure to use smooth peanut butter for the best texture.
- Sweetened Condensed Milk: This adds a rich sweetness to the peanut butter filling and makes it ultra creamy.
- Chocolate Sauce: For that extra layer of indulgence, a little chocolate sauce drizzled on top of the cake after it’s baked brings even more chocolate goodness to the party.
- Whipped Topping: The fluffy whipped topping is the final touch, making this dessert light and smooth. It balances out the richness of the peanut butter and chocolate layers.
(Note: The full ingredients list, including measurements, is provided in the recipe card directly below.)
Instructions
Let’s dive into the steps to make this unforgettable Chocolate Peanut Butter Poke Cake:
1. Prepare the Cake
Start by preheating your oven to the temperature specified on the cake mix box. Grease and flour a 9×13-inch baking dish. Then, mix together your cake ingredients (cake mix, eggs, milk, and oil) in a large bowl, following the instructions on the box. Pour the batter into your prepared dish and bake until a toothpick inserted comes out clean—usually around 30-35 minutes. You want that perfect, moist base for the filling to soak into!
2. Poke the Cake
Once your cake is done and has cooled for a bit, use a fork or the handle of a wooden spoon to poke holes all over the surface of the cake. Don’t be shy—poke generously, because the peanut butter filling needs to soak in!
3. Make the Peanut Butter Filling
In a medium bowl, whisk together the smooth peanut butter and sweetened condensed milk until smooth and creamy. It should have a thick, pourable consistency. If it’s too thick, add a tiny bit of milk to loosen it up. Pour this delicious peanut butter mixture over the poked cake, making sure it fills up all the holes and seeps into every little crevice.
4. Add the Chocolate Sauce
Now comes the chocolatey goodness! Drizzle the chocolate sauce all over the top of the cake. The sauce will melt and create beautiful pockets of chocolate throughout. If you like, you can even swirl it gently with a spoon to mix it in just a little.
5. Top It Off with Whipped Topping
Spread the whipped topping evenly over the cake, covering it completely. This gives it that light, airy finish that balances out the rich, dense flavors of the cake and peanut butter.
6. Chill and Serve
Pop the cake in the fridge for at least an hour to let all the flavors meld together. This also helps the cake set and makes it even more refreshing when you serve it. Once chilled, slice it up and watch it disappear!
Nutrition Facts
Servings: [Number of servings]
Calories per serving: [Calorie count per serving]
Preparation Time
Prep Time: [Time to prepare ingredients]
Cook Time: [Time to cook or bake]
Total Time: [Total time needed]
How to Serve Chocolate Peanut Butter Poke Cake
This cake is sweet and indulgent enough to be served as a stand-alone treat, but here are a few ideas to take it to the next level:
- Fresh Fruit: Pair it with a side of fresh berries, like raspberries or strawberries, to cut through the richness and add a pop of color.
- Vanilla Ice Cream: A scoop of creamy vanilla ice cream on the side complements the peanut butter and chocolate perfectly. (You can’t go wrong with this pairing!)
- Chocolate Drizzle: If you’re a true chocolate lover, drizzle extra melted chocolate over the top of the whipped topping. It’s the ultimate finishing touch.
Additional Tips
Here are some extra tips to make sure your Chocolate Peanut Butter Poke Cake turns out perfectly:
- Make It in Advance: This cake gets better with time! Make it the night before your event and let it chill overnight. This allows the peanut butter filling to soak in even more and makes for an easier serving the next day.
- Storage Tips: Store leftovers (if you have any!) in an airtight container in the fridge for up to 3 days. The cake stays moist and delicious for a surprising amount of time.
- Customize the Flavors: If you’re craving a little more texture, sprinkle some chopped peanuts over the whipped topping or add mini chocolate chips to the cake batter.
- Double the Recipe: If you’re serving a large crowd, consider making two cakes. Just make sure you have enough space in your fridge to chill them!
FAQ Section
Q1: Can I use homemade chocolate cake for this recipe instead of a mix?
A1: Yes, you can absolutely use a homemade chocolate cake recipe if you prefer! Just make sure the cake is moist and sturdy enough to hold up to the poke cake method.
Q2: Can I make this cake ahead of time?
A2: Absolutely! This cake actually tastes even better the next day, so it’s perfect for prepping ahead of time. Just store it in the fridge, covered, until you’re ready to serve.
Q3: How do I store leftovers?
A3: Store leftovers in the fridge in an airtight container for up to 3 days. It will stay moist and delicious for a good while!
Q4: Can I freeze this cake?
A4: While poke cakes can be frozen, it’s best to freeze just the cake (before adding the filling and whipped topping). After it cools, wrap it tightly in plastic wrap and freeze for up to a month. When ready, thaw it, poke, fill, and top!
Q5: Can I use natural peanut butter?
A5: Sure! Just keep in mind that natural peanut butter may be a bit thinner and less creamy than processed peanut butter, so you might need to adjust the consistency with a tiny bit of milk.
Q6: Can I make this without whipped topping?
A6: Yes! If you’re not a fan of whipped topping, feel free to use homemade whipped cream instead. It adds an extra layer of deliciousness and feels just as indulgent.
Q7: How can I make this cake more decadent?
A7: Try adding mini chocolate chips to the batter or drizzling some caramel sauce over the top for an extra sweet twist!
This Chocolate Peanut Butter Poke Cake is the ultimate dessert for any chocolate and peanut butter lover. It’s simple to make, ridiculously delicious, and perfect for any occasion. You’re going to be obsessed with every bite!
Print
Chocolate Peanut Butter Poke Cake
- Total Time: 40 minutes
- Yield: 12 servings
- Diet: Vegetarian
Description
This Chocolate Peanut Butter Poke Cake is the ultimate dessert for peanut butter lovers! A rich, chocolate cake soaked in a creamy peanut butter and sweetened condensed milk mixture, topped with a fluffy peanut butter whipped topping. It’s a sweet, indulgent treat that will leave everyone asking for more!
Ingredients
For the Cake:
- 1 box chocolate cake mix (plus ingredients listed on the package)
- 1 cup creamy peanut butter, melted
- 1 can (14 oz) sweetened condensed milk
For the Topping:
- 1 container (8 oz) whipped topping (such as Cool Whip), thawed
- 1/2 cup peanut butter, melted
- 1/4 cup powdered sugar
- 1/2 cup mini chocolate chips or chocolate shavings (optional for garnish)
Instructions
- Bake the Chocolate Cake:
Prepare the chocolate cake mix according to the package instructions. Pour the batter into a greased 9×13-inch baking dish and bake as directed. Once the cake is fully baked, remove it from the oven and allow it to cool slightly. - Poke the Cake:
Using the handle of a wooden spoon, poke holes all over the cake, spacing them about 1 inch apart. - Add Peanut Butter and Condensed Milk:
Melt the peanut butter and mix it with the sweetened condensed milk. Pour this mixture evenly over the top of the cake, allowing it to soak into the holes. Let the cake cool completely. - Prepare the Topping:
In a medium bowl, fold the melted peanut butter into the thawed whipped topping until fully combined. Add the powdered sugar and stir until smooth and creamy. - Assemble the Cake:
Spread the peanut butter whipped topping evenly over the cooled cake. Sprinkle mini chocolate chips or chocolate shavings on top for garnish if desired. - Chill and Serve:
Refrigerate the cake for at least 2 hours before serving to allow the flavors to meld together. Slice and enjoy!
Notes
- Make-Ahead: This cake can be made a day in advance and stored in the fridge for easy prep ahead of time.
- Storage: Store leftovers in an airtight container in the fridge for up to 3 days.
- Garnish: Mini chocolate chips, chocolate shavings, or even crushed peanut butter cups make excellent garnishes for extra indulgence.
- Prep Time: 15 minutes
- Cook Time: 25 minutes
- Category: Dessert
- Method: Baking
- Cuisine: American
Nutrition
- Serving Size: 1 slice (1/12th of the cake)
- Calories: 450 kcal
- Sugar: 38g
- Sodium: 230mg
- Fat: 24g
- Saturated Fat: 8 g
- Unsaturated Fat: 14g
- Trans Fat: 0g
- Carbohydrates: 53g
- Fiber: 2g
- Protein: 6g
- Cholesterol: 30mg


