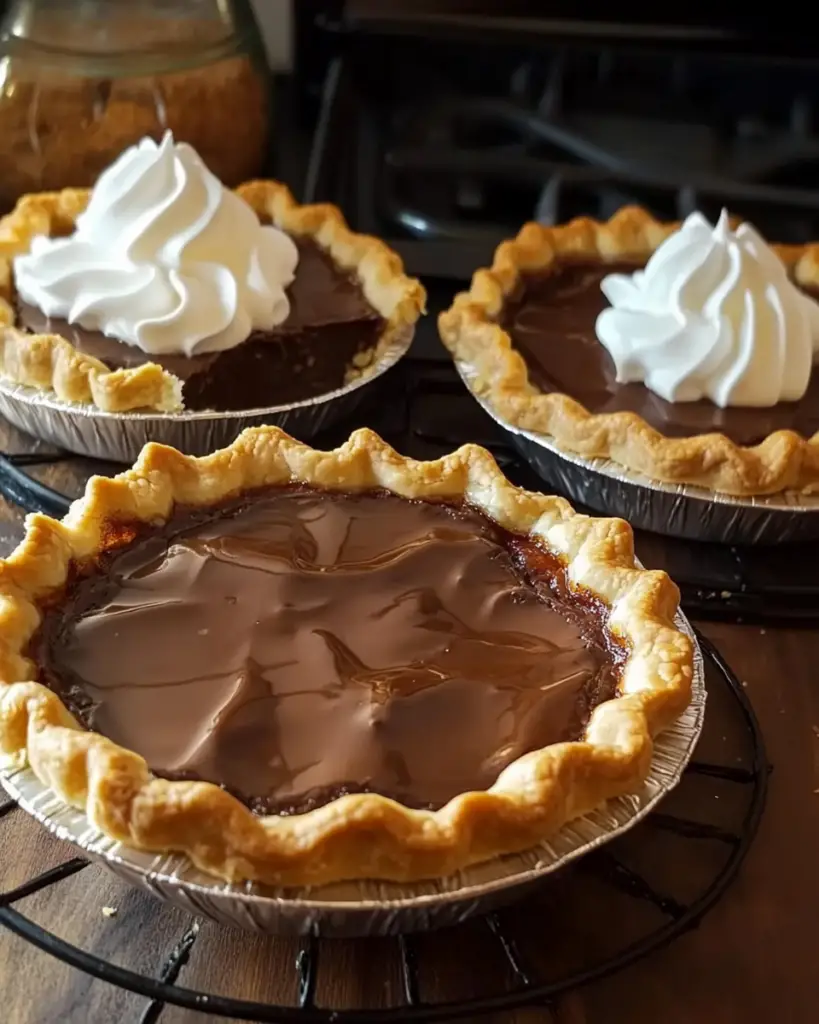
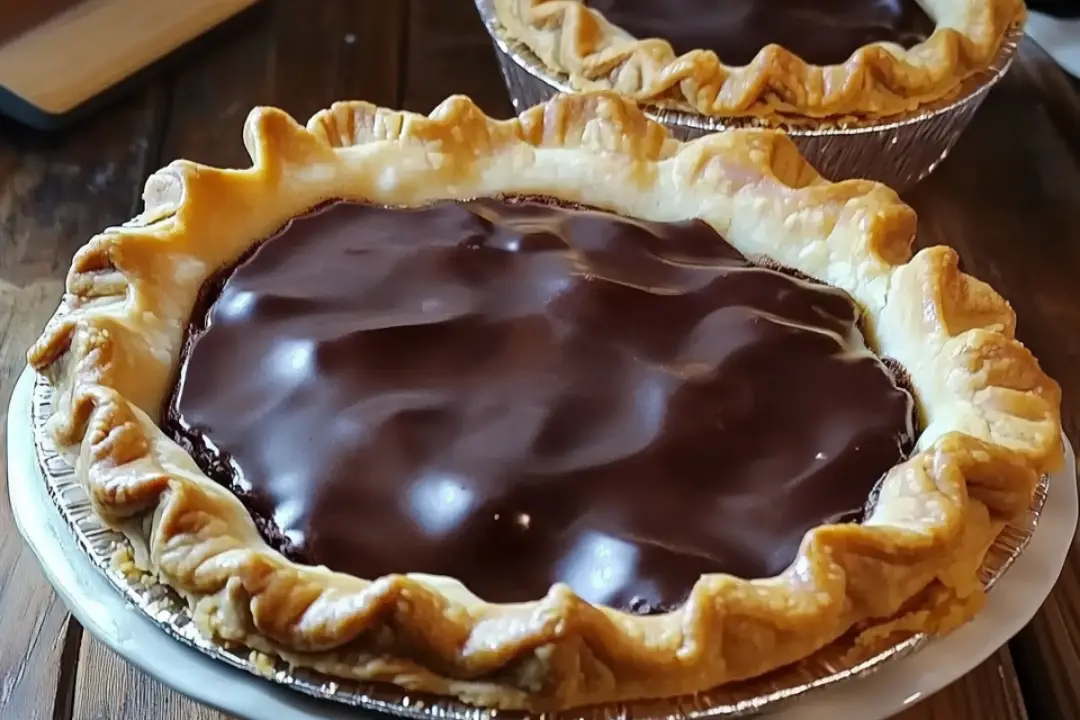
If you love chocolate (and who doesn’t?), then you’re going to adore these Chocolate Pies. Picture a rich, velvety chocolate filling nestled in a buttery, flaky crust, with each bite offering a little taste of heaven. Whether you’re baking for a special occasion or simply because you’re in the mood for something sweet, this dessert is guaranteed to hit the spot. These pies are so indulgent, they almost feel like a decadent hug for your taste buds. Trust me, you’ll want to make these over and over again!
Why You’ll Love Chocolate Pies
Let’s talk about why these chocolate pies are destined to be your new favorite treat.
Irresistible Flavor
The combination of creamy chocolate filling and a perfectly crisp crust is a classic that will never go out of style. You can’t beat the rich, decadent chocolate flavor that shines through every bite.
Easy to Make
Despite the elegant look, these pies are surprisingly simple to make. They’re perfect for beginners or anyone looking to whip up a delicious dessert without hours in the kitchen.
Perfect for Any Occasion
From holiday dinners to casual weeknight desserts, these chocolate pies fit every occasion. They’re elegant enough for special gatherings but comforting enough for everyday indulgence.
Customizable
Feel free to add your own twist! You could try topping these pies with whipped cream, fresh berries, or even a drizzle of caramel or peanut butter for a little extra something special.
Always a Crowd-Pleaser
Who can resist a slice of chocolate pie? These little beauties are always a hit with family and friends, whether they’re kids or adults. They’re the kind of dessert that makes everyone around the table say, “Wow!”

Disclosure: This post contains affiliate links.If you click and make a purchase, I may earn a small commission at no extra cost to you.
Ingredients
For these Chocolate Pies, you’ll need a few basic ingredients. Don’t worry—nothing too fancy here, but the combination creates a truly magic result. Here’s what you’ll need:
For the Pie Crust:
- Pre-made pie crusts: This saves time and makes it super easy, but feel free to make your own if you’re up for it.
For the Chocolate Filling:
- Milk: Whole milk is ideal here, for that rich and creamy texture.
- Heavy cream: Adds extra richness and smoothness to the filling.
- Sugar: For that perfect amount of sweetness.
- Cocoa powder: This is the secret to that deep chocolate flavor. Make sure you use unsweetened cocoa powder for the best taste.
- Eggs: They give the filling its silky texture and help it set as it bakes.
- Cornstarch: Helps thicken the filling to that perfect pudding-like consistency.
- Butter: A bit of butter for extra creaminess and shine.
- Vanilla extract: The vanilla balances out the chocolate flavor and adds warmth.
(Note: Exact measurements will be provided in the recipe card below.)
Instructions
Here’s how you’ll make these chocolate pies that’ll leave everyone wanting more:
Preheat the Oven
Start by preheating your oven to 350°F (175°C). This is important for making sure your pies bake evenly and turn out perfectly golden brown.
Prepare the Pie Crust
If you’re using pre-made pie crusts, place them in your mini pie pans or tart pans. If you’re feeling ambitious and making your own, roll it out and line your pans. Either way, bake them for about 10-12 minutes until lightly golden. Let them cool before adding the filling.
Make the Chocolate Filling
In a medium saucepan, combine milk, heavy cream, and sugar. Whisk it all together and heat over medium heat until it’s just starting to simmer, but not boiling. While it’s heating, whisk together the cocoa powder, cornstarch, and eggs in a separate bowl until smooth.
Once the milk mixture is hot, slowly pour about half of it into the egg mixture, whisking constantly to avoid scrambling the eggs. After that, gradually pour the egg mixture back into the saucepan with the remaining hot milk, whisking as you go. Cook the mixture on medium heat, stirring constantly, until it thickens, about 3-5 minutes.
Once it has thickened, remove the saucepan from the heat and stir in the butter and vanilla extract until fully melted and smooth.
Fill the Pies
Spoon the warm chocolate filling into the pre-baked pie crusts, dividing it evenly between your mini pies. Use the back of a spoon to smooth out the top. Allow the pies to cool on the counter for about 30 minutes to set.
Chill the Pies
Once the pies have cooled to room temperature, transfer them to the fridge to chill for at least 2 hours. This will help the filling set and become perfectly sliceable.
Serve and Enjoy
Once your pies have chilled, they’re ready to serve! Top with whipped cream, fresh berries, or a sprinkle of cocoa powder if you want to add a little extra something. The creamy, decadent filling paired with the crisp, buttery crust is a match made in dessert heaven.
Nutrition Facts
Servings: 6
Calories per serving: [Insert calorie count per serving]
Preparation Time
Prep Time: 30 minutes
Cook Time: 15 minutes
Chill Time: 2 hours
Total Time: 2 hours 45 minutes
How to Serve Chocolate Pies
These chocolate pies are fantastic on their own, but if you’re looking to elevate the experience, here are a few ways to serve them:
With Whipped Cream
Top each pie with a generous dollop of whipped cream for that classic chocolate-pie experience. You could even sprinkle a little cocoa powder or grated chocolate on top for an extra chocolatey kick.
With Fresh Berries
Fresh raspberries, strawberries, or blueberries pair beautifully with the rich chocolate filling. The tartness of the berries balances out the sweetness of the pie, making every bite even more delicious.
As Part of a Dessert Spread
Serve these chocolate pies as part of a dessert platter, alongside other sweets like cookies, brownies, and mini cheesecakes. It’s the ultimate way to please your sweet tooth!
With Ice Cream
For an over-the-top treat, serve your chocolate pies with a scoop of vanilla, chocolate, or raspberry sorbet. The cool, creamy ice cream will melt beautifully against the warm, rich chocolate pie.
Additional Tips
Here are a few tips to ensure your chocolate pies turn out perfectly every time:
Use Full-Fat Dairy
For the creamiest, richest filling, be sure to use whole milk and heavy cream. The fat content makes all the difference in achieving that dreamy texture.
Make Ahead
You can make these pies ahead of time and store them in the fridge for up to 3 days. Just cover them tightly with plastic wrap or foil to prevent the filling from drying out.
Don’t Overcook the Filling
Be sure to remove the filling from the heat once it’s thickened. Overcooking can make it grainy, and no one wants that!
Swap the Crust
Feel free to experiment with different crusts—graham cracker crust, chocolate crust, or even an Oreo crust could be great alternatives to the traditional pie crust.
FAQ Section
Q1: Can I use a store-bought pie crust?
A1: Yes, absolutely! A pre-made pie crust will save time and still give you a delicious result.
Q2: Can I make these pies without mini pie pans?
A2: Yes, you can use a regular pie dish instead, just adjust the baking time accordingly.
Q3: Can I freeze these pies?
A3: Yes, these pies freeze wonderfully! Just wrap them tightly in plastic wrap and foil and store them for up to 1 month. Thaw in the fridge before serving.
Q4: How do I prevent the filling from being lumpy?
A4: Make sure to whisk the egg mixture constantly when adding the hot milk, and be sure to stir the filling continuously while it’s cooking to avoid any lumps.
Q5: Can I make the filling without eggs?
A5: Yes! You can make an egg-free filling by using a cornstarch and milk-based mixture instead. The texture might vary slightly, but it will still be creamy and delicious.
Q6: How long do these pies need to chill?
A6: Let the pies chill in the fridge for at least 2 hours to allow the filling to fully set.
Q7: Can I add other flavors to the filling?
A7: Absolutely! You can experiment by adding a bit of coffee, orange zest, or even a splash of liqueur to the chocolate filling for a twist.
Q8: Can I top the pies with something other than whipped cream?
A8: Definitely! You could use a scoop of ice cream, fresh fruit, or even a drizzle of chocolate ganache for extra flair.
Q9: How do I store leftovers?
A9: Store leftover pies in the fridge for up to 3 days. Be sure to cover them tightly to keep them fresh.
Q10: Can I make the filling without using heavy cream?
A10: If you prefer a lighter filling, you can substitute heavy cream with more milk, but the texture may be a little less rich.
Conclusion
These Chocolate Pies are the perfect balance of rich, decadent chocolate and buttery, flaky crust. They’re an irresistible dessert that’s sure to become a favorite in your household. Whether you’re baking for a special occasion or just treating yourself to something sweet, this recipe has got you covered. Enjoy every indulgent bite!
Print
Chocolate Pies
- Total Time: 1 hour
- Yield: 6 servings 1x
Description
These homemade chocolate pies are the ultimate indulgence for chocolate lovers! With a rich, velvety chocolate filling and a buttery, flaky pie crust, these individual-sized pies are perfect for any occasion. Whether served warm or chilled, they’re sure to be a crowd-pleaser.
Ingredients
For the Pie Crust:
- 1 1/2 cups all-purpose flour
- 1/2 cup unsalted butter, cold and cubed
- 1/4 cup ice water (more if needed)
- 1/4 tsp salt
- 1 tsp granulated sugar (optional)
For the Chocolate Filling:
- 1 1/2 cups whole milk
- 1/2 cup heavy cream
- 1/2 cup granulated sugar
- 1/3 cup unsweetened cocoa powder
- 1 tbsp cornstarch
- 1/2 tsp salt
- 3 large egg yolks
- 2 tbsp unsalted butter
- 1 tsp vanilla extract
- 4 oz semisweet or bittersweet chocolate, chopped
For Topping (optional):
- Whipped cream or whipped topping
- Chocolate shavings or cocoa powder for garnish
Instructions
-
For the Pie Crust:
- Prepare the Pie Dough:
- In a large bowl, combine the flour, salt, and sugar (if using). Add the cold, cubed butter and use a pastry cutter or your fingers to cut the butter into the flour until the mixture resembles coarse crumbs with pea-sized pieces of butter.
- Gradually add the ice water, one tablespoon at a time, and mix until the dough begins to come together. Add more water if necessary.
- Chill the Dough:
- Form the dough into a disc, wrap it in plastic wrap, and refrigerate for at least 30 minutes to allow it to firm up.
- Roll Out the Dough:
- After the dough has chilled, roll it out on a floured surface until it’s about 1/8 inch thick. Cut out circles (about 5 inches in diameter) and gently press them into a muffin tin or individual pie tins.
- Bake the Crust:
- Preheat your oven to 375°F (190°C). Line the pie crusts with parchment paper and add pie weights or dried beans to keep them from puffing up. Bake for 10-12 minutes, then remove the parchment paper and weights and bake for another 5 minutes until golden and fully cooked. Let them cool while you make the filling.
For the Chocolate Filling:
- Make the Chocolate Custard:
- In a medium saucepan, whisk together the milk, heavy cream, granulated sugar, cocoa powder, cornstarch, and salt. Heat the mixture over medium heat, whisking constantly, until it begins to simmer and thicken.
- Temper the Eggs:
- In a separate bowl, whisk the egg yolks. Gradually pour a small amount of the hot milk mixture into the eggs while whisking constantly to temper them (this prevents curdling).
- Combine and Cook:
- Slowly pour the egg mixture back into the saucepan with the remaining milk mixture, whisking constantly. Continue cooking over medium heat for 3-5 minutes, until the custard has thickened to a pudding-like consistency.
- Add Chocolate and Butter:
- Remove the saucepan from the heat and stir in the chopped chocolate, butter, and vanilla extract until the chocolate has melted and the filling is smooth and glossy.
- Fill the Pies:
- Pour the chocolate filling into the cooled pie crusts. Let them cool at room temperature for 15-20 minutes, then refrigerate for at least 2 hours or until the filling is set.
For Topping:
- Once the pies have cooled and set, top them with whipped cream, chocolate shavings, or a dusting of cocoa powder.
- Prepare the Pie Dough:
Notes
- You can make the crust ahead of time and store it in the refrigerator for up to 2 days.
- For a richer filling, you can use all heavy cream instead of milk and cream combined.
- If you prefer a store-bought crust, that can be used as a shortcut.
- Prep Time: 40 minutes (plus chilling time for dough and cooling time for filling)
- Cook Time: 20 minutes
- Category: Dessert
- Method: Baking
- Cuisine: American
Nutrition
- Serving Size: 1 pie
- Calories: 320
- Sugar: 30
- Sodium: 180mg
- Fat: 22g
- Saturated Fat: 10g
- Unsaturated Fat: 9g
- Trans Fat: 0g
- Carbohydrates: 34g
- Fiber: 2g
- Protein: 4g
- Cholesterol: 100mg


