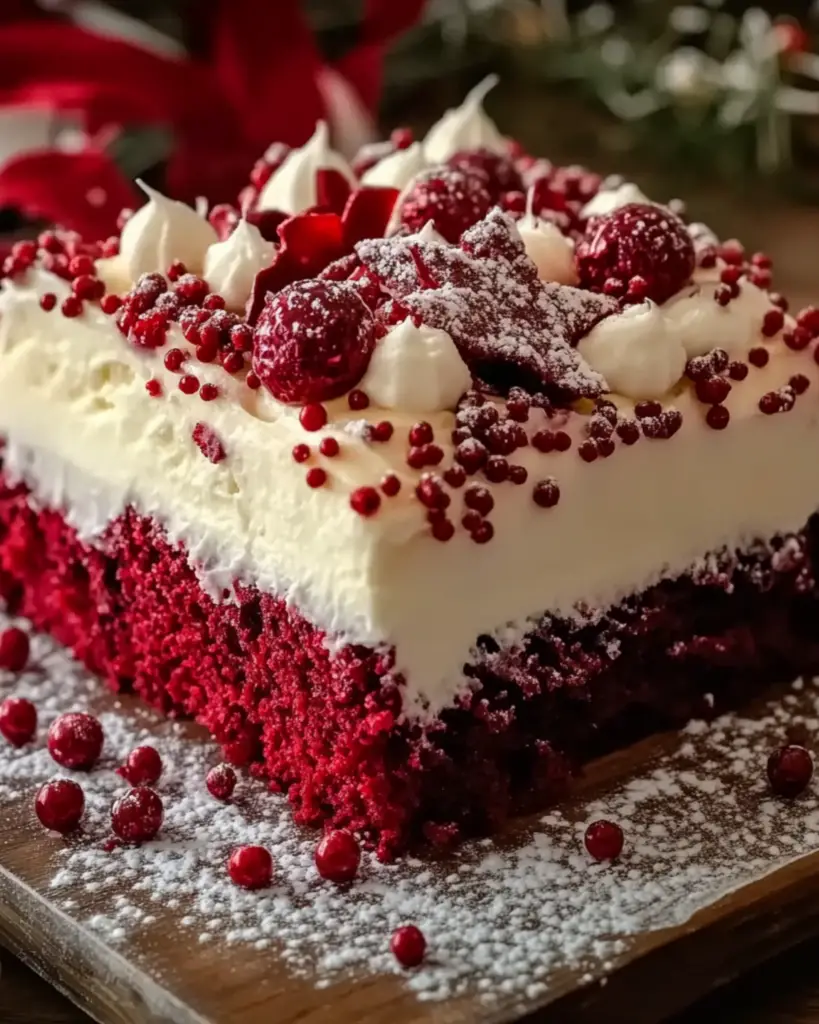
There’s something magical about Christmas desserts, and this Christmas Red Velvet Poke Cake is a true showstopper. Picture this: layers of moist, rich red velvet cake soaked with sweetened condensed milk and topped with a creamy whipped topping that’s just the right balance of sweet and light. The best part? It’s not just for looks—every bite is bursting with flavor. This cake is as festive as it is delicious, making it the perfect centerpiece for your holiday table. Trust me, this one’s going to be a crowd favorite!
Why You’ll Love Christmas Red Velvet Poke Cake
- Festive and Fun: With its vibrant red color and creamy white topping, this cake screams holiday cheer. It’s perfect for bringing a little extra joy to your Christmas celebrations.
- Easy to Make: While it looks impressive, this cake is actually super simple to make, and it requires minimal effort for maximum flavor.
- Moist and Flavorful: The poke cake technique ensures every bite is infused with the sweet condensed milk, making the cake extra moist and rich.
- Perfect for a Crowd: Whether you’re hosting a holiday party or bringing dessert to a family gathering, this cake serves a crowd and looks beautiful on any dessert table.
- Make-Ahead: You can prepare this cake a day or two in advance, so it’s perfect for busy holiday schedules.

Disclosure: This post contains affiliate links.If you click and make a purchase, I may earn a small commission at no extra cost to you.
Ingredients
Here’s everything you’ll need to create this decadent cake:
- Red Velvet Cake Mix: The base of this cake is a store-bought mix that makes the process easier while still giving you that classic red velvet flavor.
- Eggs: To help bind the ingredients together and give the cake structure.
- Vegetable Oil: For moisture and a tender texture.
- Buttermilk: A must for achieving the signature tangy flavor and soft crumb of red velvet cake.
- Sweetened Condensed Milk: The star ingredient for soaking the cake, giving it an irresistibly creamy texture.
- Whipped Topping: Light and fluffy, this will be the creamy layer on top, adding that signature contrast to the rich cake.
- Cream Cheese: For a tangy, creamy filling that makes every bite more indulgent.
- Powdered Sugar: To sweeten the whipped topping and cream cheese layer without making it too heavy.
- Red and Green Sprinkles: For a festive touch that makes this cake perfect for Christmas.
(Note: Full ingredient list with measurements can be found in the recipe card below.)
Instructions
Let’s dive into making this delicious Christmas Red Velvet Poke Cake:
1. Bake the Cake:
Start by preparing the red velvet cake mix according to the instructions on the box, but replace any water with buttermilk for extra flavor. Once mixed, pour the batter into a greased 9×13-inch baking dish and bake at the temperature specified on the box (typically 350°F). Once baked, remove the cake from the oven and let it cool for about 15 minutes.
2. Poke the Cake:
Once the cake has cooled slightly, use the end of a wooden spoon or a fork to poke holes all over the cake—about 1-inch apart. Make sure to poke deep enough so the milk can soak in, but not all the way through the cake.
3. Add the Sweetened Condensed Milk:
Pour the sweetened condensed milk evenly over the top of the cake, making sure to fill all the holes. This will create that signature moist, creamy texture and flavor. Let the cake sit for about 30 minutes so the milk can soak in fully.
4. Prepare the Topping:
While the cake is soaking, prepare the creamy topping. In a medium bowl, mix the whipped topping with cream cheese and powdered sugar. Beat until smooth and fluffy.
5. Top the Cake:
Once the cake has finished soaking, spread the whipped cream mixture evenly over the top of the cake, making sure it’s smooth and covers every inch.
6. Decorate:
Top the cake with festive red and green sprinkles to give it a holiday look. You can also add a few extra touches like holiday-themed sugar decorations or mini candy canes.
7. Chill and Serve:
Cover the cake with plastic wrap and refrigerate for at least 2 hours, or overnight for the best results. The longer it chills, the more the flavors will meld together.
Nutrition Facts
Servings: [Number of servings]
Calories per serving: [Calorie count per serving]
Preparation Time
Prep Time: 20 minutes
Cook Time: 30 minutes
Total Time: 50 minutes (plus chilling time)
How to Serve Christmas Red Velvet Poke Cake
- Perfect for Christmas Dinner: Serve this cake as the grand finale of your holiday meal. It’s rich enough to feel indulgent yet light enough to leave everyone wanting just one more bite.
- Holiday Parties: This cake is a hit at Christmas parties—whether it’s a family gathering, a potluck, or an office holiday party, it’s sure to be devoured.
- Gift a Slice: Pack slices in a cute container and give them to friends or neighbors for a festive homemade gift.
Additional Tips
- Make it More Indulgent: If you love chocolate, try drizzling some chocolate syrup or chocolate chips over the whipped topping for extra richness.
- Vegan or Dairy-Free Options: Swap the cake mix for a dairy-free or vegan red velvet mix, and use non-dairy whipped topping and cream cheese for a delicious dairy-free version.
- Storage Tips: Store leftovers in the fridge for up to 3-4 days. Make sure to cover it tightly with plastic wrap to keep it fresh.
- Add More Toppings: For even more flavor, you can add a sprinkle of chopped nuts or mini chocolate chips to the topping.
FAQ Section
Q1: Can I make this cake ahead of time?
A1: Yes! This cake actually gets better after sitting in the fridge for a few hours or even overnight. It’s perfect for making ahead of time.
Q2: Can I use homemade red velvet cake instead of a mix?
A2: Absolutely! If you have a favorite homemade red velvet cake recipe, feel free to use it. Just make sure to follow the same method of poking holes and adding the sweetened condensed milk.
Q3: Can I use whipped cream instead of whipped topping?
A3: Yes, you can! If you prefer real whipped cream, you can make your own using heavy cream and a bit of sugar. Just make sure it’s stabilized so it holds its shape.
Q4: How do I store leftovers?
A4: Store any leftover cake in the fridge, tightly covered with plastic wrap. It will stay fresh for up to 3-4 days.
Q5: Can I freeze this cake?
A5: While it’s best enjoyed fresh, you can freeze the cake before adding the whipped topping. Just cover it tightly and freeze for up to 2 months. Thaw in the fridge overnight and top with the whipped cream before serving.
This Christmas Red Velvet Poke Cake is everything you want in a holiday dessert—festive, flavorful, and utterly delicious. It’s the perfect way to spread holiday cheer and share something sweet with the ones you love. Enjoy every bite!
Print
Christmas Red Velvet Poke Cake
- Total Time: 0 hours
- Yield: 12 servings
- Diet: Vegetarian
Description
This indulgent Christmas Red Velvet Poke Cake is a deliciously festive dessert that combines the rich flavors of red velvet cake with creamy white chocolate. Topped with a light, fluffy cream cheese frosting and finished with colorful sprinkles, it’s the perfect treat for holiday celebrations!
Ingredients
For the Cake:
- 1 box red velvet cake mix (plus ingredients listed on the box, usually eggs, oil, and water)
- 1 (14 oz) can sweetened condensed milk
- 1 cup white chocolate chips, melted
For the Topping:
- 1 (8 oz) package cream cheese, softened
- 1 (8 oz) tub whipped topping (like Cool Whip), thawed
- 1 teaspoon vanilla extract
- ½ cup powdered sugar
- Festive sprinkles or holiday-themed decorations (optional)
Instructions
- Bake the Cake: Preheat your oven according to the instructions on the red velvet cake mix box. Prepare the cake batter by mixing the cake mix with eggs, oil, and water as directed. Pour the batter into a greased 9×13-inch baking dish and bake according to the package instructions. Once baked, remove the cake from the oven and let it cool for 10 minutes.
- Poke the Cake: Using the handle of a wooden spoon, poke holes all over the cake, making sure to space them evenly.
- Add Sweetened Condensed Milk and White Chocolate: In a small bowl, combine the sweetened condensed milk and melted white chocolate. Stir until smooth. Pour this mixture evenly over the cake, making sure it fills the holes. Allow the cake to absorb the mixture for at least 30 minutes, then let it cool completely.
- Prepare the Topping: In a medium bowl, beat the softened cream cheese until smooth. Add powdered sugar and vanilla extract, then beat again until well combined. Gently fold in the whipped topping until the mixture is light and fluffy.
- Frost the Cake: Spread the cream cheese mixture evenly over the cooled cake, creating a thick and smooth layer of frosting.
- Decorate: Top the cake with festive holiday sprinkles or decorations, such as red and green sprinkles or edible glitter. Chill the cake for at least 30 minutes before slicing and serving for the best results.
Notes
- For an extra peppermint twist, mix ½ teaspoon of peppermint extract into the whipped topping before spreading it on the cake.
- To add more festive flair, drizzle the cake with melted chocolate or red and green candy melts.
- This cake can be made a day in advance and stored in the fridge for best results.
- Prep Time: 15 minutes
- Cook Time: 30-35 minutes
- Category: Dessert
- Method: Baking
- Cuisine: American
Nutrition
- Serving Size: 1 slice (1/12 of the cake)
- Calories: 350
- Sugar: 36 g
- Sodium: 200mg
- Fat: 18g
- Saturated Fat: 9g
- Unsaturated Fat: 7 g
- Trans Fat: 0g
- Carbohydrates: 47g
- Fiber: 1g
- Protein: 3g
- Cholesterol: 35mg


