Introduction
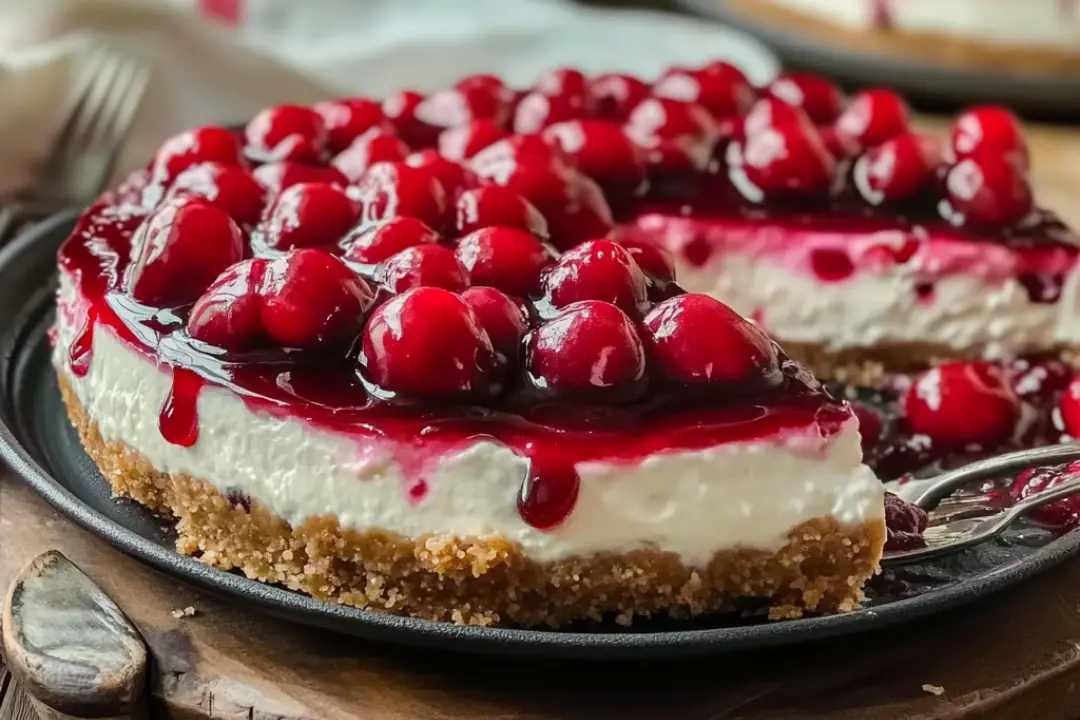
When it comes to easy, no-fuss desserts, the Easiest No-Bake Cherry Cheesecake is one of my absolute favorites. It’s quick to prepare, requires no baking, and yet delivers on taste and texture in a big way. The smooth and creamy cheesecake filling sits perfectly on a crunchy graham cracker crust, topped with sweet and tart cherry pie filling. Every time I make it, my family devours it in no time. My kids love the sweet cherries on top, and my husband always asks for seconds. This dessert has become a go-to in our house, especially for gatherings, holidays, or when we simply want a delicious treat without all the work. It’s the perfect dessert to impress guests without having to spend hours in the kitchen. Let’s dive into how you can make this easy and delicious no-bake cherry cheesecake!
Ingredients
For the Crust:
- 1 ½ cups graham cracker crumbs
- ½ cup unsalted butter, melted
- ¼ cup granulated sugar
For the Cheesecake Filling:
- 16 oz cream cheese, softened
- ¾ cup powdered sugar
- 1 tsp vanilla extract
- 1 cup heavy whipping cream
For the Topping:
- 1 can (21 oz) cherry pie filling
Instructions
- Prepare the Crust:
In a medium-sized bowl, mix together the graham cracker crumbs, melted butter, and granulated sugar. Stir until the mixture is well combined and all the crumbs are evenly coated in butter. Press the mixture into the bottom of a 9-inch springform pan, making sure it’s spread out evenly. Chill the crust in the refrigerator while preparing the cheesecake filling to help it set and firm up. - Make the Cheesecake Filling:
In a large mixing bowl, beat the softened cream cheese and powdered sugar together until smooth. Use an electric mixer for best results. Once the mixture is smooth, add the vanilla extract and mix until well combined. In a separate bowl, whip the heavy cream using a hand mixer or stand mixer until stiff peaks form. This step is crucial for getting the light and airy texture that no-bake cheesecakes are known for. Gently fold the whipped cream into the cream cheese mixture, being careful not to deflate the whipped cream. Continue folding until fully combined. The filling should be smooth, fluffy, and light. - Assemble the Cheesecake:
Pour the cheesecake filling over the chilled graham cracker crust, smoothing the top with a spatula. Try to make the top as even as possible for a professional-looking finish. Cover the cheesecake with plastic wrap and refrigerate for at least 4 hours or until fully set. For the best results, let it set overnight to ensure a firm, perfectly sliceable cheesecake. - Serve:
Once the cheesecake is set, top with the cherry pie filling just before serving. Spoon the cherries over the top, allowing some of the sauce to drizzle down the sides of the cheesecake for an added touch of flavor and visual appeal.
Nutrition Facts
Servings: 8-10
Calories per Serving: 310 kcal
Nutritional Breakdown (per serving):
- Calories: 310 kcal
- Sugar: 30g
- Sodium: 270mg
- Fat: 22g
- Saturated Fat: 13g
- Unsaturated Fat: 9g
- Trans Fat: 0g
- Carbohydrates: 30g
- Fiber: 1g
- Protein: 4g
- Cholesterol: 55mg
Preparation Time
- Prep Time: 15 minutes
- Chill Time: 4 hours
- Total Time: 4 hours 15 minutes
How to Serve
Here are some ideas for serving your No-Bake Cherry Cheesecake:
- With a Garnish: Add a dollop of whipped cream or a sprig of mint for an elegant touch.
- With a Drink: Pair the cheesecake with a cold glass of milk, iced coffee, or even a glass of champagne for a festive treat.
- Mini Cheesecakes: Make individual servings by using a muffin tin or mini springform pans. This makes for a cute presentation and easy serving at parties.
- With Fresh Fruit: In addition to cherry pie filling, you can top the cheesecake with fresh berries like strawberries, blueberries, or raspberries for a fresh and colorful twist.
Additional Tips
- Use Room Temperature Cream Cheese: For a smooth and lump-free cheesecake filling, make sure your cream cheese is softened to room temperature before mixing it.
- Whip the Cream Properly: When whipping the heavy cream, make sure it reaches stiff peaks. This will give your cheesecake filling the light and airy texture it’s known for.
- Use a Springform Pan: A springform pan is the best option for no-bake cheesecakes because it allows you to easily remove the cheesecake from the pan without damaging it.
- Let It Set Overnight: While 4 hours of chilling is the minimum, letting the cheesecake sit overnight will give it the best texture and make it easier to slice.
- Customize the Topping: You can use different toppings for variety. Fresh fruit, caramel sauce, or even chocolate ganache can be a great addition to the cheesecake.
Recipe Variations
- Berry Cheesecake: Instead of cherry pie filling, top the cheesecake with mixed berries or a berry compote for a fresh and tangy variation.
- Chocolate Cheesecake: Add 1/4 cup of cocoa powder or melted chocolate to the cheesecake filling to create a chocolate-flavored base. You can also drizzle chocolate sauce over the top for an extra indulgent treat.
- Lemon Cheesecake: Add lemon zest and a bit of lemon juice to the cheesecake filling to give it a refreshing citrus flavor. Top with lemon curd or fresh lemon slices.
- Peanut Butter Cheesecake: Stir in peanut butter into the cheesecake filling and top with crushed peanuts or a drizzle of chocolate syrup for a peanut butter-chocolate combo.
- Tropical Cheesecake: Top the cheesecake with a mix of tropical fruits like pineapple, mango, and kiwi for a sunny, vacation-inspired twist.
Serving Suggestions
- For Family Gatherings: This no-bake cheesecake is perfect for a family get-together, offering a crowd-pleasing dessert that’s easy to make and requires minimal effort.
- As a Holiday Dessert: Serve this cheesecake during holidays like Thanksgiving, Christmas, or Easter. The cherry topping is perfect for adding a festive touch to any celebration.
- For Parties: Cut the cheesecake into smaller slices and serve at parties, potlucks, or BBQs. Everyone will love the creamy texture and sweet, tart topping.
- As an Afternoon Snack: Pair a slice of this cheesecake with your afternoon coffee for a delightful pick-me-up.
Freezing and Storage
- Freezing: This cheesecake freezes well. If you have leftovers, you can wrap individual slices in plastic wrap and store them in an airtight container in the freezer for up to 3 months. Let it thaw in the refrigerator for a few hours before serving.
- Storage: Store the cheesecake in the refrigerator in an airtight container for up to 5 days. The topping may soften slightly, but the cheesecake will remain fresh and delicious.
FAQ Section
- Can I make this cheesecake ahead of time?
Yes, this cheesecake is perfect for making ahead of time. Prepare it the day before and let it chill overnight for best results. - Can I use a different crust?
Yes, you can use a different crust, such as an Oreo cookie crust or a gluten-free crust, if you prefer. - Can I use whipped topping instead of heavy cream?
You can use whipped topping (like Cool Whip), but whipping your own heavy cream gives the cheesecake a fresher taste and a lighter, fluffier texture. - Can I use a different topping instead of cherry pie filling?
Absolutely! You can use fresh fruit, a fruit compote, or other canned pie fillings such as strawberry, blueberry, or raspberry. - Is this cheesecake suitable for vegetarians?
Yes, this cheesecake is vegetarian-friendly, but it does contain dairy products. - Can I use non-dairy alternatives?
Yes, you can substitute the cream cheese with a non-dairy cream cheese and the heavy cream with coconut cream or another plant-based option. - How do I prevent the crust from sticking?
Be sure to press the crust firmly into the pan, and consider using a non-stick springform pan. If necessary, line the pan with parchment paper for extra protection. - How can I make the cheesecake sweeter?
If you prefer a sweeter cheesecake, add a little more powdered sugar to the filling to taste. - What can I do if the cheesecake filling isn’t thick enough?
If the filling is too soft, you can add a little more powdered sugar or whip the heavy cream a bit longer to make it firmer. - Can I make mini cheesecakes with this recipe?
Yes
, you can make individual mini cheesecakes by using muffin tins with liners or small tart pans. The chill time will be shorter for mini versions.
Conclusion
The Easiest No-Bake Cherry Cheesecake is a simple yet delicious dessert that’s sure to impress. It’s the perfect balance of creamy cheesecake, crunchy graham cracker crust, and sweet, tart cherry topping. Whether you’re serving it for a holiday, a special occasion, or just as a treat for the family, this cheesecake is always a hit. Its ease of preparation and wonderful flavor make it an essential recipe for anyone who loves cheesecake. Enjoy!
Print
Easiest No-Bake Cherry Cheesecake
- Total Time: 4 hours 15 minutes
- Yield: 8–10 servings 1x
- Diet: Vegetarian
Description
This Easiest No-Bake Cherry Cheesecake is a quick and delicious dessert that’s perfect for any occasion. With a buttery graham cracker crust, a smooth and creamy cheesecake filling, and a sweet cherry topping, this no-bake treat is sure to be a crowd-pleaser. It’s simple to make, requires minimal ingredients, and can be made ahead of time, making it an ideal choice for busy hosts and dessert lovers alike.
Ingredients
For the Crust:
- 1 ½ cups graham cracker crumbs
- ½ cup unsalted butter, melted
- ¼ cup granulated sugar
For the Cheesecake Filling:
- 16 oz cream cheese, softened
- ¾ cup powdered sugar
- 1 tsp vanilla extract
- 1 cup heavy whipping cream
For the Topping:
- 1 can (21 oz) cherry pie filling
Instructions
- Prepare the Crust:
In a medium bowl, mix the graham cracker crumbs, melted butter, and granulated sugar until well combined.
Press the mixture into the bottom of a 9-inch springform pan, making sure the crust is even. Chill in the refrigerator while you prepare the cheesecake filling. - Make the Cheesecake Filling:
In a large bowl, beat the softened cream cheese and powdered sugar together until smooth and creamy.
Add the vanilla extract and mix until fully combined.In a separate bowl, whip the heavy whipping cream until stiff peaks form. Gently fold the whipped cream into the cream cheese mixture until well combined.
- Assemble the Cheesecake:
Pour the cheesecake filling over the chilled graham cracker crust, smoothing the top with a spatula.
Refrigerate for at least 4 hours or until the cheesecake is set (overnight is best for a firmer consistency). - Serve:
Just before serving, top with the cherry pie filling.
Slice, serve, and enjoy!
Notes
- Chill Time: For best results, refrigerate the cheesecake overnight to allow it to set properly.
- Crust Options: You can substitute the graham cracker crumbs with crushed Oreos or vanilla wafer cookies for a different flavor.
- Topping Variations: Try different toppings like fresh fruit, chocolate ganache, or fruit compote to customize the flavor.
- Non-Dairy: You can make a dairy-free version by using a non-dairy cream cheese and whipped coconut cream in place of the heavy cream.
- Prep Time: 15 minutes
- Cook Time: 4 hours
- Category: Dessert
- Method: No-Bake
- Cuisine: American
Nutrition
- Serving Size: 1 slice
- Calories: 310
- Sugar: 30g
- Sodium: 270mg
- Fat: 22g
- Saturated Fat: 13g
- Unsaturated Fat: 9g
- Trans Fat: 0g
- Carbohydrates: 30g
- Fiber: 1g
- Protein: 4g
- Cholesterol: 55mg


