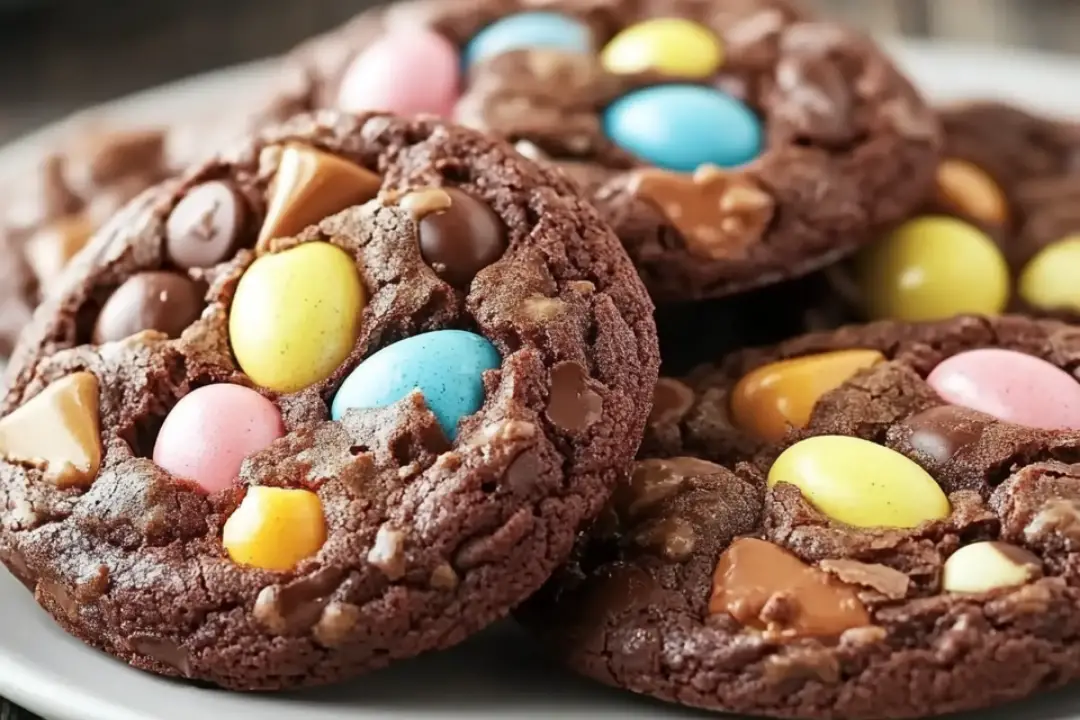
Looking for the perfect dessert to celebrate Easter? Easter Egg Brownie Cookies are the answer! These little gems combine the rich, fudgy goodness of a brownie with the chewy texture of a cookie, all wrapped up in an Easter-themed, egg-shaped surprise. Imagine biting into a soft, chocolatey cookie and discovering pastel-colored candy-coated Easter eggs tucked inside. It’s like a fun Easter egg hunt, but with extra sweetness! These are easy to make, irresistibly delicious, and will have everyone at the table hopping for joy!
Why You’ll Love Easter Egg Brownie Cookies
- Fudgy & Chewy: The perfect balance of brownie and cookie texture—chewy, gooey, and oh-so-chocolatey.
- Fun & Festive: Perfect for Easter celebrations, these cookies bring some fun and color to your table.
- Customizable: Feel free to mix things up with different types of candy or chocolate eggs, or even add a handful of mini chocolate chips for an extra dose of chocolatey goodness.
- Quick & Easy: With simple ingredients and straightforward steps, these cookies are a breeze to make!

Disclosure: This post contains affiliate links.If you click and make a purchase, I may earn a small commission at no extra cost to you.
Ingredients
Here’s what you’ll need to make these delicious Easter Egg Brownie Cookies:
For the Cookies:
- Butter: Softened, for a rich, tender texture.
- Granulated Sugar: To add sweetness and help create a chewy cookie.
- Eggs: For binding the ingredients together and creating that chewy texture.
- Vanilla Extract: For a warm, comforting flavor base.
- Cocoa Powder: The foundation for that fudgy brownie texture.
- All-Purpose Flour: To give structure to the cookies.
- Baking Powder: For lift and lightness in the cookies.
- Salt: A pinch to balance the sweetness and bring out the chocolate flavor.
- Mini Easter Eggs: Candy-coated chocolate eggs in pastel colors, which will be tucked inside the cookies for a fun Easter surprise.
For the Topping (Optional):
- Powdered Sugar: To dust over the cookies for a pretty finishing touch.
Instructions
Step 1: Preheat the Oven
Preheat your oven to 350°F (175°C). Line a baking sheet with parchment paper or a silicone baking mat to prevent the cookies from sticking.
Step 2: Prepare the Cookie Dough
In a large mixing bowl, cream together the softened butter and granulated sugar until light and fluffy, about 2-3 minutes. Add the eggs, one at a time, mixing well after each addition. Stir in the vanilla extract.
In a separate bowl, whisk together the cocoa powder, flour, baking powder, and salt. Gradually add the dry ingredients to the wet ingredients, mixing until just combined. Be careful not to overmix the dough.
Step 3: Shape the Cookies
Scoop out tablespoon-sized portions of dough and roll them into balls. Flatten each dough ball slightly, then press a few mini Easter eggs into the center of each cookie. Gently fold the dough around the eggs, sealing them inside. This will give you the fun surprise when you bite into the cookie later!
Step 4: Bake the Cookies
Place the cookie dough balls onto the prepared baking sheet, leaving a little space between each one. Bake for 10-12 minutes, or until the edges of the cookies are set but the centers are still slightly soft. They will firm up as they cool.
Step 5: Cool and Serve
Allow the cookies to cool on the baking sheet for a few minutes before transferring them to a wire rack to cool completely. If you’d like, you can dust the cookies with a little powdered sugar for a sweet finishing touch.
Step 6: Enjoy!
Serve these Easter Egg Brownie Cookies with a glass of milk or your favorite beverage. These cookies are perfect for an Easter party, an afternoon treat, or just a fun way to celebrate the season.
Nutrition Facts
Note: These values are approximate and based on standard ingredients.
Servings: 12 cookies
Calories per cookie: 150-180 (depending on size and specific ingredients used)
How to Serve Easter Egg Brownie Cookies
- With Milk: These cookies go perfectly with a cold glass of milk. The milk complements the fudgy texture and balances the sweetness of the cookies.
- As Part of a Dessert Table: Serve these cookies as part of a fun Easter dessert spread along with other treats like cupcakes, brownies, or fruit.
- For an Easter Basket: Add these cookies to your Easter basket as a sweet homemade gift.
Additional Tips
- Use Different Eggs: If you can’t find mini Easter eggs, you can use regular-sized candy-coated chocolate eggs or even M&M’s in pastel colors for a fun twist.
- Chill the Dough: If you find the dough too sticky to handle, chill it in the refrigerator for 30 minutes before rolling it into balls. This will make it easier to shape the cookies.
- Make Ahead: The dough can be made ahead of time and stored in the refrigerator for up to 2 days, or frozen for up to 3 months. Just thaw before baking.
- Make It Gluten-Free: Substitute the all-purpose flour with a gluten-free flour blend to make these cookies gluten-free.
FAQ Section
Q1: Can I use other types of candy instead of mini Easter eggs?
A1: Yes! You can use any candy you like—chocolate-covered candies, pastel M&M’s, or even chopped chocolate for a different flavor.
Q2: Can I freeze these cookies?
A2: Absolutely! You can freeze the cookie dough before baking, then bake directly from the freezer when you’re ready. They’ll bake in a few extra minutes.
Q3: How do I store leftover cookies?
A3: Store the cookies in an airtight container at room temperature for up to 5 days. If you want to keep them longer, you can freeze them for up to 3 months.
Q4: Can I make the dough ahead of time?
A4: Yes, you can prepare the dough in advance and refrigerate it for up to 2 days before baking. It will be easier to handle if it’s chilled.
Q5: Can I add more mix-ins to the dough?
A5: Definitely! You can mix in mini chocolate chips, chopped nuts, or even swirls of caramel if you like.
Q6: Can I use regular-sized Easter eggs?
A6: Yes, you can use regular-sized Easter eggs, but you may want to break them into smaller pieces so they fit better inside the cookies.
Q7: How do I know when the cookies are done baking?
A7: The cookies should look slightly set on the edges but still soft in the center. They will continue to cook as they cool.
Q8: Can I add frosting to these cookies?
A8: Absolutely! You can drizzle them with white chocolate or cream cheese frosting for an extra decadent treat.
Q9: Can I make these cookies without eggs?
A9: Yes! You can substitute the eggs with flax eggs (1 tablespoon ground flaxseed mixed with 3 tablespoons water per egg) or another egg substitute.
Q10: How can I make these cookies more festive?
A10: Add colorful sprinkles or extra pastel candies on top before baking to make them even more fun and festive!
Conclusion
These Easter Egg Brownie Cookies are the perfect combination of two beloved treats—brownies and cookies—wrapped up in a cute and colorful Easter package. Whether you’re baking for a holiday gathering or just want to surprise your loved ones with something special, these cookies are sure to delight. Soft, fudgy, and full of chocolatey goodness with a fun candy surprise inside—what’s not to love? Happy baking and happy Easter!
Print
Easter Egg Brownie Cookies
- Total Time: 0 hours
- Yield: 18–24 cookies 1x
Description
These Easter Egg Brownie Cookies are a fun and festive treat, combining the fudgy richness of brownies with the chewy texture of cookies. Packed with colorful mini Easter eggs, they’re the perfect cookie to celebrate the holiday and delight your family and friends.
Ingredients
For the Cookies:
- 1/2 cup unsalted butter, melted
- 1 cup granulated sugar
- 1/2 cup brown sugar, packed
- 2 large eggs
- 1 tsp vanilla extract
- 1/2 cup unsweetened cocoa powder
- 1 cup all-purpose flour
- 1/2 tsp baking powder
- 1/4 tsp salt
- 1/2 cup mini chocolate chips (optional)
- 1 cup mini Easter eggs (such as Cadbury Mini Eggs or chocolate-coated candy eggs), chopped if desired
For Topping:
- Additional mini Easter eggs (whole or chopped) for topping (optional)
Instructions
- Preheat the Oven: Preheat your oven to 350°F (175°C). Line two baking sheets with parchment paper or silicone baking mats.
- Mix Wet Ingredients: In a large bowl, whisk together the melted butter, granulated sugar, and brown sugar until smooth. Add the eggs, one at a time, and beat until well combined. Stir in the vanilla extract.
- Add Dry Ingredients: In a separate bowl, whisk together the cocoa powder, flour, baking powder, and salt. Gradually add the dry ingredients to the wet ingredients and mix until just combined.
- Fold in the Chocolate Chips and Easter Eggs: Gently fold in the mini chocolate chips (if using) and the chopped mini Easter eggs. If you prefer whole Easter eggs, you can reserve them to place on top of each cookie.
- Scoop the Dough: Using a cookie scoop or tablespoon, scoop dough portions and roll them into balls. Place them about 2 inches apart on the prepared baking sheets. Press additional mini Easter eggs into the tops of the dough balls for a festive touch.
- Bake the Cookies: Bake the cookies for 9-11 minutes, or until the edges are set but the centers are still slightly soft. Do not overbake, as the cookies will firm up as they cool.
- Cool the Cookies: Let the cookies cool on the baking sheet for 5 minutes, then transfer them to a wire rack to cool completely.
- Serve: Enjoy these fun and chewy Easter Egg Brownie Cookies with a glass of milk or as a sweet treat at your Easter celebration!
Notes
- If you want a more fudgy texture, slightly underbake the cookies and let them set on the sheet for a few extra minutes.
- You can use any type of candy-coated mini eggs, including chocolate or even pastel-colored ones, to suit your preference.
- For a more vibrant look, you can sprinkle some colored sugar on top before baking for a fun effect.
- Prep Time: 15 minutes
- Cook Time: 9-11 minutes
- Category: Dessert
- Method: Baking
- Cuisine: American
Nutrition
- Serving Size: 1 cookie (out of 20)
- Calories: 150
- Sugar: 16g
- Sodium: 45mg
- Fat: 7g
- Saturated Fat: 4g
- Unsaturated Fat: 3g
- Trans Fat: 0g
- Carbohydrates: 22g
- Fiber: 1g
- Protein: 2g
- Cholesterol: 30mg


