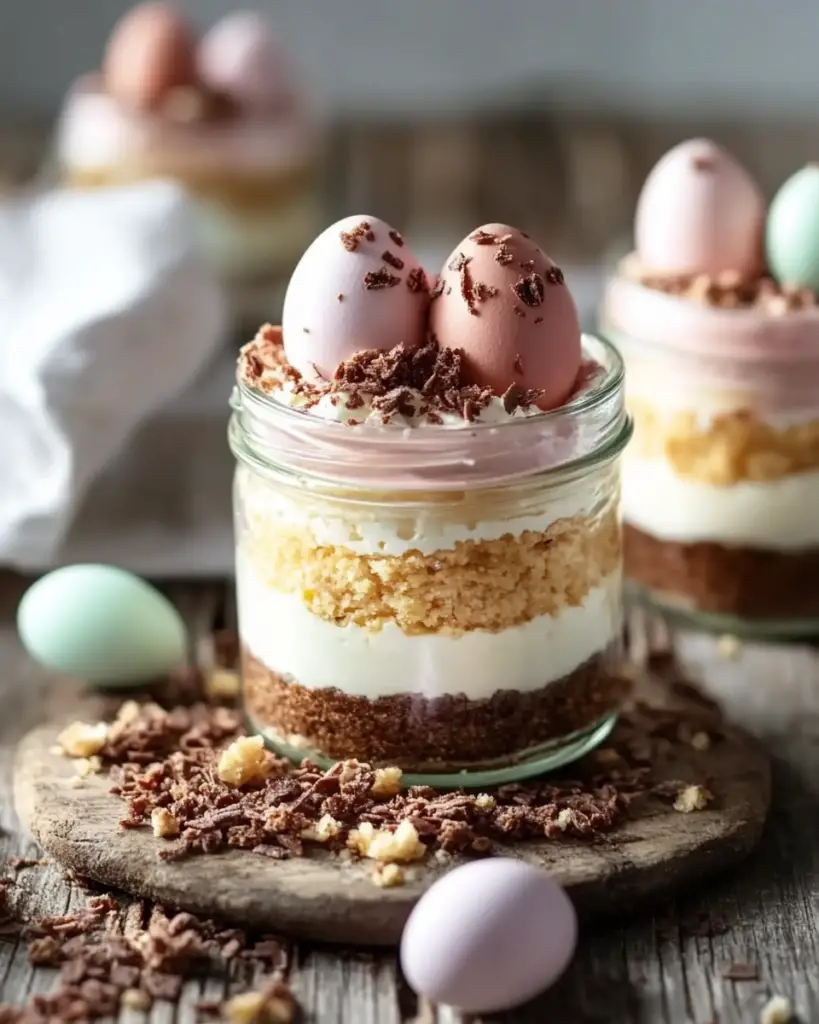
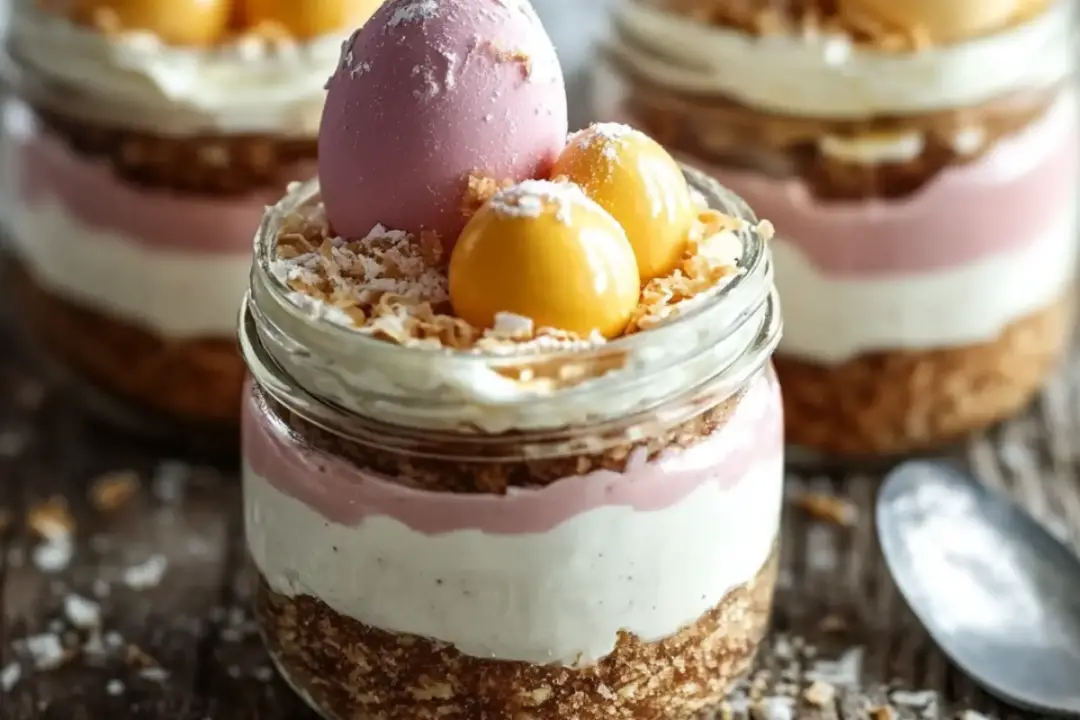
Imagine a dessert that feels as fun and festive as Easter itself—Easter Egg Cheesecake Jars. Picture creamy, dreamy cheesecake layered in individual jars, topped with colorful mini Easter eggs, and finished with a sweet, tangy finish that’s perfectly balanced. These little desserts are as cute as they are delicious. Whether you’re hosting an Easter brunch or looking for a fun treat to make with the kids, these cheesecake jars are sure to steal the show. The best part? They’re so easy to make, you’ll wonder why you haven’t been making desserts in jars all along. Trust me, once you try these, you’ll be hooked.
Why You’ll Love Easter Egg Cheesecake Jars
Let me tell you, these cheesecake jars are about more than just their appearance (though they are adorable). Here’s why they’re a game-changer:
Effortlessly Festive
With vibrant Easter egg candies on top and layers of cheesecake filling in every jar, these desserts are a festive treat that brings a smile to everyone’s face. They’re the perfect way to make Easter a little sweeter.
No-Bake and Simple
You don’t need to turn on the oven for these little beauties. Just mix up the cheesecake filling, layer it, and let the refrigerator do the rest. It’s quick, easy, and minimal fuss—ideal for busy cooks.
Perfectly Portion-Controlled
These individual jars make it easy to enjoy just the right amount of dessert, and they’re a great way to serve guests without the mess. No need for cutting slices—just grab a jar and dig in!
Customizable for Your Taste
Love chocolate? Add some cocoa powder or crushed cookies to the crust. Prefer a fruitier flavor? Top with fresh berries or a drizzle of raspberry sauce. The possibilities are endless, so you can make these jars as unique as you want.
Crowd-Pleasing
They’re the kind of dessert everyone will be talking about—both kids and adults will love the creamy filling and the adorable presentation. Plus, they’re super easy to take to a gathering or serve at a picnic!

Disclosure: This post contains affiliate links.If you click and make a purchase, I may earn a small commission at no extra cost to you.
Ingredients
Here’s the magic that makes these Easter Egg Cheesecake Jars come together:
Graham Cracker Crumbs
These form the perfect base for the cheesecake filling. They add just the right amount of crunch and sweetness to balance the creamy layers.
Butter
Melted butter helps bind the graham cracker crumbs together, creating that perfect, buttery crust.
Cream Cheese
The heart of any cheesecake! Cream cheese gives the filling its rich and creamy texture. Be sure to use softened cream cheese for the smoothest results.
Powdered Sugar
Powdered sugar sweetens the filling while keeping it light and airy. It dissolves beautifully into the cream cheese, making the texture flawless.
Vanilla Extract
A touch of vanilla extract adds a warm, sweet flavor that enhances the cheesecake’s richness without overpowering it.
Heavy Cream
For that luscious, whipped texture, heavy cream is essential. It helps create the perfect, silky smooth filling.
Easter Egg Candies
This is where the fun comes in! Mini Easter egg candies (chocolate, pastel-colored, or even caramel) make the perfect topping for these jars, adding color, crunch, and a touch of sweetness.
(Note: The full ingredients list, including measurements, is provided in the recipe card directly below.)
Instructions
Let’s make this adorable dessert come to life:
Prepare the Crust
In a medium bowl, combine the graham cracker crumbs and melted butter. Stir until the crumbs are fully coated in butter. Spoon about a tablespoon of the graham cracker mixture into the bottom of each jar and press it down gently to create an even, firm base.
Make the Cheesecake Filling
In a large bowl, beat the softened cream cheese with the powdered sugar and vanilla extract until smooth and creamy. Gradually add the heavy cream and continue beating until the mixture becomes thick and airy. The texture should be light and fluffy, with no lumps.
Layer the Jars
Spoon the cheesecake filling over the graham cracker crust in each jar, filling them almost to the top. Use a spatula to smooth the top, making it as even as possible.
Chill the Cheesecake Jars
Cover the jars with lids or plastic wrap and refrigerate for at least 2 hours, or until the filling has set and the flavors have had time to meld together. If you’re in a pinch, chilling for 30 minutes will still give you a nice result, but the longer, the better!
Add the Toppings
Once the cheesecake has set, it’s time for the fun part—topping your jars with Easter egg candies! Place a few mini Easter eggs on top of each jar. Feel free to get creative and arrange them however you like—whether you want to group them in the center or scatter them for a whimsical look.
Serve and Enjoy
Serve these adorable jars chilled, and get ready for the “oohs” and “aahs” when your guests dig in. They’re perfect for sharing, or you can enjoy one all to yourself!
(Note: The full instructions, including specific times, are provided in the recipe card directly below.)
Nutrition Facts
Servings: 8
Calories per serving: 300 kcal
Total Fat: 20g
Saturated Fat: 12g
Cholesterol: 60mg
Sodium: 120mg
Total Carbohydrates: 27g
Dietary Fiber: 1g
Sugars: 20g
Protein: 3g
Preparation Time
Prep Time: 20 minutes
Chill Time: 2 hours
Total Time: 2 hours 20 minutes
How to Serve Easter Egg Cheesecake Jars
These Easter Egg Cheesecake Jars are a sweet treat on their own, but if you want to make them extra special, here are a few ideas:
Fresh Fruit
Top the jars with fresh berries like raspberries, strawberries, or blueberries for a burst of color and freshness that complements the creamy filling.
Whipped Cream
Add an extra swirl of whipped cream on top for a light, airy finish that’s perfect with the rich cheesecake.
Chocolate Sauce
Drizzle with a little bit of chocolate sauce or caramel for a decadent, indulgent touch.
Easter-themed Sprinkles
Add some pastel sprinkles or edible glitter on top for even more festive flair. It’s all about the fun vibes!
Pair with Coffee or Tea
These little cheesecakes pair perfectly with a cup of coffee or a refreshing iced tea. It’s the kind of dessert you’ll want to sip and savor slowly.
Additional Tips
- Use Mini Jars: If you have mini mason jars or small glass containers, they make this recipe even more adorable. Plus, they’re the perfect portion size!
- Add Layers: You can get creative and add layers of fruit puree or chocolate ganache between the cheesecake filling layers for even more flavor and texture.
- Make Ahead: These cheesecake jars are perfect for making ahead of time. They’ll last for up to 3 days in the fridge, so they’re great for prepping the day before a party.
- Customize the Toppings: You can swap out the Easter eggs for other seasonal candies, like jellybeans or chocolate bunnies, for a fun twist.
FAQ Section
Q1: Can I use regular cream cheese instead of softened cream cheese?
A1: Yes, just make sure to let your cream cheese sit at room temperature for about 30 minutes so it’s soft and easy to blend.
Q2: Can I make these jars without the graham cracker crust?
A2: Definitely! You can skip the crust for a lighter, gluten-free version or try an alternative like crushed cookies or oats.
Q3: Can I freeze these cheesecake jars?
A3: Yes, you can freeze the jars before adding the toppings. Just make sure they’re tightly sealed. Thaw them in the fridge before serving and add the Easter egg candies just before serving.
Q4: Can I use whipped cream instead of heavy cream for the filling?
A4: You can use whipped cream, but it won’t give the same rich texture. Heavy cream helps to create that thick, creamy filling, while whipped cream is lighter and fluffier.
Q5: Can I use a different candy topping?
A5: Absolutely! Any candy can work here—chocolate chips, jelly beans, or even mini marshmallows would be great substitutes.
Q6: How long do these cheesecake jars last in the fridge?
A6: They’ll last up to 3 days in the fridge. After that, the filling may start to lose its texture.
Q7: Can I use low-fat cream cheese?
A7: Yes, low-fat cream cheese will work, though the texture might be a little less creamy.
Q8: Can I add a fruit topping?
A8: Yes! Fresh fruit like berries, kiwi, or even citrus slices would make a beautiful and flavorful topping for your jars.
Q9: Can I make these jars in advance?
A9: Yes! These are perfect for making ahead of time. You can prep them the day before, just make sure to add the toppings just before serving.
Q10: Can I make these jars in larger portions?
A10: Sure! You can use larger jars or even individual bowls if you prefer a bigger serving. Just adjust the amount of cheesecake filling accordingly.
Conclusion
These Easter Egg Cheesecake Jars are a fun, festive, and delicious way to celebrate Easter or any occasion. They’re cute, customizable, and easy to make—what’s not to love? So go ahead, grab those jars, and whip up a batch of these sweet treats. Whether you’re hosting a big gathering or just looking for something fun to enjoy, these cheesecake jars will definitely put a smile on your face. Happy Easter (or any day you want a little extra sweetness)!
Print
Easter Egg Cheesecake Jars
- Total Time: 15 minutes
- Yield: 6-8 servings
Description
These adorable Easter Egg Cheesecake Jars are a fun and festive treat for your Easter celebrations! Creamy, smooth cheesecake layered with colorful Easter candy eggs makes for a delightful, portable dessert. Perfect for a crowd or a family gathering.
Ingredients
-
8 oz cream cheese, softened
-
1 cup heavy cream
-
½ cup powdered sugar
-
1 teaspoon vanilla extract
-
1 cup graham cracker crumbs
-
2 tablespoons melted butter
-
1 tablespoon sugar
-
- ½ cup Easter candy eggs (chocolate, candy-coated, or any preferred Easter candy)
Instructions
-
Prepare Cheesecake Filling: In a large mixing bowl, beat together the softened cream cheese, heavy cream, powdered sugar, and vanilla extract until smooth and creamy. Set aside.
-
Prepare the Crust: In a small bowl, combine the graham cracker crumbs, melted butter, and sugar. Stir until well mixed.
-
Assemble the Jars: Divide the graham cracker crust evenly among your jars or serving cups (about 2 tablespoons per jar). Press down gently with a spoon to form a compact layer.
-
Add the Cheesecake Filling: Spoon the cheesecake filling on top of the graham cracker crust, filling each jar about ¾ full.
-
Chill the Cheesecakes: Refrigerate the jars for at least 2 hours to allow the cheesecake to set.
-
Top with Easter Eggs: Before serving, top each jar with a handful of Easter candy eggs for decoration.
-
Serve and Enjoy: Serve chilled and enjoy your festive Easter Egg Cheesecake Jars!
Notes
-
You can use any type of candy eggs you like (chocolate, jelly beans, or candy-coated). You could also add fruit like berries for a fresh twist.
-
These jars can be made ahead of time and stored in the fridge for up to 3 days before serving.
-
If you want to make it more decadent, top with whipped cream or a drizzle of chocolate sauce.
- Prep Time: 15 minutes
- Cook Time: 0 minutes
- Category: Dessert
- Method: No-Bake
- Cuisine: American
Nutrition
- Serving Size: 1 jar
- Calories: 350 kcal
- Sugar: 30g
- Sodium: 150mg
- Fat: 22g
- Saturated Fat: 12g
- Unsaturated Fat: 8g
- Trans Fat: 0g
- Carbohydrates: 33g
- Fiber: 1g
- Protein: 4g
- Cholesterol: 60mg


