Introduction
This easy banana pudding recipe has quickly become a staple in our family gatherings. Every time I make it, it disappears within minutes, with everyone asking for seconds. It’s the perfect combination of creamy, fruity, and crunchy all in one dish. Whether it’s a holiday, birthday, or just a regular family get-together, this banana pudding never fails to impress. The layers of smooth pudding, ripe bananas, and crunchy vanilla wafers make each bite a satisfying treat. Plus, the best part is that it’s no-bake, so you can easily prepare it in advance and let it chill in the fridge while you focus on other things.
Why You’ll Love This Easy Banana Pudding
This easy banana pudding is everything you want in a dessert: it’s quick to prepare, irresistibly creamy, and has just the right balance of sweetness and texture. It’s the kind of dessert that can be served at any occasion, from casual family dinners to special holiday feasts. The layers of vanilla wafers, fresh bananas, and a smooth pudding mixture make it an instant crowd-pleaser. Plus, the best part is that you can make it ahead of time and just pop it in the fridge. It’s the ultimate make-ahead dessert that’s perfect for any occasion.
Ingredients
For the Pudding Layer:
- 1 (8-ounce) package cream cheese, softened
- 1 (14-ounce) can sweetened condensed milk
- 1 (5-ounce) package instant vanilla pudding mix
- 3 cups cold milk
- 1 (8-ounce) container Cool Whip, divided
For the Layers:
- 1 box vanilla wafers (about 60 cookies) or butter cookies
- 4-5 ripe bananas, sliced
For the Topping (optional):
- Crushed vanilla wafers
- Additional banana slices
Instructions
- Prepare the Creamy Pudding Mixture:
Begin by beating the softened cream cheese in a large mixing bowl until smooth and creamy. This is the foundation of your pudding layer, giving it a rich, tangy base. Add the sweetened condensed milk and continue to beat until well combined. - Make the Pudding:
In a separate bowl, whisk together the instant vanilla pudding mix and cold milk until smooth. Let it sit for a few minutes to thicken and set. Gradually fold the pudding mixture into the cream cheese mixture until fully combined. Once combined, fold in half of the Cool Whip to lighten the texture and make the pudding extra fluffy. - Assemble the Layers:
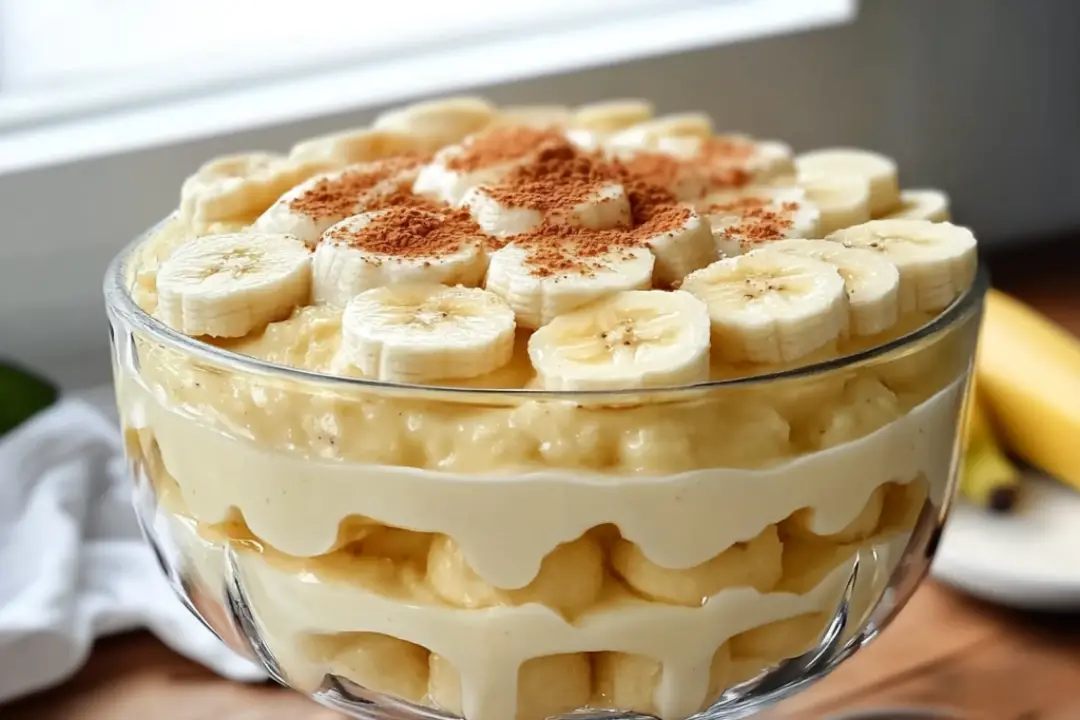
In a trifle dish, clear bowl, or 9×13-inch pan, start by placing a layer of vanilla wafers on the bottom. Follow this with a layer of banana slices, and then spread a generous amount of the pudding mixture over the bananas. - Repeat Layers:
Continue layering with vanilla wafers, bananas, and pudding mixture until all ingredients are used. Be sure to end with a thick layer of pudding. - Top It Off:
Spread the remaining Cool Whip evenly over the top of the pudding, smoothing it out for a polished finish. Cover the dish tightly with plastic wrap and refrigerate for at least 4 hours, or overnight for the best results. This allows the flavors to meld and the wafers to soften into a cake-like texture. - Serve:
When you’re ready to serve, you can garnish the top with crushed vanilla wafers and additional banana slices for decoration if desired.
Nutrition Facts
Servings: 12
Calories per serving: 300 kcal (estimate)
Preparation Time
- Prep Time: 15 minutes
- Chill Time: 4 hours (or overnight)
- Total Time: 4 hours 15 minutes
How to Serve
- Serve in a large trifle dish for a beautiful presentation.
- Garnish with extra banana slices and crushed vanilla wafers on top.
- Refrigerate for at least 4 hours to allow the flavors to set and the wafers to soften.
- Serve chilled as a sweet finish to any meal.
Additional Tips
- Use Ripe Bananas: Make sure your bananas are ripe but not overripe, as they will add the perfect amount of sweetness and texture to the pudding.
- Cool Whip Substitution: If you prefer, you can use homemade whipped cream instead of Cool Whip for a fresher taste.
- Make Ahead: This dessert is ideal for making ahead. Prepare it the night before and let it chill in the fridge overnight.
- Change the Cookies: While vanilla wafers are traditional, you can also use butter cookies or even graham crackers for a different flavor twist.
- Don’t Skip the Chill Time: Be patient and allow the pudding to chill for the full 4 hours or overnight. This ensures the flavors develop and the dessert firms up nicely.
FAQ Section
- Can I make this banana pudding in advance?
Yes, this dessert is perfect for making ahead! You can prepare it a day before your event and let it chill overnight. - Can I use different cookies instead of vanilla wafers?
Yes! Butter cookies or graham crackers also work well in this recipe. - Can I use a different type of pudding mix?
While vanilla pudding is traditional, you can experiment with chocolate or banana pudding mix for a fun twist. - Can I make this banana pudding without Cool Whip?
Yes, you can substitute homemade whipped cream or even heavy cream whipped to stiff peaks. - How long can I store the banana pudding?
Store any leftover banana pudding in the fridge for up to 3-4 days. However, it’s best to enjoy it within 1-2 days for the freshest taste. - Can I freeze banana pudding?
Freezing is not recommended for banana pudding, as it may cause the texture to become watery when thawed. - Can I use skim milk instead of whole milk?
Yes, you can use skim milk, but it may slightly alter the creaminess of the pudding. - Is this banana pudding gluten-free?
Traditional vanilla wafers contain gluten, but you can substitute gluten-free cookies to make the dessert gluten-free. - Can I add other fruits to this banana pudding?
Yes, berries like strawberries or raspberries can be added between the layers for a fresh, fruity twist. - What can I use instead of cream cheese?
If you don’t have cream cheese, you can try mascarpone cheese or Greek yogurt for a similar texture.
Conclusion
This Easy Banana Pudding is the perfect dessert for any occasion, whether it’s a holiday, a family gathering, or just a casual weekend treat. With its creamy pudding layers, fresh bananas, and crunchy vanilla wafers, it’s an irresistible dessert that everyone will love. It’s quick to prepare, and the best part is that it can be made in advance, allowing you to focus on other things. Whether you’re looking for something classic or just want a crowd-pleasing dish, this banana pudding will not disappoint. So, go ahead and give this recipe a try, and let it become a new favorite in your dessert rotation!
Print
Easy Banana Pudding
- Total Time: 4 hours 15 minutes
- Yield: 12 servings
- Diet: Vegetarian
Description
This no-bake banana pudding is creamy, delicious, and perfect for holidays, family gatherings, or any occasion. With layers of vanilla wafers, ripe bananas, and a smooth pudding mixture, it’s as easy to make as it is delightful to eat!
Ingredients
Pudding Layer
- 1 (8-ounce) package cream cheese, softened
- 1 (14-ounce) can sweetened condensed milk
- 1 (5-ounce) package instant vanilla pudding mix
- 3 cups cold milk
- 1 (8-ounce) container Cool Whip, divided
Layers
- 1 box vanilla wafers (about 60 cookies) or butter cookies
- 4-5 ripe bananas, sliced
Topping (optional)
- Crushed vanilla wafers
- Additional banana slices
Instructions
- Prepare the Creamy Pudding Mixture: Beat the softened cream cheese in a large mixing bowl until smooth and creamy. Add the sweetened condensed milk and continue to beat until well combined.
- Make the Pudding: In a separate bowl, whisk together the instant pudding mix and cold milk until smooth. Let it sit for a few minutes to thicken. Gradually fold the pudding mixture into the cream cheese mixture until fully combined. Fold in half of the Cool Whip for a light, airy texture.
- Assemble the Layers: Place a layer of vanilla wafers on the bottom of a trifle dish, clear bowl, or 9×13-inch pan. Add a layer of banana slices on top of the cookies, then spread a generous layer of the pudding mixture over the bananas.
- Repeat Layers: Continue layering wafers, bananas, and pudding mixture until all ingredients are used, ending with a pudding layer.
- Top It Off: Spread the remaining Cool Whip evenly over the top. Cover tightly with plastic wrap and refrigerate for at least 4 hours, preferably overnight, to allow the flavors to meld and the wafers to soften into a cake-like texture.
- Serve: Before serving, sprinkle crushed vanilla wafers and additional banana slices on top for decoration, if desired.
Notes
- This dessert is best served after it has chilled for at least 4 hours or overnight.
- You can substitute graham crackers or butter cookies for vanilla wafers if preferred.
- For extra flavor, consider adding a pinch of cinnamon or nutmeg to the pudding mixture.
- Prep Time: 15 minutes
- Cook Time: 4 hours
- Category: Dessert
- Method: No-Bake
- Cuisine: American
Nutrition
- Serving Size: 1 serving
- Calories: 300 kcal
- Sugar: 34g
- Sodium: 180mg
- Fat: 16g
- Saturated Fat: 8 g
- Unsaturated Fat: 8g
- Trans Fat: 0g
- Carbohydrates: 39g
- Fiber: 2g
- Protein: 4g
- Cholesterol: 40mg


