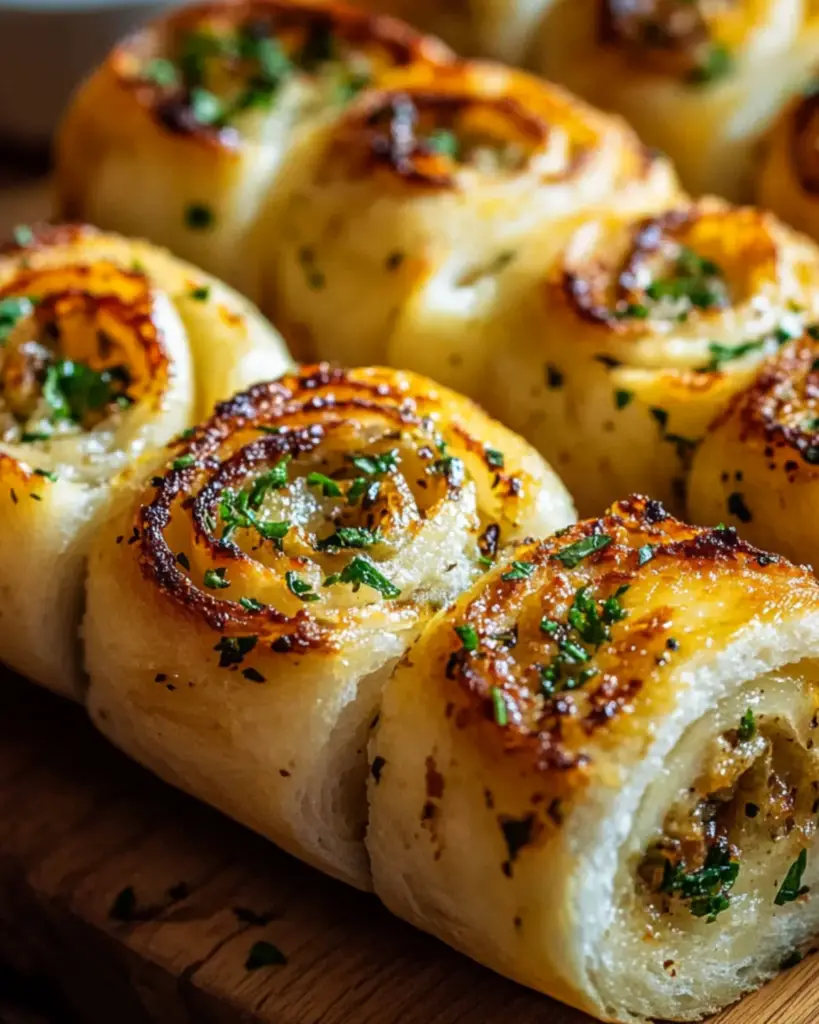
Garlic bread is a beloved side dish, but have you ever tried Garlic Bread Roll Ups? Trust me, these are about to become your new go-to for any meal or snack. Imagine your favorite garlic bread, but transformed into soft, pillowy roll-ups that are stuffed with all that delicious garlicky goodness. They’re easy to make, shareable, and seriously addictive. Whether you’re serving them as a side dish, an appetizer, or just a treat for yourself, these roll-ups will have everyone coming back for more. Let’s just say, they might even outshine the main course!
Why You’ll Love Garlic Bread Roll Ups
Here’s why you’ll want to add these garlic bread roll-ups to your menu:
Simple Yet Flavorful: With just a few basic ingredients, these roll-ups bring all the flavor of classic garlic bread but in a fun, bite-sized form.
Customizable: You can add your favorite extras—like melted cheese, herbs, or even a touch of red pepper flakes for a little kick. The possibilities are endless!
Quick and Easy: The best part? They come together in no time! These roll-ups are as easy as it gets, and you can make them even if you’re a beginner in the kitchen.
Great for Any Occasion: Whether it’s a cozy dinner, a family gathering, or a party, these garlic bread roll-ups are perfect for any occasion. They’re small enough to serve as finger food, and everyone will love them.
Satisfyingly Soft: The bread gets soft and pillowy in the oven, creating that ideal texture that makes you want to keep coming back for more.

Disclosure: This post contains affiliate links.If you click and make a purchase, I may earn a small commission at no extra cost to you.
Ingredients
For the Garlic Butter Filling:
- Butter: The base for your garlic butter filling, making everything extra rich and flavorful.
- Garlic: Fresh minced garlic or garlic powder will do the trick, infusing your roll-ups with that irresistible garlic taste.
- Parsley: Fresh parsley adds a pop of color and a touch of freshness to balance the richness of the butter.
- Salt: Enhances all the flavors and makes sure the garlic stands out.
- Black Pepper: For a little extra kick.
For the Roll-Ups:
- Bread: Use soft sandwich bread or any white bread you prefer. Make sure it’s fresh and not too thick for easy rolling.
- Parmesan Cheese: This adds a savory, slightly nutty flavor that perfectly complements the garlic butter.
- Mozzarella Cheese: Melt-in-your-mouth mozzarella brings a creamy, cheesy layer to the roll-ups.
(Note: Specific measurements are provided in the recipe card above.)
Instructions
- Prepare the Garlic Butter
In a small bowl, combine softened butter, minced garlic (or garlic powder), chopped parsley, salt, and pepper. Mix until smooth and well combined. If you’re using fresh garlic, make sure to finely mince it so it incorporates well into the butter. - Prepare the Bread
Lay out your bread slices on a flat surface. Use a rolling pin to gently flatten each slice of bread, which makes it easier to roll up later and ensures the filling sticks. You don’t want to flatten it too much—just a gentle press. - Spread the Garlic Butter
Spread a generous amount of garlic butter on each flattened slice of bread. Be sure to coat the entire surface to get that irresistible flavor in every bite. - Add Cheese
Sprinkle a mix of mozzarella and parmesan cheese on top of the garlic butter. Make sure the cheese is evenly distributed over the surface of the bread. - Roll Up the Bread
Carefully roll up each slice of bread, starting at one end and gently rolling it toward the other. The cheese and garlic butter should stay tucked inside as you roll. - Bake the Roll-Ups
Preheat your oven to 375°F (190°C). Place the roll-ups seam side down on a baking sheet lined with parchment paper. Bake for 10-12 minutes, or until the bread is golden brown and the cheese is melted and bubbly. - Serve and Enjoy
Once they’re out of the oven, let them cool for a few minutes before serving. The roll-ups will be warm and cheesy on the inside, with a crispy exterior. Serve them as a side dish or snack and enjoy with your favorite dipping sauce, like marinara or a creamy ranch dressing.
Nutrition Facts
Servings: 12
Calories per serving: ~150
Total Fat: 10g
Saturated Fat: 6g
Cholesterol: 25mg
Sodium: 300mg
Total Carbohydrates: 14g
Dietary Fiber: 1g
Sugars: 2g
Protein: 4g
Preparation Time
Prep Time: 10 minutes
Cook Time: 10-12 minutes
Total Time: 20 minutes
How to Serve Garlic Bread Roll-Ups
- As a Snack: These roll-ups are the perfect snack on their own, especially if you’re craving something savory and cheesy.
- With Pasta: Pair these with your favorite pasta dishes, like spaghetti or lasagna, for a deliciously comforting meal.
- As an Appetizer: They make a fantastic appetizer for parties, gatherings, or family dinners. Serve with marinara sauce or a side of ranch dressing for dipping.
- With Soup: Garlic bread roll-ups are great for dipping into creamy soups, like tomato or a rich chowder.
Additional Tips
- Add Extra Fillings: If you want to amp up the flavor, feel free to add other ingredients like sliced olives, red pepper flakes, or even some sautéed onions for extra punch.
- Make Ahead: You can prepare the roll-ups ahead of time and store them in the fridge. Just bake them when you’re ready to enjoy.
- Use Fresh Bread: Fresh, soft bread works best, but if you have a little stale bread, you can toast it lightly before rolling to bring it back to life.
FAQ Section
Q1: Can I use a different type of bread?
A1: Absolutely! While sandwich bread works well, you can use any bread you like. Try using sourdough for a more robust flavor, or even pita bread for a fun twist.
Q2: Can I make these ahead of time?
A2: Yes! You can prepare the roll-ups, cover them, and store them in the fridge for up to a day before baking. Just pop them in the oven when you’re ready to serve.
Q3: Can I add extra cheese?
A3: Definitely! Feel free to add more mozzarella, or even experiment with other cheeses like cheddar or gouda to make these roll-ups extra cheesy.
Q4: Can I make these without cheese?
A4: While cheese is a key ingredient, you could skip it and just make garlic bread roll-ups with the butter and garlic. It’ll still be delicious!
Q5: Can I freeze these roll-ups?
A5: Yes, you can freeze the uncooked roll-ups. Just wrap them tightly in plastic wrap and store them in an airtight container. When you’re ready to bake, just add a few extra minutes to the cooking time.
Q6: How do I store leftovers?
A6: Store leftover roll-ups in an airtight container at room temperature for up to 2 days. You can reheat them in the oven to keep them crispy.
Q7: Can I add herbs to the garlic butter?
A7: Absolutely! Fresh herbs like thyme, rosemary, or oregano would be wonderful additions to the garlic butter for extra flavor.
Q8: Can I use store-bought garlic butter?
A8: Yes, you can use store-bought garlic butter in place of homemade garlic butter, but homemade is always a little fresher and tastier!
Q9: How can I make these spicier?
A9: To add some heat, sprinkle red pepper flakes or cayenne pepper into the garlic butter mixture before spreading it on the bread.
Q10: Can I make these without parsley?
A10: Yes! If you don’t have parsley, you can skip it or substitute with another herb like basil or chives for a different flavor profile.
Conclusion
These Garlic Bread Roll-Ups are the perfect twist on a classic. Soft, cheesy, and bursting with garlic goodness, they make the ultimate snack, side, or appetizer. They’re quick, easy, and sure to be a hit every time you make them. Whether you’re serving them at a dinner party or enjoying them by yourself, these roll-ups are guaranteed to satisfy your garlic bread cravings. Enjoy!
Print
Garlic Bread Roll Ups
- Total Time: 25 minutes
- Yield: 12 roll-ups (depending on size)
Description
These Garlic Bread Roll Ups are the perfect appetizer or side dish for any meal. With soft, pillowy bread, a garlicky, buttery filling, and a crispy finish, they offer all the flavors of classic garlic bread in a fun, bite-sized roll-up form. Ideal for dipping in marinara sauce or enjoying on their own!
Ingredients
- 1 loaf of French bread (or 8-10 pieces of small baguette-style bread)
- 4 tablespoons unsalted butter, softened
- 3 cloves garlic, minced
- 2 tablespoons fresh parsley, chopped (or 1 tablespoon dried parsley)
- ½ teaspoon dried oregano
- 1 cup shredded mozzarella cheese
- Salt to taste
- 2 tablespoons grated Parmesan cheese (optional)
- ½ teaspoon crushed red pepper flakes (optional, for a little heat)
Instructions
- Preheat the Oven: Preheat your oven to 375°F (190°C). Line a baking sheet with parchment paper or a silicone baking mat.
- Prepare the Garlic Butter: In a small bowl, combine the softened butter, minced garlic, chopped parsley, oregano, salt, and crushed red pepper flakes (if using). Mix until the ingredients are well combined.
- Prepare the Bread: Slice the French bread loaf into 1-inch thick slices, or cut smaller pieces from a baguette. If using a larger loaf, slice each piece in half lengthwise, then spread each piece with the garlic butter mixture. If you’re using smaller baguette pieces, you can spread butter directly on each piece.
- Assemble the Roll-Ups: After spreading the garlic butter on the bread slices, sprinkle the shredded mozzarella cheese over the buttered side of each slice. Add a sprinkle of grated Parmesan cheese if desired.
- Roll the Bread: Gently roll each bread slice tightly, like a mini cinnamon roll or burrito. Place the roll-ups seam-side down on the prepared baking sheet.
- Bake the Roll-Ups: Bake in the preheated oven for 12-15 minutes, or until the bread is golden and the cheese is melted and bubbly. The garlic butter should be fragrant, and the bread should be slightly crispy on the outside.
- Serve: Remove from the oven and allow to cool for a few minutes before serving. Optionally, garnish with additional chopped parsley for a pop of color.
- Optional: Serve with marinara sauce or a creamy dipping sauce on the side for extra flavor.
Notes
- You can use any type of bread for this recipe, but French bread or a baguette works best due to its soft inside and crunchy exterior.
- For extra cheesy garlic bread roll-ups, add more mozzarella to the filling.
- If you want a spicier kick, drizzle a little hot sauce over the rolls after baking or add a pinch of cayenne pepper to the garlic butter mixture.
- Prep Time: 10 minutes
- Cook Time: 15 minutes
Nutrition
- Serving Size: 1 roll-up
- Calories: 120 kcal
- Sugar: 1g
- Sodium: 350mg
- Fat: 9g
- Saturated Fat: 5g
- Unsaturated Fat: 3g
- Trans Fat: 0 g
- Carbohydrates: 10g
- Fiber: 1g
- Protein: 4g
- Cholesterol: 20mg


