Introduction
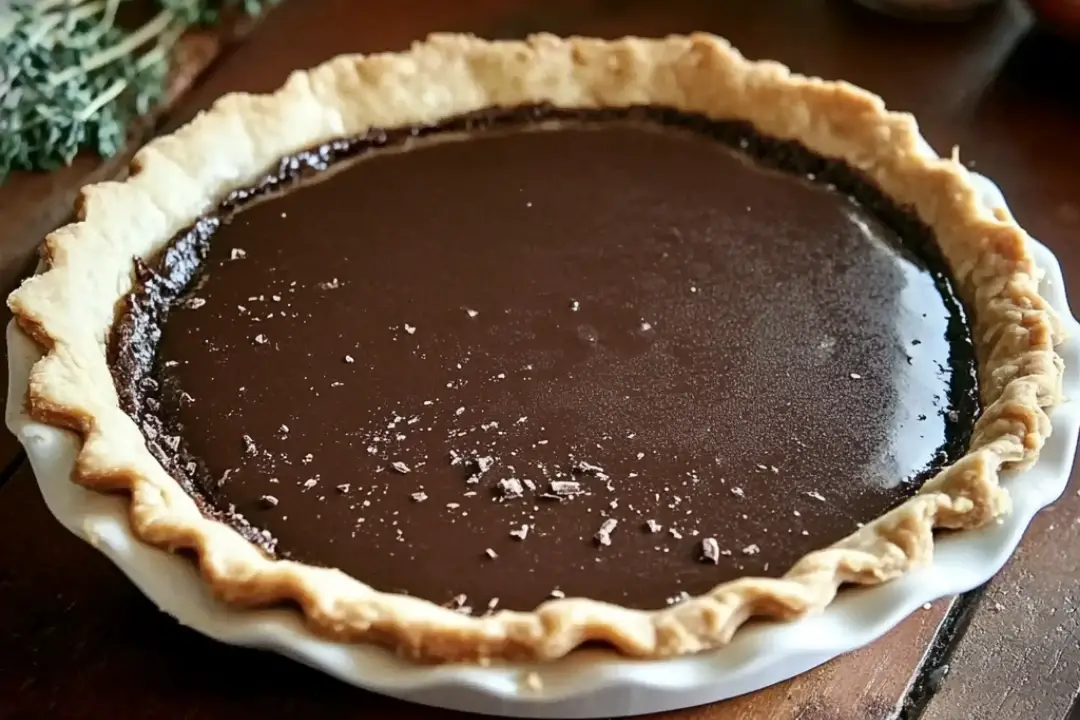
There’s something so comforting about indulging in a slice of Grandma’s Chocolate Pie. This recipe has been passed down through generations, and every time I make it, it brings back fond memories of family gatherings and the sweet smell of baking in the kitchen. The rich, creamy filling with just the right amount of sweetness and cocoa flavor never fails to impress. It’s the kind of pie that can be made any time you’re craving a nostalgic, homemade dessert that everyone will love. Whether it’s a special occasion or just a quiet night at home, this chocolate pie is sure to satisfy your sweet tooth and leave everyone asking for seconds.
Ingredients
- ½ cup cocoa
- ¼ cup cornstarch
- 3 egg yolks
- 1 ½ cups sugar
- ¼ teaspoon salt
- 2 cups milk
- 1 teaspoon vanilla
Instructions
- Prepare the Ingredients:
In a medium-sized saucepan, whisk together the cocoa, cornstarch, beaten egg yolks, sugar, salt, and vanilla. Once combined, gradually add the milk while stirring to ensure the mixture is smooth. - Cook the Filling:
Place the saucepan on medium-high heat and cook the mixture, stirring constantly. It’s important to beat the mixture smooth as it heats up. Continue cooking until the filling thickens to a pudding-like consistency. - Pour into Pie Shell:
Once thickened, pour the chocolate filling into a pre-baked pie shell. You can use a store-bought crust or make your own from scratch, depending on your preference. - Chill in the Fridge:
Let the pie cool slightly at room temperature before placing it in the refrigerator. Chill for at least 2 hours, or until the filling is set and firm. - Serve:
Once chilled, slice the pie and serve. If desired, you can top the pie with whipped cream or a dollop of meringue, though it’s delicious on its own.
Nutrition Facts
Servings: 8
Calories per Serving: 280
(Note: Nutritional information is an estimate based on standard ingredients and may vary depending on specific product choices.)
Preparation Time
- Preparation Time: 15 minutes
- Cook Time: 10-15 minutes
- Chill Time: 2 hours
- Total Time: 2 hours 30 minutes
How to Serve
Grandma’s Chocolate Pie is perfect on its own, but you can elevate it with a few extra touches. Here are some great ways to serve it:
- With Whipped Cream: Add a dollop of freshly whipped cream on top for a rich, creamy finish.
- Topped with Meringue: Although the original recipe doesn’t include meringue, you can top the pie with it if you like a little extra sweetness and texture.
- With a Scoop of Ice Cream: Serve with vanilla or chocolate ice cream for a decadent dessert.
- Chilled in Individual Portions: For a fun twist, make mini pies in ramekins or small tart pans and chill them in the fridge for individual servings.
- Drizzled with Chocolate Sauce: For a more indulgent treat, drizzle the pie with warm chocolate sauce before serving.
Additional Tips
- Be Patient with Cooking: Stir the mixture constantly as it cooks to avoid lumps and ensure a smooth, creamy texture.
- Use Full-Fat Milk: For the richest, creamiest filling, use full-fat milk instead of low-fat or skim milk.
- Make It Ahead of Time: This pie needs to chill for a few hours, so it’s a great make-ahead dessert for parties or family gatherings.
- Use a Pre-baked Pie Shell: Be sure to bake the pie shell beforehand, so the filling doesn’t make the crust soggy. You can use a store-bought pie crust or make your own.
- Let the Pie Cool Before Chilling: Allow the pie to cool at room temperature for about 10 minutes before refrigerating to help set the filling.
Recipe Variations
- Peanut Butter Chocolate Pie: Swirl in some peanut butter with the chocolate filling for a delicious peanut butter-chocolate flavor combination.
- Mint Chocolate Pie: Add a few drops of peppermint extract to the filling for a refreshing mint-chocolate variation.
- No-Bake Version: Skip the pre-baked pie shell and make this pie as a no-bake dessert by chilling the filling in individual cups or in a graham cracker crust.
- Dairy-Free Option: For a dairy-free version, substitute the milk with almond or coconut milk and use a dairy-free pie crust.
- Chocolate Coconut Pie: Add shredded coconut to the chocolate filling for a tropical twist.
Serving Suggestions
- With Fresh Fruit: Fresh berries like raspberries or strawberries make a great contrast to the rich chocolate filling and add a burst of freshness.
- As a Dessert for Dinner Parties: This pie makes a show-stopping dessert for any dinner party or holiday meal.
- With Coffee or Tea: Serve this pie with a cup of coffee or tea for a comforting dessert after a meal.
Freezing and Storage
Freezing:
Grandma’s Chocolate Pie can be frozen for up to 2-3 months. To freeze, wrap the pie tightly in plastic wrap and then foil. When ready to serve, let the pie thaw in the refrigerator for a few hours before slicing.
Storing Leftovers:
If you have leftovers, store them in the refrigerator for up to 3-4 days. Cover the pie with plastic wrap or place it in an airtight container to keep it fresh.
FAQ Section
- Can I make this pie without a pre-baked pie shell?
It’s best to use a pre-baked pie shell, as it prevents the crust from becoming soggy. However, you could use a graham cracker crust as a no-bake option. - Can I use a different type of milk?
Yes, you can use any type of milk, such as skim milk or almond milk, though the consistency and richness may vary slightly. - What can I use if I don’t have cornstarch?
You can substitute cornstarch with an equal amount of arrowroot powder or flour, though cornstarch will give you the smoothest filling. - Can I add meringue to this pie?
Yes! While the recipe doesn’t include meringue, you can make it separately and top the pie with it before serving. - How do I know when the filling has thickened enough?
The filling should be thick enough to coat the back of a spoon. When it starts to look like pudding, it’s ready to be poured into the crust. - Can I make this pie in advance?
Yes, you can make this pie the day before and chill it overnight in the fridge for a more set filling. - What kind of pie shell should I use?
You can use any standard pie shell, either homemade or store-bought, as long as it’s pre-baked to avoid a soggy crust. - Can I make this pie dairy-free?
Yes, substitute dairy milk with almond milk or coconut milk and use a dairy-free pie crust for a dairy-free option. - What if my filling is lumpy?
Make sure to stir the filling constantly while cooking to prevent lumps. If lumps do occur, you can use a whisk or an immersion blender to smooth it out. - Can I make this pie gluten-free?
Yes, use a gluten-free pie crust and make sure that the cornstarch you use is certified gluten-free.
Conclusion
Grandma’s Chocolate Pie is a timeless dessert that never fails to bring comfort and joy. It’s a simple yet indulgent treat that’s perfect for any occasion. Whether you’re making it for a family dinner or a special celebration, this chocolate pie will always be a crowd-pleaser. The creamy, rich filling and the flakey pie crust come together to create a dessert that’s both nostalgic and delicious. Make it today, and enjoy the sweetness of tradition with every bite!
Print
Grandma’s Chocolate Pie Recipe
- Total Time: 0 hours
- Yield: 8 servings 1x
Description
This classic Grandma’s Chocolate Pie is rich, creamy, and full of chocolatey goodness. A smooth and decadent filling made from cocoa, egg yolks, and sugar is poured into a pre-baked pie shell, then chilled to perfection. Whether it’s for a family gathering or just because, this pie is sure to bring comfort and satisfy your sweet tooth. It’s simple to make with basic ingredients, and though the recipe doesn’t include meringue, you can always top it with some if desired for an extra touch!
Ingredients
- ½ cup cocoa
- ¼ cup cornstarch
- 3 egg yolks
- 1 ½ cups sugar
- ¼ teaspoon salt
- 2 cups milk
- 1 teaspoon vanilla
Instructions
- Mix the Ingredients: In a saucepan, mix cocoa, cornstarch, beaten egg yolks, sugar, salt, and vanilla. Gradually add the milk while stirring to ensure everything is well combined.
- Cook the Filling: Place the saucepan over medium-high heat. Stir continuously as the mixture heats up. Cook until the filling thickens, and keep stirring to make sure it’s smooth and doesn’t form lumps.
- Pour Into the Pie Shell: Once the filling has thickened, pour it into a pre-baked pie shell.
- Chill the Pie: Allow the pie to cool at room temperature for a few minutes, then place it in the fridge. Chill for about 2 hours until the filling is set.
- Serve: Once chilled, slice and serve. You can top it with whipped cream or meringue if desired, but it’s delicious on its own too.
Notes
- While this recipe doesn’t call for meringue, feel free to top it with meringue before chilling if you enjoy that texture.
- Ensure the filling is cooked to a pudding-like consistency for the best results.
- The pie can be made a day ahead and kept in the fridge for an easy make-ahead dessert.
- Prep Time: 10 minutes
- Cook Time: 10-15 minutes
- Category: Dessert
- Method: Stovetop
- Cuisine: American
Nutrition
- Serving Size: 1 slice
- Calories: 300
- Sugar: 35g
- Sodium: 180mg
- Fat: 12g
- Saturated Fat: 3 g
- Unsaturated Fat: 8g
- Trans Fat: 0g
- Carbohydrates: 45g
- Fiber: 2g
- Protein: 5
- Cholesterol: 90mg


