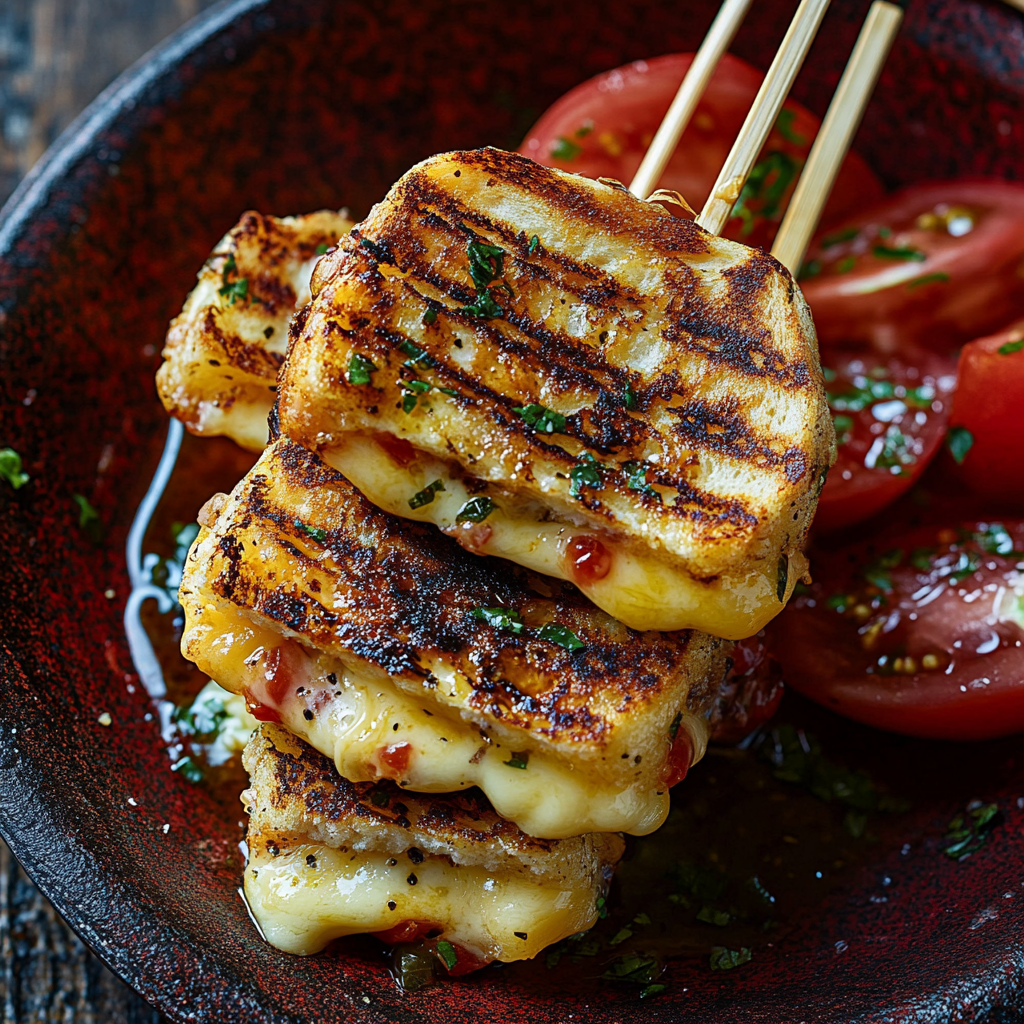
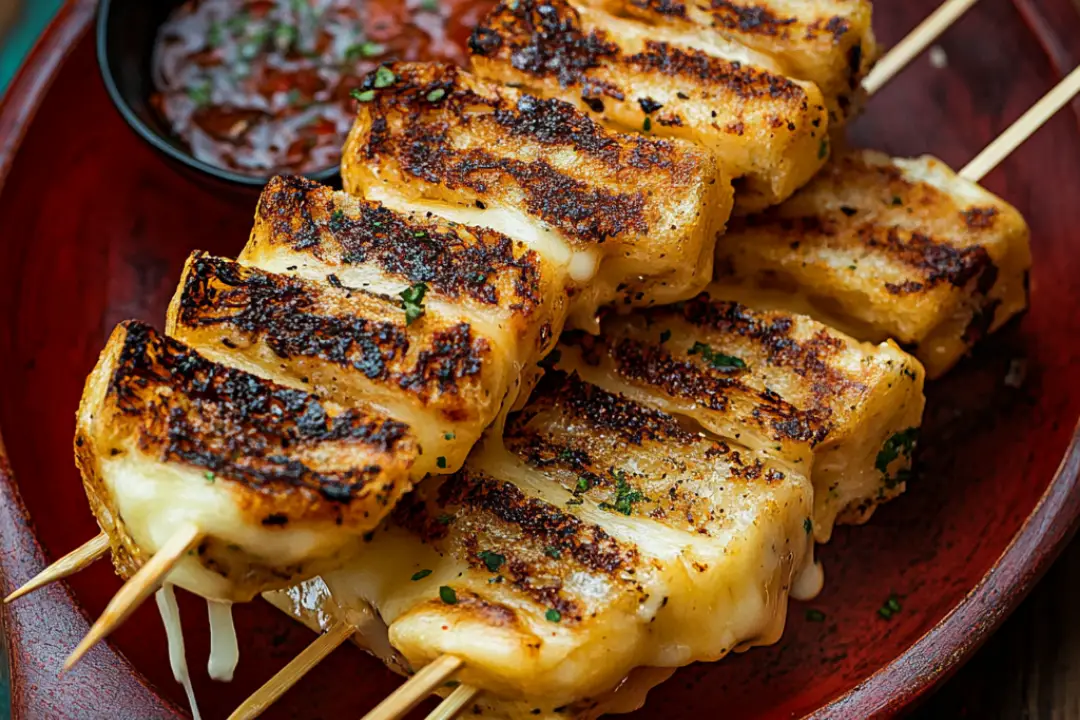
Grilled cheese is a comfort food staple that never goes out of style, but what if you could elevate it into something even more fun and delicious? Enter Grilled Cheese Skewers! These adorable, bite-sized skewers take the classic grilled cheese to a whole new level by grilling the sandwiches on sticks. Perfect for dipping, sharing, or serving at parties, these skewers are crispy, melty, and packed with all the gooey, cheesy goodness we love about grilled cheese—just with a playful twist.
Imagine crispy golden bread, perfectly toasted to golden-brown perfection, with gooey melted cheese inside, all threaded onto a skewer. They’re easy to make, and you can dip them in your favorite sauces, like tomato soup, ranch, or even a spicy sriracha mayo! Trust me, you’re going to love this fun take on a classic.
Why You’ll Love Grilled Cheese Skewers
Easy to Make: These skewers are so simple to put together, and the results are fantastic. Perfect for even beginner cooks who want to impress!
Fun and Interactive: Serving grilled cheese on skewers makes them easy to dip and share with friends and family. It’s a playful way to enjoy a classic favorite!
Customizable: Add extra fillings like tomatoes, bacon, or avocado for a more exciting take on the traditional grilled cheese.
Perfect for Parties or Snacks: Whether you’re hosting a game night, preparing a snack for the kids, or serving them at a casual get-together, these skewers are sure to be a hit.
Great for Dipping: Serve these with a side of tomato soup, creamy ranch, or even spicy sriracha mayo for extra flavor. The dipping options are endless!

Disclosure: This post contains affiliate links.If you click and make a purchase, I may earn a small commission at no extra cost to you.
Ingredients in Grilled Cheese Skewers
(Note: the full ingredients list, including measurements, is provided in the recipe card directly below.)
Bread
The bread is the foundation of any grilled cheese. Choose your favorite type—white, whole wheat, or even sourdough for a little extra flavor and texture.
Cheese
Classic American cheese is the go-to choice for that ooey-gooey melt, but feel free to mix it up with sharp cheddar, mozzarella, or even provolone for a more gourmet twist.
Butter
For that irresistible golden crisp on the bread, butter is key! It helps toast the bread to perfection while making it rich and flavorful.
Skewers
Wooden or metal skewers are essential for threading the grilled cheese cubes, making them easy to dip and serve.
Instructions
Prepare the Sandwiches
Start by buttering one side of each slice of bread. On the unbuttered side, place a slice of cheese (or more if you like it extra cheesy!) and top with another slice of bread. Press down slightly to compact the sandwich.
Grill the Sandwiches
Heat a skillet or griddle over medium heat. Place the sandwiches in the skillet, buttered side down, and cook until golden brown on one side, about 2-3 minutes. Flip and grill the other side until golden and the cheese is melted, another 2-3 minutes. Remove from the skillet and let them cool for a minute.
Cut and Skewer
Once the grilled cheese sandwiches have cooled slightly, cut them into bite-sized squares (about 2-3 pieces per sandwich). Carefully thread the cubes onto the skewers.
Serve and Enjoy
Arrange the grilled cheese skewers on a plate and serve with your favorite dipping sauce, such as tomato soup or ranch dressing. Enjoy the gooey, crispy, cheesy goodness!
Nutrition Facts
Servings: 4
Calories per serving: 300
Total Fat: 16g
Saturated Fat: 8g
Cholesterol: 35mg
Sodium: 600mg
Total Carbohydrates: 28g
Dietary Fiber: 2g
Total Sugars: 5g
Protein: 14g
Nutrition values are approximate and will vary depending on portion size and specific ingredients used.
Preparation Time
Prep Time: 10 minutes
Cook Time: 10 minutes
Total Time: 20 minutes
How to Serve Grilled Cheese Skewers
With Tomato Soup: The classic pairing! Serve these skewers with a warm, creamy bowl of tomato soup for the ultimate comforting meal.
As a Snack: These skewers are perfect for a light snack or appetizer. Serve them with a side of dipping sauces for extra flavor.
For Kids’ Lunch: If you’re packing lunch for the little ones, these grilled cheese skewers are a fun and portable way to enjoy this favorite sandwich.
At a Party: Serve these skewers at your next get-together. They’re easy to grab and dip, making them the perfect finger food for parties.
Additional Tips
Make It Fancy: Feel free to get creative with your fillings! Try adding bacon, sautéed onions, or even tomato slices to your grilled cheese for a more gourmet flavor.
Use a Grill Pan: If you have a grill pan, you can get those fun grill marks on the bread for an extra touch of charm and flavor.
Customize Your Dipping Sauces: Besides the classic tomato soup, try spicy ranch, creamy sriracha mayo, or even a tangy mustard dip to mix things up.
Make It Ahead: You can prepare these skewers ahead of time by grilling the sandwiches, cutting them into cubes, and storing them in the fridge until you’re ready to serve. Just skewer them and heat them in a skillet when you’re ready!
FAQ Section
Q1: Can I use a different type of cheese for the skewers?
A1: Absolutely! You can use any cheese you like. Sharp cheddar, mozzarella, or gouda all work wonderfully for a flavorful grilled cheese.
Q2: Can I make these skewers ahead of time?
A2: Yes! You can grill the sandwiches and cut them into cubes ahead of time. Store the cubes in an airtight container in the fridge and skewer them just before serving.
Q3: Can I use gluten-free bread for these skewers?
A3: Yes, gluten-free bread works great in this recipe! Just be sure to choose a good-quality gluten-free bread that will hold up well when grilled.
Q4: Can I add other ingredients to the grilled cheese filling?
A4: Of course! You can add bacon, sautéed mushrooms, tomatoes, or even spinach to take your grilled cheese to the next level.
Q5: Can I use a toaster oven to make the grilled cheese?
A5: Yes! You can make the grilled cheese in a toaster oven. Just be sure to flip the sandwiches halfway through to ensure both sides get golden and crispy.
Q6: Can I freeze these skewers?
A6: You can freeze the grilled cheese sandwiches before they are cut into cubes. Once frozen, cut them into squares and skewer them. Reheat in a skillet before serving.
Q7: How can I make these skewers spicier?
A7: Add some jalapeños or drizzle hot sauce between the bread slices for an extra kick!
Q8: How do I store leftovers?
A8: Store leftovers in an airtight container in the fridge for up to 2 days. To reheat, place them in a skillet over low heat until warmed through.
Q9: Can I use a different type of bread?
A9: Yes! You can use sourdough, whole wheat, or even rye bread for a different twist on this recipe.
Q10: Can I make these skewers without cheese?
A10: If you’re looking for a dairy-free version, you can try using dairy-free cheese or even make a savory sandwich with avocado, hummus, or other fillings.
Conclusion
These Grilled Cheese Skewers are the perfect way to enjoy a classic comfort food in a fun, shareable, and totally delicious way. Whether you’re serving them at a party, packing them for a lunch, or simply enjoying them as a snack, they’re sure to be a hit. So grab your skewers, melt some cheese, and get ready to indulge in this delightful twist on the traditional grilled cheese!
Print
Grilled Cheese Skewers
- Total Time: 20 minutes
- Yield: 4 servings (2 skewers per person)
Description
- These Grilled Cheese Skewers are a fun, bite-sized twist on the classic grilled cheese sandwich. Skewered for easy dipping and perfect for parties, these crispy, cheesy treats are sure to be a crowd-pleaser!
Ingredients
-
8 slices of bread (your choice, such as white, whole wheat, or sourdough)
-
8 slices of cheese (American, cheddar, or your favorite melting cheese)
-
4 tablespoons unsalted butter, softened
-
1 tablespoon olive oil (optional, for grilling)
-
1 teaspoon garlic powder (optional, for extra flavor)
-
Salt, to taste
-
Wooden skewers (soaked in water for 15 minutes to prevent burning)
Instructions
-
Prepare the bread and cheese: Cut the bread into quarters (making small square pieces) and slice the cheese to fit each piece of bread. You can also use pre-sliced cheese if desired.
-
Assemble the skewers: Take a piece of bread, place a slice of cheese on top, and then add another piece of bread to sandwich the cheese. Slide the sandwich onto a skewer, repeating for the remaining pieces of bread and cheese.
-
Butter the bread: Brush each side of the bread with softened butter, ensuring it’s evenly coated. If you want extra flavor, sprinkle garlic powder on the buttered bread.
-
Grill the skewers: Heat a large skillet or griddle over medium heat. If using olive oil, add it to the pan. Place the skewers in the pan and grill for about 3-4 minutes per side, or until the bread is golden brown and the cheese is melted.
-
Serve: Once the skewers are crispy and the cheese is melted, remove them from the pan and serve immediately. They’re perfect with your favorite dipping sauces, such as marinara, ranch, or tomato soup.
Notes
-
Dipping Sauce: These grilled cheese skewers pair wonderfully with tomato soup, marinara sauce, or even a spicy mustard for an added twist.
-
Make-ahead: You can assemble the skewers in advance and store them in the fridge for up to 2 hours before grilling.
-
Flavor Variations: Feel free to add cooked bacon, tomatoes, or even a sprinkle of herbs like basil for a more gourmet touch.
- Prep Time: 10 minutes
- Cook Time: 10 minutes
- Category: Appetizer
- Method: Grilling
- Cuisine: American
Nutrition
- Serving Size: 1 skewer (2 pieces of bread)
- Calories: 150
- Sugar: 1g
- Sodium: 350mg
- Fat: 8g
- Saturated Fat: 4g
- Unsaturated Fat: 3g
- Trans Fat: 0g
- Carbohydrates: 18g
- Fiber: 1g
- Protein: 6g
- Cholesterol: 20mg


