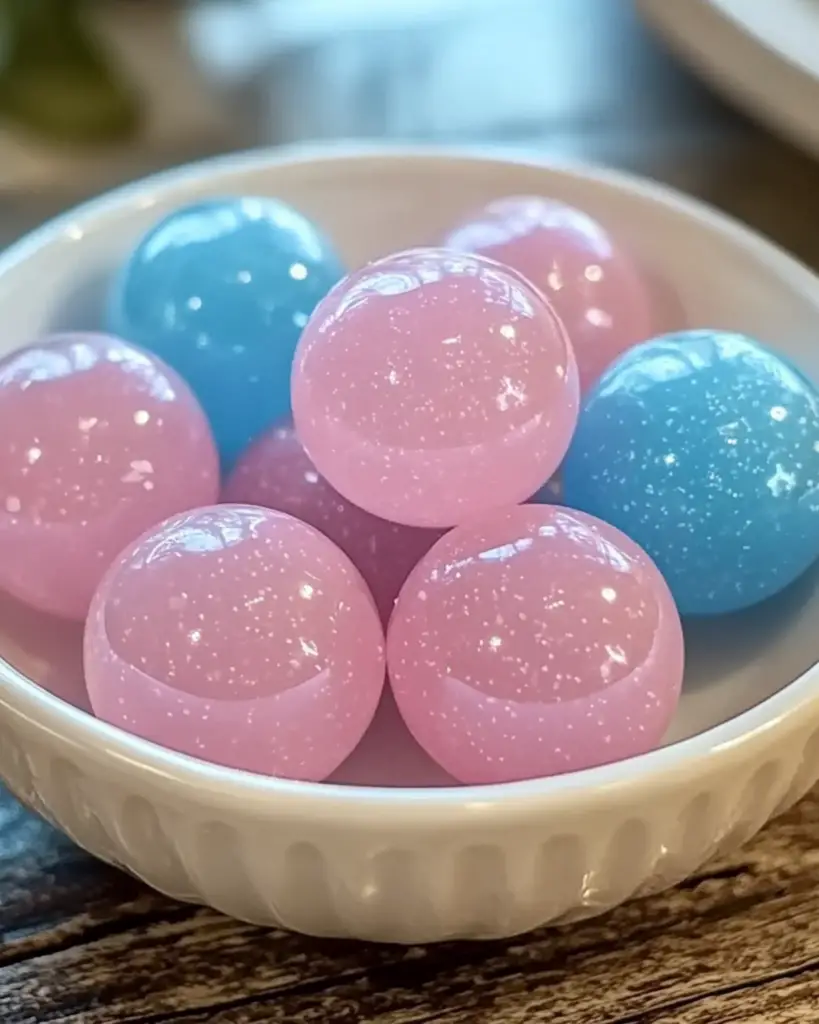
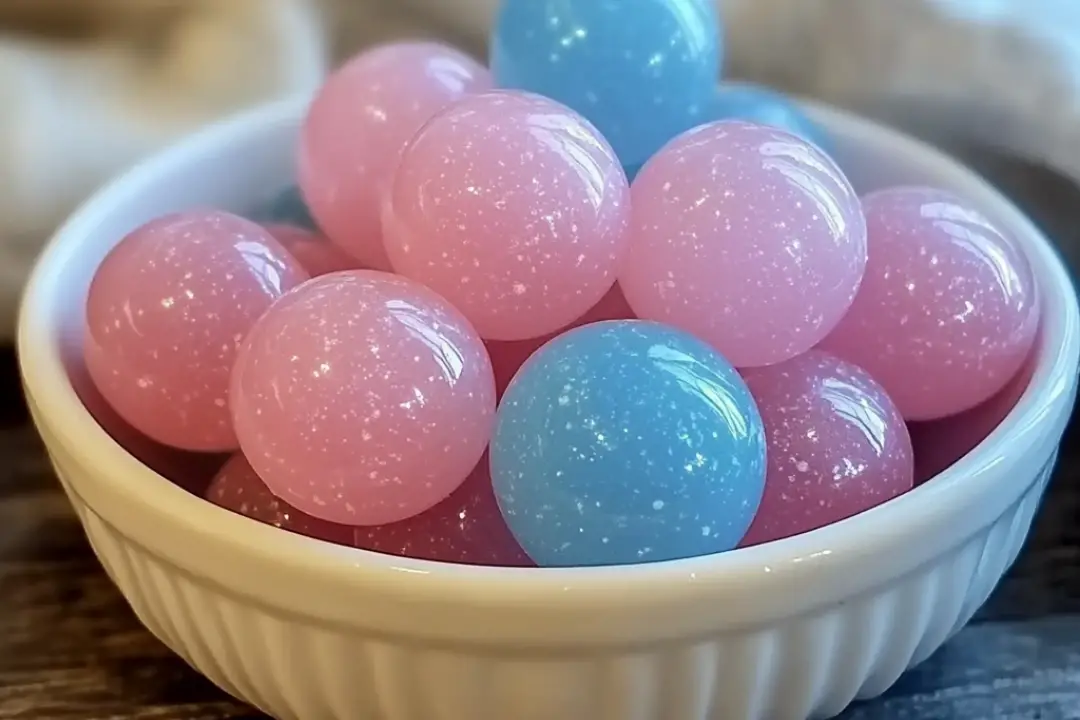
This recipe is the perfect way to relive those childhood bubble-blowing days, but with a homemade twist. Let’s dive into how you can make your very own batch of bubble gum from scratch!
Why You’ll Love Homemade Bubble Gum
Customizable Flavor: You’re in control here! Want watermelon, strawberry, or something more exotic like green apple? You can pick the flavoring to suit your taste.
Fun to Make: It’s like a science experiment and a baking session rolled into one. You’ll be amazed at how the ingredients come together into something that’s both chewy and bubble-licious!
Perfect for a Snack or a Gift: Whether you’re whipping up a batch for a treat or giving it as a quirky gift, homemade bubble gum is a fun and unique way to enjoy something sweet.
No Artificial Additives: Making your own gum means you can avoid all the artificial colors and preservatives that store-bought gum often contains. Plus, you can adjust the sweetness to your liking!
Impressive: You’ll be the talk of the party when you show up with a bag of homemade bubble gum—your friends and family won’t believe you made it yourself!

Disclosure: This post contains affiliate links.If you click and make a purchase, I may earn a small commission at no extra cost to you.
Ingredients
Making Homemade Bubble Gum requires just a few ingredients you can easily find at most grocery stores. Here’s what you’ll need:
For the Gum Base:
- Chicle Gum Base: The main ingredient in gum that gives it that chewy, elastic texture. This is what makes bubble gum stretchable, and it’s the key to getting that classic chewiness. You can find it online or at specialty stores.
- Corn Syrup: Helps add sweetness and creates that sticky, gum-like consistency.
- Powdered Sugar: This will sweeten your gum and help it firm up, preventing it from being too sticky when you chew it.
- Gum Arabic (optional): This is sometimes added to help with texture and consistency. It’s not strictly necessary, but it can improve the smoothness of the gum.
For Flavoring:
- Flavoring Oil: This is what gives your gum its taste! You can use any type of food-grade flavoring oil (like mint, fruit, bubblegum flavor, etc.). Start with about 1/2 teaspoon and adjust to your preference.
- Food Coloring (optional): If you want to add some fun colors to your gum, a few drops of food coloring will do the trick.
(Note: The full ingredient list, including measurements, is provided in the recipe card directly below.)
Instructions
Ready to make your own bubble gum? Let’s break it down step-by-step:
Step 1: Prepare Your Work Area
Since this recipe involves heating ingredients and a bit of sticky fun, it’s best to have everything prepared before you start. Lay out a clean surface like a silicone mat, parchment paper, or wax paper to roll your gum later. Have your flavoring oil and food coloring ready to go.
Step 2: Melt the Gum Base
In a medium saucepan, combine the chicle gum base and corn syrup over low heat. Stir continuously to melt the gum base and ensure it doesn’t burn. It should melt into a smooth, sticky consistency. This can take about 5-7 minutes, so be patient!
Step 3: Add the Powdered Sugar
Once the gum base has melted, slowly stir in the powdered sugar. Add it in small batches and keep stirring until it’s all incorporated. You may notice the mixture becoming thicker and less sticky—that’s a good sign!
Step 4: Flavor It Up
Now that your gum base is ready, it’s time to add the flavoring! Drop in your flavoring oil of choice and food coloring if you’re using it. Mix it well to ensure the flavor and color are evenly distributed throughout the gum base.
Step 5: Knead the Gum
Once everything is mixed, it’s time to let the gum cool down a bit so it’s safe to handle. You can use a spoon or spatula to help knead it until it becomes a firm, pliable dough. You may want to dust your hands with a little powdered sugar to avoid sticking, and be sure to knead for about 5-7 minutes to get the perfect bubble-gum consistency.
Step 6: Roll and Cut the Gum
Once the gum is at a comfortable temperature, roll it out into a log shape or divide it into small chunks for individual pieces of gum. You can use scissors or a knife to cut it into small pieces, then let it sit and firm up for about 10 minutes.
Step 7: Wrap and Enjoy
Now that you’ve shaped your gum, you can wrap it in wax paper or store it in an airtight container. Make sure it’s completely cooled and firm before eating. Let the fun begin—blow those bubbles!
Nutrition Facts
Servings: Approximately 20 pieces (depending on the size of your gum pieces)
Calories per serving: 15-20 calories per piece
Fat: 0g
Carbs: 5g
Sugar: 4g
Protein: 0g
Preparation Time
Prep Time: 15 minutes
Cook Time: 10 minutes
Total Time: 25 minutes
How to Serve Homemade Bubble Gum
Homemade bubble gum is a fun treat on its own, but you can get creative with how you serve it! Here are a few fun ideas:
Bubble Blowing Contest: Invite friends or family over for a bubble-blowing competition! See who can blow the biggest bubble or hold their bubble the longest.
Party Favors: Wrap individual pieces of gum in cute packaging and give them out as party favors. It’s a unique and fun gift idea!
Snack Break: Enjoy a piece of homemade gum during your afternoon snack break for a chewy, satisfying treat.
Additional Tips
Customize Your Flavors: You can mix and match flavors to create your own unique gum blends. How about mixing blueberry and lemon, or making a tropical fruit combo? Let your imagination run wild!
Don’t Overheat: Be careful not to overheat the gum base, as it can become too sticky or burn. Stir constantly to maintain an even heat.
Storing the Gum: Store your bubble gum in an airtight container at room temperature. It will stay fresh for up to 1-2 weeks. If you want to keep it fresh longer, wrap each piece in wax paper before storing it.
Adjust the Sweetness: Feel free to adjust the amount of powdered sugar for a sweeter or less sweet gum. If you want it less sweet, you can reduce the sugar by a little.
Use Different Shapes: Get creative and shape your gum into fun shapes like hearts or stars before wrapping it up. This adds a cute touch if you’re giving it away as a gift.
FAQ Section
Q1: Can I use regular gum instead of chicle gum base?
A1: Chicle is the traditional gum base used in making bubble gum, and it gives the best texture. Regular chewing gum won’t provide the same elasticity or chewiness.
Q2: Can I use liquid flavoring instead of oil?
A2: You can use liquid flavoring, but oil-based flavoring works better because it won’t affect the texture of the gum. If using liquid flavoring, use it sparingly.
Q3: How long will homemade bubble gum last?
A3: When stored properly in an airtight container, homemade bubble gum will stay fresh for about 1-2 weeks. After that, it may lose some of its chewiness.
Q4: Can I make bubble gum without food coloring?
A4: Of course! Food coloring is purely optional. Your gum will still taste just as delicious without it.
Q5: How do I know if the gum is done?
A5: The gum is done when it has a firm but pliable texture that’s not too sticky. You should be able to knead it easily without it sticking to your hands.
Q6: Can I make this recipe vegan?
A6: Yes! You can make the gum vegan by ensuring your flavoring oils are plant-based and avoiding any animal-derived ingredients in the gum base.
Q7: Can I freeze homemade bubble gum?
A7: Yes, you can freeze it for up to 3 months! Just wrap the pieces tightly in wax paper and store them in a freezer-safe container.
Q8: How do I adjust the flavor if it’s too strong or too weak?
A8: If the flavor is too strong, you can add more powdered sugar to balance it out. If it’s too weak, add a few more drops of the flavoring oil.
Q9: Can I make gum with no gum base?
A9: Gum base is necessary to get the chewiness and elasticity. Without it, you’ll end up with a candy rather than gum.
Q10: Can I add extra ingredients to my gum, like sprinkles or candy bits?
A10: Absolutely! Just make sure any additional ingredients are small and won’t interfere with the gum’s texture. Sprinkles, candy bits, or even small pieces of fruit work well.
Conclusion
Making Homemade Bubble Gum is a fun and creative way to indulge in a childhood favorite with a twist. From customizing your flavors to blowing huge bubbles, this homemade treat will surely bring a smile to your face. Whether you’re making it for yourself, a party, or as a gift, it’s an experience you won’t forget. Get ready to chew, bubble, and enjoy every moment of your homemade gum! Happy chewing!
Print
Homemade Bubble Gum Recipe
- Total Time: 30 minutes
- Yield: About 10-12 pieces of bubble gum
- Diet: Vegetarian
Description
Homemade Bubble Gum is a fun and easy way to make your own chewy, stretchy gum at home! Using simple ingredients like gum base, powdered sugar, and corn syrup, you can create a customizable, flavorful bubble gum that’s perfect for kids and adults alike. Add your favorite flavor and color to create a one-of-a-kind treat that you can chew, stretch, and blow bubbles with.
Ingredients
- 1/4 cup gum base (can be found at candy supply stores or online)
- 1/4 cup powdered sugar (plus extra for dusting)
- 2 tablespoons corn syrup
- 1 tablespoon glycerin (optional, for added softness)
- 1/2 teaspoon citric acid (optional, for a tangy flavor)
- 1/2 teaspoon flavoring (like strawberry, mint, or any desired flavor extract)
- Food coloring (optional, for vibrant gum)
- 1 tablespoon warm water (for melting the gum base)
Instructions
- Melt the Gum Base:
- In a small saucepan over low heat, combine the gum base and warm water. Stir occasionally until the gum base is fully melted, which should take about 5-7 minutes. Be sure to watch closely and avoid overheating.
- Mix in the Corn Syrup and Glycerin:
- Once the gum base is melted, add the corn syrup and glycerin (if using) to the mixture. Stir until well combined.
- Add Flavor and Color:
- Add your flavoring of choice (such as strawberry, cherry, or mint extract) and food coloring (if desired). Stir until the flavor and color are evenly incorporated.
- Incorporate Powdered Sugar:
- Slowly add the powdered sugar, about a tablespoon at a time, to the gum mixture while stirring continuously. The mixture will start to thicken and become dough-like. Once it’s cool enough to handle, knead the mixture with your hands until it becomes a smooth and pliable gum dough.
- Knead and Stretch the Gum:
- Sprinkle some powdered sugar on your work surface and continue to knead the gum for 5-10 minutes, stretching and folding it to ensure it’s fully smooth and no longer sticky. If the gum feels too sticky, add more powdered sugar as needed.
- Shape the Bubble Gum:
- Once the gum is smooth and stretchy, divide it into small pieces and roll each piece into a ball or shape it as desired. You can roll it into a thin log and cut it into small pieces for individual portions.
- Let it Cool and Set:
- Allow the bubble gum to cool completely before chewing. Store any leftover gum in an airtight container or plastic wrap to keep it fresh.
- Enjoy:
- Once the gum has cooled and set, it’s ready to chew! Blow bubbles, stretch it, and enjoy the homemade goodness.
Notes
- Be cautious when melting the gum base as it can get very hot.
- The flavor of homemade bubble gum can be customized to your liking by adjusting the amount of flavoring and food coloring. You can use fruit extracts, mint, or even bubble gum flavoring if available.
- The addition of citric acid can help enhance the tanginess of the gum and create a more traditional sour bubble gum taste.
- Prep Time: 15 minutes
- Cook Time: 15 minutes
- Category: Candy
- Method: Cooking
- Cuisine: American
Nutrition
- Serving Size: 1 piece of bubble gum
- Calories: 40
- Sugar: 7g
- Sodium: 0mg
- Fat: 0g
- Saturated Fat: 0g
- Unsaturated Fat: 0g
- Trans Fat: 0g
- Carbohydrates: 9g
- Fiber: 0g
- Protein: 0g
- Cholesterol: 0g


