Introduction
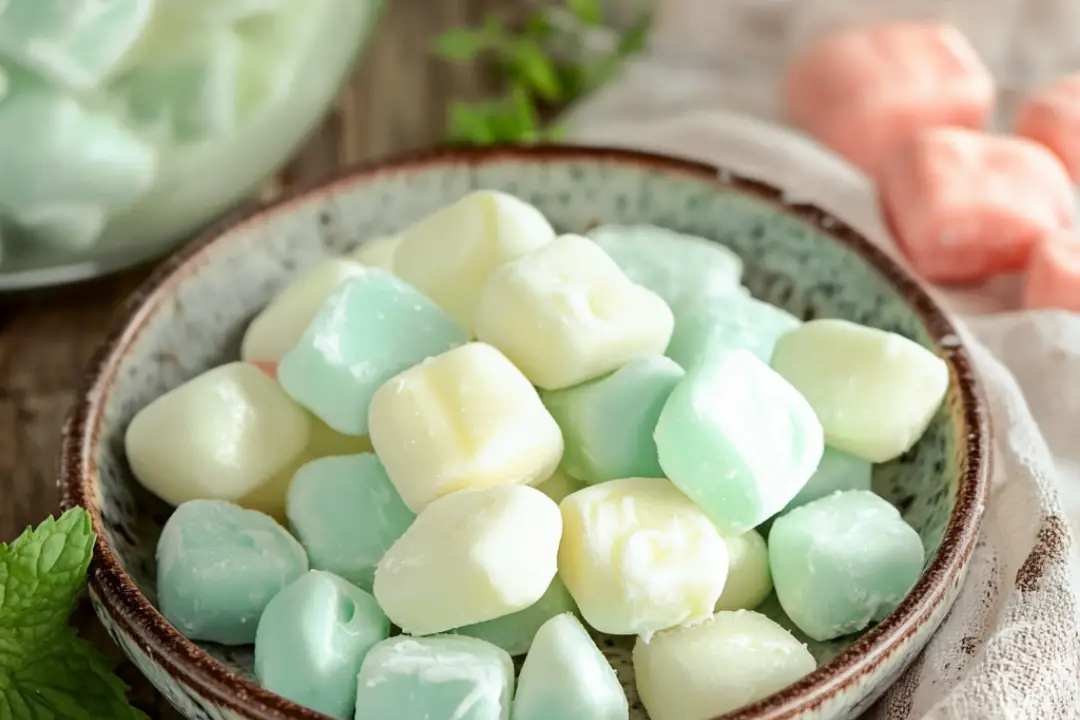
Every holiday season, our family has a tradition of creating homemade candies to share with friends and family. This year, we decided to try our hand at making butter mints, and it was a delightful experience! The process of mixing the ingredients and watching the dough transform into colorful, minty treats was not only fun but also brought back fond memories of holidays past. The kids loved helping out, especially when it came to adding the food coloring and rolling the dough into little ropes. The best part? The homemade butter mints turned out to be a huge hit! They’re creamy, sweet, and just the right amount of minty, making them perfect for holiday gatherings or as a simple after-dinner treat.
Ingredients
To make these delicious homemade butter mints, you will need:
- 1 stick unsalted butter (softened)
- 1 tablespoon whipping cream
- 4 cups powdered sugar (divided, plus more for dusting)
- ½ teaspoon pure peppermint extract
- 1-4 drops food coloring (more for brighter colors, if desired)
Instructions
Step 1: Cream the Ingredients
- Mix the Base: In the bowl of a stand mixer, combine the softened butter, whipping cream, 1 cup of powdered sugar, and peppermint extract. Mix on medium speed until the mixture is smooth and well combined.
- Add the Sugar Gradually: Scrape down the sides of the bowl to push down any dough that sticks. Add another cup of powdered sugar and mix again. Continue this process, adding in the remaining powdered sugar one cup at a time, until all of it is incorporated and the dough starts pulling away from the sides of the bowl.
Step 2: Color the Dough
- Divide the Dough: If you’re using multiple colors, weigh the entire ball of dough on a kitchen scale and divide it evenly. Wrap each section in plastic wrap to prevent it from drying out.
- Add Color: Working with one section at a time, add 1-4 drops of your chosen food coloring. Knead the dough by hand until the color is evenly distributed. For reference, we used Yellow (4 drops), Green (2 drops), Blue (2 drops), and Red (1 drop). Wrap the colored dough again and chill in the fridge for about 1 hour. Repeat this process for the other colors.
Step 3: Shape the Mints
- Roll the Dough: After chilling, take one color of dough and place it on a cutting board dusted with powdered sugar. Roll the dough into a rope about ½ inch thick using the palm of your hand.
- Cut the Mints: Use a sharp knife or dough scraper to cut the rope into small pieces. Place the cut pieces on the cutting board or transfer them to a baking sheet.
Step 4: Dry the Mints
- Let Them Set: Allow the cut mints to dry at room temperature for about 12 hours. This will help them firm up.
Step 5: Store the Mints
- Final Storage: Once dried, store the butter mints in an airtight container at room temperature for up to 2 weeks.
Nutrition Facts
- Servings: Approximately 20 mints
- Calories per serving: 70 kcal
Preparation Time
- Prep Time: 30 minutes
- Chill Time: 1 hour
- Drying Time: 12 hours
- Total Time: Approximately 13 hours and 30 minutes
How to Serve
Here are some fun ways to serve your homemade butter mints:
- Candy Dish: Place them in a decorative candy dish for guests to help themselves.
- Gift Bags: Package them in small gift bags with ribbons to give as holiday gifts.
- Party Favors: Use them as sweet party favors at holiday gatherings.
- Dessert Table: Include them on a dessert table at festive occasions.
- With Tea or Coffee: Serve alongside hot beverages for a delightful pairing.
Additional Tips
- Consistency: If the dough is too sticky, add a little more powdered sugar until you achieve the right consistency.
- Flavor Variations: Try using other extracts like vanilla or almond for a different flavor profile.
- Coloring: Use gel food coloring for more vibrant colors without adding too much liquid.
- Kitchen Tools: A dough scraper is helpful for cutting the ropes into even pieces.
- Make Ahead: These mints can be made ahead of time and stored for the holidays!
Recipe Variations
- Chocolate Butter Mints: Add cocoa powder to the mixture for a chocolate twist.
- Seasonal Flavors: Experiment with other seasonal flavors like cinnamon or spearmint.
- Coated Mints: Dip the dried mints in chocolate for a decadent treat.
- Mini Shapes: Use cookie cutters to make fun shapes instead of ropes for a playful presentation.
- Different Colors: Customize colors for different holidays or occasions.
Serving Suggestions
Consider these serving suggestions for your butter mints:
- Alongside Desserts: Pair with brownies or cookies for a sweet treat platter.
- At Tea Parties: Serve with an assortment of teas and scones.
- As Stocking Stuffers: Perfect for stuffing into stockings during the holidays.
- With Ice Cream: Crushed mints can be sprinkled over ice cream for a minty crunch.
- In Gift Baskets: Include them in holiday gift baskets with other homemade treats.
Freezing and Storage
- Storage: Keep the mints in an airtight container to maintain freshness. They can last up to 2 weeks at room temperature.
- Freezing: If you want to make them further in advance, you can freeze the uncut dough for up to 3 months. Thaw in the fridge before rolling and cutting.
FAQ Section
- Can I use salted butter?
- Yes, but it may alter the flavor slightly. Unsalted butter is recommended for a balanced taste.
- What if my mints are too sticky?
- If the dough is sticky, gradually add more powdered sugar until it reaches a workable consistency.
- How do I know when the mints are dry?
- The mints should feel firm to the touch and no longer sticky.
- Can I use other types of food coloring?
- Yes, gel food coloring is preferred for vibrant colors, but liquid coloring works as well.
- Are these mints gluten-free?
- Yes, all the ingredients are gluten-free.
- How should I store the mints?
- Store in an airtight container at room temperature. Avoid humidity, which can make them sticky.
- Can I make these mints vegan?
- Substitute the butter with a vegan butter alternative and omit the cream.
- Can I use a different extract?
- Yes, feel free to experiment with different flavor extracts!
- How long can I store these mints?
- They can be stored for up to 2 weeks at room temperature.
- Can I make these without a stand mixer?
- Yes, you can use a mixing bowl and a hand mixer, or mix by hand, though it may take longer.
Conclusion
Homemade butter mints are a delightful addition to any holiday celebration. They are easy to make, fun to color, and even better to eat! Whether you’re sharing them with friends and family or enjoying them yourself, these sweet, minty treats are sure to bring a smile to everyone’s face. So gather your ingredients, roll up your sleeves, and get ready to create a batch of delicious homemade butter mints that will become a cherished tradition in your home!
Print
Homemade Butter Mints: A Sweet Holiday Treat
- Total Time: 12 hours 30 minutes
- Yield: Approximately 20–30 mints (depending on size) 1x
- Diet: Vegetarian
Description
These creamy and minty homemade butter mints are a delightful treat perfect for any occasion. With a simple mix of butter, powdered sugar, and peppermint extract, these colorful mints are easy to make and a great addition to holiday gatherings, party favors, or as a sweet gift for loved ones.
Ingredients
- 1 stick unsalted butter (softened)
- 1 tablespoon whipping cream
- 4 cups powdered sugar (divided, plus more for dusting)
- ½ teaspoon pure peppermint extract
- 1–4 drops food coloring (or more for brighter colors)
Instructions
- Cream the Ingredients: In the bowl of a stand mixer, cream together the softened butter, whipping cream, 1 cup of powdered sugar, and peppermint extract until smooth.
- Add Sugar Gradually: Push down any dough that sticks to the sides of the bowl. Add another cup of powdered sugar and mix again. Repeat this process until all the powdered sugar is incorporated, and the dough starts to pull away from the sides of the bowl.
- Divide the Dough: If using multiple colors, divide the dough evenly and wrap each section in plastic wrap to prevent drying. (Weigh the entire ball of dough for even division.)
- Color the Dough: Starting with one section, add 1-4 drops of your chosen food coloring and knead until evenly distributed. Wrap it again and chill in the fridge for 1 hour. Repeat for the other colors.
- Shape the Mints: Working with one color at a time on a cutting board dusted with powdered sugar, roll the dough into a rope shape about ½ inch thick. Cut with a sharp knife or dough scraper.
- Dry the Mints: Leave the cut pieces on the cutting board or transfer them to a baking sheet. Allow them to dry at room temperature for about 12 hours.
- Store the Mints: Store the mints at room temperature in an airtight container for up to 2 weeks.
Notes
- Ensure the butter is softened for easier mixing.
- Use gel food coloring for more vibrant colors without adding extra liquid.
- These mints can be customized with different flavors or extracts, such as chocolate or vanilla.
- Prep Time: 30 minutes
- Cook Time: 12 hours (drying time)
- Category: candy
- Method: Mixing and Rolling
- Cuisine: American
Nutrition
- Serving Size: 1 mint
- Calories: 60
- Sugar: 14g
- Sodium: 0mg
- Fat: 1.5g
- Saturated Fat: 1g
- Unsaturated Fat: 0.5g
- Trans Fat: 0g
- Carbohydrates: 14g
- Fiber: 0g
- Protein: 0g
- Cholesterol: 5mg


