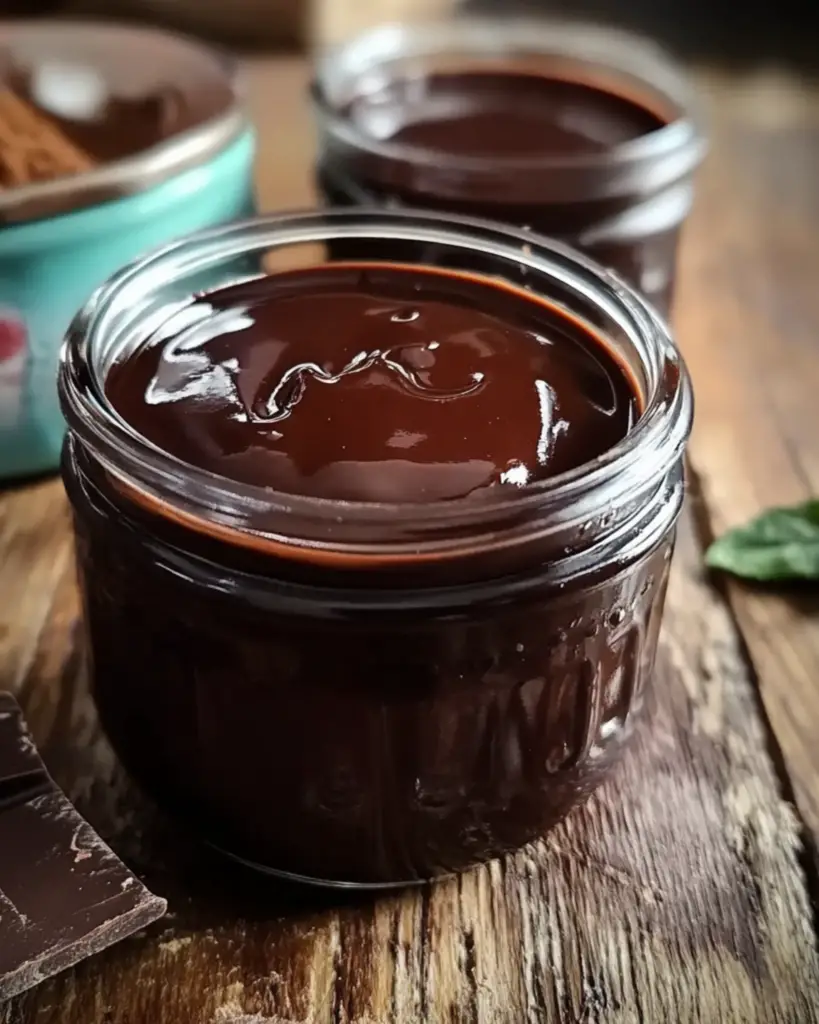
Craving a rich, indulgent chocolate syrup to drizzle over ice cream, pancakes, or maybe just to sneak a spoonful straight from the jar? Well, you’ve found the perfect recipe. Homemade chocolate syrup is one of those little luxuries that’s so easy to make and yet tastes a thousand times better than anything you can buy. Trust me, once you’ve tried this, you’ll wonder why you ever bought the store-bought version! It’s smooth, velvety, and packed with deep chocolate flavor. You’ll be pouring it over everything, from milkshakes to waffles, and maybe even a spoonful when you need a quick pick-me-up. It’s just that good.
Why You’ll Love Homemade Chocolate Syrup
This homemade chocolate syrup is everything you want in a syrup, and more:
Simple Ingredients
This recipe uses just a handful of pantry staples—things you probably already have in your kitchen. No weird additives or preservatives, just pure, chocolatey goodness.
Quick and Easy
Ready in less than 10 minutes! Seriously, it’s that fast. The best part? You only need to stir a few ingredients together and let them cook for a minute. That’s it!
Customizable
Want a richer chocolate flavor? Add a bit more cocoa powder. Prefer it sweeter? A little extra sugar will do the trick. You can even make it a bit darker or more intense depending on your taste.
Perfect for Any Occasion
Whether you’re making an ice cream sundae for dessert, drizzling it on pancakes for breakfast, or stirring it into hot milk for a comforting treat, this syrup is super versatile. It’s perfect for just about any chocolate craving.
No High Fructose Corn Syrup
When you make it at home, you know exactly what’s in it. No mystery ingredients, just a delicious, homemade treat!

Disclosure: This post contains affiliate links.If you click and make a purchase, I may earn a small commission at no extra cost to you.
Ingredients
Here’s all you need to make this decadent homemade chocolate syrup. Just a few basic ingredients, but the result is so much more:
Cocoa Powder
This is the key to that deep, rich chocolate flavor. Make sure to use unsweetened cocoa powder for the best taste.
Sugar
Adds the perfect amount of sweetness to balance out the cocoa. You can adjust the sugar to suit your sweetness preference.
Water
To bring everything together and create that silky syrup consistency.
Vanilla Extract
A dash of vanilla rounds out the flavor and adds a lovely warmth to the syrup.
Salt
Just a pinch of salt enhances the chocolate flavor and helps balance the sweetness.
(Note: Full ingredient measurements provided in the recipe card above!)
Instructions
Here’s how you make this luscious chocolate syrup:
Combine Ingredients
In a medium saucepan, whisk together the cocoa powder, sugar, and salt. Add the water and stir until everything is well combined. The mixture will be thick at first, but that’s okay.
Cook Over Medium Heat
Place the saucepan on medium heat and bring the mixture to a simmer, stirring frequently. Let it cook for about 3-5 minutes, allowing it to thicken up to the consistency of syrup. Keep an eye on it to prevent it from boiling over!
Add Vanilla
Once the syrup has thickened, remove it from the heat. Stir in the vanilla extract, and give it a good mix to fully incorporate.
Cool and Store
Let the chocolate syrup cool to room temperature. Once it’s cooled, transfer it to an airtight container or jar. You can store it in the fridge for up to 2 weeks—though I doubt it will last that long!
Nutrition Facts
Servings: 10
Calories per serving: 75
Total Fat: 0g
Saturated Fat: 0g
Cholesterol: 0mg
Sodium: 5mg
Carbohydrates: 18g
Fiber: 2g
Sugar: 17g
Protein: 1g
Preparation Time
Prep Time: 2 minutes
Cook Time: 5 minutes
Total Time: 7 minutes
How to Serve Homemade Chocolate Syrup
This syrup is incredibly versatile and can be served in many delicious ways:
Over Ice Cream
Classic, right? Drizzle this homemade chocolate syrup over a big bowl of ice cream for a treat that’s next-level. It’s the perfect topping for sundaes, cones, or just scooped in a bowl.
On Pancakes or Waffles
Skip the maple syrup for a fun twist and pour this over your breakfast stack. It adds a decadent, chocolatey touch that makes any morning feel special.
In Milkshakes or Hot Chocolate
Stir a spoonful of syrup into milk to create a quick chocolate milk. For an extra indulgent treat, mix it into your milkshake or hot chocolate for the ultimate cozy drink.
As a Fruit Dip
Chocolate and fruit are a match made in heaven! Use this syrup as a dip for strawberries, bananas, or even apples for a sweet treat that’s also a little healthier.
For Desserts
Drizzle it over cakes, brownies, or even a fruit salad to bring a touch of chocolate indulgence to any dessert.
Additional Tips
Here are a few extra tips to help you get the most out of this homemade chocolate syrup:
Adjust Consistency
If you like a thinner syrup, simply add a little more water and heat it for a minute or two to get it to the perfect pouring consistency. For a thicker syrup, cook it a bit longer.
Make It Dairy-Free
If you want a dairy-free version, you can swap out regular vanilla extract for a dairy-free option and use almond milk or coconut milk for a different flavor profile.
Double the Batch
This recipe is easy to double if you want a bigger batch on hand. Just be sure to store it in a larger jar or container!
Store Properly
Keep the syrup in an airtight container in the fridge, and it will last for up to two weeks. Be sure to stir it well before using, as it may separate a little after sitting for a while.
FAQ Section
Q1: Can I make this chocolate syrup without sugar?
A1: You can use a sugar substitute like stevia or monk fruit sweetener. Just adjust the amount to your taste, as some substitutes are sweeter than sugar.
Q2: Can I make this syrup without cocoa powder?
A2: Cocoa powder gives the syrup its rich chocolate flavor, so it’s best not to skip it. If you don’t have cocoa, you could try using chocolate chips, but the texture and flavor may change.
Q3: How long does this chocolate syrup last?
A3: This homemade chocolate syrup will last up to two weeks if stored in an airtight container in the fridge.
Q4: Can I use this syrup in baking?
A4: Yes, you can use this syrup in baking as a filling for cakes or brownies, or as a topping for baked goods like muffins or donuts.
Q5: Can I make this syrup with milk instead of water?
A5: Yes! Using milk instead of water will give the syrup a creamier texture, but it will be slightly thicker. Be sure to cook it for a bit longer.
Q6: Can I add spices to this syrup?
A6: Absolutely! You can experiment with cinnamon, chili powder, or even a splash of coffee for a deeper flavor. A pinch of cayenne will add a bit of heat too!
Q7: Can I freeze this chocolate syrup?
A7: While it’s not ideal to freeze chocolate syrup, you can store it in the fridge for up to two weeks. If it thickens too much, just heat it gently to bring it back to the right consistency.
Q8: Can I use this syrup for ice cream sundaes?
A8: Yes, it’s perfect for sundaes! Drizzle it over your favorite ice cream and add toppings like whipped cream, nuts, or sprinkles for a treat that’s hard to beat.
Q9: How do I adjust the sweetness of the syrup?
A9: You can adjust the sweetness by adding more or less sugar. Start with the recipe as written and taste it—if you like it sweeter, add a little more sugar and stir until dissolved.
Q10: Is this syrup gluten-free?
A10: Yes, this homemade chocolate syrup is naturally gluten-free! Just make sure the cocoa powder and vanilla extract you use are gluten-free, and you’re good to go.
Conclusion
Once you’ve tasted this homemade chocolate syrup, you’ll never want to go back to store-bought! It’s quick, easy, and made with just a few simple ingredients, but the flavor is indulgent and irresistible. Whether you’re drizzling it on desserts, stirring it into drinks, or just enjoying it by the spoonful, this syrup is the perfect way to satisfy your chocolate cravings. Make a batch today, and let the chocolatey magic begin!
Print
Homemade Chocolate Syrup Recipe
- Total Time: 25 minutes
- Yield: About 1 1/2 cups
Description
This Homemade Chocolate Syrup is rich, smooth, and perfect for drizzling over ice cream, mixing into milk, or adding to your favorite desserts. Made with simple ingredients, it’s a delicious and customizable treat.
Ingredients
- 1 cup unsweetened cocoa powder
- 1 cup water
- 1 1/2 cups granulated sugar
- 1/4 tsp salt
- 1 tsp vanilla extract
- 1/4 tsp instant coffee (optional, for depth of flavor)
Instructions
- Combine Ingredients:
- In a medium saucepan, whisk together the cocoa powder, sugar, salt, and water. Stir to combine well.
- Cook the Syrup:
- Place the saucepan over medium heat. Bring the mixture to a simmer, stirring constantly to prevent burning.
- Once it begins to simmer, reduce the heat and cook for 3-5 minutes, allowing the syrup to thicken slightly.
- Add Vanilla and Coffee:
- Remove the saucepan from heat. Stir in the vanilla extract and instant coffee (if using). The coffee enhances the chocolate flavor, but it’s optional.
- Cool and Store:
- Let the syrup cool before transferring it to a jar or bottle.
- Store in the refrigerator for up to 3 weeks.
- Serve:
- Drizzle over ice cream, mix into milk, or use in your favorite desserts. Enjoy!
Notes
- For a smoother texture, you can strain the syrup through a fine-mesh sieve to remove any lumps.
- Adjust the sweetness to your taste by adding more or less sugar.
- You can also add a pinch of cinnamon or chili powder for a unique twist on the flavor.
- Prep Time: 10 minutes
- Cook Time: 15 minutes
- Category: Dessert
- Method: Stovetop
- Cuisine: American
Nutrition
- Serving Size: 1 tablespoon
- Calories: 50
- Sugar: 12 g
- Sodium: 10mg
- Fat: 1g
- Saturated Fat: 0g
- Unsaturated Fat: 0g
- Trans Fat: 0g
- Carbohydrates: 12g
- Fiber: 1g
- Protein: 1 g
- Cholesterol: 0 g


