
Introduction
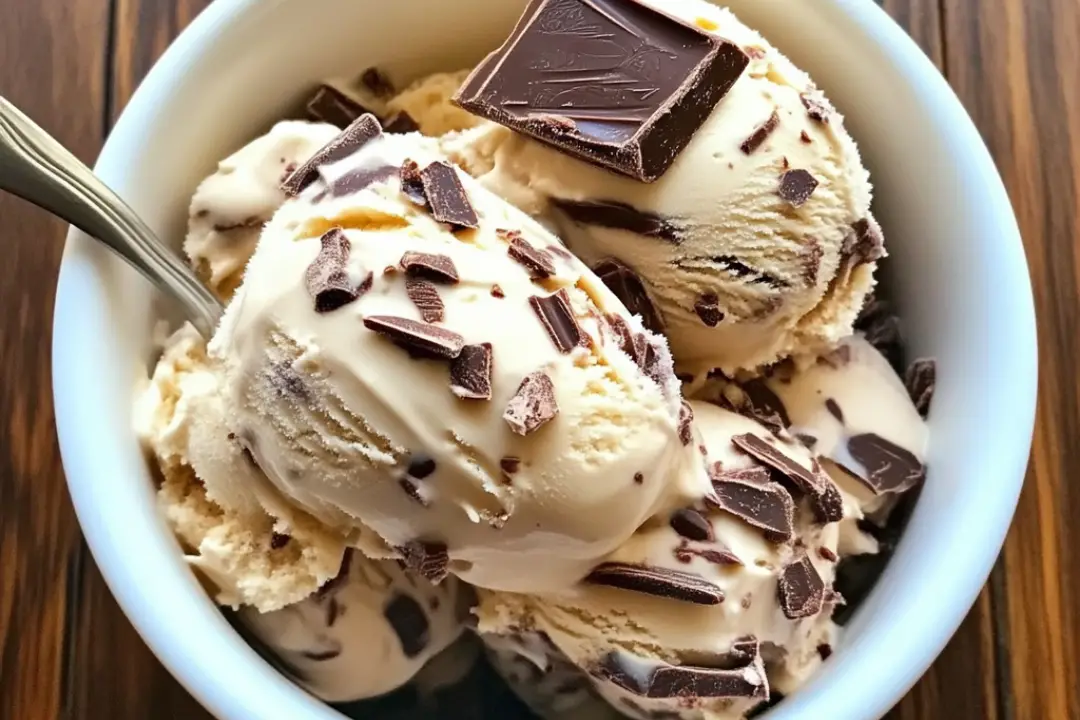
There’s something undeniably delightful about homemade chocolate ice cream bars. The combination of creamy ice cream and a rich chocolate shell is a classic treat that brings back memories of summers spent enjoying sweet snacks on hot days. I remember making these bars with my family as a fun weekend project, each of us excited to pick our favorite toppings and flavors. The result was always a deliciously satisfying dessert that everyone loved. Whether it was a birthday celebration or just a casual Saturday afternoon, these chocolate ice cream bars were a hit every time. With just a few simple ingredients and steps, you can recreate that joy in your own kitchen!
Ingredients
For the Ice Cream Base:
- 2 cups heavy cream: This is what gives the ice cream its rich and creamy texture.
- 1 cup sweetened condensed milk: Adds sweetness and creaminess, making the ice cream smooth.
- 1 teaspoon vanilla extract (optional): Enhances the flavor, but can be omitted if you prefer a more chocolate-forward taste.
For the Chocolate Shell:
- 300g dark or milk chocolate: Use your favorite chocolate to coat the bars.
- 2 tablespoons coconut oil: This helps thin the chocolate for dipping and gives it a nice sheen once it sets.
Optional Toppings/Garnishes:
- Chopped nuts (almonds, hazelnuts, etc.): Adds crunch and flavor.
- Caramel sauce: For a sweet drizzle that complements the chocolate.
- Crushed cookies: For extra texture and flavor.
- Sea salt: A sprinkle on top can enhance the sweetness and add a gourmet touch.
Equipment:
- Ice cream molds or a small loaf pan (for shaping the ice cream).
- Wooden sticks (for popsicles).
Instructions
Make the Ice Cream Base:
- Whip the Cream: In a large bowl, whip the heavy cream until stiff peaks form. This will create a light and airy texture for the ice cream.
- Combine Ingredients: Gently fold in the sweetened condensed milk and vanilla extract. Be careful not to deflate the whipped cream; you want to keep that airy texture.
- Freeze: Pour the mixture into your ice cream molds or a small loaf pan. Insert popsicle sticks into the molds. Freeze for at least 4 to 6 hours or until completely set.
Make the Chocolate Shell:
- Melt the Chocolate: In a microwave-safe bowl, melt the chocolate and coconut oil together. Heat in 30-second intervals, stirring in between, until smooth. Alternatively, you can melt the chocolate over a double boiler.
- Cool Slightly: Let the melted chocolate cool slightly, but ensure it remains liquid for dipping.
Dip Ice Cream Bars:
- Remove from Molds: Once the ice cream is completely frozen, carefully remove the bars from the molds.
- Dip in Chocolate: Quickly dip each ice cream bar into the melted chocolate, ensuring it’s completely coated. If desired, drizzle on caramel or sprinkle with chopped nuts before the chocolate hardens.
- Set in Freezer: Place the dipped bars back in the freezer for a few minutes to allow the chocolate to harden.
Serve and Enjoy:
- Ready to Serve: Once the chocolate is completely set, your homemade chocolate ice cream bars are ready to enjoy!
Nutrition Facts (per serving)
- Serving Size: 1 ice cream bar
- Calories: Approximately 250
- Total Fat: 18g
- Saturated Fat: 10g
- Cholesterol: 30mg
- Sodium: 50mg
- Total Carbohydrates: 25g
- Dietary Fiber: 1g
- Sugars: 15g
- Protein: 2g
Preparation Time
- Total Time: 6 to 8 hours (including freezing time)
- Active Time: 30 minutes
How to Serve
- Serve the chocolate ice cream bars chilled.
- Garnish with additional toppings such as:
- Chopped nuts
- A drizzle of caramel sauce
- Crushed cookies
- A sprinkle of sea salt for an added touch
Additional Tips
- Experiment with Flavors: Try adding different extracts (like mint or almond) to the ice cream base for a unique twist.
- Chocolate Choices: Use different types of chocolate (white, milk, dark) for a variety of flavor profiles.
- Keep It Cold: Make sure to work quickly when dipping the bars to prevent the ice cream from melting.
- Storage: Wrap the bars individually in wax paper to keep them fresh and prevent sticking.
- Dipping Techniques: For a thicker chocolate shell, let the first layer of chocolate set and then dip again.
Recipe Variations
- Mint Chocolate Chip: Add crushed mint candies to the ice cream base for a minty twist.
- Cookies and Cream: Fold in crushed chocolate sandwich cookies into the ice cream mixture before freezing.
- Fruit-Filled: Swirl in some fruit puree (like raspberry or strawberry) into the ice cream base for a fruity flavor.
- Nutty Delight: Mix in chopped nuts or nut butter into the ice cream for added flavor and texture.
Serving Suggestions
- Pair with fresh fruit for a refreshing contrast.
- Serve alongside a scoop of sorbet for an ice cream sampler.
- Drizzle with chocolate or caramel sauce just before serving for an extra indulgent touch.
Freezing and Storage
- Freezing: Once dipped in chocolate, the bars can be returned to the freezer and kept for up to 2 months.
- Storage: Store the ice cream bars in an airtight container or wrapped individually in wax paper to prevent freezer burn.
FAQ Section
- Can I use different types of chocolate?
- Yes, you can use dark, milk, or white chocolate based on your preference!
- How do I prevent the chocolate from cracking when it hardens?
- Make sure the chocolate is not too hot when dipping and allow the ice cream to freeze completely before dipping.
- What can I use instead of coconut oil?
- You can use vegetable oil or shortening as alternatives, but coconut oil gives the best texture and sheen.
- How long do these ice cream bars last in the freezer?
- They can last up to 2 months when stored properly.
- Can I make these without molds?
- Yes, you can use a loaf pan and cut the ice cream into bars after it has frozen.
- Is it possible to make these dairy-free?
- Yes, you can substitute the cream and condensed milk with coconut cream and dairy-free condensed milk.
- How do I know when the chocolate is melted enough?
- The chocolate should be smooth and pourable, without any lumps.
- Can I add flavors to the chocolate shell?
- Yes! You can mix in extracts or flavored oils to the melted chocolate.
- What’s the best way to serve these bars?
- Serve them straight from the freezer for the best texture, and let them sit for a minute before biting in.
- Can I make these bars ahead of time?
- Absolutely! They’re perfect for preparing in advance and serving later.
Conclusion
Homemade chocolate ice cream bars are a delightful treat that’s easy to make and perfect for sharing with family and friends. With a creamy base and a rich chocolate shell, they’re sure to satisfy any sweet tooth. Plus, the fun of customizing them with your favorite toppings makes them a hit for all occasions. Whether you’re hosting a summer barbecue, celebrating a birthday, or just treating yourself, these ice cream bars will bring joy and deliciousness to your day. Enjoy crafting these delectable treats in your kitchen, and watch them become a favorite in your household!
Print


Homemade Delicious Chocolate Ice Cream Bars
- Total Time: 15 minutes
- Yield: About 6–8 bars (depending on mold size) 1x
- Diet: Vegetarian
Description
Indulge in these creamy homemade chocolate ice cream bars with a rich chocolate shell. Perfect for warm days, they’re customizable with your favorite toppings!
Ingredients
- For the Ice Cream Base:
- 2 cups heavy cream
- 1 cup sweetened condensed milk
- 1 teaspoon vanilla extract (optional)
- For the Chocolate Shell:
- 300g dark or milk chocolate (your choice)
- 2 tablespoons coconut oil
- Optional Toppings/Garnishes:
- Chopped nuts (almonds, hazelnuts, etc.)
- Caramel sauce
- Crushed cookies
- Sea salt
Instructions
- Make the Ice Cream Base:
- In a large bowl, whip heavy cream until stiff peaks form.
- Gently fold in sweetened condensed milk and vanilla extract.
- Pour mixture into ice cream molds or a small loaf pan and insert popsicle sticks.
- Freeze for at least 4 to 6 hours or until completely set.
- Make the Chocolate Shell:
- Melt chocolate and coconut oil together in the microwave or over a double boiler until smooth.
- Let chocolate cool slightly, ensuring it remains liquid for dipping.
- Dip Ice Cream Bars:
- Once ice cream is completely frozen, remove bars from molds.
- Quickly dip each bar into melted chocolate, coating thoroughly. Optionally drizzle caramel or sprinkle nuts before the chocolate hardens.
- Place the dipped bars back in the freezer for a few minutes to let the chocolate set.
- Serve and Enjoy:
- Once the chocolate is set, enjoy your homemade ice cream bars!
Notes
Feel free to get creative with toppings or variations, such as using white chocolate or different flavored ice creams.
- Prep Time: 15 mins
- Cook Time: 0 minutes (freezing time: 4-6 hours)
- Category: Dessert
- Method: Freezing
- Cuisine: American
Nutrition
- Serving Size: 1 bar
- Calories: 200
- Sugar: 16g
- Sodium: 50mg
- Fat: 12g
- Saturated Fat: 7g
- Unsaturated Fat: 4g
- Trans Fat: 0g
- Carbohydrates: 20g
- Fiber: 1g
- Protein: 2g
- Cholesterol: 25mg