
Introduction
If you’re wondering How do you make sugar crystals step by step? you’ve come to the right place. With a methodical approach, anyone can make sugar crystals step by step, transforming simple kitchen ingredients into a sparkling treat. This process, often searched as ‘Make Sugar Crystals Step By Step,’ begins with dissolving sugar in water to create a saturated solution. You can customize your sugar crystals by adding food coloring or flavoring of your choice. To start, heat water in a pot, stirring in sugar until it’s completely dissolved. This initial step is the foundation of the guide on How do you make sugar crystals step by step? Once the sugar is dissolved, take the pot off the heat and let the solution cool a bit before moving it to your selected jar or container.
Forming the Seed Crystal
Continuing with ‘How do you make sugar crystals step by step?’, the next phase involves the creation of a seed crystal. Achieve this by dipping a string or stick into the sugar solution and allowing it to dry. This step is essential when you’re following the Steps to create sugar crystals. Once your seed crystal is prepared, attach it to a pencil or skewer and place it in the sugar solution without touching the container’s sides or bottom. The ‘Make Sugar Crystals Step By Step’ procedure now simply requires your patience. Over the following days, the solution will evaporate, and sugar crystals will form on the seed crystal, showcasing the magical journey of ‘How do you make sugar crystals step by step?’
In the quest to Make Sugar Crystals Step By Step, it’s crucial to understand the science behind the formation of these delightful treats. Sugar crystals form as the dissolved sugar in water binds together when the liquid evaporates. The key to making perfect crystals lies in creating a supersaturated sugar solution, which is a solution that has more sugar dissolved in it than would be possible under normal circumstances. This is a vital concept in making sugar crystals step by step, You can make such a solution by heating water and then adding sugar gradually until no more can dissolve, all the while stirring continuously. Alternatively, boiling the water before incorporating the sugar also works well for the DIY sugar crystal making.
Crystal Growth
After you’ve prepared your supersaturated solution, the actual crystal growth can commence. This is the exciting part of How do you make sugar crystals step by step. There are several ways to grow sugar crystals, but a favored technique is to hang a seeded string or stick in the solution, which, as it evaporates, leaves sugar crystals clinging to your seed. It is important to remember that Sugar Crystals is a process that doesn’t happen overnight. It may take days to weeks, depending on various factors such as temperature and humidity. But this Process for sugar crystal formation activity is not just about the end result—it’s about the fun and learning along the way. After all, the satisfaction of making sugar crystals step by step is as sweet as the crystals themselves!
Necessary Materials
To make sugar crystals at home, you will need the following materials:
Sugar
The primary ingredient in making sugar crystals is, of course, sugar. You will need granulated sugar, which is the most common type of sugar found in households. You can use either fine or coarse sugar, but fine sugar dissolves quicker in water, making it easier to work with.
Water
Water is the solvent used to dissolve the sugar and create a solution. You will need to use boiling water to dissolve the sugar completely.
A pot or bowl
You will need a pot or bowl to heat the water and dissolve the sugar. Make sure the pot or bowl is large enough to hold all the sugar you will be using.
A stirring utensil
You will need a spoon or stirring rod to mix the sugar and water together.
A seed crystal
To grow larger sugar crystals, you will need a seed crystal. This is a small crystal that will provide a surface for the larger crystals to grow on. You can use a rough string or yarn as a substitute for a seed crystal.
A container
You will need a container to hold the sugar solution and allow the crystals to grow. A glass or plastic jar is ideal for this purpose.
Optional: food coloring and flavoring
If you want to add some color and flavor to your sugar crystals, you can use food coloring and flavoring. Good choices for flavoring include cherry, peppermint, and cinnamon.
By gathering these necessary materials, you will be well on your way to making your own sugar crystals at home.
Preparation Stage
Before you start making sugar crystals, you need to prepare the necessary materials and equipment. Here are the steps you need to follow:
Creating the Solution
- In a saucepan, mix 2 cups of water and 4 cups of granulated sugar. You can adjust the measurements based on how much sugar crystals you want to make.
- Heat the mixture over medium heat while stirring constantly until the sugar has completely dissolved. This will create a supersaturated solution.
- Remove the saucepan from heat and let the solution cool for a few minutes.
Preparing the Stick and String
- While waiting for the solution to cool, prepare a stick and a string that will serve as the base for your sugar crystals. You can use a wooden skewer or a pencil for the stick and a piece of cotton string for the string.
- Tie one end of the string to the middle of the stick and the other end to a weight such as a paper clip or a washer. The string should be long enough to reach the bottom of the saucepan without touching the sides or the bottom.
- Dip the stick and string into the solution and coat them with sugar. Be sure to cover the entire string evenly.
- Remove the stick and string from the solution and let the excess sugar drip off. Place the stick on a piece of wax paper or foil and let it dry completely. This will create a seed crystal that will attract sugar molecules and start the crystal formation process.
By following these steps, you can now proceed to the next stage of making sugar crystals, which is the crystal growing process.
Crystallization Process
To make sugar crystals, you need to create a supersaturated solution of sugar and water. This means that you need to dissolve as much sugar as possible in the water, creating a solution that contains more sugar than it normally would. When the solution cools down, the excess sugar will start to come out of the solution and form crystals.
Immersing the String
To start the crystallization process, you will need to immerse a string in the supersaturated solution. The string will act as a nucleation point, which means that it will provide a surface for the sugar crystals to grow on. Tie one end of the string to a pencil or a stick and the other end to a weight, such as a paper clip or a washer. Dip the string in the solution, making sure that the weight is heavy enough to keep the string submerged.
Waiting for Crystallization
After placing the string in the solution, wait for the crystals to form. This might take a few hours or even days, based on the conditions. Keep the solution still during this period; ensure the container stays in a location where no one will bump or move it.
As the solution cools down, the excess sugar will start to come out of the solution and form crystals on the string. The longer you wait, the larger the crystals will grow. Once you are happy with the size of the crystals, carefully remove the string from the solution and let it dry. You now have your very own sugar crystals!
Remember that the crystallization process requires patience and careful attention to detail. Make sure that you follow the steps carefully and don’t rush the process. With a little bit of time and effort, you can create beautiful sugar crystals that are both fun to make and delicious to eat.
Observation and Analysis
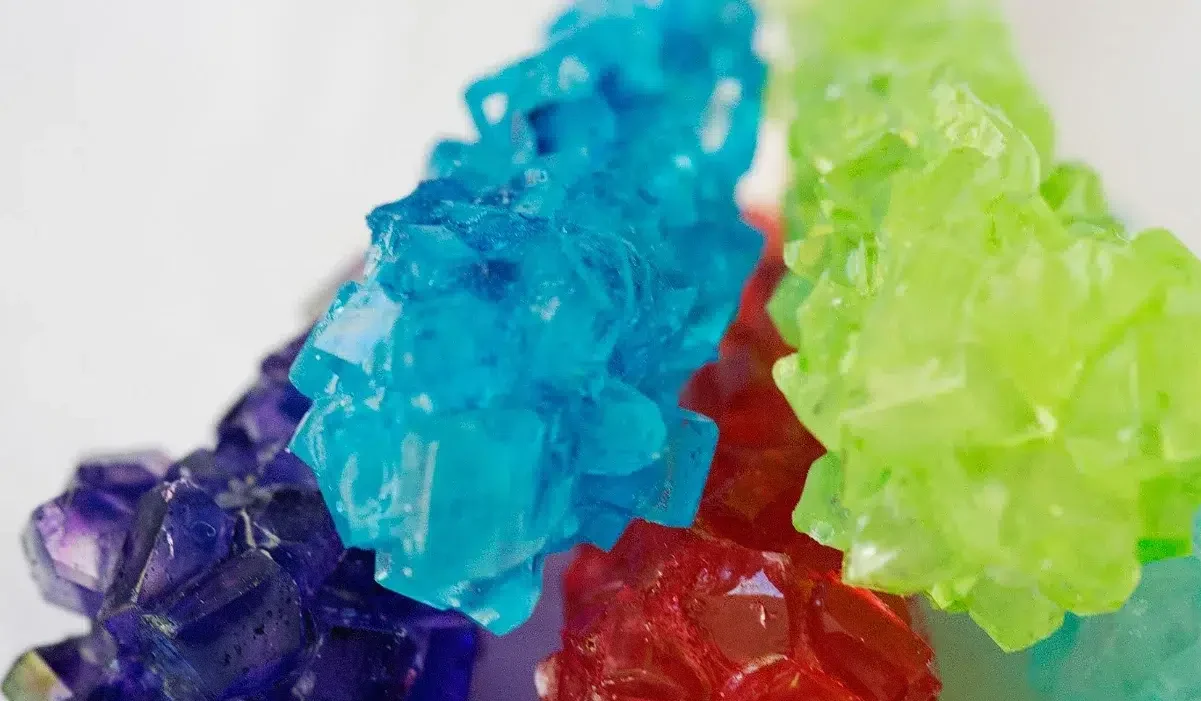
After several days of waiting, you should be able to observe the sugar crystals growing on the string or skewer. The crystals will start to form at the bottom and work their way up. You may notice that some crystals are larger than others, which is normal.
Take note of the shape and size of the crystals. Sugar crystals can take on a variety of shapes, including cubes, prisms, and needles. The conditions, like temperature and concentration, determine the shape of the crystals.
You can analyze your sugar crystals under a microscope to get a closer look at their structure. Use a spatula to transfer a few crystals onto a microscope slide and observe them at different magnifications. You may notice that sugar crystals are made up of smaller, repeating units called unit cells.
If you want to experiment with different colors or flavors, you can add food coloring or flavor extracts to the sugar syrup before crystallization. Keep in mind that adding too much of these additives may affect the crystal formation and result in smaller or misshapen crystals.
Overall, making sugar crystals is a fun and educational experiment that can teach you about chemistry and crystal formation. By observing and analyzing your crystals, you can learn more about how they form and what factors affect their shape and size.
Safety Measures
When making sugar crystals, safety should always be a top priority. Here are a few safety measures to keep in mind:
- Adult supervision is required: This experiment involves boiling water and handling hot liquids, so it’s important to have an adult present to supervise the process.
- Wear protective gear: When working with boiling water, it’s important to wear heat-resistant gloves to protect your hands from burns. You should also wear safety goggles to protect your eyes from any splashes or spills.
- Use caution when handling the sugar solution: The sugar solution will be very hot, so it’s important to use caution when handling it. Avoid touching the solution with your bare hands and use a spoon or other utensil to stir it.
- Clean up spills immediately: If you spill any of the sugar solution, clean it up immediately to avoid any slips or falls.
- Dispose of materials properly: Once you’re finished with the experiment, dispose of any leftover materials properly. The sugar crystals can be disposed of in the trash, while the sugar solution should be poured down the sink with plenty of water to avoid clogging.
By following these safety measures, you can ensure a safe and successful sugar crystal-making experiment.
Troubleshooting
If you’re having trouble growing sugar crystals, don’t worry. Here are some common problems and solutions:
Problem: Sugar crystals won’t form
If crystals aren’t forming on your string or stick, you might not have saturated your sugar solution enough. Try adding more sugar to the solution and heating it until the sugar dissolves. Keep adding sugar until it starts to accumulate at the bottom of the container and won’t dissolve even with more stirring. This means your sugar solution is saturated.
Another reason your sugar crystals may not be forming is that the temperature of your solution is too low. Make sure your solution is hot enough to dissolve the sugar and that it stays hot throughout the crystal growing process.
Problem: Crystals are forming too slowly
If your crystals are taking a long time to form, it could be because your sugar solution is too diluted. Try adding more sugar to the solution and heating it until the sugar dissolves. Keep adding sugar until it starts to accumulate at the bottom of the container and won’t dissolve even with more stirring. This means your sugar solution is saturated.
Another reason your crystals may be forming slowly is that the temperature of your solution is too low. Make sure your solution is hot enough to dissolve the sugar and that it stays hot throughout the crystal growing process.
Problem: Crystals are forming too quickly
If your crystals are forming too quickly, it could be because your sugar solution is too concentrated. Try adding more water to the solution and heating it until the sugar dissolves. Keep adding water until the sugar starts to dissolve more easily. This means your sugar solution is less concentrated.
Another reason your crystals may be forming too quickly is that the temperature of your solution is too high. Make sure your solution is not too hot and that it stays at a consistent temperature throughout the crystal growing process.
Problem: Crystals are cloudy or discolored
If your crystals are cloudy or discolored, it could be because there are impurities in your sugar solution. Make sure you’re using pure white granulated sugar and that your water is clean. You may also want to filter your sugar solution through a coffee filter or cheesecloth to remove any impurities.
Problem: Crystals are too small or too big
If your crystals are too small or too big, it could be because of the size of the string or stick you’re using. Try using a thicker or thinner string or stick to see if that affects the size of your crystals. You can also try adjusting the temperature or concentration of your sugar solution to see if that affects the size of your crystals.
FAQs
What is the process of making crystals of sugar?
- Dissolve sugar in boiling water until no more sugar can be added. This creates a saturated sugar solution.
- Allow the solution to cool and then pour it into a clear container.
- Hang a string or stick into the container, ensuring it doesn’t touch the sides or bottom.
- Place the container in a cool, undisturbed place. Over time, sugar crystals will grow on the string or stick.
How do you make sugar crystals for kids’ experiment?
- In a pot, heat water until it’s nearly boiling.
- Gradually add sugar, stirring continuously until it’s completely dissolved.
- Once dissolved, let it cool for a while and then transfer the solution to a clear jar.
- Tie a string to a pencil or stick, placing the pencil over the jar so the string dangles into the liquid without touching the sides or bottom.
- Leave the setup in a safe place. In several days, kids will observe sugar crystals forming on the string!
How do you make easy crystals at home?
The simplest way is the sugar crystal method mentioned above. Alternatively, you can use salt or alum. For salt crystals, the process is similar: dissolve salt in hot water, let it cool, and then allow crystals to form over time.
Can you grow sugar crystals without boiling water?
- Boiling water helps dissolve more sugar to create a saturated solution, which is ideal for growing large and clear crystals. However, you can grow sugar crystals without boiling water; it just might take longer and the crystals may not be as large. Simply dissolve sugar in warm tap water until it won’t dissolve anymore, and then follow the general steps of the crystallization process.
Related Posts:
- What is Kohakutou Made of? Unveiling the Japanese Delight
- Kohakutou Recipe: Making Japanese Crystal Candy Easily
- How Do You Make Edible Crystals Fast? Best Quick Techniques!


How Do You Make Edible Crystals Fast? Best Quick Techniques!
- Total Time: 25 minutes (excluding days for crystal growth)
- Yield: Varies depending on the size of your container, but typically yields several dozen small crystals.
- Diet: Gluten Free
Description
Create shimmering and beautiful edible crystals perfect for garnishing your desserts and making them look exquisite. This recipe is simple yet offers a touch of elegance to any dish.
Ingredients
- 2 cups granulated sugar
- 1 cup water
- Food coloring (optional)
Instructions
- In a saucepan, combine the sugar and water. Stir until the sugar is mostly dissolved.
- Bring the mixture to a boil over medium heat. Reduce the heat and allow it to simmer without stirring until the liquid becomes clear and slightly thickened.
- Remove the saucepan from heat and let it cool for about 20 minutes.
- If you wish to color your crystals, add a few drops of food coloring and stir until the desired color is achieved.
- Pour the solution into a shallow dish or container. Allow it to sit undisturbed in a cool, dry place for several days.
- As the liquid evaporates, crystals will begin to form. After several days, when the growth stops, remove the crystals gently from the container.
Notes
- The longer you allow the solution to sit, the larger your crystals will become.
- The use of food coloring is optional. If you want natural-looking crystals, you can skip this step.
- Prep Time: 10 minutes
- Cook Time: 15 minutes
- Category: Dessert Garnish
- Method: Simmering
- Cuisine: Modern
Nutrition
- Serving Size: 10 crystals
- Calories: 77
- Sugar: 20g
- Sodium: 0mg
- Fat: 0g
- Saturated Fat: 0g
- Unsaturated Fat: 0g
- Trans Fat: 0g
- Carbohydrates: 20g
- Fiber: 0g
- Protein: 0g
- Cholesterol: 0mg