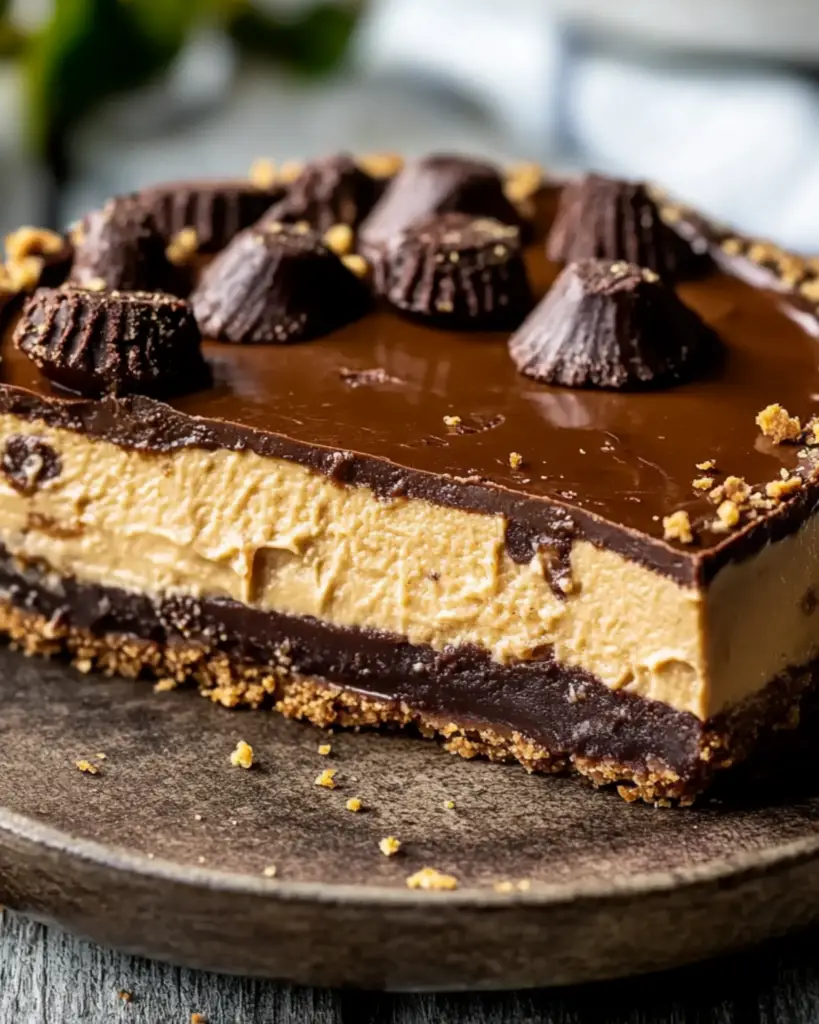
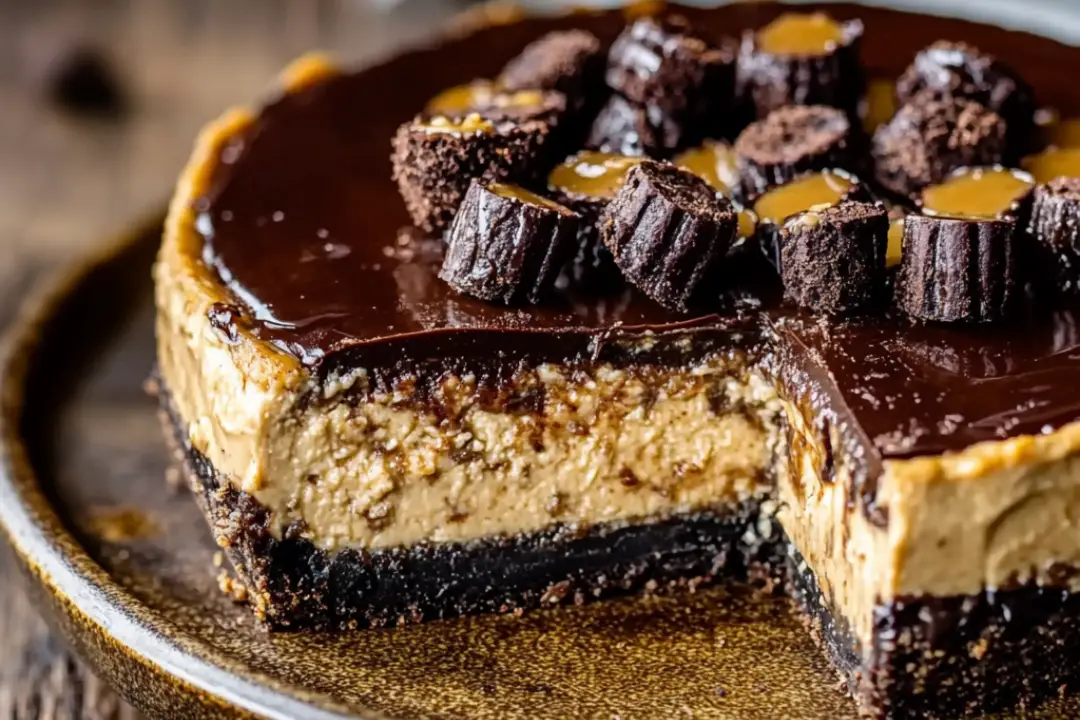
Looking for a dessert that’s rich, decadent, and guaranteed to impress? Say hello to Instant Pot Peanut Butter Cup Cheesecake—a creamy, smooth cheesecake with the irresistible combo of peanut butter and chocolate. And guess what? You don’t need to wait hours to bake it! Thanks to the Instant Pot, this cheesecake comes together in a fraction of the time with the same melt-in-your-mouth flavor. Each bite is a heavenly blend of peanut butter, chocolate, and a buttery graham cracker crust—what’s not to love? Trust me, you won’t be able to stop at just one slice!
Why You’ll Love Instant Pot Peanut Butter Cup Cheesecake
This cheesecake is everything you could want in a dessert, and here’s why:
No-Bake Magic with the Instant Pot
Who knew you could make such a decadent cheesecake in an Instant Pot? The pressure cooking method gives you the most velvety smooth texture without the hassle of a traditional oven bake.
Peanut Butter and Chocolate Perfection
This is the dream combination for peanut butter and chocolate lovers. The peanut butter flavor is rich and creamy, balanced perfectly with the richness of the chocolate and the crunchy graham cracker crust. It’s a flavor bomb in every bite!
Quick and Easy to Make
The Instant Pot cuts down the cook time, making this cheesecake super quick to whip up. You can make it even on your busiest days, and it will taste like it’s been slow-baked for hours.
Impressive but Low Effort
Don’t let the creamy, luscious texture fool you—this cheesecake is easy to prepare. It’s a great showstopper for dinner parties, holidays, or just when you’re in the mood to treat yourself.
Perfect for Any Occasion
Whether it’s a special celebration or just a random Tuesday, this cheesecake is guaranteed to turn any day into something extraordinary. Pair it with a cup of coffee or a scoop of vanilla ice cream for the ultimate treat!

Disclosure: This post contains affiliate links.If you click and make a purchase, I may earn a small commission at no extra cost to you.
Ingredients
Here’s what you’ll need to create this Instant Pot Peanut Butter Cup Cheesecake:
- Graham Cracker Crumbs: For that classic cheesecake crust.
- Butter: To bind the graham cracker crumbs and create a rich, buttery base.
- Peanut Butter: Creamy peanut butter for that indulgent, nutty flavor.
- Cream Cheese: The base of the cheesecake filling, making it extra creamy and smooth.
- Sugar: Sweetens up the filling just right.
- Eggs: Helps set the cheesecake and gives it that soft, custardy texture.
- Heavy Cream: Adds to the creaminess and smooth texture.
- Vanilla Extract: A little vanilla enhances the flavors in the cheesecake.
- Mini Peanut Butter Cups: Chopped up and mixed into the cheesecake filling for extra peanut butter and chocolate flavor.
- Chocolate Chips: For melting and drizzling over the top for that chocolatey finish.
(Note: Full measurements are provided in the recipe card above.)
Instructions
Let’s get started with making this creamy, decadent cheesecake:
Prepare the Crust
Start by combining graham cracker crumbs and melted butter in a bowl. Mix until the crumbs are coated, then press the mixture into the bottom of a 7-inch springform pan, creating an even layer. Use the back of a spoon to press it down tightly. Set aside.
Make the Cheesecake Filling
In a large bowl, beat together the cream cheese, peanut butter, and sugar until smooth and creamy. Add the eggs, one at a time, beating well after each addition. Then, mix in the heavy cream and vanilla extract until everything is well combined. Gently fold in the chopped mini peanut butter cups, ensuring they’re evenly distributed throughout the batter.
Assemble the Cheesecake
Pour the cheesecake filling over the prepared graham cracker crust in the springform pan. Tap the pan lightly on the counter to release any air bubbles and level the top.
Cook in the Instant Pot
Pour 1 cup of water into the bottom of your Instant Pot. Place a trivet or steam rack inside and carefully set the springform pan on top. Close the Instant Pot lid and set the valve to “sealing.” Cook on high pressure for 35 minutes. After the cooking time is complete, allow the pressure to release naturally for 10 minutes before quick-releasing any remaining pressure.
Let It Set
Carefully remove the cheesecake from the Instant Pot and let it cool to room temperature. Then, cover it with plastic wrap and refrigerate for at least 4 hours or overnight to allow it to fully set.
Add the Chocolate Drizzle
Once the cheesecake has set, melt the chocolate chips in the microwave or over a double boiler. Drizzle the melted chocolate over the top of the cheesecake, allowing it to pool in the center or drizzle down the sides. For an extra touch, you can add more chopped peanut butter cups on top for decoration.
Serve and Enjoy
Slice this creamy masterpiece, and get ready for an explosion of peanut butter and chocolate in every bite! It’s the ultimate treat that’s sure to satisfy your sweet tooth.
Nutrition Facts
Servings: 10
Calories per serving: 420
Fat: 32g
Saturated Fat: 15g
Carbohydrates: 33g
Fiber: 2g
Sugar: 26g
Protein: 7g
Preparation Time
Prep Time: 20 minutes
Cook Time: 35 minutes
Total Time: 4 hours 55 minutes (including chilling time)
How to Serve Instant Pot Peanut Butter Cup Cheesecake
This cheesecake is perfect on its own, but here are a few ways you can serve it for extra flair:
- With Fresh Berries: Fresh raspberries, strawberries, or blueberries pair wonderfully with the rich peanut butter and chocolate flavors.
- With Whipped Cream: A dollop of freshly whipped cream on top adds a light, fluffy contrast to the creamy cheesecake.
- A Scoop of Ice Cream: Vanilla or chocolate ice cream is the perfect creamy companion to this rich dessert.
- Drizzle More Chocolate: If you’re a chocolate lover, add extra chocolate syrup or even some caramel drizzle for an indulgent finish.
Additional Tips
- Let It Chill: The key to a perfect cheesecake is letting it chill long enough to set. Don’t rush the cooling process—it helps with texture and flavor.
- Make It Ahead: This cheesecake stores really well in the fridge. Make it the day before your event and have one less thing to worry about!
- Custom Flavors: If you’re not a peanut butter fan, feel free to switch it out with almond or cashew butter for a different nutty flavor.
- Pan Size: This recipe is designed for a 7-inch springform pan, but if you’re using a different size, adjust the cooking time accordingly.
FAQ Section
Q1: Can I use crunchy peanut butter instead of creamy?
A1: Yes! Crunchy peanut butter will add a little texture to the cheesecake, but make sure the consistency is smooth enough to blend with the cream cheese.
Q2: Can I make this without an Instant Pot?
A2: Absolutely! You can bake this cheesecake in a traditional oven at 325°F (165°C) for 50-60 minutes. Just be sure to keep an eye on it, as oven times may vary.
Q3: How can I make this cheesecake dairy-free?
A3: For a dairy-free version, use dairy-free cream cheese, coconut milk instead of heavy cream, and a dairy-free chocolate option.
Q4: Can I freeze this cheesecake?
A4: Yes! You can freeze this cheesecake for up to 2 months. Just wrap it well in plastic wrap and aluminum foil, and thaw in the fridge before serving.
Q5: How can I make the cheesecake extra peanut-buttery?
A5: You can add a tablespoon of peanut butter powder to the filling for an extra peanut butter flavor boost.
Q6: Can I make individual cheesecakes in my Instant Pot?
A6: Yes! You can use small mason jars or ramekins to make individual cheesecakes. Just reduce the cooking time by about 5 minutes.
Q7: Can I use a different crust for the cheesecake?
A7: Definitely! You can use an Oreo crust, or even a cookie crust, if you prefer something with more chocolate flavor.
Q8: How do I prevent cracks in my cheesecake?
A8: Cracks can happen with any cheesecake, but by letting it cool gradually and chilling it long enough, you’ll reduce the risk. If it does crack, just cover it with chocolate drizzle!
Q9: Can I add toppings to the cheesecake?
A9: Absolutely! Crushed peanuts, more chopped peanut butter cups, or even a drizzle of caramel would make great toppings.
Q10: How do I store leftovers?
A10: Store any leftovers in an airtight container in the fridge for up to 4 days.
Conclusion
Instant Pot Peanut Butter Cup Cheesecake is a rich, creamy, and indulgent dessert that will wow everyone who tries it. Whether you’re a cheesecake lover, a peanut butter fanatic, or simply someone who enjoys a good dessert, this cheesecake hits all the marks. Plus, it’s quick and easy with the Instant Pot, so you can enjoy this decadent treat without all the hassle. Go ahead, make this cheesecake—it’s guaranteed to be a hit!
Print
Instant Pot Peanut Butter Cup Cheesecake
- Total Time: 55 minutes
- Yield: 8–10 servings 1x
- Diet: Vegetarian
Description
This Instant Pot Peanut Butter Cup Cheesecake is the ultimate indulgence for peanut butter lovers. With a creamy cheesecake filling, a chocolate crust, and chunks of peanut butter cups throughout, this dessert is a perfect, easy-to-make treat that doesn’t require the oven.
Ingredients
- For the crust:
- 1 1/2 cups chocolate cookie crumbs (like Oreos or chocolate graham crackers)
- 1/4 cup granulated sugar
- 1/4 cup unsalted butter, melted
- For the cheesecake filling:
- 3 packages (8 oz each) cream cheese, softened
- 1 cup granulated sugar
- 1 tsp vanilla extract
- 1/2 cup sour cream
- 2 large eggs
- 1 cup creamy peanut butter
- 6–8 mini peanut butter cups, chopped (or more for topping)
- For the topping:
- Whipped cream (optional)
- Chopped peanut butter cups (optional)
Instructions
- Prepare the Crust:
In a medium bowl, combine the chocolate cookie crumbs, granulated sugar, and melted butter. Stir until the mixture is well combined and the crumbs are coated in butter. Press the mixture into the bottom of a 7-inch springform pan, making sure it’s compacted evenly. Set aside. - Make the Cheesecake Filling:
In a large bowl, beat the softened cream cheese with an electric mixer on medium speed until smooth and creamy. Add the sugar and vanilla extract and continue mixing until combined. Add the sour cream and mix until smooth. Beat in the eggs one at a time, mixing after each addition. - Add Peanut Butter:
Fold the creamy peanut butter into the cheesecake mixture until fully combined. Gently stir in the chopped mini peanut butter cups. - Assemble the Cheesecake:
Pour the cheesecake filling into the prepared crust in the springform pan. Smooth the top with a spatula. - Prepare the Instant Pot:
Add 1 cup of water to the bottom of the Instant Pot insert. Place the trivet inside the Instant Pot. Carefully lower the springform pan onto the trivet using handles or foil sling. - Cook the Cheesecake:
Close the Instant Pot lid and set the valve to “Sealing.” Select the “Manual” or “Pressure Cook” button and cook on high pressure for 35 minutes. Once the cooking time is complete, let the pressure release naturally for 10 minutes before performing a quick release to release any remaining pressure. - Chill the Cheesecake:
Carefully remove the springform pan from the Instant Pot. Let the cheesecake cool to room temperature, then refrigerate for at least 4 hours or overnight. - Serve:
Before serving, top the cheesecake with whipped cream and additional chopped peanut butter cups, if desired.
Notes
- For a more intense chocolate flavor, you can use chocolate graham cracker crumbs for the crust.
- Make sure the cheesecake is fully chilled before serving to ensure the best texture.
- If you don’t have a springform pan, you can use a regular cake pan but make sure it’s properly greased and lined for easy removal.
- Prep Time: 20 minutes
- Cook Time: 35 minutes
- Category: Dessert
- Method: Instant Pot, Baking, Chilling
- Cuisine: American
Nutrition
- Serving Size: 1 slice (based on 10 servings)
- Calories: 400
- Sugar: 30g
- Sodium: 300mg
- Fat: 30g
- Saturated Fat: 12g
- Unsaturated Fat: 16g
- Trans Fat: 0g
- Carbohydrates: 30g
- Fiber: 2g
- Protein: 8g
- Cholesterol: 65mg


