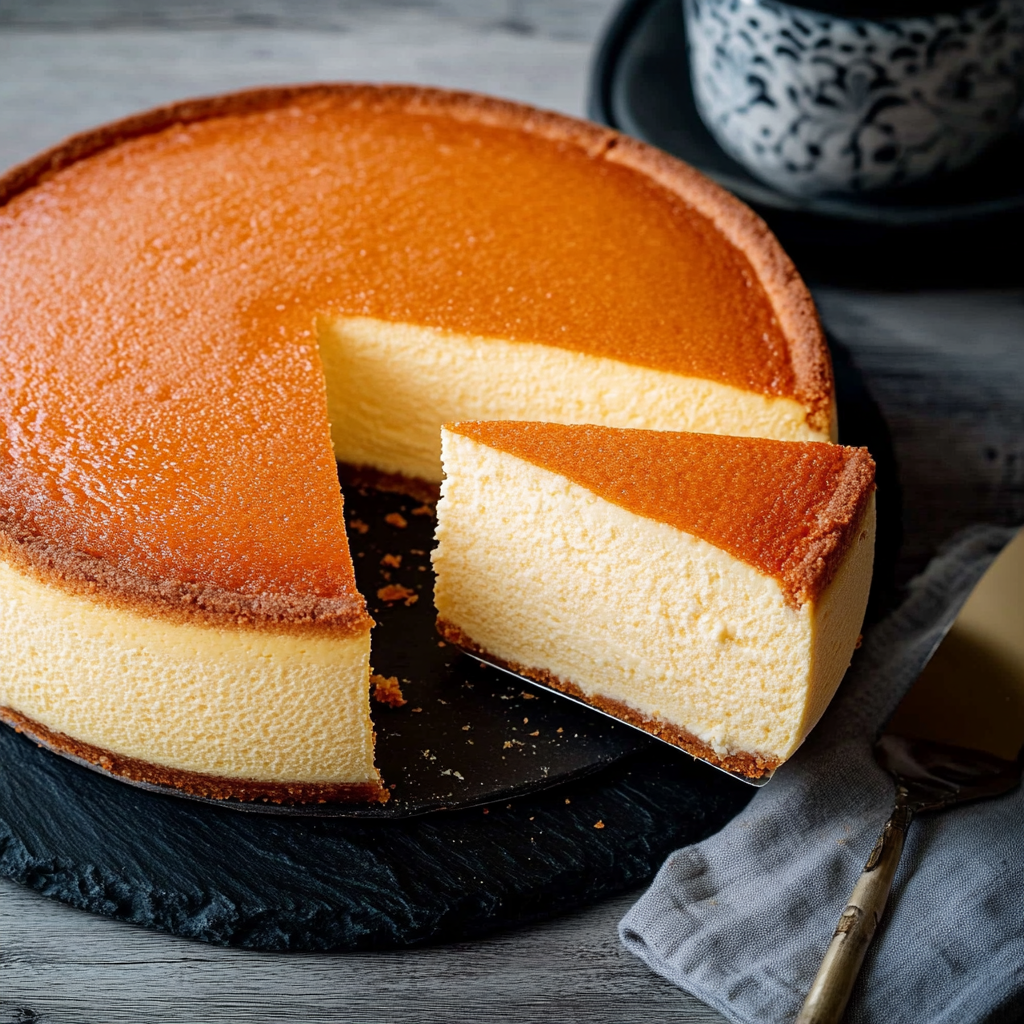
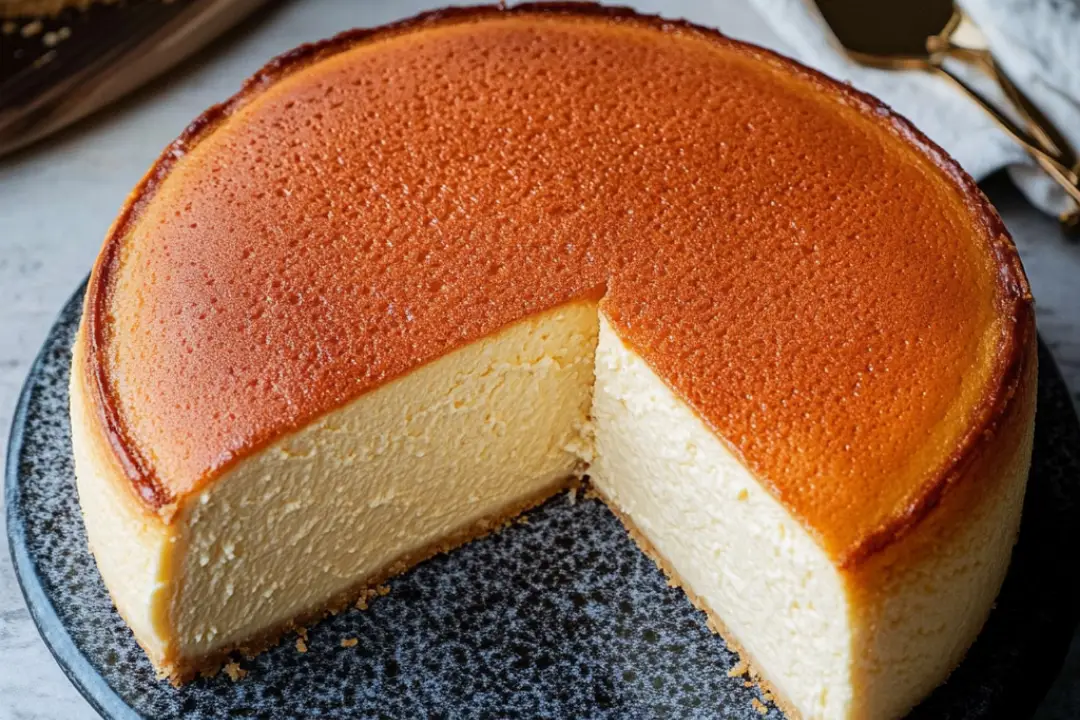
Let’s Talk About This Japanese Cheesecake…
Oh friend, if you’ve never tried Japanese Cheesecake, you are in for a fluffy, jiggly, melt-in-your-mouth kind of experience that’s going to change how you think about cheesecake forever. This isn’t your typical rich and dense New York slice—nope, this one’s a dreamy cloud of creamy goodness with a souffle-like texture that’s light as air and just the right touch of sweetness.
The magic of this cake is all in the texture. It’s soft, pillowy, and jiggles just a little when you give it a gentle nudge (honestly, it’s kind of fun to watch). And don’t let its delicate look fool you—it’s surprisingly simple to make once you get the hang of a few key steps. Trust me, this one’s a showstopper. Whether you’re treating yourself on a quiet afternoon or bringing something special to a gathering, Japanese Cheesecake never fails to impress.
Why You’ll Love Japanese Cheesecake
Versatile
Perfect for birthdays, tea time, or just when you want something a little different. It feels fancy without being fussy.
Budget-Friendly
Made with basic ingredients like eggs, cream cheese, and sugar—nothing too wild or expensive. Just simple staples turned into magic.
Quick and Easy
Okay, maybe not super quick (we’re baking a delicate beauty here), but the steps are totally doable. Even if you’re not an expert baker, you’ve got this.
Customizable
Want to infuse it with lemon zest? A splash of vanilla? A bit of matcha? Go for it. It’s easy to put your own spin on it.
Crowd-Pleasing
This one’s a guaranteed ooh-and-aah dessert. Light, lovely, and not too sweet—so even folks who don’t usually love cheesecake tend to fall for it.
(Note: the full ingredients list, including measurements, is provided in the recipe card directly below.)

Disclosure: This post contains affiliate links.If you click and make a purchase, I may earn a small commission at no extra cost to you.
Ingredients in Japanese Cheesecake
It’s amazing what you can create with just a handful of everyday ingredients. Here’s what brings this beauty to life:
Cream Cheese
The creamy base of our cake. Softened and smooth, it brings that signature cheesecake flavor in a much lighter form
Eggs
Separated into yolks and whites. The yolks enrich the batter, while the whipped whites create that dreamy, cloud-like texture
Milk
Adds richness and helps melt the cream cheese into a silky smooth mixture
Butter
Melted into the batter for that little touch of indulgence
Cake Flour or All-Purpose Flour
Just a small amount to give the cake its structure without weighing it down
Cornstarch
Helps stabilize the egg whites and contributes to that delicate crumb
Sugar
Split between the yolks and whites for balanced sweetness and perfect meringue peaks
Lemon Juice or Vanilla Extract (Optional)
For a little extra flavor that brightens things up beautifully
Instructions
Preheat Your Equipment
Start by preheating your oven to 320°F (160°C) and prepare a water bath. Place a rack in the lower third of the oven and get your cake pan ready—greased and lined with parchment
Melt and Mix
In a double boiler or heatproof bowl over simmering water, gently melt the cream cheese, milk, and butter until smooth. Let it cool slightly before continuing
Whisk in Yolks
Add the egg yolks one at a time, whisking well after each addition. Then sift in the flour and cornstarch, mixing until just combined
Make the Meringue
In a clean bowl, beat the egg whites until foamy. Gradually add sugar and continue beating until stiff peaks form. You’re looking for glossy, pillowy clouds here
Fold with Care
Gently fold the meringue into the yolk mixture in thirds. Go slowly—no rushing. You want to keep all that lovely air in the batter
Bake in a Water Bath
Pour the batter into your prepared pan. Tap gently to release any large air bubbles. Place the pan in a larger tray filled with hot water and bake for about 60–70 minutes, until it’s puffed, golden, and just slightly jiggly
Cool Slowly
Once baked, turn off the oven and leave the cake inside with the door cracked open for about 15 minutes to prevent sudden shrinking. Then let it cool completely at room temperature before removing from the pan
Serve and Enjoy
Dust with powdered sugar if you’d like, and slice with a warm knife for clean edges. It’s light, delicate, and a total joy to eat
How to Serve Japanese Cheesecake
Simple and Classic
Enjoy it as is, maybe with a light dusting of powdered sugar or a few fresh berries
With Whipped Cream
Add a soft swirl of whipped cream for an extra creamy touch
Fruit Topping
Top with a spoonful of berry compote, sliced peaches, or even mango for a refreshing twist
With Tea or Coffee
Perfect for pairing with a cup of green tea, matcha latte, or a gentle pour-over coffee. It’s a lovely treat for a slow afternoon
Chilled or Room Temp
It’s delicious both ways. Chilled for a firmer bite, room temp for that melt-in-your-mouth texture
Additional Tips
Use Room Temp Ingredients
This helps everything blend together more smoothly and evenly
Be Gentle
The folding step is key—keep a light hand so your meringue doesn’t deflate
Water Bath is a Must
It keeps the texture silky and prevents cracking. Make sure the water is hot and reaches about halfway up the cake pan
Cool Gradually
Don’t skip the oven-cooling step—it prevents shrinking and helps set the texture just right
Storage Tips
Store leftovers in the fridge, tightly wrapped. It’ll keep for 3–4 days and is just as good (if not better) the next day
FAQ Section
Q1: Can I skip the water bath?
A1: Not recommended! It helps create the soft, fluffy texture and prevents the top from cracking
Q2: Can I use a springform pan?
A2: You can, but make sure it’s well-sealed with foil to prevent water from leaking in during the water bath
Q3: How do I know it’s done baking?
A3: It should be puffed up, lightly golden on top, and still have a gentle jiggle in the center
Q4: Can I flavor it differently?
A4: Absolutely! Try a bit of matcha powder, lemon zest, or almond extract to mix things up
Q5: What’s the best way to slice it?
A5: Use a warm, sharp knife and wipe it clean between each cut for those picture-perfect slices
Q6: Can I freeze Japanese Cheesecake?
A6: Yes! Wrap tightly and freeze for up to a month. Thaw in the fridge overnight before serving
Q7: Why did my cake deflate?
A7: Slight shrinking is normal, but drastic deflating may mean the meringue was over- or under-beaten, or the cake cooled too quickly
Q8: Can I make it ahead?
A8: Yes! It actually tastes even better after it’s had time to rest in the fridge for a few hours or overnight
Conclusion
Japanese Cheesecake is the kind of dessert that surprises and delights every time. It’s gentle, elegant, and just a little magical. Whether you’re baking it for the first time or the fiftieth, it has that same wow factor—light, jiggly, and utterly irresistible. So go ahead, give it a try. And don’t be surprised if you catch yourself doing a happy dance after the first bite.
Print
Japanese Cheesecake
- Total Time: 1 hour 30 minutes (includes cooling)
- Yield: 6 servings
- Diet: Vegetarian
Description
Japanese Cheesecake is a light, fluffy, and slightly jiggly dessert that blends the richness of cream cheese with the airiness of a soufflé. It’s less sweet and lighter than traditional Western-style cheesecakes, making it perfect for any occasion.
Ingredients
- 7 oz (200g) cream cheese, softened
- 3 tablespoons unsalted butter
- 1/4 cup (60 ml) milk
- 1/4 cup (30g) cake flour
- 2 tablespoons cornstarch
- 1/4 teaspoon salt
- 4 large eggs, separated
- 1/4 teaspoon cream of tartar (or lemon juice)
- 1/4 cup (50g) granulated sugar
- Powdered sugar, for dusting (optional)
Instructions
- Preheat oven to 320°F (160°C). Line the bottom and sides of a 6- or 7-inch round cake pan with parchment paper. Wrap the outside of the pan in foil if using a water bath.
- In a double boiler or heatproof bowl over simmering water, melt cream cheese, butter, and milk together until smooth. Remove from heat and let cool slightly.
- Sift in cake flour, cornstarch, and salt. Mix until just combined.
- Add egg yolks one at a time, mixing until fully incorporated. Set aside.
- In a separate bowl, beat egg whites with cream of tartar until foamy. Gradually add sugar and beat to stiff peaks.
- Fold the egg white mixture into the cream cheese batter in 3 additions, being careful not to deflate the batter.
- Pour the batter into the prepared pan. Tap gently to remove air bubbles. Place the pan inside a larger pan and pour hot water into the outer pan to create a water bath.
- Bake at 320°F (160°C) for 25 minutes, then lower to 275°F (135°C) and bake for another 30–35 minutes, or until a toothpick inserted comes out clean.
- Turn off the oven, leave the door slightly ajar, and let the cake cool inside for 15 minutes to prevent collapse.
- Remove from the oven, cool completely, and dust with powdered sugar if desired. Refrigerate before serving for best texture.
Notes
- Use room-temperature eggs for best volume when whipping egg whites.
- A springform pan can be used but must be tightly sealed to prevent water from leaking in during the water bath.
- Do not overmix the batter after adding the egg whites to maintain the cake’s fluffiness.
- Prep Time: 25 minutes
- Cook Time: 1 hour
- Category: Dessert
- Method: Baked
- Cuisine: Japanese
Nutrition
- Serving Size: 1 slice
- Calories: 190
- Sugar: 10g
- Sodium: 150mg
- Fat: 13g
- Saturated Fat: 7g
- Unsaturated Fat: 5g
- Trans Fat: 0g
- Carbohydrates: 12g
- Fiber: 0g
- Protein: 5g
- Cholesterol: 105mg


