
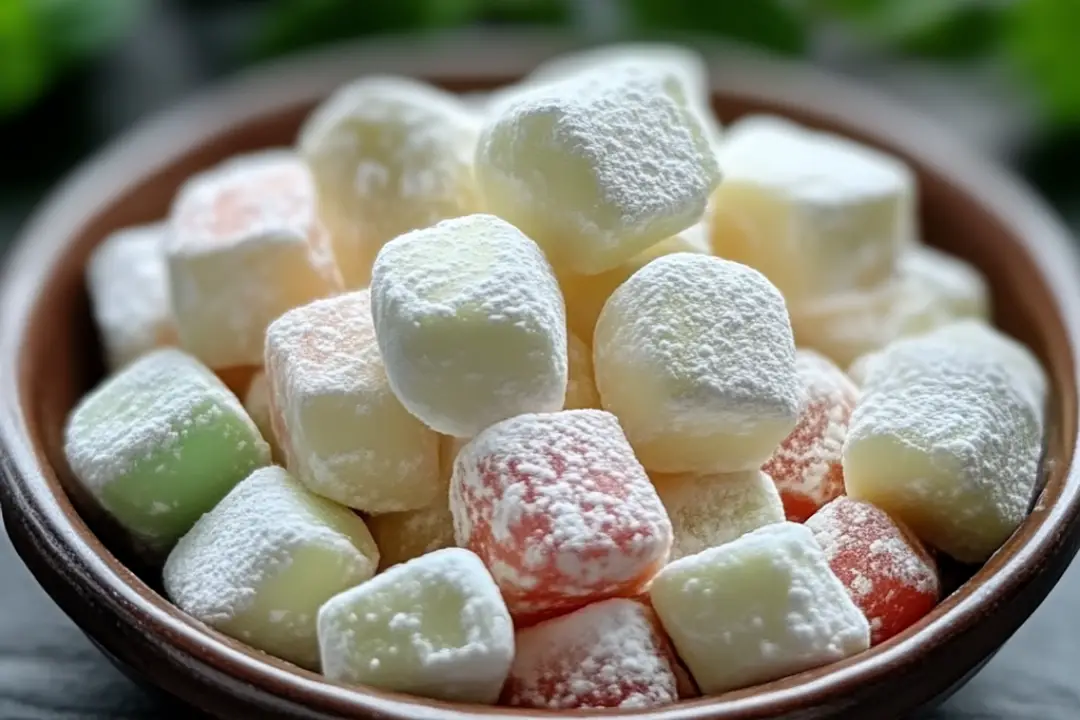
There’s something incredibly nostalgic about homemade butter mints. Perhaps it’s the sweet, refreshing taste that takes you back to family gatherings or festive holidays. I remember my grandmother making these delightful treats during the holidays, filling the house with the aroma of peppermint. The best part? They melt in your mouth, leaving a cool, refreshing sensation that’s simply irresistible. My family eagerly anticipates these mints each year, and it has become a cherished tradition to make them together. If you’re looking for a simple yet impressive treat, these melt-in-your-mouth butter mints are sure to please!
Disclosure: This post contains affiliate links.If you click and make a purchase, I may earn a small commission at no extra cost to you.


Ingredients
- 1/2 cup unsalted butter, softened
- 4 cups powdered sugar, sifted
- 1/4 cup heavy cream
- 1/4 tsp salt
- 1 tsp peppermint extract
- Food coloring (optional)
Instructions
- Prepare the Butter: Begin by beating the softened butter in a large mixing bowl until it becomes smooth and creamy. This step is crucial as it lays the foundation for the light texture of the mints.
- Incorporate Dry Ingredients: Gradually add the sifted powdered sugar and heavy cream to the butter. Alternate between the two, mixing until the mixture reaches a dough-like consistency. You may want to start with a whisk and then switch to a spatula to combine everything thoroughly.
- Add Flavor: Once the mixture is well combined, add the peppermint extract and salt. Mix until everything is incorporated. The peppermint extract will provide that classic mint flavor that we all love.
- Color the Dough (Optional): If you want to add some visual appeal, divide the dough into sections based on how many colors you wish to use. Knead a few drops of food coloring into each portion until you achieve your desired color. This step is particularly fun for kids!
- Shape the Mints: Roll each colored dough into long, thin ropes, about 1/4 inch in diameter. Cut the ropes into 1/2-inch pieces. You can also roll them into small balls if you prefer a different shape.
- Arrange on Baking Sheet: Place the cut pieces on a parchment-lined baking sheet. Make sure to leave space between each mint, as they will expand slightly while drying.
- Air Dry: Allow the mints to air-dry at room temperature for about 12 hours or until they are firm to the touch. This step is essential as it helps the mints hold their shape and texture.
- Enjoy: Once dried, your butter mints are ready to be enjoyed! They make a perfect after-dinner treat or a sweet addition to any gathering.
Nutrition Facts
- Servings: Approximately 24 mints
- Calories: 100 kcal per serving
- Total Fat: 4 g
- Saturated Fat: 2.5 g
- Cholesterol: 10 mg
- Sodium: 15 mg
- Total Carbohydrates: 15 g
- Dietary Fiber: 0 g
- Sugars: 14 g
- Protein: 0 g
Preparation Time
- Prep Time: 20 minutes
- Drying Time: 12 hours
- Total Time: 12 hours 20 minutes
How to Serve
- On a platter: Arrange the mints beautifully on a decorative platter.
- Gift jars: Fill small mason jars with mints and tie with a ribbon for a delightful gift.
- As party favors: Package them individually in cellophane bags for guests at parties or weddings.
- After meals: Serve them alongside coffee or tea for a refreshing end to a meal.
- At holiday gatherings: These mints are perfect for Christmas or any festive celebration!
Additional Tips
- Use Quality Ingredients: For the best flavor, use high-quality unsalted butter and pure peppermint extract.
- Sift Your Sugar: Always sift the powdered sugar to avoid lumps in your mints.
- Experiment with Flavors: Feel free to try different extracts like spearmint, chocolate mint, or even almond for unique flavor twists.
- Customize Shapes: Instead of cutting into pieces, try using candy molds for fun shapes, especially for special occasions.
- Check Drying Conditions: Ensure the drying area is dry and not too humid, as moisture can affect the mints’ texture.
Recipe Variations
- Chocolate Butter Mints: Add cocoa powder to the dough for a chocolatey twist. Adjust the amount of powdered sugar accordingly.
- Fruit Flavored Mints: Replace peppermint extract with other flavor extracts like raspberry or lemon for a fruity version.
- Nutty Mints: Incorporate finely ground nuts like walnuts or almonds into the dough for added texture.
- Seasonal Colors: Use food coloring to create seasonal mints, like pastel colors for spring or festive red and green for Christmas.
Serving Suggestions
- Pair with Drinks: Serve alongside hot chocolate, coffee, or herbal teas for a delightful treat.
- Combine with Desserts: Use as a garnish on cakes, cupcakes, or ice cream for a refreshing contrast.
- Holiday Desserts: Include them on dessert tables during holidays as a sweet treat for guests.
Freezing and Storage
- Freezing: These mints can be frozen for up to three months. Just make sure they are fully dried before storing them in an airtight container.
- Storage: Keep mints in an airtight container at room temperature for up to two weeks. Avoid placing them in the fridge, as this may alter their texture.
FAQ Section
- Can I use salted butter instead of unsalted?
- Yes, but it may alter the flavor slightly. It’s best to use unsalted butter for a more controlled taste.
- How do I know when the mints are dry?
- They should feel firm to the touch and not stick to your fingers.
- Can I make these mints vegan?
- Yes, substitute the butter with a vegan butter alternative and use a dairy-free cream.
- What if I don’t have heavy cream?
- You can use whole milk, but the texture might be slightly less creamy.
- How can I make these mints more colorful?
- Use gel food coloring, which will give a more vibrant color compared to liquid food coloring.
- Can I use different extracts?
- Absolutely! Experiment with different flavors like almond, coconut, or lemon.
- What should I do if the dough is too sticky?
- Add a little more powdered sugar until the dough reaches the desired consistency.
- Can I use fresh mint instead of extract?
- Fresh mint can be used, but it will require more preparation to extract the flavor and may not provide the same intensity.
- Are these mints suitable for children?
- Yes, they are a fun and sweet treat for kids. Just ensure the food coloring is safe and appropriate.
- How do I keep the mints from sticking together?
- Make sure they are fully dried and store them in a single layer or with parchment paper between layers.
Conclusion
Homemade melt-in-your-mouth butter mints are a delightful treat that can brighten any occasion. With their creamy texture, refreshing flavor, and vibrant colors, they’re not just a treat for the taste buds but also a feast for the eyes. Whether you’re making them for a holiday gathering, a party favor, or just a sweet indulgence for yourself, these mints are sure to impress. Gather your ingredients, invite your family to help, and create a batch of these delightful mints that everyone will love. Enjoy the smiles they bring as much as the sweet, buttery flavor they deliver!
Print
Melt-in-Your-Mouth Butter Mints
- Total Time: 12 hours 15 minutes
- Yield: Approximately 60 mints 1x
- Diet: Vegetarian
Description
A delightful homemade mint treat that melts in your mouth, perfect for parties, holidays, or just a sweet indulgence!
Ingredients
- 1/2 cup unsalted butter, softened
- 4 cups powdered sugar, sifted
- 1/4 cup heavy cream
- 1/4 tsp salt
- 1 tsp peppermint extract
- Food coloring (optional)
Instructions
- Beat the Butter: In a mixing bowl, beat the softened butter until smooth.
- Add Sugar and Cream: Gradually add the sifted powdered sugar and heavy cream, alternating between the two, until a dough-like consistency forms.
- Mix in Flavor: Add the peppermint extract and salt, mixing well to combine.
- Color the Dough: If desired, divide the dough and knead in food coloring to create different colors.
- Shape the Mints: Roll the dough into long, thin ropes and cut into 1/2-inch pieces.
- Arrange to Dry: Place the mints on a parchment-lined baking sheet.
- Dry: Allow the mints to air-dry at room temperature for 12 hours or until firm.
- Enjoy: Your delicious homemade butter mints are ready to be enjoyed!
Notes
- Ensure the butter is softened for easy mixing.
- The drying time is crucial for the right texture.
- Prep Time: 15 mins
- Cook Time: 12 hours (drying time)
- Category: Dessert
- Method: No-Bake
- Cuisine: American
Nutrition
- Serving Size: 1 mint
- Calories: 45
- Sugar: 7g
- Sodium: 20mg
- Fat: 2g
- Saturated Fat: 1g
- Unsaturated Fat: 1g
- Trans Fat: 0g
- Carbohydrates: 8g
- Fiber: 0g
- Protein: 0g
- Cholesterol: 5mg