
Introduction
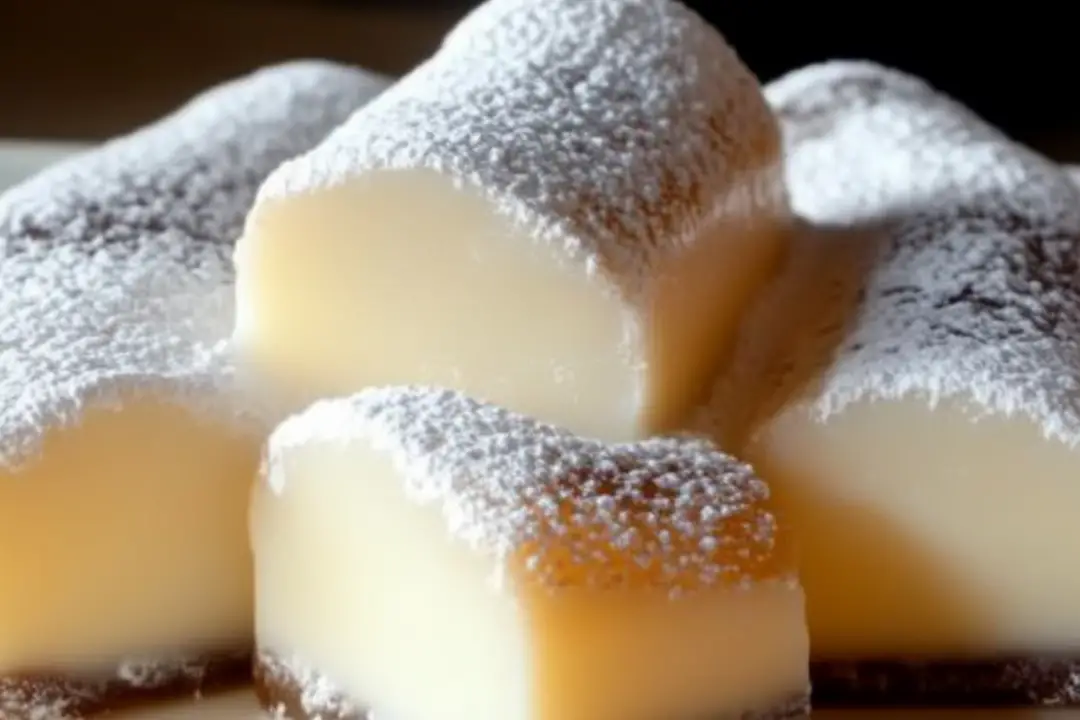
There’s something magical about a cookie that practically dissolves in your mouth, and Melting Moment Logs do just that. I first discovered this recipe during a holiday baking spree, and it quickly became a family favorite. The buttery flavor combined with the light, crumbly texture makes these cookies perfect for any occasion. My family adores them at our tea parties, and they’ve even become a staple on our holiday platters. With just the right amount of sweetness and a dusting of powdered sugar, these cookies bring a touch of elegance to any gathering. Whether enjoyed with a warm cup of tea or served at a festive celebration, Melting Moment Logs are sure to impress.
Ingredients
- 1 cup butter (softened)
- ¾ cup confectioner’s sugar (plus more for dusting)
- 1 tsp vanilla extract
- 1½ cups all-purpose flour
- ½ cup cornstarch
- ¼ tsp salt
Instructions
Cream Butter and Sugar:
In a mixing bowl, beat the softened butter and ¾ cup of confectioner’s sugar together until the mixture is light and fluffy, about 4 minutes. This step is crucial as it incorporates air into the dough, which helps achieve that melt-in-your-mouth texture.
Add Vanilla:
Mix in the vanilla extract, ensuring it’s evenly distributed throughout the butter and sugar mixture.
Mix Dry Ingredients:
In a separate bowl, sift together the all-purpose flour, cornstarch, and salt. Gradually add the dry ingredients to the butter mixture, beating until smooth. The cornstarch is key here, as it contributes to the cookie’s delicate crumb.
Shape Logs:
Divide the dough into three equal portions. Roll each portion into a log about 1 inch in diameter. Wrap each log in plastic wrap and chill in the refrigerator for at least one hour. Chilling the dough is essential; it helps maintain the shape of the cookies while baking.
Preheat Oven:
Preheat your oven to 350°F (175°C) and line a baking sheet with parchment paper.
Slice and Chill Again:
Remove the logs from the refrigerator and slice them into 1-inch pieces. Place the slices on the prepared baking sheet, ensuring they are spaced apart. Chill the slices again for another 30 minutes; this extra chilling helps keep them from spreading too much during baking.
Bake:
Bake in the preheated oven for about 8 minutes, or until the bottoms are lightly golden. Keep a close eye on them; they should not brown too much. Once baked, let them cool on the sheet for 3 minutes before transferring them to a wire rack to cool completely.
Dust with Sugar:
Once cooled, generously dust the cookies with confectioner’s sugar. This final touch adds a lovely sweetness and makes them look extra special.
Nutrition Facts
- Servings: Approximately 24 cookies
- Calories: 110 kcal per cookie
- Sugar: 4g
- Sodium: 45mg
- Fat: 7g
- Saturated Fat: 4g
- Unsaturated Fat: 2g
- Trans Fat: 0g
- Carbohydrates: 10g
- Fiber: 0g
- Protein: 1g
- Cholesterol: 25mg
Preparation Time
- Prep Time: 15 minutes
- Cook Time: 8 minutes
- Total Time: 1 hour 23 minutes (including chilling)
How to Serve
- Dust with additional confectioner’s sugar just before serving for an elegant presentation.
- Pair with tea or coffee for a delightful afternoon treat.
- Serve on a festive platter alongside other cookies for holiday gatherings.
- Store in an airtight container to keep them fresh and soft.
- Enjoy as a quick snack any time of day!
Additional Tips
- Use Quality Butter: The better the butter, the richer the flavor of your cookies. Opt for unsalted butter for better control of the overall saltiness.
- Room Temperature Ingredients: Make sure your butter is softened to room temperature to ensure easy creaming with sugar.
- Sift the Dry Ingredients: Sifting the flour and cornstarch helps remove any lumps and incorporates air, making for lighter cookies.
- Don’t Overmix: Once the dry ingredients are added, mix just until combined to prevent the cookies from becoming tough.
- Customize Flavors: Experiment with different extracts, like almond or lemon, for a unique twist on the classic recipe.
Recipe Variations
- Chocolate Chip Melting Moments: Add mini chocolate chips to the dough for a chocolatey twist.
- Nutty Variation: Incorporate finely chopped nuts, such as walnuts or pecans, into the dough for added texture and flavor.
- Citrus Zest: Add lemon or orange zest to the dough for a fresh, zesty flavor.
- Filling Option: Fill the logs with fruit preserves before rolling for a sweet surprise inside.
- Spiced Moments: Mix in some ground cinnamon or nutmeg for a warming spiced version, perfect for the holidays.
Serving Suggestions
- Serve with a side of fresh fruit or a fruit compote for a more balanced snack.
- Pair with a scoop of vanilla ice cream for a delightful dessert.
- Use as a base for an ice cream sandwich by placing a scoop of ice cream between two cookies.
Freezing and Storage
- Freezing: These cookies freeze beautifully! Once cooled, store in an airtight container or freezer bag. They can be frozen for up to 3 months. Thaw at room temperature before serving.
- Storage: Keep in an airtight container at room temperature for up to one week. For longer freshness, refrigerate in a sealed container.
FAQ Section
- Can I use margarine instead of butter?
While margarine can be used, it may affect the flavor and texture. Butter is recommended for the best results. - How can I tell when the cookies are done?
Look for a light golden color on the bottoms. They should be firm to the touch but still soft on top. - What if my dough is too crumbly?
If the dough feels too dry, you can add a teaspoon of milk to help it come together. - Can I make these cookies gluten-free?
Yes, substitute the all-purpose flour with a gluten-free flour blend. Make sure it contains xanthan gum for better structure. - How can I enhance the vanilla flavor?
Use vanilla bean paste instead of extract for a more intense vanilla flavor. - What’s the best way to store leftover cookies?
Store in an airtight container at room temperature, separated by parchment paper to prevent sticking. - Can I decorate these cookies?
Absolutely! Use icing or chocolate drizzle for an extra special touch. - Why do I need to chill the dough?
Chilling the dough helps prevent the cookies from spreading too much during baking, resulting in a more uniform shape. - What’s the origin of Melting Moments?
Melting Moments are popular in various countries, known for their tender, crumbly texture that melts in your mouth. - Can I make these cookies ahead of time?
Yes, you can prepare the logs ahead of time, freeze them, and then slice and bake when you’re ready to enjoy.
Conclusion
Melting Moment Logs are the epitome of delicate, buttery goodness. Their easy preparation and delightful flavor make them a perfect addition to any dessert table or a simple afternoon tea. With the right balance of sweetness and a soft, crumbly texture, these cookies are bound to be a hit with family and friends. So, whether you’re preparing for the holidays, a tea party, or just a cozy night in, give this recipe a try and enjoy the melt-in-your-mouth experience that is truly unforgettable!
Print


Melting Moment Logs: A Sweet Delight
- Total Time: 23 minutes
- Yield: 24 cookies
- Diet: Vegetarian
Description
These light, buttery Melting Moment Logs truly live up to their name, melting in your mouth with every bite! With a soft shortbread-like texture and a dusting of powdered sugar, they’re perfect for holiday platters, tea parties, or anytime you crave a delicate treat.
Ingredients
- 1 cup butter (softened)
- ¾ cup confectioner’s sugar (plus more for dusting)
- 1 tsp vanilla extract
- 1½ cups all-purpose flour
- ½ cup cornstarch
- ¼ tsp salt
Instructions
- Cream Butter and Sugar: Beat the butter and ¾ cup confectioner’s sugar together until light and fluffy (about 4 minutes).
- Add Vanilla: Mix in the vanilla extract.
- Mix Dry Ingredients: In a separate bowl, sift together flour, cornstarch, and salt. Slowly add to the butter mixture, beating until smooth.
- Shape Logs: Divide the dough into three equal portions and roll into 1-inch diameter logs. Wrap in plastic wrap and chill for at least one hour.
- Preheat Oven: Preheat to 350°F (175°C) and line a baking sheet with parchment paper.
- Slice and Chill Again: Slice the logs into 1-inch pieces, place them on the baking sheet, and chill for another 30 minutes.
- Bake: Bake for about 8 minutes, until the bottoms are lightly golden. Cool on the sheet for 3 minutes, then transfer to a wire rack.
- Dust with Sugar: Once cooled, dust generously with confectioner’s sugar.
Notes
- For added flavor, consider incorporating lemon or almond extract.
- Ensure the butter is softened for easier creaming with sugar.
- Prep Time: 15 mins
- Cook Time: 8 minutes
- Category: Dessert
- Method: Baking
- Cuisine: American
Nutrition
- Serving Size: 1 cookie
- Calories: 110
- Sugar: 6g
- Sodium: 30mg
- Fat: 7g
- Saturated Fat: 4g
- Unsaturated Fat: 2g
- Trans Fat: 0g
- Carbohydrates: 10g
- Fiber: 0g
- Protein: 1g
- Cholesterol: 30mg