Why You’ll Love Mini Cheesecake Tarts
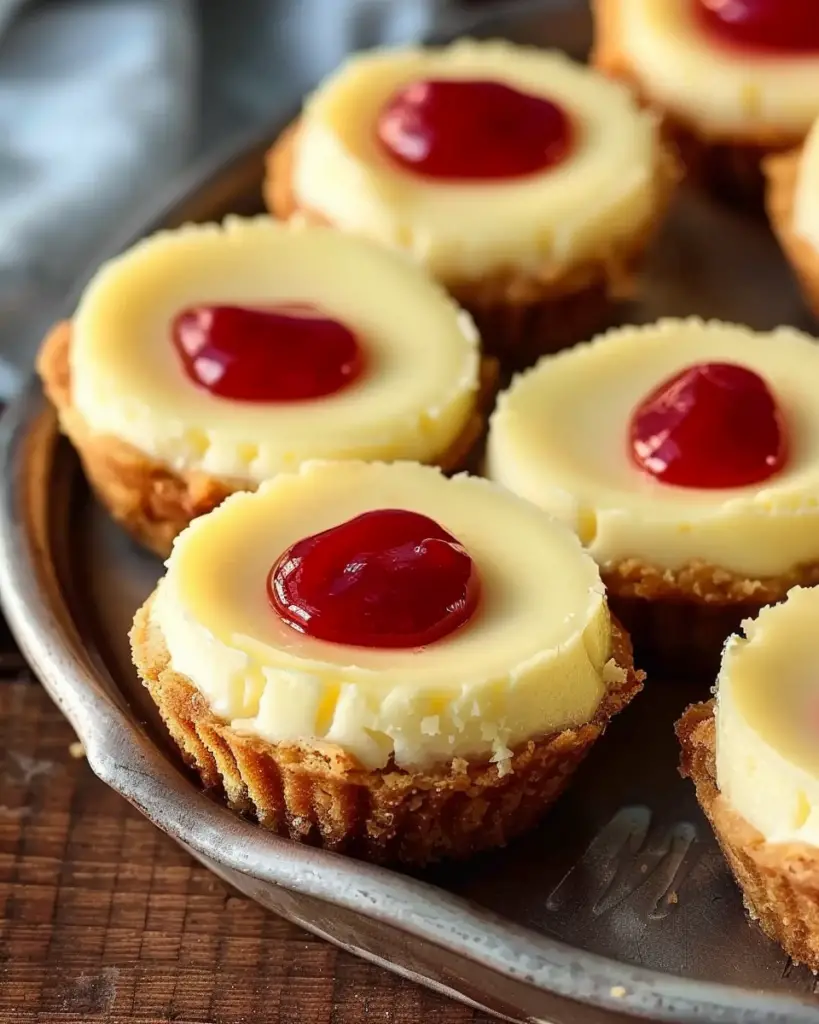
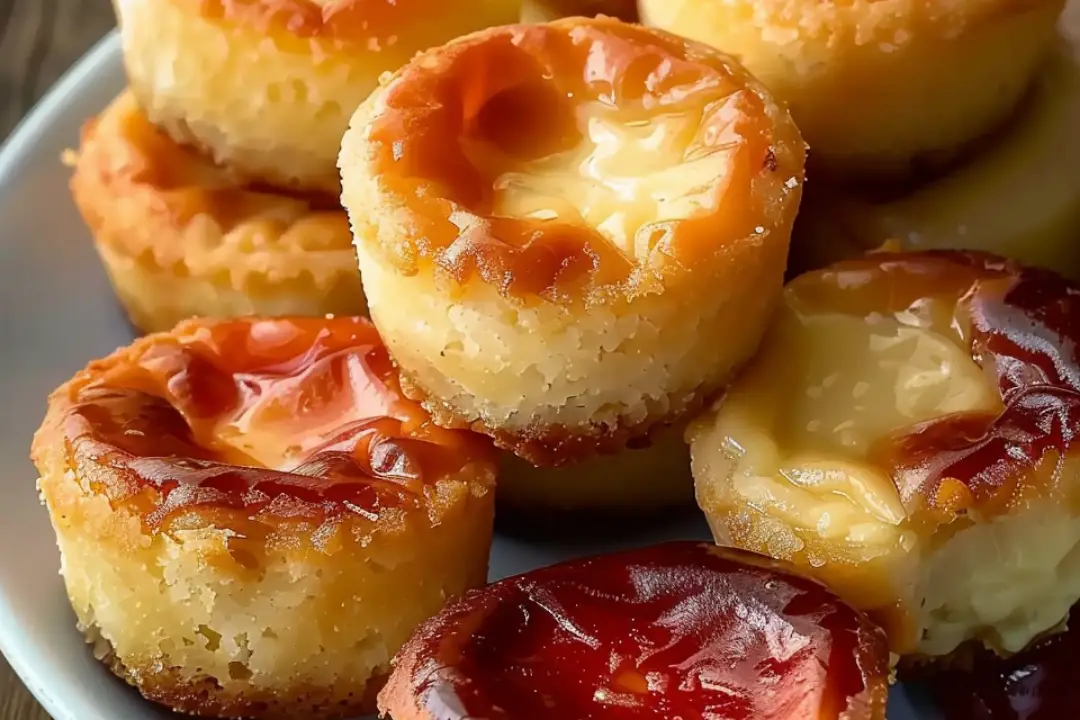
These mini tarts are the perfect balance of creamy, tangy cheesecake with the satisfying crunch of a graham cracker crust. They’re just the right size for snacking, and they’re a total crowd-pleaser. The best part? You can get super creative with the toppings! Whether you prefer fresh berries, chocolate ganache, or caramel drizzle, these mini cheesecakes are versatile enough to be dressed up however you like. Plus, they’re perfect for portion control—though, let’s be real, it’s hard to stop at just one!

Disclosure: This post contains affiliate links.If you click and make a purchase, I may earn a small commission at no extra cost to you.
Ingredients in Mini Cheesecake Tarts
Here’s everything you’ll need to whip up these bite-sized cheesecake delights:
For the Crust
- Graham cracker crumbs: The base of the crust. It gives the perfect crunch and that signature cheesecake flavor.
- Butter: Melted butter helps the crumbs stick together and gives the crust richness.
- Sugar: A bit of sweetness to balance the salty butter and add flavor to the crust.
For the Cheesecake Filling
- Cream cheese: The main ingredient for that smooth, tangy, and creamy filling.
- Sour cream: Adds a little extra tang and creaminess to the filling.
- Sugar: Sweetens up the filling and balances out the tanginess of the cream cheese.
- Vanilla extract: Adds that signature cheesecake flavor.
- Eggs: Helps bind the filling together and give it that rich texture.
(Note: The full ingredient list with measurements is provided in the recipe card below.)
Instructions
Make the Crust
- Preheat the Oven: Preheat your oven to 325°F (163°C) to get it nice and hot for baking.
- Mix the Crust: In a medium bowl, combine the graham cracker crumbs, melted butter, and sugar. Stir until the crumbs are evenly coated in butter.
- Press the Crust: Spoon about 1 tablespoon of the crumb mixture into each muffin cup in a muffin tin. Press down firmly with the back of a spoon to create a solid crust base.
- Bake the Crust: Place the muffin tin in the oven and bake the crusts for about 5-7 minutes, just until they’re lightly golden. Remove from the oven and set aside to cool.
Make the Cheesecake Filling
- Prepare the Filling: In a large bowl, beat the cream cheese and sugar together with an electric mixer until smooth and creamy. Add the sour cream and vanilla extract, and continue to mix until well combined.
- Add the Eggs: Beat in the eggs one at a time, mixing until each egg is fully incorporated before adding the next. Don’t overmix—just blend until smooth.
- Fill the Tarts: Spoon the cheesecake filling into each muffin cup over the pre-baked crust, filling each one about 3/4 of the way full.
- Bake the Cheesecake Tarts: Bake the tarts in the preheated oven for 15-18 minutes, or until the centers are set but still slightly jiggly. They’ll firm up as they cool.
- Cool and Chill: Let the tarts cool in the muffin tin for about 15 minutes, then transfer them to the fridge. Chill the tarts for at least 2 hours, or until they’re completely set.
Add Your Toppings
Once your mini cheesecakes are chilled and ready, it’s time to get creative with the toppings! Here are a few ideas:
- Fresh berries: Strawberries, raspberries, or blueberries add a refreshing, tangy bite.
- Chocolate ganache: Drizzle some silky ganache on top for an extra indulgent touch.
- Caramel sauce: For a sweet, buttery finish, drizzle with homemade or store-bought caramel.
- Whipped cream: A dollop of freshly whipped cream is the perfect finishing touch.
Serve and Enjoy
Serve your mini cheesecake tarts chilled for the perfect creamy texture. They’re ideal for a sweet snack or a festive dessert at any occasion. Trust me, these little treats will be the star of the show!
Nutrition Facts
Servings: 12
Calories per serving: 250
Total Fat: 16g
Saturated Fat: 9g
Cholesterol: 65mg
Sodium: 110mg
Total Carbohydrates: 25g
Dietary Fiber: 1g
Sugars: 18g
Protein: 4g
Calcium: 50mg
Iron: 0.5mg
Potassium: 60mg
Preparation Time
Prep Time: 20 minutes
Cook Time: 25 minutes
Total Time: 45 minutes (plus 2 hours chill time)
How to Serve Mini Cheesecake Tarts
With Fresh Fruit
Top your mini tarts with an assortment of fresh fruit—berries, kiwi, or even tropical fruits like mango and pineapple—for a burst of color and flavor.
With a Drizzle of Sauce
A drizzle of raspberry coulis, chocolate syrup, or caramel will elevate these little cheesecakes and give them that “wow” factor.
As a Party Dessert
These mini cheesecake tarts are perfect for parties! Set up a topping bar with options like whipped cream, nuts, fruit, and chocolate chips, and let guests customize their own tarts.
Additional Tips
Prep Ahead: These mini cheesecakes can be made ahead of time and stored in the fridge for up to 3 days. They’re perfect for preparing the night before a gathering!
Gluten-Free Option: For a gluten-free crust, simply swap the graham cracker crumbs for gluten-free crackers or almond flour.
Dairy-Free Version: You can substitute the cream cheese and sour cream with dairy-free alternatives to make these tarts dairy-free.
Toppings Galore: These tarts are super versatile—try topping them with a drizzle of honey, chocolate chips, or even a sprinkle of cinnamon for a fun twist.
FAQ Section
Q1: Can I use a different kind of crust?
A1: Yes, you can swap the graham cracker crust for a crushed cookie crust, like Oreos or shortbread cookies.
Q2: Can I make these without a muffin tin?
A2: If you don’t have a muffin tin, you can use tart pans or even a regular pie pan and slice them into small portions once they’re set. Just make sure to adjust baking time accordingly.
Q3: Can I freeze these mini cheesecakes?
A3: Yes, you can freeze these tarts! Just make sure to wrap them tightly in plastic wrap and store in an airtight container. Thaw in the fridge before serving.
Q4: How do I prevent the crust from being too crumbly?
A4: Be sure to press the crust mixture firmly into the muffin cups and bake it long enough so that it holds together. The melted butter is key for binding the crumbs!
Q5: Can I use a store-bought crust?
A5: Absolutely! If you’re short on time, store-bought mini graham cracker tart shells or cookie crusts will work just fine.
Q6: Can I make these mini cheesecakes without eggs?
A6: You can use an egg substitute like flaxseed meal or chia seeds mixed with water, though the texture might be slightly different.
Q7: How do I make the filling extra creamy?
A7: To make the filling extra creamy, make sure to beat the cream cheese until it’s super smooth and free of lumps before adding other ingredients. Also, don’t overbake—slightly underbaking will keep them creamy.
Q8: How do I know when the mini cheesecakes are done baking?
A8: The center should be set but still slightly jiggly. They’ll firm up more as they cool.
Q9: How do I store leftovers?
A9: Store leftovers in an airtight container in the fridge for up to 3 days. Just be sure to keep them chilled until ready to serve.
Q10: Can I add chocolate to the cheesecake filling?
A10: Yes! You can fold in melted chocolate or cocoa powder to the cheesecake filling to create a chocolate version of these tarts.
Conclusion
Mini Cheesecake Tarts are a perfect blend of creamy, tangy cheesecake with a crunchy, buttery crust—all in a bite-sized treat that’s just too easy to love. Whether you’re having a party or just want a little something sweet, these tarts are the way to go. Get ready for your new favorite dessert—trust me, they won’t last long!
Print
Mini Cheesecake Tarts
- Total Time: 0 hours
- Yield: 12 mini tarts
Description
- These Mini Cheesecake Tarts are the perfect bite-sized dessert that combines a creamy, tangy cheesecake filling with a crunchy, buttery crust. Topped with fresh fruit, chocolate, or a drizzle of caramel, they are sure to be a crowd-pleaser at any event. Easy to make and incredibly delicious!
Ingredients
-
For the crust:
-
1 ½ cups graham cracker crumbs
-
¼ cup granulated sugar
-
6 tablespoons unsalted butter, melted
For the cheesecake filling:
-
8 oz cream cheese, softened
-
½ cup powdered sugar
-
1 teaspoon vanilla extract
-
1 cup heavy whipping cream
-
2 tablespoons powdered sugar (for whipped cream)
Toppings (optional):
-
Fresh berries (blueberries, strawberries, raspberries, etc.)
-
Chocolate shavings or drizzle
-
Caramel sauce
-
Fruit preserves (apricot, strawberry, etc.)
-
Instructions
-
Make the crust:
-
Preheat your oven to 350°F (175°C).
-
In a medium bowl, mix together the graham cracker crumbs, sugar, and melted butter until well combined.
-
Spoon about 1 tablespoon of the crust mixture into the bottom of each tart pan (or muffin tin if you don’t have tart pans). Press down firmly with the back of a spoon or your fingers to form a crust.
-
Bake the crusts in the preheated oven for 5-7 minutes, until golden brown. Let them cool completely.
-
-
Make the cheesecake filling:
-
In a medium mixing bowl, beat the softened cream cheese with a hand mixer on medium speed until smooth and creamy.
-
Add the powdered sugar and vanilla extract, and continue to mix until well incorporated.
-
In a separate bowl, whip the heavy cream and 2 tablespoons powdered sugar until stiff peaks form (this takes about 2-3 minutes with an electric mixer).
-
Gently fold the whipped cream into the cream cheese mixture until smooth and fully combined.
-
-
Assemble the mini tarts:
-
Once the crusts have cooled, spoon the cheesecake filling into each tart shell, smoothing the top with a spatula. You can fill them slightly over the edge for a taller tart.
-
Refrigerate the tarts for at least 2 hours or until the cheesecake filling sets.
-
-
Add toppings:
-
Once the tarts are chilled and set, top with your desired toppings such as fresh berries, chocolate shavings, caramel drizzle, or fruit preserves.
-
-
Serve and enjoy:
-
Serve the mini cheesecake tarts chilled and enjoy the creamy, sweet, and refreshing flavors!
-
Notes
-
Crust Alternatives: If you prefer, you can use pre-made mini tart shells or other types of cookie crumbs like Oreos for the crust.
-
Toppings: Get creative with your toppings! Mini cheesecake tarts are versatile and can be customized with your favorite fruits, syrups, or nuts.
-
Make-Ahead: These tarts can be made up to a day ahead and stored in the refrigerator. Just wait to add the toppings until right before serving.
- Prep Time: 20 minutes
- Cook Time: 7-9 minutes
- Category: Dessert
- Method: Baking
- Cuisine: American
Nutrition
- Serving Size: 1 mini tart
- Calories: 220
- Sugar: 18g
- Sodium: 130mg
- Fat: 14g
- Saturated Fat: 8g
- Unsaturated Fat: 5g
- Trans Fat: 0g
- Carbohydrates: 22g
- Fiber: 1g
- Protein: 3g
- Cholesterol: 55mg


