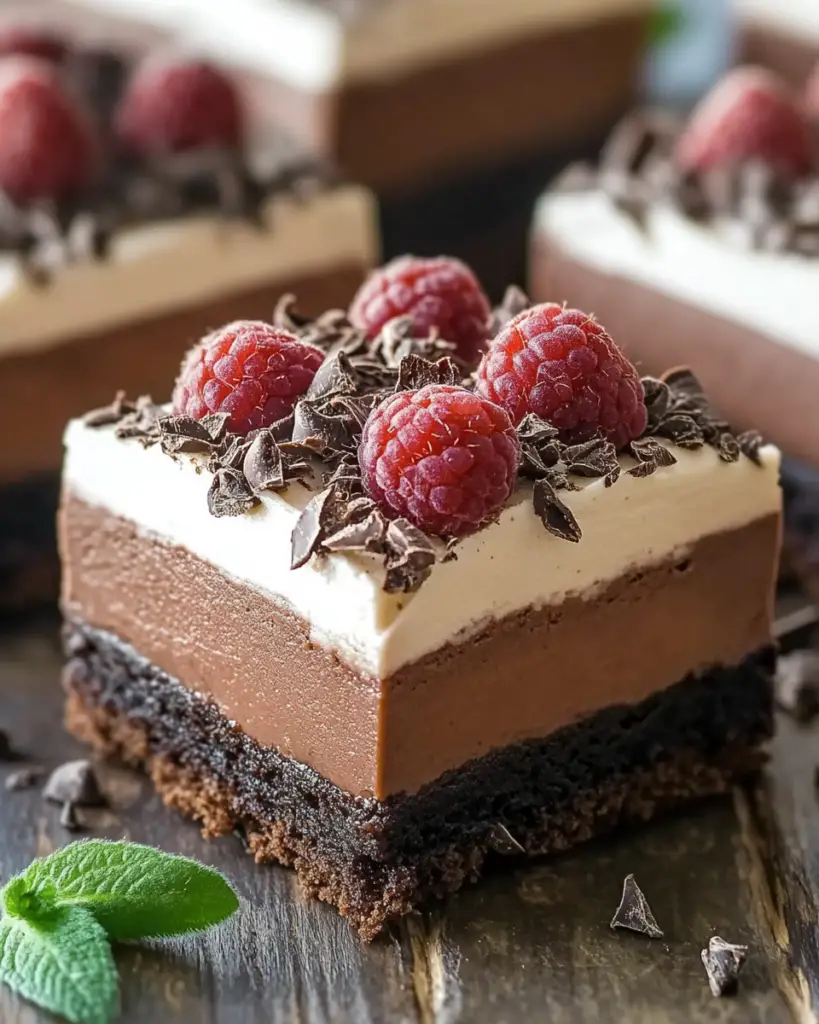
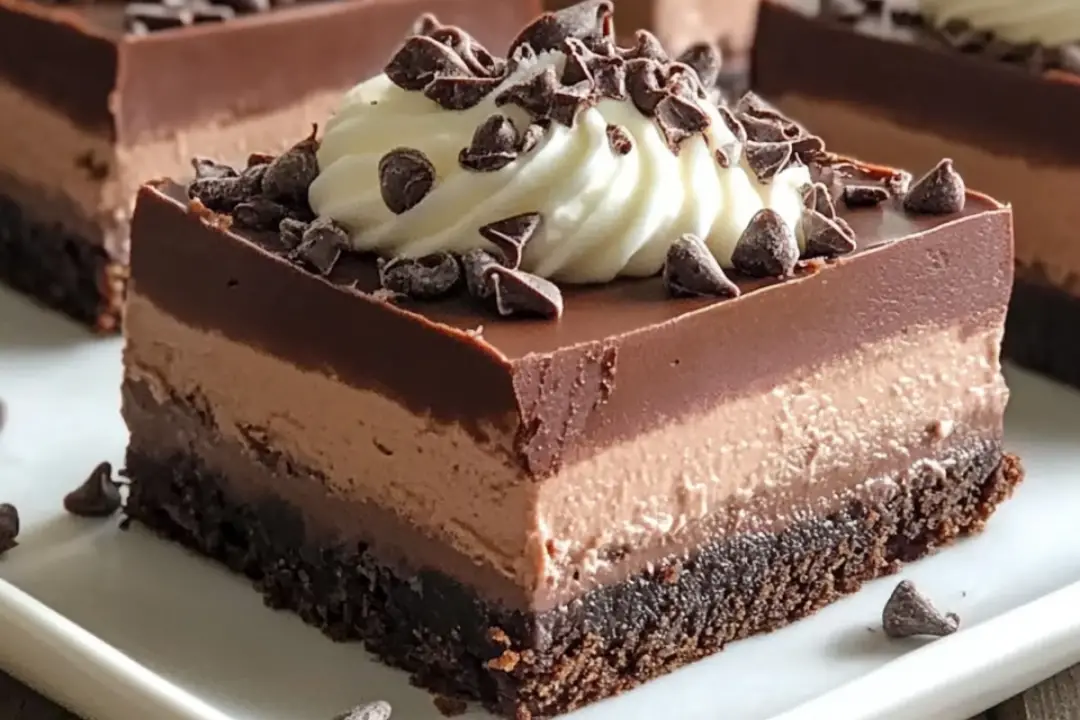
Ready for a decadent treat that doesn’t require turning on the oven? No-Bake Chocolate Mousse Bars are everything you want in a dessert—rich, creamy, and irresistibly chocolaty—but without the hassle of baking. The silky, fluffy mousse sits perfectly atop a buttery, crisp crust, creating a perfect balance of textures in every bite. Plus, they come together in a snap, meaning you’ll be enjoying a crowd-pleasing dessert with minimal effort. Whether you’re treating yourself or making a sweet impression at your next gathering, these bars are sure to be the star of the show. Trust me, once you try them, you’ll be hooked!
Why You’ll Love No-Bake Chocolate Mousse Bars
- Effortless to Make: No need to preheat the oven or wait for dough to rise. These bars are made in minutes, and you don’t even have to bake them—just chill and enjoy!
- Luxuriously Creamy: The chocolate mousse is silky smooth, almost melting in your mouth with every bite. It’s a chocolate lover’s dream!
- Perfect Texture Combination: The crunchy, buttery crust balances out the smooth mousse, providing that delicious contrast that makes each bite so satisfying.
- Great for All Occasions: Whether you’re hosting a party, going to a potluck, or just craving something sweet at home, these bars are the perfect treat. They’re easy to slice into individual servings and serve to guests.
- Customizable: Want to get creative? Add a sprinkle of sea salt, a drizzle of caramel, or fresh berries on top for extra flavor and decoration.

Disclosure: This post contains affiliate links.If you click and make a purchase, I may earn a small commission at no extra cost to you.
Ingredients
Here’s what you’ll need to whip up these indulgent No-Bake Chocolate Mousse Bars:
For the Crust:
- Graham cracker crumbs: The base for the crust. These add a slightly sweet and crunchy texture.
- Butter (melted): The butter binds the crumbs together and helps form a solid crust.
- Sugar: A bit of sweetness to complement the graham cracker flavor.
For the Chocolate Mousse Layer:
- Heavy cream: This is the secret to achieving that rich, creamy texture in the mousse.
- Semi-sweet chocolate chips: The star of the mousse. Use high-quality chocolate for the best flavor.
- Sugar: To add sweetness to the mousse layer.
- Vanilla extract: A splash of vanilla enhances the flavor and rounds out the richness of the chocolate.
- Gelatin: This helps the mousse set perfectly, giving it that mousse-like texture while keeping it sturdy enough to cut into bars.
For the Topping (Optional):
- Whipped cream: A light and fluffy topping that pairs beautifully with the mousse.
- Chocolate shavings or cocoa powder: For a little extra chocolatey goodness and to make the bars look extra fancy.
- Fresh berries (like raspberries or strawberries): For a fruity burst of flavor and a gorgeous pop of color.
(Note: Full measurements are provided in the recipe card above.)
Instructions
Let’s dive into the steps to create these indulgent bars:
For the Crust:
- Prepare the Crust: In a medium bowl, combine the graham cracker crumbs, melted butter, and sugar. Stir until the mixture resembles wet sand and everything is well combined.
- Press into the Pan: Press the crust mixture into the bottom of a lined or greased 9×9-inch baking pan, creating an even layer. Use the back of a spoon to press it firmly down.
- Chill: Place the crust in the fridge while you prepare the mousse layer. This helps it set and firm up.
For the Chocolate Mousse Layer:
- Melt the Chocolate: In a heatproof bowl, melt the semi-sweet chocolate chips over a double boiler or in the microwave. Stir until smooth and set aside to cool slightly.
- Whip the Cream: In a separate mixing bowl, whip the heavy cream and sugar with an electric mixer until stiff peaks form. You want it to be firm but not overwhipped.
- Mix Gelatin: In a small bowl, dissolve the gelatin in a bit of water and let it sit for a couple of minutes to bloom. Then, gently heat it until fully dissolved. Let it cool slightly before adding it to the mousse mixture.
- Combine Chocolate and Whipped Cream: Carefully fold the melted chocolate and vanilla extract into the whipped cream, being sure to mix it gently to keep the mousse light and airy. Add in the cooled gelatin mixture and fold again until everything is incorporated.
- Spread the Mousse: Spread the mousse evenly over the chilled crust, smoothing the top with a spatula.
- Chill to Set: Refrigerate the bars for at least 4 hours, or overnight if possible, to allow the mousse to set.
Nutrition Facts
Servings: 12
Calories per Serving: 280
Total Fat: 18g
Saturated Fat: 10g
Cholesterol: 45mg
Sodium: 75mg
Total Carbohydrates: 31g
Dietary Fiber: 1g
Sugars: 20g
Protein: 3g
Preparation Time
- Prep Time: 20 minutes
- Chill Time: 4 hours
- Total Time: 4 hours 20 minutes
How to Serve No-Bake Chocolate Mousse Bars
These No-Bake Chocolate Mousse Bars are so good on their own, but you can take them to the next level by serving them with:
- Fresh Whipped Cream: A dollop on top will add a light and fluffy contrast to the rich mousse.
- Berries: Fresh raspberries, strawberries, or even blueberries pair beautifully with the chocolate mousse, giving a burst of sweetness and color.
- Crushed Nuts: A sprinkle of chopped pistachios or almonds adds a crunchy texture that complements the creamy mousse perfectly.
Additional Tips
Here are some extra tips to help you get the most out of this recipe:
- Make Ahead: These bars are perfect for making ahead. They keep well in the fridge for up to 5 days, so you can prepare them in advance and have dessert ready when you need it.
- Garnish Ideas: You can add shaved chocolate, cocoa powder, or even crushed cookies for an extra texture on top.
- Chill Time: Don’t rush the chilling time! The mousse needs to set properly in the fridge to achieve that perfect, sliceable texture.
- Gelatin Substitution: If you want to avoid gelatin, you could try using agar-agar or a store-bought stabilizer for whipped cream.
FAQ Section
Q1: Can I make these without gelatin?
A1: Yes, you can use alternatives like agar-agar or simply skip it. Just keep in mind that the mousse will be a bit softer without the gelatin.
Q2: Can I use dark chocolate instead of semi-sweet?
A2: Absolutely! Dark chocolate will give a more intense flavor. Just make sure to adjust the sweetness level to your liking.
Q3: Can I freeze these bars?
A3: Yes, you can freeze them! Just store them in an airtight container in the freezer for up to 2-3 months. Thaw in the fridge before serving.
Q4: How do I store these bars?
A4: Store them in an airtight container in the fridge for up to 5 days. They hold up well and stay creamy and delicious.
Q5: Can I use a different crust than graham crackers?
A5: Sure! You can use crushed cookies like Oreos or vanilla wafers, or even a nut-based crust for a gluten-free version.
Q6: Can I double the recipe for a larger batch?
A6: Yes, you can! Simply double the ingredients and use a larger pan. Keep in mind the chilling time may increase slightly.
Q7: How can I make this recipe gluten-free?
A7: Use gluten-free graham crackers or substitute with a gluten-free cookie crust. The rest of the recipe is naturally gluten-free.
Q8: Can I make these bars vegan?
A8: Yes, you can use coconut cream or a dairy-free whipped topping for the mousse, and substitute the gelatin with agar-agar. For the crust, use vegan butter or coconut oil.
Q9: Can I add some flavoring to the mousse?
A9: Absolutely! You can infuse the mousse with flavors like mint, orange zest, or even a splash of liqueur like Baileys or Kahlúa.
Q10: Can I make this recipe without whipping the cream?
A10: The whipped cream gives the mousse its airy texture, so I highly recommend it. Skipping this step would result in a denser mousse.
Conclusion
These No-Bake Chocolate Mousse Bars are the epitome of indulgence without the need for baking. Whether you’re hosting a gathering, treating yourself, or simply in need of a quick and delicious dessert, these bars will satisfy your sweet tooth in the best way possible. With rich chocolate mousse, a buttery graham cracker crust, and endless customization possibilities, these are bound to become a go-to dessert recipe. Enjoy!
Print
No-Bake Chocolate Mousse Bars
- Total Time: 4 hours 20 minutes
- Yield: 12 servings
Description
These No-Bake Chocolate Mousse Bars are the ultimate decadent dessert. With a smooth, creamy chocolate mousse layer atop a crunchy base, these bars are perfect for any occasion. Easy to make and absolutely irresistible, they’re the dessert your guests will rave about!
Ingredients
For the Crust:
- 1 1/2 cups graham cracker crumbs (or chocolate wafer crumbs for extra flavor)
- 1/4 cup granulated sugar
- 1/2 cup unsalted butter, melted
For the Chocolate Mousse Layer:
- 1 1/2 cups heavy cream
- 8 oz semi-sweet chocolate, chopped (or chocolate chips)
- 1/2 cup powdered sugar
- 1 teaspoon vanilla extract
- 1/4 cup milk (or more for a creamier texture)
- 1 tablespoon gelatin (optional, for extra firmness)
For the Topping:
- 1/2 cup whipped cream (for garnish)
- Shaved chocolate or chocolate chips (optional, for garnish)
Instructions
- Prepare the Crust:
In a medium bowl, mix the graham cracker crumbs, sugar, and melted butter until well combined.
Press the mixture into the bottom of a 9×9-inch square baking pan (or similar-sized pan) to form an even crust. Use the back of a spoon to press it down firmly. Place the pan in the fridge to chill while you make the mousse layer. - Make the Chocolate Mousse:
In a small saucepan over low heat, melt the chopped semi-sweet chocolate (or chocolate chips) with 1/4 cup of milk, stirring constantly until smooth. Remove from heat and let it cool slightly.
In a separate bowl, whip the heavy cream with the powdered sugar and vanilla extract until stiff peaks form.
Gently fold the cooled chocolate mixture into the whipped cream until smooth and well combined. For added stability, you can dissolve gelatin in warm water and mix it into the mousse. - Assemble the Bars:
Once the mousse mixture is ready, spread it evenly over the chilled crust, smoothing it into an even layer. Cover the pan with plastic wrap and refrigerate for at least 4 hours, or overnight, to set. - Serve:
Before serving, top the mousse bars with whipped cream and garnish with shaved chocolate or chocolate chips, if desired. Slice into bars and enjoy!
Notes
- If you want a richer crust, substitute the graham crackers with chocolate wafers for an extra chocolatey base.
- For a dairy-free version, use coconut cream and dairy-free chocolate.
- The mousse needs to chill for a few hours, so plan ahead when making these bars.
- You can also add a layer of caramel or fruit jam for a different flavor twist!
- Prep Time: 20 minutes
- Cook Time: 4 hours
- Category: Dessert
- Method: Chilling
- Cuisine: American
Nutrition
- Serving Size: 1 bar
- Calories: 320
- Sugar: 26g
- Sodium: 80mg
- Fat: 22g
- Saturated Fat: 13g
- Unsaturated Fat: 7g
- Trans Fat: 0g
- Carbohydrates: 28g
- Fiber: 1g
- Protein: 3g
- Cholesterol: 55mg


