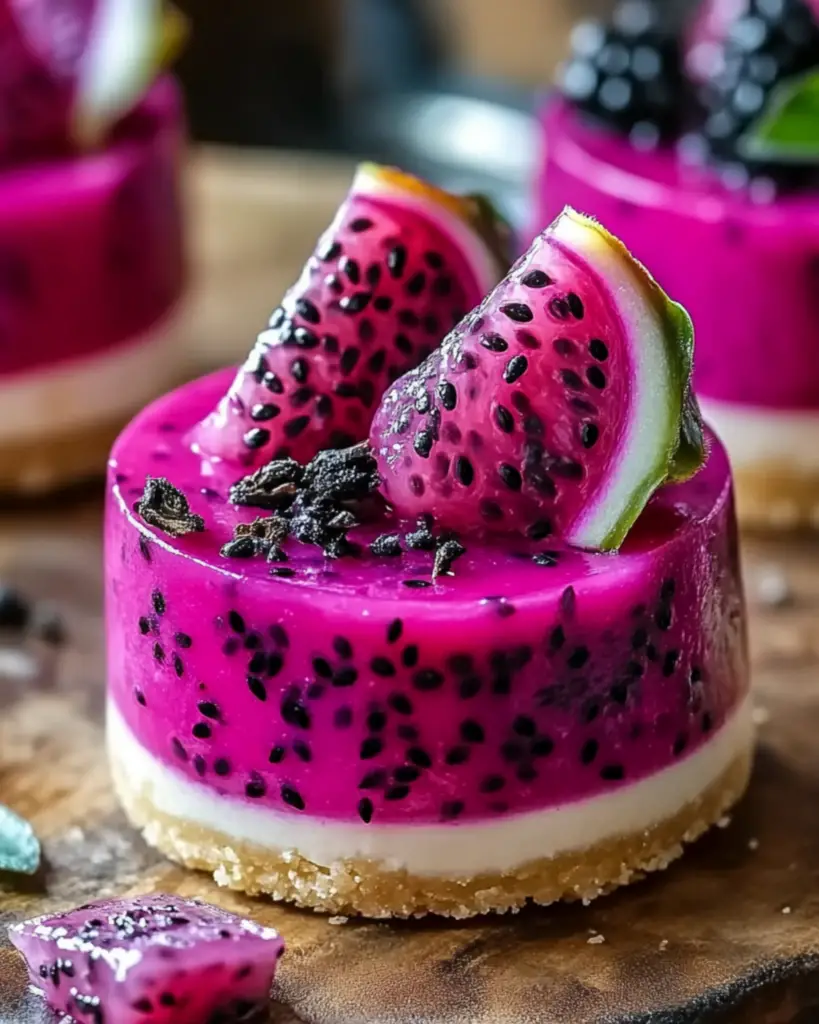
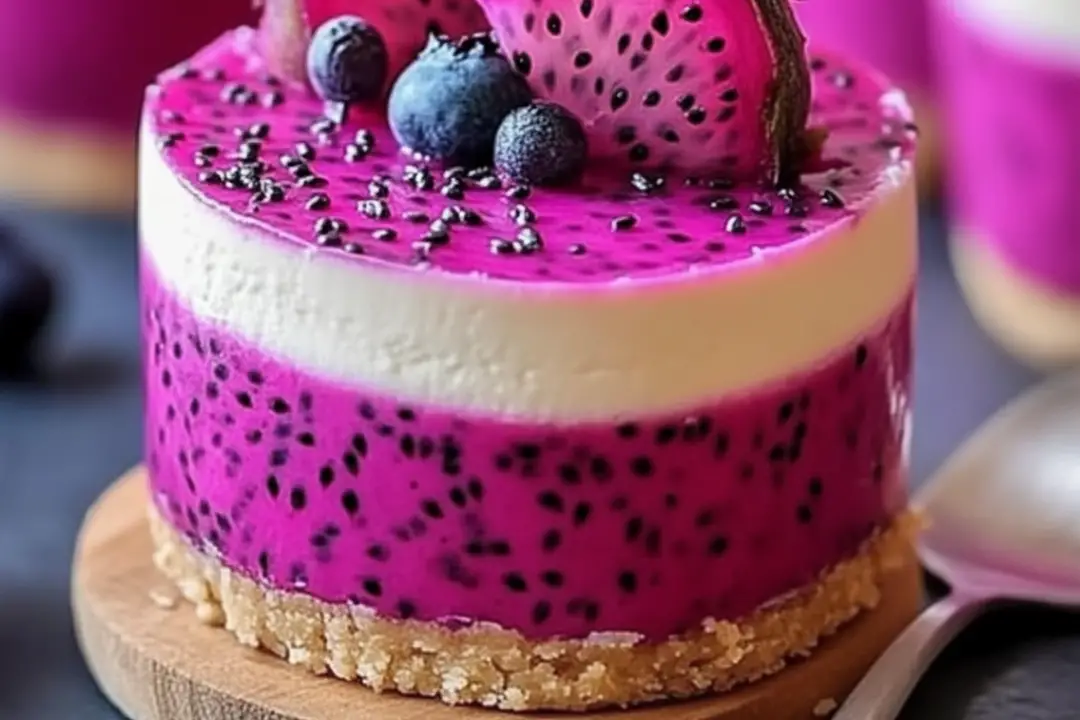
Hello, fellow food enthusiast! Get ready for a sweet treat that’s not only delicious but also beautiful to look at. These No-Bake Dragon Fruit Mini Cheesecakes are like little bites of heaven, and they’ll make you feel like a culinary artist! The creamy, smooth cheesecake filling paired with the tropical sweetness and vibrant pink of dragon fruit makes these mini cheesecakes irresistibly fun and satisfying. Trust me, you won’t be able to stop at just one. Whether you’re preparing a treat for yourself or serving them at a gathering, these no-bake beauties are sure to impress. Get your forks ready, because you’re going to love these!
Why You’ll Love No-Bake Dragon Fruit Mini Cheesecakes
There’s so much to love about these mini cheesecakes—let me give you the rundown:
No-Bake Magic:
No oven, no fuss! These cheesecakes are a breeze to make, and the best part is—you don’t need to bake a thing. Just mix, chill, and voilà, you’re ready to indulge in a perfect dessert.
Stunning and Unique:
These cheesecakes are vibrant, thanks to the dragon fruit’s bold pink color. It’s the kind of dessert that will steal the spotlight at any gathering. Your friends will be oohing and aahing before they even take their first bite.
Tropical Flavor:
Dragon fruit adds a subtle sweetness that’s fresh and unique. It’s like a little tropical vacation in every bite, and the smooth, creamy cheesecake perfectly complements that exotic flavor.
Simple Ingredients:
You don’t need any fancy ingredients for this recipe. With a few basics, including cream cheese, dragon fruit, and a graham cracker crust, you’re all set to make a show-stopping dessert. It’s simple but tastes so fancy!
Fun and Customizable:
The mini cheesecakes are perfect for individual servings, which means you can get creative with toppings and add-ins. Swap in different fruits if dragon fruit isn’t available or top with a drizzle of honey or crushed nuts. The possibilities are endless!

Disclosure: This post contains affiliate links.If you click and make a purchase, I may earn a small commission at no extra cost to you.
Ingredients
Here’s everything you need to create these beautiful little cheesecakes—simple and delightful!
- Dragon Fruit: The star of the show, bringing that vibrant pink color and sweet flavor. Make sure it’s ripe and juicy!
- Cream Cheese: Smooth and creamy, this will form the luscious base of the cheesecake.
- Whipped Cream: Adds lightness and fluffiness to the cheesecake filling.
- Sugar: Just enough to add sweetness without overpowering the natural flavors.
- Graham Crackers: For the perfect crust with a buttery crunch.
- Butter: To bind the graham crackers and give the crust its richness.
- Lime Juice: Adds a refreshing zesty kick to balance out the sweetness.
(Note: The full ingredients list, including measurements, is provided in the recipe card directly above.)
Instructions
Now that you’ve got your ingredients ready, it’s time to put everything together for these gorgeous mini cheesecakes!
1. Prepare the Crust
In a food processor, crush the graham crackers into fine crumbs. Then, melt your butter and mix it into the crumbs until everything is evenly coated. Spoon the mixture into mini cheesecake pans or muffin tins, pressing it down gently to form a compact, even crust. Pop these in the fridge to set while you prepare the filling.
2. Make the Cheesecake Filling
In a bowl, beat the cream cheese until it’s smooth and creamy. Add the sugar and lime juice and continue to mix until everything is well combined. Then, fold in the whipped cream for a light and fluffy texture. Now, the best part—puree your dragon fruit and fold that into the mixture. The vibrant pink will make your cheesecake filling absolutely gorgeous!
3. Fill the Cups
Spoon the cheesecake mixture on top of the chilled graham cracker crusts, smoothing it out with a spatula. Make sure the filling is evenly distributed in each cup. They should look perfectly cute and ready for chilling!
4. Chill and Set
Place the mini cheesecakes in the fridge for at least 4 hours, or preferably overnight, to let them set. This is where the magic happens! The filling will firm up and become luxuriously creamy.
5. Serve and Enjoy!
Once they’re set, remove the cheesecakes from the pans and transfer them to serving plates. You can garnish with extra dragon fruit slices, a dollop of whipped cream, or a sprinkle of fresh mint. Dig in and enjoy the tropical, creamy bliss!
Nutrition Facts
Servings: 6-8 Calories per serving: Varies (check recipe card for details)
How to Serve No-Bake Dragon Fruit Mini Cheesecakes
These mini cheesecakes are the perfect individual servings, but here are a few ideas to make them even more special:
- Fresh Fruit: Add extra dragon fruit slices, kiwi, or berries on top for a fresh, juicy contrast.
- Whipped Cream: Top with a swirl of freshly whipped cream for an added creamy touch.
- Mint Leaves: A sprig of fresh mint gives the dessert a fresh pop of color and a little extra flavor.
- Chocolate Drizzle: If you’re feeling a bit adventurous, drizzle a little melted dark chocolate over the top. It pairs wonderfully with the sweetness of the dragon fruit!
Additional Tips
- Make Ahead: These cheesecakes are perfect for preparing in advance. Make them the night before and they’ll be ready to impress the next day.
- Dragon Fruit Variations: If dragon fruit is hard to find, feel free to swap it out with other tropical fruits like mango, passion fruit, or even a mix of berries.
- Storage Tips: Store leftover mini cheesecakes in an airtight container in the fridge for up to 3 days. They’ll still be delicious!
- Serving Size: These mini cheesecakes are perfect for portion control, but if you’d like to make one large cheesecake instead, simply use a springform pan and adjust the crust and filling accordingly.
FAQ Section
Q1: Can I use a different fruit instead of dragon fruit?
A1: Yes! Mango, berries, or passion fruit would all work wonderfully in this recipe. Just make sure to puree the fruit for a smooth filling.
Q2: Can I make these cheesecakes ahead of time?
A2: Absolutely! In fact, these mini cheesecakes are even better when made ahead. Let them chill in the fridge for at least 4 hours or overnight.
Q3: How do I store leftovers?
A3: Keep leftovers in an airtight container in the fridge for up to 3 days. They’ll still be delicious and ready to enjoy!
Q4: Can I freeze these mini cheesecakes?
A4: Yes, you can freeze them! Just wrap them in plastic wrap and store them in a freezer-safe container for up to 2 months. Thaw in the fridge before serving.
Q5: Can I use a different type of crust?
A5: You can! If you want to get creative, you could use crushed cookies, like Oreos or coconut macaroons, for a fun twist on the crust.
Q6: Can I add more sugar?
A6: Of course! If you like things sweeter, feel free to adjust the sugar to your liking. But be careful, as dragon fruit already has a nice natural sweetness!
Q7: Can I make this recipe vegan?
A7: Yes, you can use dairy-free cream cheese and whipped coconut cream to make this recipe vegan. Make sure to double-check the ingredients for any hidden dairy!
Enjoy making (and eating) these No-Bake Dragon Fruit Mini Cheesecakes—they’re as fun to make as they are to eat!
Print
No-Bake Dragon Fruit Mini Cheesecakes
- Total Time: 0 hours
- Yield: 12 servings
- Diet: Vegetarian
Description
These colorful and refreshing No-Bake Dragon Fruit Mini Cheesecakes are a delightful treat for any occasion. With a creamy filling and vibrant dragon fruit layer, they are not only delicious but also visually stunning.
Ingredients
For the crust:
- 1 1/2 cups graham cracker crumbs
- 1/4 cup unsalted butter, melted
- 2 tablespoons sugar
For the cheesecake filling:
- 1 1/2 cups cream cheese, softened
- 1/2 cup powdered sugar
- 1/2 teaspoon vanilla extract
- 1 cup whipped cream or whipped topping
- 1/2 cup dragon fruit puree (use pink dragon fruit for vibrant color)
- 1/4 cup dragon fruit chunks (optional for texture)
For the dragon fruit layer:
- 1/2 cup dragon fruit puree
- 1 tablespoon lemon juice
- 1 teaspoon gelatin (or agar-agar for a vegetarian option)
- 2 tablespoons hot water
For garnish:
- Fresh raspberries
- Dragon fruit slices
- Fresh mint leaves
- Powdered sugar for dusting
Instructions
-
Prepare the crust:
- In a bowl, mix the graham cracker crumbs, melted butter, and sugar until the texture resembles wet sand.
- Press this mixture into the bottoms of mini cheesecake molds (or a muffin tin with liners) to form the crust.
- Chill in the fridge for at least 20 minutes to set.
-
Make the cheesecake filling:
- In a large mixing bowl, beat the softened cream cheese, powdered sugar, and vanilla extract until smooth and creamy.
- Gently fold in the whipped cream and dragon fruit puree. If desired, fold in the dragon fruit chunks for added texture.
- Spoon this mixture over the chilled crusts, smoothing the tops with a spatula.
- Refrigerate for at least 2-3 hours to allow the filling to set.
-
Create the dragon fruit layer:
- Dissolve the gelatin (or agar-agar) in the hot water.
- Mix the gelatin solution with the dragon fruit puree and lemon juice until well combined.
- Gently pour this mixture over the set cheesecake layer to create a vibrant top.
- Return the cheesecakes to the fridge to set for another hour.
-
Garnish and serve:
- Once fully set, carefully remove the mini cheesecakes from their molds.
- Garnish with fresh raspberries, dragon fruit slices, mint leaves, and a light dusting of powdered sugar for an elegant finish.
Notes
These mini cheesecakes are perfect for parties, celebrations, or simply a sweet treat to enjoy at home.
- Prep Time: 10 minutes
- Cook Time: None
- Category: Dessert
- Method: No-Bake
- Cuisine: Fusion
Nutrition
- Serving Size: 1 mini cheesecake
- Calories: 220
- Sugar: 15g
- Sodium: 150mg
- Fat: 15g
- Saturated Fat: 8g
- Unsaturated Fat: 7g
- Trans Fat: 0g
- Carbohydrates: 20g
- Fiber: 1g
- Protein: 3g
- Cholesterol: 30mg


