

Hey there, sweet tooth! Are you ready to indulge in some decadent, no-fuss deliciousness? These No-Bake Valentine’s Brownies are the perfect treat for anyone who loves rich, chocolatey goodness without the hassle of baking. Trust me, you’re going to love this one. It’s like a big hug for your taste buds, and it’s so easy that even the most kitchen-averse can whip them up with confidence.
Why You’ll Love No-Bake Valentine’s Brownies
Versatile
These brownies are perfect for any occasion, from a cozy night in with your sweetheart to a fun dessert at a Galentine’s Day party. Whether you’re making them for someone special or just treating yourself, they fit the bill perfectly. Imagine coming home after a long day, knowing you can create something indulgent and comforting in no time.
Budget-Friendly
No need to break the bank here! This recipe uses simple ingredients that you probably already have in your pantry. It’s amazing how a few staple items can transform into something so spectacular. Plus, it’s rich enough to satisfy even the hungriest of appetites without costing a fortune.
Quick and Easy
If you’re someone who usually avoids complex recipes, this one’s for you. The steps are straightforward and foolproof, making cooking stress-free and enjoyable. Even if you’re a beginner, you’ll feel like a pro in no time.
Customizable
Feel free to tweak the toppings to suit your taste buds. Love nuts? Add some chopped almonds or walnuts. Prefer something fruity? Toss in some dried cranberries or cherries. The possibilities are endless!
Crowd-Pleasing
This dish strikes the perfect balance of flavor and comfort, making it a universal favorite. It’s always a win when a single dessert can satisfy everyone at the table, from the little ones to the adults.
Disclosure: This post contains affiliate links.If you click and make a purchase, I may earn a small commission at no extra cost to you.


Ingredients in No-Bake Valentine’s Brownies
Here’s the magic of these brownies—they’re made with just a few simple ingredients, but the result is an explosion of flavors that will leave you craving more. Let’s break it down:
Chocolate Chips
The star of the show. Rich, creamy chocolate chips melt into a dreamy base that forms the foundation of these brownies. If you’re a fan of all things chocolate, you’re in for a treat.
Dates
Sweet and sticky, dates add natural sweetness and a chewy texture that complements the chocolate beautifully. They also act as a binding agent, holding everything together without needing to bake.
Almonds
Crunchy and nutty, almonds bring a delightful contrast to the smooth chocolate and chewy dates. They also add a boost of protein and healthy fats, making these brownies a bit more nutritious.
Cocoa Powder
A generous amount of cocoa powder gives these brownies their deep, rich chocolate flavor. Make sure to use good-quality cocoa for the best results.
Vanilla Extract
A splash of vanilla extract adds a touch of warmth and complexity to the brownies, enhancing the overall flavor profile. It’s the secret ingredient that takes these brownies from good to great.
(Note: the full ingredients list, including measurements, is provided in the recipe card directly below.)
Instructions
Let’s dive into the steps to create this decadent masterpiece:
Prepare Your Equipment
Start by lining a square baking dish with parchment paper. This ensures easy removal and clean-up later on. Preparing your dish ahead of time makes assembling the brownies a breeze.
Combine Ingredients
In a food processor, combine the dates, almonds, and cocoa powder. Process until the mixture forms a sticky dough-like consistency. Add the melted chocolate chips and vanilla extract, and pulse until well-combined. Be careful not to over-process, as this could affect the texture.
Assemble the Dish
Transfer the mixture into the prepared baking dish and press it down firmly with a spatula or the back of a spoon. Make sure the mixture is evenly spread and compacted to ensure uniform pieces once cut.
Finishing Touches
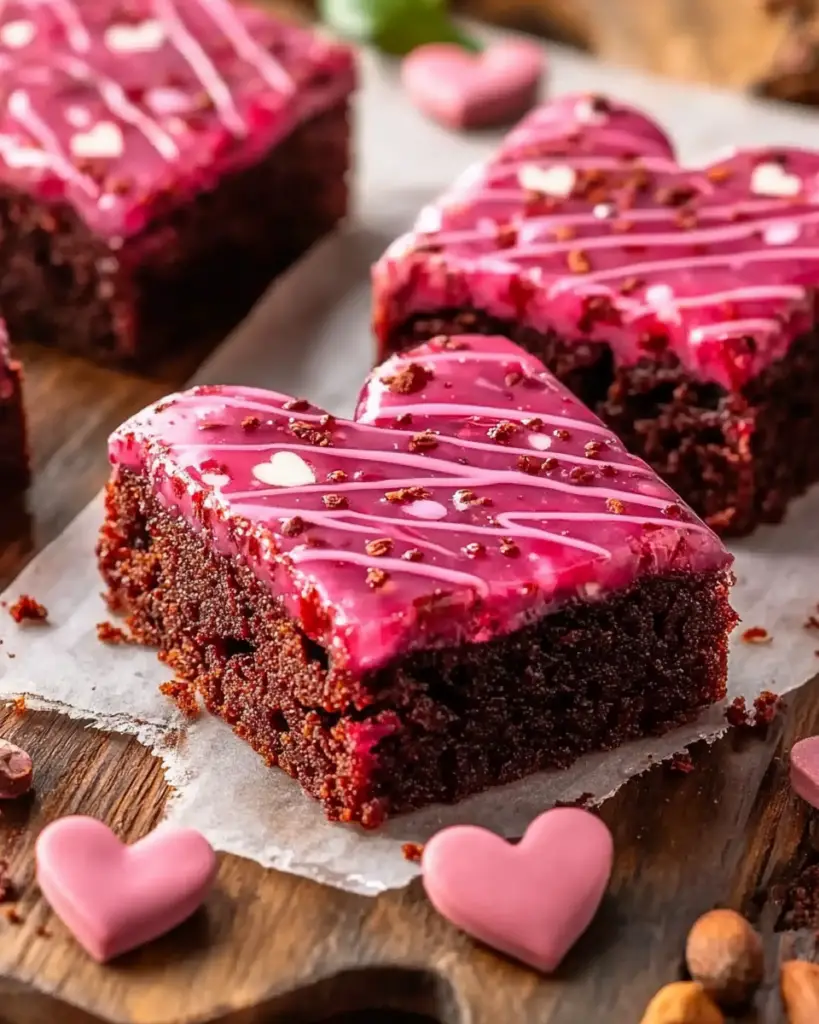
Sprinkle the top with extra chocolate chips, crushed nuts, or dried fruit for added texture and visual appeal. This step is crucial to make the brownies look as good as they taste.
Chill to Perfection
Place the dish in the refrigerator and chill for at least 2 hours, or until the brownies are firm. This step allows the mixture to set properly, ensuring the brownies hold their shape when cut.
Serve and Enjoy
Once chilled, remove the brownies from the dish using the parchment paper to lift them out. Cut into squares and serve. These brownies are perfect on their own or paired with a scoop of vanilla ice cream for an extra indulgent treat.
Nutrition Facts
Servings: 9
Calories per serving: 250 kcal
Preparation Time
Prep Time: 10 minutes
Chill Time: 2 hours
Total Time: 2 hours 10 minutes
How to Serve No-Bake Valentine’s Brownies
This dessert pairs wonderfully with various accompaniments. Here are a few serving suggestions to enhance your dining experience:
Fresh Berries
Pair it with a handful of fresh berries like strawberries, raspberries, or blueberries for a refreshing contrast to the rich chocolate flavors.
Whipped Cream
Serve with a dollop of whipped cream for an airy, light addition that balances out the richness of the brownies.
Ice Cream
Add a scoop of vanilla ice cream on top for a classic combination that never fails to impress.
Coffee or Tea
Enjoy these brownies with a cup of coffee or tea for a perfect afternoon treat. The bitterness of the coffee or tea complements the sweetness of the brownies beautifully.
Presentation matters too! Serving the brownies on a beautiful platter can elevate the dining experience. Add a sprinkle of powdered sugar or a drizzle of melted chocolate for that extra pop.
Additional Tips
Here are some extra tips to help you get the most out of this recipe:
Prep Ahead
Save time by preparing the brownies the night before. Store them in the fridge overnight and they’ll be ready to enjoy the next day.
Spice It Up
Experiment with spices like cinnamon or cayenne pepper to give the brownies a unique twist. A pinch of sea salt on top can also enhance the flavors.
Dietary Adjustments
If you’re catering to specific dietary needs, swap regular chocolate chips for dairy-free alternatives or use gluten-free oats instead of almonds.
Storage Tips
Store leftovers in an airtight container in the refrigerator for up to five days. For best results, keep them chilled to maintain their texture.
Double the Batch
This recipe scales easily, so consider making a double batch. Having a homemade dessert ready in the fridge can be a lifesaver on busy days.
FAQ Section
Q1: Can I substitute dates with another sweetener?
A1: Absolutely! For instance, if you don’t have dates, you can use Medjool dates or prunes. It may slightly alter the texture, but it’ll still be delicious.
Q2: Can I make this dish ahead of time?
A2: Yes, it’s a great make-ahead recipe. Prepare the brownies and chill them the night before. They’ll be ready to slice and serve when you need them.
Q3: How do I store leftovers?
A3: Store leftovers in an airtight container in the refrigerator for up to five days. For best results, keep them chilled to maintain their texture.
Q4: Can I freeze this dish?
A4: Yes! Place the uncut brownies in a freezer-safe container and freeze for up to three months. When you’re ready to eat, thaw overnight in the fridge and slice as usual.
Q5: What’s the best way to reheat this dish?
A5: There’s no need to reheat these brownies. Simply let them come to room temperature before enjoying.
Q6: Can I double the recipe?
A6: Definitely! Just make sure you have a larger pan or dish to accommodate the extra volume. Chilling time may need slight adjustments.
Q7: Is this recipe suitable for vegans?
A7: With a few tweaks, yes! For example, to make it vegan, substitute regular chocolate chips with dairy-free alternatives.
Q8: What side dishes go well with this recipe?
A8: Some great options include fresh fruit salad, a glass of cold milk, or a cup of hot cocoa.
Q9: How can I make this dish healthier?
A9: Use dark chocolate with a higher percentage of cocoa solids and reduce the amount of added sugar. Adding extra nuts or seeds is another great way to boost its nutritional value.
Q10: What’s the best cookware to use for this recipe?
A10: A square baking dish works best for these brownies. Ensure it’s lined with parchment paper for easy removal and clean-up.
Conclusion
So, there you have it—No-Bake Valentine’s Brownies that are not only a breeze to make but also guaranteed to wow everyone at the table. Whether you’re sharing them with someone special or simply indulging in some comforting flavors for yourself, these brownies are versatile enough to fit the occasion. So gather your ingredients, chill out, and get ready to savor the taste of pure chocolate bliss. Happy cooking, my friend!
Print
No-Bake Valentine’s Brownies
- Total Time: 15 minutes
- Yield: 16-20 squares
Description
These easy, no-bake brownies are the perfect treat for Valentine’s Day! With a rich, fudgy base and a sweet, chocolatey topping, they’re sure to impress your loved ones.
Ingredients
- 1 cup unsalted butter
- 1 1/4 cups granulated sugar
- 1/2 cup cocoa powder
- 1/4 tsp salt
- 1 tsp vanilla extract
- 2 large eggs
- 1 1/2 cups graham cracker crumbs
- 1 cup powdered sugar
- 1/2 cup mini chocolate chips (for topping)
Instructions
- Prepare the Brownie Base:
In a medium saucepan, melt butter over medium heat. Stir in the granulated sugar, cocoa powder, salt, and vanilla extract until well combined. Remove from heat and let cool slightly. - Add the Eggs and Grahams:
Whisk the eggs into the cooled butter and cocoa mixture one at a time. Stir in graham cracker crumbs until well incorporated. Press the mixture into a greased 8×8-inch baking dish and set aside. - Make the Topping:
In a separate bowl, combine powdered sugar and chocolate chips. Melt them together in the microwave in 30-second intervals, stirring between, until smooth. Pour the chocolate topping over the brownie base and spread it out evenly. - Chill:
Place the dish in the fridge for at least 2 hours, or until the brownies are firm enough to cut into squares. - Serve:
Cut into squares and serve chilled. Enjoy!
- Prep Time: 15 minutes
- Cook Time: 0 minutes
- Category: Dessert
- Method: No-Bake
- Cuisine: American
Nutrition
- Serving Size: 1 square
- Calories: 200
- Sugar: 18g
- Sodium: 50mg
- Fat: 12g
- Saturated Fat: 7g
- Unsaturated Fat: 3g
- Trans Fat: 0g
- Carbohydrates: 24g
- Fiber: 1g
- Protein: 2g
- Cholesterol: 25mg