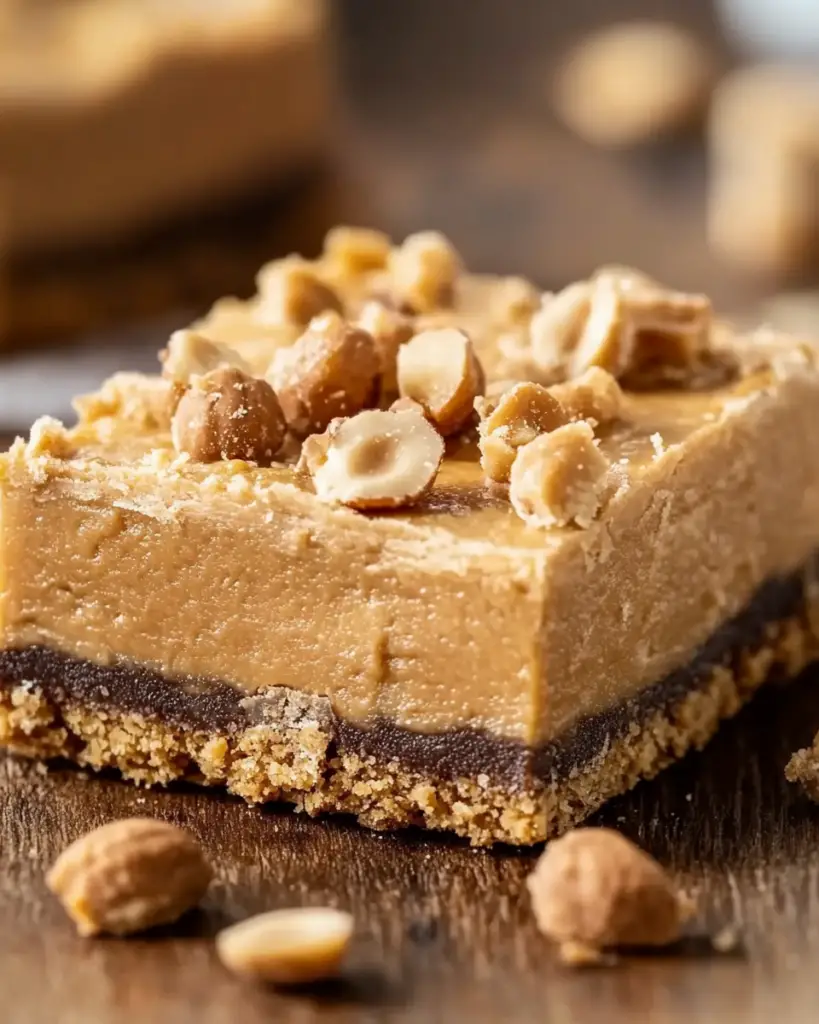
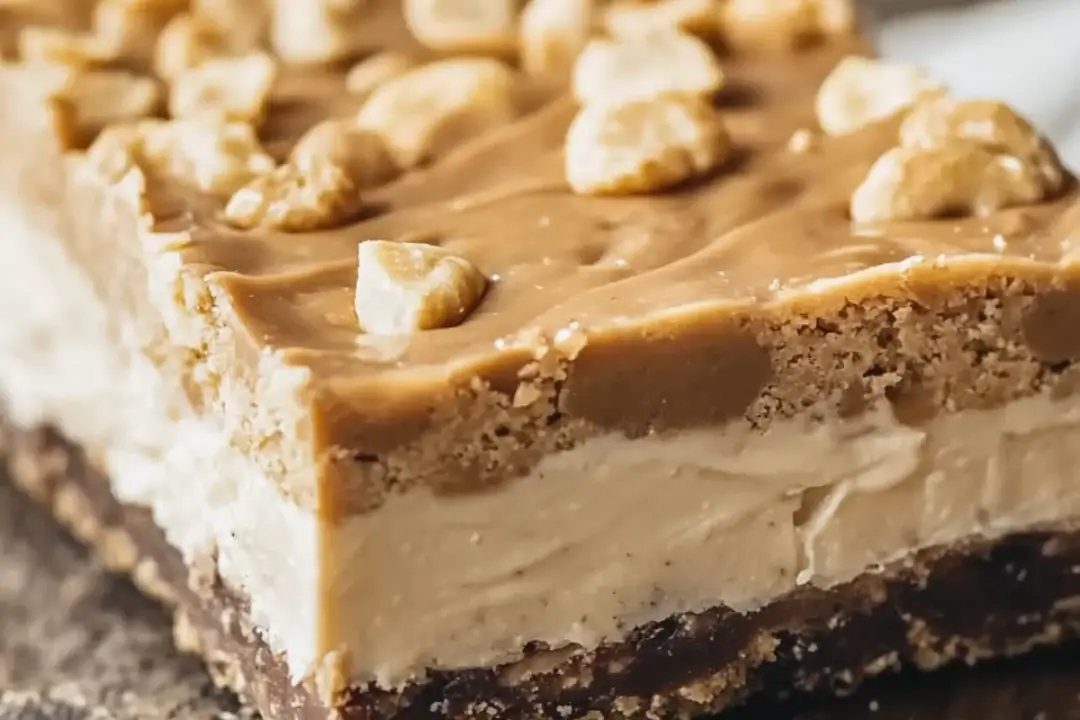
These Peanut Butter Dream Bars are the perfect balance of creamy peanut butter, rich chocolate, and a crunchy, buttery base. Imagine taking a bite and getting hit with that classic peanut butter and chocolate combo—it’s like a little slice of heaven. The best part? They’re no-bake, so you don’t even need to turn on the oven! Whether you’re looking for a quick dessert to satisfy your sweet tooth or a treat to bring to a gathering, these bars are a total crowd-pleaser. Trust me, you won’t be able to stop at just one.
Why You’ll Love Peanut Butter Dream Bars
No-Bake Simplicity
These bars are a breeze to make! With minimal effort and no baking required, you’ll have a dessert that looks and tastes like it came from a bakery—without any of the hassle. Just mix, chill, and enjoy!
Irresistible Flavor Combination
Peanut butter and chocolate—need I say more? The creamy peanut butter filling is rich and satisfying, while the layer of chocolate on top adds a silky sweetness that perfectly complements the peanut butter.
Texture That’ll Make You Swoon
The base of the bars is crunchy and buttery, providing the perfect contrast to the creamy filling and smooth chocolate. With every bite, you’ll experience a delightful mix of textures.
Crowd-Pleasing Treat
These bars are sure to be a hit at any event. Whether you’re serving them at a potluck, a party, or just as an afternoon snack, everyone will be reaching for seconds.

Disclosure: This post contains affiliate links.If you click and make a purchase, I may earn a small commission at no extra cost to you.
Ingredients
For the Base:
- Butter: The base is buttery and rich, creating a solid foundation for the rest of the dessert.
- Graham Cracker Crumbs: Adds crunch and flavor, making for a perfect base.
- Powdered Sugar: Sweetens up the crust while giving it a little extra texture.
For the Peanut Butter Layer:
- Peanut Butter: This is the star of the show! Use creamy peanut butter for a smooth filling that’s perfectly balanced with the other ingredients.
- Butter: For extra creaminess and a rich texture.
- Powdered Sugar: Sweetens the peanut butter filling and gives it a dream-like consistency.
For the Chocolate Topping:
- Semi-Sweet Chocolate Chips: The perfect choice for a rich, chocolatey layer that complements the peanut butter.
- Butter: Helps the chocolate layer set beautifully, giving it a smooth and glossy finish.
Instructions
1. Prepare the Base
In a medium bowl, combine graham cracker crumbs, powdered sugar, and melted butter. Mix until everything is well combined and the crumbs are moistened. Press the mixture into the bottom of a greased 9×9-inch baking dish, creating an even layer. Use the back of a spoon to press it down firmly. Place the dish in the fridge while you make the peanut butter layer.
2. Make the Peanut Butter Layer
In another bowl, mix together peanut butter, melted butter, and powdered sugar. Stir until smooth and creamy. Once the mixture is fully combined, spread it evenly over the graham cracker crust. Use a spatula to smooth it out. Place the dish back into the fridge to chill for about 30 minutes.
3. Make the Chocolate Topping
In a microwave-safe bowl, melt the semi-sweet chocolate chips and butter in 30-second intervals, stirring between each, until the chocolate is smooth and fully melted. Pour the melted chocolate over the peanut butter layer, spreading it into an even layer.
4. Chill and Set
Return the dish to the fridge and let the bars set for at least 2 hours (or until the chocolate is firm). This step is key—resist the temptation to cut into them too early! Once the bars are set, you’ll have perfectly smooth, delicious layers.
5. Slice and Serve
Once the bars are fully chilled and set, remove them from the fridge and cut into squares. Serve chilled, and get ready to enjoy a bite of peanut butter and chocolate bliss.
How to Serve Peanut Butter Dream Bars
These bars are great on their own, but here are a few ideas for serving them:
With a Glass of Milk
You can’t go wrong with pairing these bars with a cold glass of milk! The richness of the peanut butter and chocolate is perfectly balanced by the cool, refreshing milk.
As Part of a Dessert Platter
Serve these bars alongside other sweet treats like brownies, cookies, or mini cheesecakes for a fun dessert spread. It’s a guaranteed hit at any party or gathering.
With a Scoop of Ice Cream
For an extra indulgent treat, top each bar with a scoop of vanilla or chocolate ice cream. The creamy ice cream perfectly complements the peanut butter and chocolate flavors of the bars.
Additional Tips
1. Make Sure to Chill
Let the bars chill long enough so that the layers fully set. It’s tempting to cut into them too early, but chilling ensures that they hold their shape and the texture is just right.
2. Use Smooth Peanut Butter
For the creamiest texture, go with creamy peanut butter rather than chunky. The smooth consistency will make the filling extra velvety.
3. Get Creative with Toppings
Feel free to top the bars with some crushed peanuts, mini chocolate chips, or even a sprinkle of sea salt for a sweet and salty combo!
4. Make a Bigger Batch
If you’re serving a crowd, you can double the recipe and use a larger pan. Just make sure to adjust the chilling time to ensure the bars set properly.
FAQ Section
Q1: Can I use crunchy peanut butter for the filling?
A1: You can, but the bars will have a chunkier texture. For a smoother filling, creamy peanut butter is recommended.
Q2: How long can I store these bars?
A2: You can store these bars in an airtight container in the fridge for up to 1 week. Just make sure they’re well covered so they stay fresh.
Q3: Can I freeze these bars?
A3: Yes! These bars freeze beautifully. Just wrap them in plastic wrap and foil, and store in the freezer for up to 3 months. Let them thaw in the fridge before serving.
Q4: Can I use a different type of chocolate for the topping?
A4: Absolutely! You can use milk chocolate for a sweeter topping or dark chocolate for a richer flavor. Feel free to experiment!
Q5: Can I add a layer of chopped peanuts?
A5: Yes! Adding a layer of chopped peanuts or peanut butter chips on top of the peanut butter filling adds extra crunch and flavor.
Q6: Can I use a different type of crust?
A6: While graham crackers provide a great base, you could also try using digestive biscuits or vanilla wafer cookies for a different flavor profile.
Q7: Do I need to use butter in the filling?
A7: The butter adds a creamy texture, but if you want a dairy-free version, you can omit it and just use peanut butter and powdered sugar.
Q8: Can I make these without powdered sugar?
A8: Powdered sugar is key to achieving the right texture for the filling and crust. If you don’t have any, you can make your own by blending regular sugar in a food processor until it’s fine and powdery.
Q9: Can I make these bars without refrigeration?
A9: Refrigeration is necessary to set the layers properly and give the bars a firm texture. Without chilling, they may not hold together well.
Q10: Can I add other fillings, like caramel or marshmallow?
A10: Yes! You can get creative and add layers of caramel, marshmallow fluff, or even chocolate ganache to switch things up.
Conclusion
There you have it, folks—Peanut Butter Dream Bars that are just as dreamy as they sound! With their no-bake simplicity, rich peanut butter filling, and velvety chocolate topping, these bars are the ultimate sweet treat that’s impossible to resist. Whether you’re serving them at a party, indulging in a late-night snack, or treating yourself after a busy week, they’re sure to impress anyone who takes a bite. So, go ahead—make these bars, enjoy the creamy, crunchy perfection, and get ready for everyone to ask for the recipe!
Print
Peanut Butter Dream Bars
- Total Time: 15 minutes
- Yield: 16 bars (depending on size)
Description
These Peanut Butter Dream Bars are a sweet, creamy, and indulgent treat! With a buttery graham cracker crust, a luscious peanut butter filling, and a smooth chocolate layer on top, they are the perfect combination of flavors and textures. A simple and irresistible no-bake dessert that will satisfy your sweet tooth in no time!
Ingredients
For the Crust:
- 1 1/2 cups graham cracker crumbs
- 1/4 cup granulated sugar
- 1/2 cup unsalted butter, melted
For the Peanut Butter Filling:
- 1 cup creamy peanut butter
- 1 cup powdered sugar
- 1/4 cup unsalted butter, softened
- 1 teaspoon vanilla extract
- 1/2 cup heavy cream (or milk)
For the Chocolate Topping:
- 1 cup semisweet chocolate chips
- 2 tablespoons unsalted butter
Instructions
-
For the Crust:
- Prepare the crust:
- In a medium bowl, mix together the graham cracker crumbs and sugar. Add the melted butter and stir until everything is evenly combined.
- Press the crust:
- Press the crumb mixture into the bottom of an 8×8-inch baking pan (or similar-sized dish) lined with parchment paper or sprayed with cooking spray. Press down firmly to compact the crumbs into an even layer.
- Chill the crust:
- Place the crust in the fridge to chill while you prepare the filling.
For the Peanut Butter Filling:
- Mix the peanut butter filling:
- In a large bowl, beat together the peanut butter, powdered sugar, softened butter, and vanilla extract until smooth and creamy.
- Add the cream:
- Gradually add the heavy cream (or milk) to the peanut butter mixture, continuing to beat until the filling becomes smooth and spreadable.
- Spread the filling:
- Once the crust has chilled, spread the peanut butter filling evenly over the graham cracker crust layer. Smooth the top with a spatula.
For the Chocolate Topping:
- Melt the chocolate:
- In a microwave-safe bowl, melt the chocolate chips and butter together. Microwave in 30-second intervals, stirring in between, until the chocolate is completely melted and smooth.
- Spread the chocolate topping:
- Pour the melted chocolate mixture over the peanut butter layer and spread it evenly with a spatula.
- Chill the bars:
- Refrigerate the bars for at least 2-3 hours, or until the chocolate is set and the bars are firm.
To Serve:
- Cut and serve:
- Once chilled and set, cut into squares or bars. Serve and enjoy!
- Prepare the crust:
Notes
- You can substitute crunchy peanut butter for a bit of texture if you prefer.
- If you want a thicker chocolate layer, you can increase the amount of chocolate and butter.
- These bars can be stored in the fridge for up to a week, or frozen for longer storage.
- Prep Time: 15 minutes
- Cook Time: 0 minutes (no baking required)
- Category: Dessert
- Method: No-Bake
- Cuisine: American
Nutrition
- Serving Size: 1 bar (if recipe yields 16 bars)
- Calories: 250
- Sugar: 22g
- Sodium: 90 mg
- Fat: 18g
- Saturated Fat: 8g
- Unsaturated Fat: 9g
- Trans Fat: 0g
- Carbohydrates: 22g
- Fiber: 1g
- Protein: 5g
- Cholesterol: 20mg


