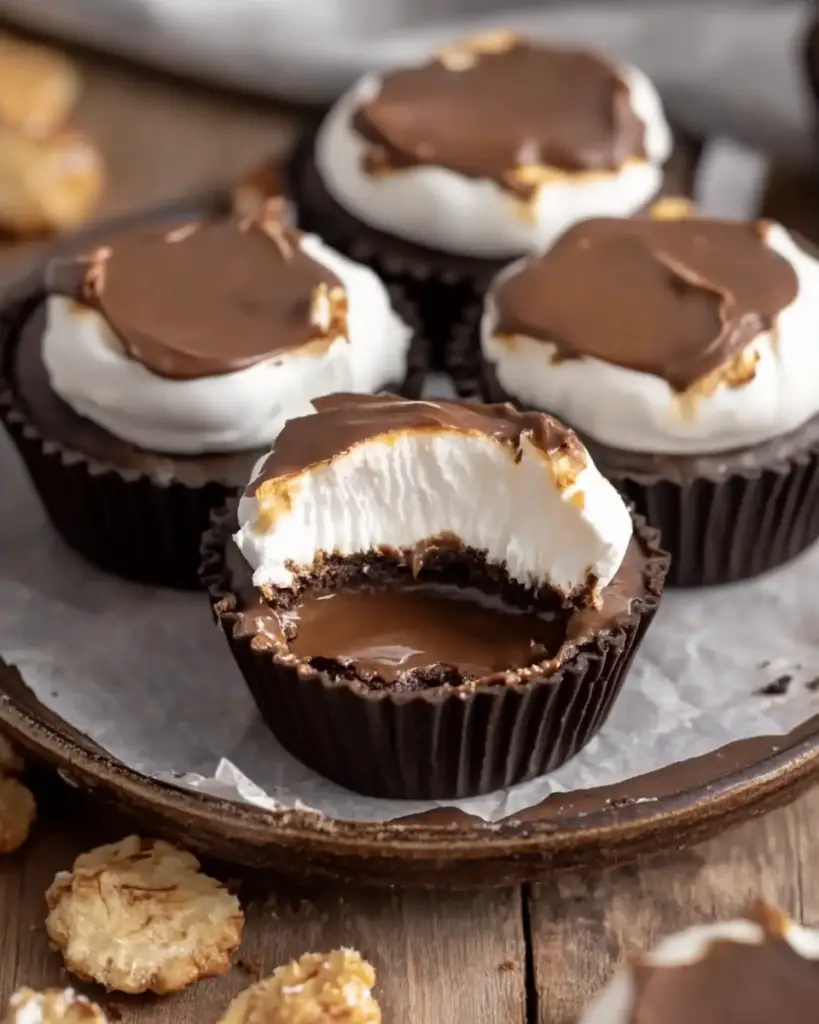
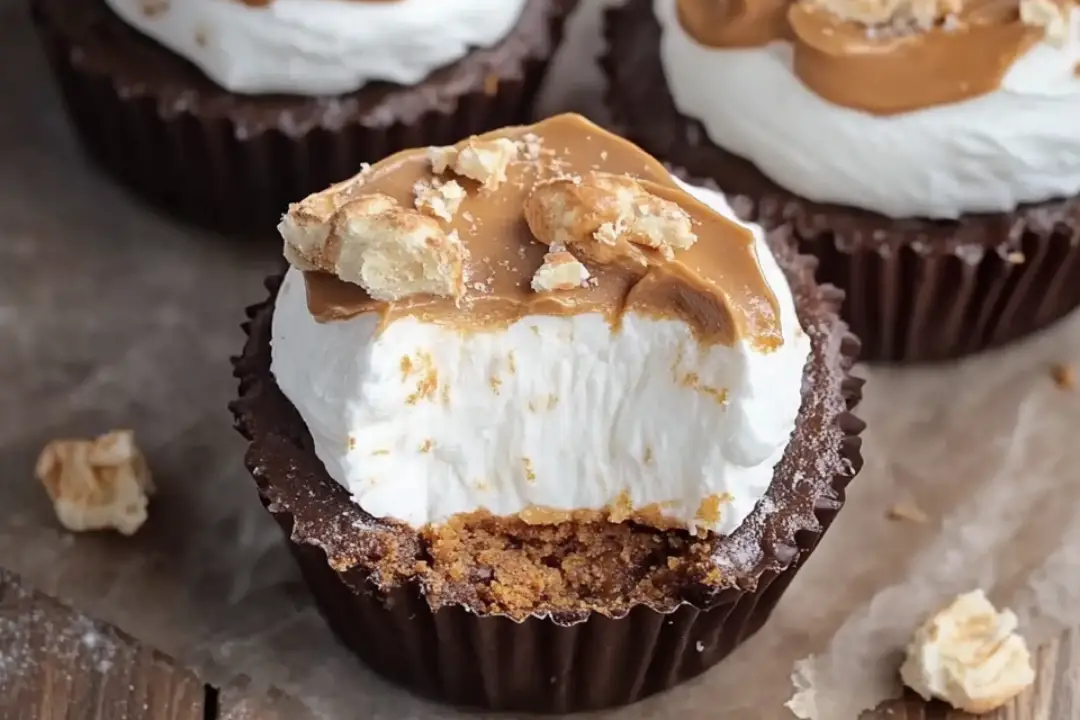
Who doesn’t love a treat that’s equal parts creamy, crunchy, and downright irresistible? Peanut Butter Marshmallow Cups are the perfect blend of two beloved flavors—peanut butter and marshmallows—combined in a way that makes them totally addicting. Picture this: a silky peanut butter center, a gooey marshmallow filling, and a chocolate shell to top it all off. It’s like your favorite candy bar, but better because it’s homemade! Trust me, once you try them, you’ll be hooked.
Why You’ll Love Peanut Butter Marshmallow Cups
Quick and Easy to Make
These cups come together in no time. With just a few simple ingredients and some time in the fridge to set, you can have a batch of these delicious treats ready to go in under an hour. No baking required!
Perfect Balance of Sweet and Salty
Peanut butter gives these cups a nice, salty kick, while the marshmallows add a sweetness that balances everything out perfectly. When you take that first bite, the combo of flavors will have you reaching for another.
Customizable
Feel free to play with the fillings! You can add a sprinkle of sea salt on top for extra flavor, or even mix in some crushed nuts or chocolate chips. It’s a fun recipe that lets you get creative.
Ideal for Any Occasion
Whether you’re hosting a party, bringing a treat to work, or just craving something sweet, these cups will always be a hit. They’re perfect for holiday gifting or a quick after-dinner treat.

Disclosure: This post contains affiliate links.If you click and make a purchase, I may earn a small commission at no extra cost to you.
Ingredients
For the Peanut Butter Layer:
- Peanut Butter: Smooth peanut butter works best for a creamy filling. You can use crunchy if you want some extra texture!
- Powdered Sugar: This gives the peanut butter filling that perfect sweet and slightly firm texture.
- Butter: Unsalted butter helps bind everything together and makes the filling nice and smooth.
- Vanilla Extract: A little splash to round out the flavor.
For the Marshmallow Layer:
- Mini Marshmallows: These tiny marshmallows melt perfectly and give that gooey, sweet filling everyone loves.
- Butter: Again, to help with melting and binding.
For the Chocolate Shell:
- Milk Chocolate or Semi-Sweet Chocolate: You can use either depending on how sweet you like it. You can also try dark chocolate for a richer taste.
- Butter: A small amount to help smooth out the chocolate and make it easier to work with.
Instructions
1. Prepare the Peanut Butter Filling
In a bowl, combine the peanut butter, powdered sugar, butter, and vanilla extract. Mix until smooth and well combined. You should have a thick, creamy consistency that can be easily molded into cups.
2. Prepare the Marshmallow Filling
In a small saucepan over low heat, melt the butter and marshmallows together. Stir frequently until the marshmallows have melted and the mixture is smooth and gooey. Remove from heat and set aside to cool slightly.
3. Create the Chocolate Shell
In a microwave-safe bowl, melt the chocolate and butter together in 30-second intervals, stirring after each interval until fully melted and smooth. Be careful not to overheat the chocolate.
4. Assemble the Cups
- Line a muffin tin with cupcake liners (this makes it easier to remove the cups later).
- Spoon a little bit of melted chocolate into the bottom of each liner, just enough to cover the base. Place the tin in the fridge for about 5-10 minutes to let the chocolate harden.
- Once the chocolate is set, scoop a small spoonful of the peanut butter mixture into each cup, spreading it evenly over the hardened chocolate.
- Next, add a spoonful of the marshmallow mixture on top of the peanut butter. You can use the back of the spoon to smooth it out if needed.
- Top each cup with another layer of melted chocolate, covering the marshmallow layer completely.
5. Let Them Set
Place the muffin tin back in the fridge for about 30 minutes, or until the chocolate has fully set and the cups are firm to the touch.
6. Serve and Enjoy
Once set, carefully remove the cups from the cupcake liners and enjoy these creamy, gooey, chocolatey treats! Store any leftovers in an airtight container in the fridge.
How to Serve Peanut Butter Marshmallow Cups
These delicious cups are perfect for sharing with friends, family, or coworkers. They make a great addition to any party or potluck, and they’re a crowd-pleaser at holiday gatherings. You can also serve them alongside a cold glass of milk for the ultimate sweet treat experience!
For Extra Fun:
- Serve them in mini cupcake liners for bite-sized treats.
- Add a sprinkle of crushed peanuts or sea salt on top before the chocolate layer sets for an extra burst of flavor.
Additional Tips
1. Use Different Chocolate
If you’re not a fan of milk chocolate, feel free to use dark or semi-sweet chocolate. It gives the cups a richer flavor, balancing out the sweetness.
2. Make Ahead
These peanut butter marshmallow cups store well in the fridge for up to 1 week—though they probably won’t last that long! They also freeze well for up to 3 months, so you can make a batch in advance for whenever the craving hits.
3. Play with Fillings
Add a twist by mixing in some chopped nuts, mini chocolate chips, or even a spoonful of your favorite jam into the peanut butter or marshmallow layers.
4. For Extra Creaminess
For a creamier texture, you can replace some of the peanut butter with a little bit of cream cheese or even Greek yogurt. It’ll give the cups a rich, smooth texture!
FAQ Section
Q1: Can I use crunchy peanut butter?
A1: Yes! Crunchy peanut butter will give the filling some texture and extra crunch. Use it if you like a bit of bite in your treats.
Q2: Can I use other types of chocolate?
A2: Absolutely! Dark chocolate or semi-sweet chocolate will work great if you prefer a less sweet flavor.
Q3: How do I store these cups?
A3: Store them in an airtight container in the fridge for up to 1 week. They’ll also freeze well for up to 3 months.
Q4: Can I use large marshmallows instead of mini ones?
A4: Yes, but you’ll need to chop them up or melt them down more carefully, as large marshmallows take longer to melt.
Q5: Can I make these without butter?
A5: You can substitute the butter with coconut oil or another oil-based fat for a dairy-free option.
Q6: Can I make these without the marshmallow layer?
A6: Of course! If you’re not a fan of marshmallows, simply make the peanut butter cups with just the chocolate and peanut butter layers.
Q7: How do I make the chocolate layer thicker?
A7: You can add a little more chocolate or let the first layer set longer before adding the next. For an extra thick shell, add two layers of chocolate.
Q8: Can I add more peanut butter to the filling?
A8: Absolutely! You can make the filling as peanut buttery as you like by adjusting the amount of peanut butter in the recipe.
Q9: Can I make these without a muffin tin?
A9: Yes! You can use silicone molds or even a baking sheet lined with parchment paper to create these cups.
Q10: How do I know when the chocolate has set?
A10: The chocolate will harden completely when it’s cool to the touch and no longer feels sticky. You can also test by gently pressing on the chocolate; it should feel firm.
Conclusion
Peanut Butter Marshmallow Cups are an absolute treat that combines all your favorite flavors into one irresistible bite. Whether you’re satisfying a sweet tooth or preparing a homemade gift for someone special, these cups will never disappoint. They’re quick, easy, and guaranteed to be a hit every time. So go ahead, make a batch (or two), and get ready for some serious peanut butter bliss!
Print
Peanut Butter Marshmallow Cups
- Total Time: 20 minutes
- Yield: 12 servings 1x
Description
Peanut Butter Marshmallow Cups are the perfect combination of creamy peanut butter, soft marshmallows, and a rich chocolate coating. These no-bake treats are easy to make and are the ideal dessert for peanut butter lovers. They’re sweet, chewy, and totally irresistible – the perfect bite-sized indulgence!
Ingredients
For the Peanut Butter Layer:
- 1 cup creamy peanut butter
- 1/4 cup unsalted butter, melted
- 1 1/2 cups powdered sugar
- 1 teaspoon vanilla extract
For the Marshmallow Filling:
- 1 1/2 cups mini marshmallows
For the Chocolate Coating:
- 1 1/2 cups semisweet chocolate chips
- 2 tablespoons unsalted butter
Instructions
-
For the Peanut Butter Layer:
- Prepare the peanut butter mixture:
- In a large bowl, combine the peanut butter, melted butter, powdered sugar, and vanilla extract. Stir until smooth and well-combined.
- Form the cups:
- Line a muffin tin with cupcake liners. Using a spoon, fill each liner with a spoonful of the peanut butter mixture and press it down to form an even layer. The peanut butter layer should cover the bottom of each liner. Chill in the fridge for 10-15 minutes to firm up slightly.
For the Marshmallow Filling:
- Add marshmallows:
- Once the peanut butter layer is firm, take the muffin tin out of the fridge and place a small handful of mini marshmallows on top of each peanut butter layer.
For the Chocolate Coating:
- Melt the chocolate:
- In a microwave-safe bowl, melt the semisweet chocolate chips and butter together in 30-second intervals, stirring in between until smooth and completely melted.
- Coat the cups:
- Spoon the melted chocolate over the marshmallows in each cup, covering them completely. Smooth the top with a spoon if needed.
- Chill and set:
- Place the muffin tin back in the fridge and allow the chocolate to set for at least 1 hour, or until completely firm.
To Serve:
- Once the chocolate is set, remove the peanut butter marshmallow cups from the muffin tin and serve!
- Prepare the peanut butter mixture:
Notes
- You can use crunchy peanut butter if you prefer a bit of texture in the cups.
- For added flavor, you can sprinkle a pinch of sea salt on top of the chocolate coating before it sets.
- These cups can be stored in an airtight container in the fridge for up to 1 week.
- Prep Time: 10 mins
- Cook Time: 10 minutes
- Category: Dessert
- Method: No-Bake
- Cuisine: American
Nutrition
- Serving Size: 1 cup (assuming recipe yields 12 cups)
- Calories: 200
- Sugar: 19g
- Sodium: 40mg
- Fat: 14g
- Saturated Fat: 5g
- Unsaturated Fat: 9g
- Trans Fat: 0g
- Carbohydrates: 22g
- Fiber: 1g
- Protein: 4g
- Cholesterol: 10mg


