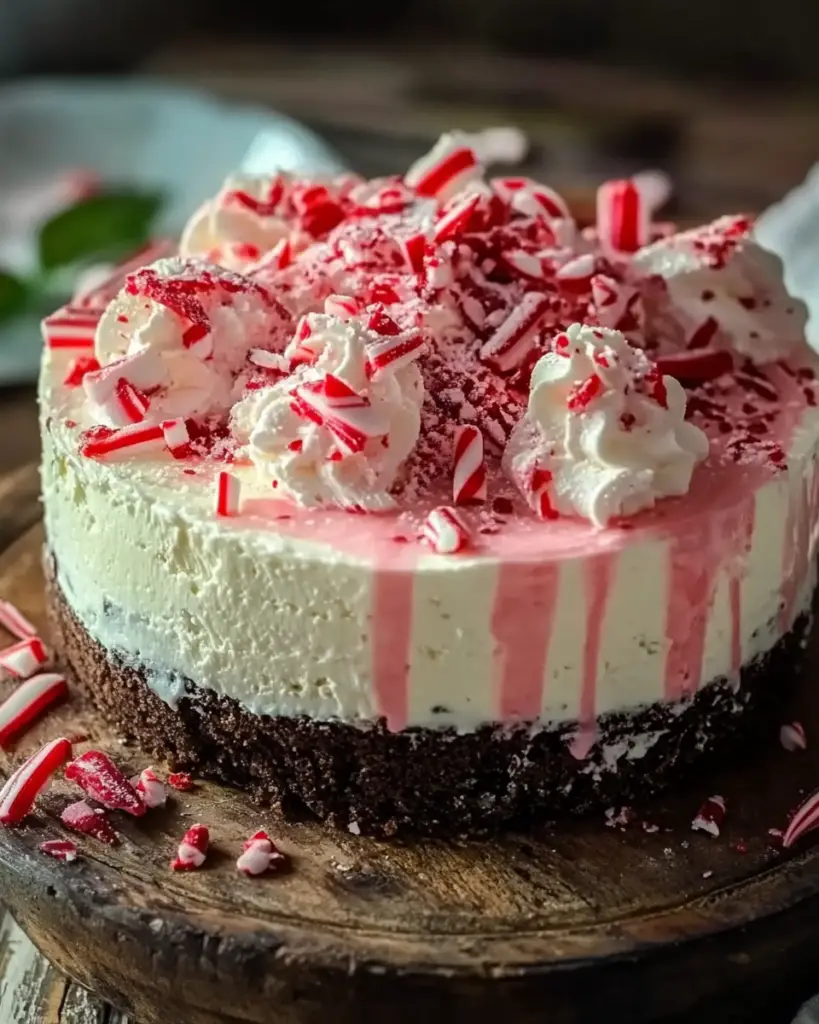
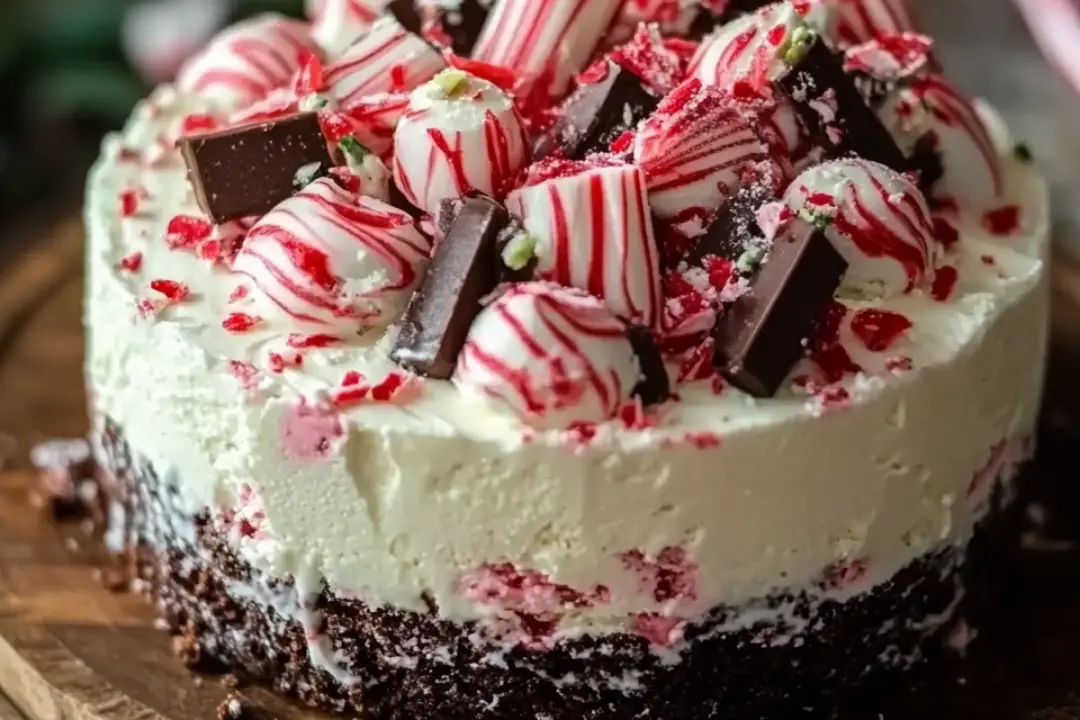
Hey there, fellow food lover! Are you ready to dive into a recipe that’s as refreshing as it is indulgent? This Peppermint Ice Cream Cake is the perfect blend of creamy, minty goodness and rich chocolate decadence. Trust me, you’re going to love this one—it’s a game-changer for anyone who craves a little something special after dinner or at your next gathering. Let’s get started!
Why You’ll Love Peppermint Ice Cream Cake
This isn’t just another dessert; it’s an experience. Whether you’re treating yourself on a quiet evening or impressing guests at a holiday party, this cake fits the bill perfectly. Here’s why it’s destined to become your new favorite:
Versatile
Imagine coming home after a long day, knowing you can whip up a treat that feels like a luxury but requires minimal effort. Or picture serving this stunning cake at a festive gathering, where everyone will be asking for the recipe before the night ends.
Budget-Friendly
You don’t need to break the bank to make this dreamy dessert. The ingredients are simple yet come together to create extraordinary flavors. It’s the perfect way to enjoy a fancy dessert without spending a fortune.
Quick and Easy
Don’t worry if you’re not a seasoned baker. This recipe is straightforward with steps even beginners can follow. No complicated techniques here—just pure enjoyment from start to finish.
Customizable
Feel free to tweak this recipe to suit your taste buds. Want more peppermint flavor? Add an extra drop of peppermint extract. Prefer a milder minty touch? Adjust accordingly. The possibilities are endless!
Crowd-Pleasing
Both kids and adults will fall in love with this cake. It strikes the perfect balance of sweetness and refreshment, making it a universal hit at any table.

Disclosure: This post contains affiliate links.If you click and make a purchase, I may earn a small commission at no extra cost to you.
Ingredients in Peppermint Ice Cream Cake
Here’s the magic of this cake—it’s made with just a few basic ingredients, but the result is nothing short of spectacular. Let’s break it down:
Chocolate Sandwich Cookies
These cookies form the crunchy base of the cake. They add a delightful texture contrast to the smooth ice cream layers. Crush them finely to ensure they mix well with the butter.
Unsalted Butter
A bit of melted butter helps bind the cookie crumbs together, creating a sturdy and delicious crust. Make sure it’s unsalted so you can control the saltiness of the cake.
Mint Chocolate Chip Ice Cream
The star of the show! Choose a high-quality mint chocolate chip ice cream for the best results. The creamy texture and specks of chocolate will make every bite heavenly.
Whipped Topping
A light and fluffy whipped topping adds a touch of elegance to the cake. It’s the perfect complement to the richness of the ice cream and chocolate.
Peppermint Extract
Just a few drops of peppermint extract elevate the flavor profile, giving the cake its signature minty kick. Be careful not to overdo it—a little goes a long way!
Dark Chocolate Chips
Sprinkle some dark chocolate chips on top for an added layer of indulgence. Their slightly bitter flavor pairs beautifully with the sweet ice cream.
(Note: the full ingredients list, including measurements, is provided in the recipe card directly below.)
Instructions
Let’s dive into the steps to create this refreshing masterpiece:
Preheat Your Equipment
Start by preheating your freezer to ensure everything stays cold while you work. If you’re using a springform pan, make sure it’s chilled as well. This step sets the stage for a perfectly frozen cake.
Combine Ingredients
In a large bowl, combine the crushed chocolate sandwich cookies and melted butter. Mix until the crumbs are evenly coated and clump together when pressed. This ensures a solid base that won’t crumble under pressure.
Prepare Your Cooking Vessel
Prepare your springform pan by lining the bottom with parchment paper and lightly greasing the sides. Proper preparation prevents sticking and makes cleanup a breeze later on.
Assemble the Dish
Press the cookie mixture firmly into the bottom of the prepared pan, creating an even layer. Spread the softened mint chocolate chip ice cream over the crust, smoothing it out with a spatula. Freeze for about 30 minutes until firm.
Cook to Perfection
Once the ice cream layer is set, spread the whipped topping over it, followed by a sprinkle of dark chocolate chips. Return the cake to the freezer and let it freeze until solid, usually around 4 hours or overnight.
Finishing Touches
Remove the cake from the freezer and let it sit for a few minutes to soften slightly. This step is crucial to make slicing easier and to let the flavors meld together.
Serve and Enjoy
Slice the cake and serve immediately. Watch as your friends and family marvel at the beautiful layers and savor each bite. Pair it with a cup of coffee or hot chocolate for the ultimate indulgence.
Nutrition Facts
Servings: 8 Calories per serving: 350
Preparation Time
Prep Time: 20 minutes
Cook Time: 0 minutes (no cooking required)
Total Time: 4 hours 20 minutes (includes freezing time)
How to Serve Peppermint Ice Cream Cake
This cake pairs wonderfully with various accompaniments. Here are a few serving suggestions to enhance your dining experience:
Fresh Berries
Top each slice with fresh berries like strawberries or raspberries for a burst of natural sweetness and a pop of color.
Hot Chocolate
Serve alongside a steaming mug of hot chocolate for a cozy, comforting combination that warms the soul.
Sprinkles
Add a festive touch with colorful sprinkles or crushed candy canes for a playful garnish that’s perfect for celebrations.
Presentation Matters
Serving the cake on a beautifully arranged platter elevates the experience. Garnish with a sprig of fresh mint or a dusting of powdered sugar for that extra wow factor.
Additional Tips
Here are some extra tips to help you get the most out of this recipe:
Prep Ahead
Save time by preparing the crust and freezing it ahead of time. Store the assembled cake in the freezer until ready to serve.
Spice It Up
For an extra minty punch, add a few drops of green food coloring to the whipped topping for a vibrant look.
Dietary Adjustments
If you’re catering to specific dietary needs, swap regular ice cream for a dairy-free alternative and use gluten-free cookies for the crust.
Storage Tips
Store leftovers in an airtight container in the freezer for up to 1 week. Reheat gently to preserve the cake’s texture and flavor.
Double the Batch
This recipe freezes beautifully, so consider making a double batch. Having a homemade dessert ready in the freezer can be a lifesaver on busy days.
FAQ Section
Q1: Can I substitute mint chocolate chip ice cream with another flavor? A1: Absolutely! Try vanilla bean or chocolate fudge for a different twist. Each flavor will bring its own unique character to the cake.
Q2: Can I make this cake ahead of time?
A2: Yes, it’s a great make-ahead recipe. Prepare it up to a day in advance and store it in the freezer. Just take it out about 10 minutes before serving to soften.
Q3: How do I store leftovers?
A3: Store leftovers in an airtight container in the freezer for up to 1 week. For best results, reheat in the microwave for a few seconds to soften.
Q4: Can I freeze this cake?
A4: Yes! Place it in a freezer-safe container and freeze for up to 1 month. When you’re ready to eat, thaw overnight in the fridge and serve.
Q5: What’s the best way to reheat this cake?
A5: There’s no need to reheat! Simply let it sit at room temperature for a few minutes to soften slightly before serving.
Q6: Can I double the recipe?
A6: Definitely! Just make sure you have a larger pan or dish to accommodate the extra volume. Freezing time may need slight adjustments.
Q7: Is this recipe suitable for vegans?
A7: With a few tweaks, yes! Use vegan ice cream and whipped topping, and opt for a plant-based butter alternative.
Q8: What side dishes go well with this cake?
A8: Keep it simple with a cup of coffee or tea. Fresh fruit or a drizzle of chocolate sauce also complements the cake beautifully.
Q9: How can I make this cake healthier?
A9: Use low-fat or dairy-free ice cream and whipped topping. Adding fresh fruit toppings can boost its nutritional value.
Q10: What’s the best cookware to use for this recipe?
A10: A springform pan works best for easy removal and presentation. Ensure it’s properly lined and greased for the best results.
Conclusion
There you have it, my friend—a delightful Peppermint Ice Cream Cake that’s sure to become a new favorite. Whether you’re enjoying it solo or sharing it with loved ones, this dessert brings joy and satisfaction with every bite. So grab your ingredients, get creative, and let’s make some unforgettable memories in the kitchen. Happy baking!
Print
Peppermint Ice Cream Cake Recipe
- Total Time: 15 minutes
- Yield: 8–10 servings 1x
Description
Cool, creamy, and packed with the festive flavor of peppermint, this Peppermint Ice Cream Cake is the perfect dessert for holidays or any occasion. With layers of chocolate cookies, peppermint ice cream, and whipped topping, it’s a showstopper that’s surprisingly easy to make!
Ingredients
For the Cake Base:
- 2 cups (200g) chocolate cookie crumbs (e.g., Oreos, without the filling)
- 6 tbsp (85g) unsalted butter, melted
For the Ice Cream Layer:
- 1 ½ quarts (1.4 liters) peppermint ice cream, slightly softened
- ½ cup (50g) crushed peppermint candies or candy canes
For the Whipped Topping:
- 2 cups (480ml) heavy whipping cream
- 3 tbsp powdered sugar
- ½ tsp vanilla extract
For Garnish:
- Crushed candy canes or peppermint candies
- Chocolate shavings or mini chocolate chips
Instructions
-
Prepare the Crust:
- Grease a 9-inch springform pan or line it with parchment paper.
- In a bowl, mix the chocolate cookie crumbs with melted butter until the mixture resembles wet sand.
- Press the mixture firmly into the bottom of the prepared pan to form an even crust. Freeze for 15 minutes.
-
Add the Ice Cream Layer:
- Spread the softened peppermint ice cream evenly over the crust.
- Sprinkle crushed peppermint candies over the ice cream for added crunch.
- Cover the pan tightly with plastic wrap and freeze for at least 4 hours, or until firm.
-
Prepare the Whipped Topping:
- In a chilled mixing bowl, whip the heavy cream with powdered sugar and vanilla extract until stiff peaks form.
-
Assemble the Cake:
- Remove the cake from the freezer and spread the whipped topping evenly over the ice cream layer.
- Decorate with crushed candy canes, chocolate shavings, or mini chocolate chips.
-
Chill and Serve:
- Return the cake to the freezer for at least 1 hour to set the topping.
- Before serving, let the cake sit at room temperature for 5-10 minutes for easier slicing.
Notes
- Storage: Cover the cake tightly and keep it in the freezer for up to 1 week.
- Custom Variations: Swap peppermint ice cream for vanilla or chocolate mint for a different twist.
- Holiday Flair: Use festive sprinkles or edible glitter for a seasonal touch.
- Prep Time: 15 minutes
- Cook Time: 0 minutes
- Category: Dessert
- Method: No-Bake
- Cuisine: American
Nutrition
- Serving Size: 1 slice
- Calories: 450
- Sugar: 35g
- Sodium: 150mg
- Fat: 25g
- Saturated Fat: 15g
- Unsaturated Fat: 7g
- Trans Fat: 0g
- Carbohydrates: 50g
- Fiber: 2g
- Protein: 5g
- Cholesterol: 60mg


