
Introduction
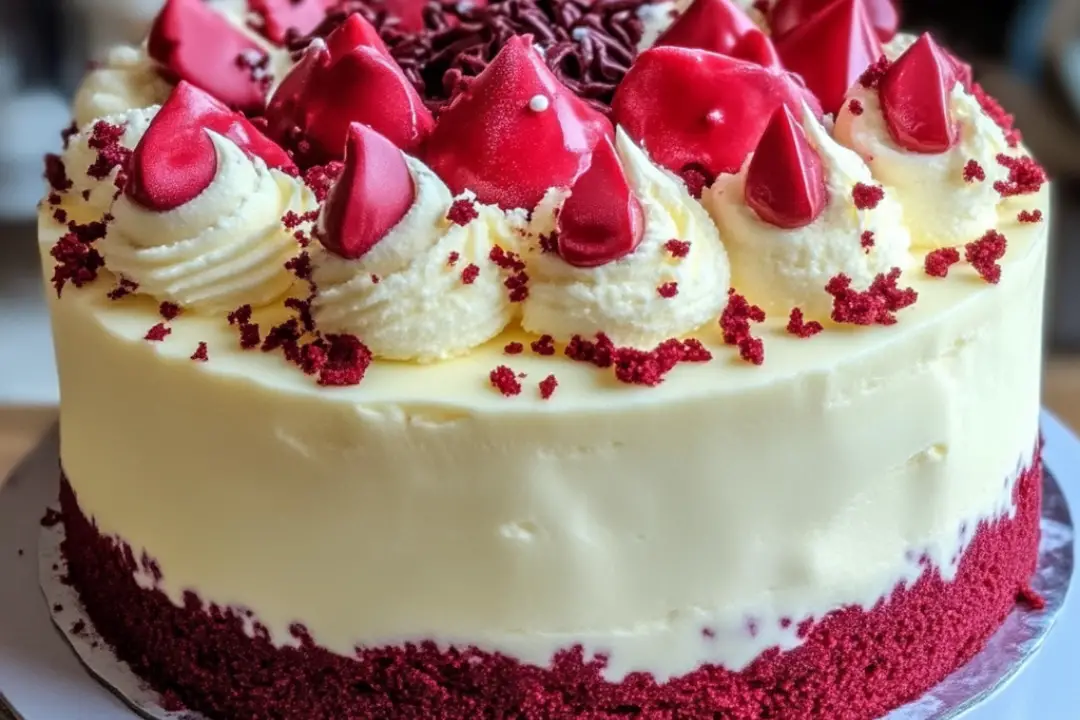
Creating desserts that bring joy to family gatherings is one of my favorite pastimes, and the Red Velvet Cheesecake Ice Cream Cake has quickly become a standout in my repertoire. When I first made this show-stopping dessert, I was a bit intimidated by the multiple components, but the process turned out to be enjoyable and straightforward. My family was in awe of the vibrant layers, and the combination of rich red velvet cake with creamy cheesecake ice cream was a hit! This cake is not only visually stunning but also deliciously indulgent, making it perfect for birthdays, holidays, or any special occasion.
Ingredients
For the Cheesecake Ice Cream:
- 4 oz cream cheese, softened
- 1 can (14 oz) sweetened condensed milk
- 2 cups heavy whipping cream
For the Red Velvet Cake:
- 2 1/4 cups all-purpose flour
- 2 tablespoons cocoa powder
- 1 teaspoon salt
- 1/2 cup butter, at room temperature
- 1 1/2 cups sugar
- 2 large eggs
- 1 cup buttermilk
- 3 tablespoons red food coloring
- 1 teaspoon vanilla extract
- 1 teaspoon distilled white vinegar
- 1 teaspoon baking soda
Instructions
For the Cheesecake Ice Cream:
- Prepare the Cream Cheese Base:
In a large mixing bowl, beat the softened cream cheese until smooth. Add the sweetened condensed milk and mix until well combined. - Whip the Cream:
In a separate bowl, whip the heavy whipping cream to soft peaks. Gently fold the whipped cream into the cream cheese mixture until fully incorporated. - Freeze the Ice Cream:
Pour the cheesecake ice cream mixture into a freezer-safe container. Freeze for at least 4 hours or until firm, preferably overnight.
For the Red Velvet Cake:
- Preheat Oven:
Preheat your oven to 350°F (175°C). Grease and flour two 8-inch round cake pans. - Mix Dry Ingredients:
In a medium bowl, whisk together the flour, cocoa powder, and salt. - Cream the Butter and Sugar:
In a large mixing bowl, cream together the butter and sugar until light and fluffy. Beat in the eggs one at a time, followed by the vanilla extract. - Prepare the Batter:
In a small bowl, mix the red food coloring with the buttermilk. Gradually add the flour mixture and buttermilk mixture to the creamed butter, alternating between the two until combined. - Activate Baking Soda:
In a small bowl, mix the vinegar and baking soda (it will fizz). Quickly fold this mixture into the batter. - Bake:
Divide the batter evenly between the prepared cake pans. Bake for 25-30 minutes or until a toothpick inserted into the center comes out clean. Allow the cakes to cool in the pans for 10 minutes, then turn them out onto a wire rack to cool completely.
Assemble the Cake:
- Layer the Cake and Ice Cream:
Once the cake layers are completely cooled and the cheesecake ice cream is firm, place one layer of the red velvet cake on a serving plate. Spread a thick layer of cheesecake ice cream on top of the cake layer, smoothing it out evenly. - Top with Second Cake Layer:
Gently place the second red velvet cake layer on top of the ice cream layer. - Freeze:
Freeze the assembled cake for at least 2-3 hours to ensure it sets properly.
Serve:
- Before serving, let the cake sit at room temperature for 5-10 minutes to soften slightly for easier slicing.
- Optionally, you can decorate the top with whipped cream, cream cheese frosting, or a dusting of cocoa powder.
Nutrition Facts
- Servings: 12
- Calories per serving: Approximately 450 calories
Preparation Time
- Total Time: 10 hours (including freezing)
- Prep Time: 30 minutes
- Cook Time: 30 minutes
How to Serve
- Slice: Cut the cake into even slices for serving.
- Garnish: Top with whipped cream or fresh berries for added presentation.
- Chill: Serve cold for a refreshing dessert experience.
- Pair: Enjoy with a scoop of vanilla ice cream or a drizzle of chocolate sauce.
- Plating: Present on a decorative cake stand for a stunning display.
Additional Tips
- Room Temperature Ingredients: Ensure that the cream cheese and butter are at room temperature for easier mixing and better texture.
- Food Coloring: Use gel food coloring for a more vibrant red color that won’t alter the cake’s consistency.
- Storage: Keep the cake tightly wrapped in the freezer for up to one week.
- Soften Cream Cheese: If you forget to take out the cream cheese ahead of time, cut it into small cubes to soften it faster.
- Use a Toothpick: To check if the cake is done, insert a toothpick into the center; it should come out clean or with a few crumbs.
Recipe Variations
- Different Ice Cream Flavors: Substitute the cheesecake ice cream with your favorite flavors, like chocolate or vanilla bean.
- Chocolate Cake Base: Use a chocolate cake instead of red velvet for a double chocolate experience.
- Add Mix-ins: Fold in chocolate chips or crushed cookies into the ice cream for added texture.
- Nutty Twist: Add chopped pecans or walnuts to the cake batter for a delightful crunch.
- Cream Cheese Swirl: Swirl some cream cheese mixture into the cake batter before baking for a marbled effect.
Serving Suggestions
- Celebrations: Perfect for birthdays, anniversaries, or holiday gatherings.
- Coffee Pairing: Serve alongside a cup of coffee or hot cocoa for a cozy treat.
- Picnic Treat: Slice and pack the cake for a delightful dessert during outdoor picnics.
- Potluck Dessert: Bring this show-stopping dessert to potlucks and watch it disappear quickly.
- Gift Idea: Share slices with friends and family as a sweet gift for special occasions.
Freezing and Storage
- Freezing: Wrap the assembled cake tightly in plastic wrap or foil before freezing to prevent freezer burn.
- Storage: Store leftover cake in the freezer for up to one week. Allow it to thaw in the refrigerator before serving.
- Individual Slices: Cut and freeze individual slices for a quick treat anytime.
FAQ Section
- Can I use low-fat cream cheese?
Yes, but it may alter the texture slightly. Regular cream cheese gives a richer flavor. - What if I don’t have buttermilk?
You can make a substitute by mixing 1 cup of milk with 1 tablespoon of vinegar or lemon juice. - Can I use a different pan size?
Yes, just adjust the baking time accordingly if using larger or smaller pans. - How long does the cheesecake ice cream last?
The cheesecake ice cream can be stored in the freezer for about 2-3 months. - Can I decorate the cake with frosting?
Absolutely! Cream cheese frosting pairs perfectly with red velvet cake. - Is it necessary to freeze the cake?
Yes, freezing helps set the ice cream layer and makes for easier slicing. - Can I make the cake ahead of time?
Yes, you can prepare the cake layers and ice cream in advance. Assemble it the day you plan to serve. - What’s the best way to slice the frozen cake?
Use a warm knife to slice through the frozen cake easily. Dip it in hot water, then dry it off before cutting. - Is this cake suitable for kids?
Yes, kids love the sweet flavors, but be mindful of the sugar content. - What should I do if the ice cream melts?
If it starts to melt, place it back in the freezer for a bit to firm up again.
Conclusion
The Red Velvet Cheesecake Ice Cream Cake is a delightful fusion of flavors and textures, sure to impress anyone who lays eyes on it. Its rich layers of red velvet cake and creamy cheesecake ice cream create an unforgettable dessert experience. Whether you’re celebrating a special occasion or simply treating yourself and your loved ones, this cake is bound to become a favorite. So gather your ingredients, roll up your sleeves, and enjoy the wonderful process of making this stunning dessert! 🍰🍦
Print


Red Velvet Cheesecake Ice Cream Cake 🍰🍦
- Total Time: 1 hour
- Yield: 12 servings 1x
- Diet: Vegetarian
Description
Indulge in a delightful fusion of rich red velvet cake and creamy cheesecake ice cream with this stunning Red Velvet Cheesecake Ice Cream Cake. Perfect for special occasions, this dessert is sure to impress with its vibrant colors and delectable flavors.
Ingredients
For the Cheesecake Ice Cream:
- 4 oz cream cheese, softened
- 1 can (14 oz) sweetened condensed milk
- 2 cups heavy whipping cream
For the Red Velvet Cake:
- 2 1/4 cups all-purpose flour
- 2 tablespoons cocoa powder
- 1 teaspoon salt
- 1/2 cup butter, at room temperature
- 1 1/2 cups sugar
- 2 large eggs
- 1 cup buttermilk
- 3 tablespoons red food coloring
- 1 teaspoon vanilla extract
- 1 teaspoon distilled white vinegar
- 1 teaspoon baking soda
Instructions
For the Cheesecake Ice Cream:
- Prepare the Cream Cheese Base:
In a large mixing bowl, beat the softened cream cheese until smooth. Add the sweetened condensed milk and mix until well combined. - Whip the Cream:
In a separate bowl, whip the heavy whipping cream to soft peaks. Gently fold the whipped cream into the cream cheese mixture until fully incorporated. - Freeze the Ice Cream:
Pour the cheesecake ice cream mixture into a freezer-safe container. Freeze for at least 4 hours or until firm, preferably overnight.
For the Red Velvet Cake:
- Preheat Oven:
Preheat your oven to 350°F (175°C). Grease and flour two 8-inch round cake pans. - Mix Dry Ingredients:
In a medium bowl, whisk together the flour, cocoa powder, and salt. - Cream the Butter and Sugar:
In a large mixing bowl, cream together the butter and sugar until light and fluffy. Beat in the eggs one at a time, followed by the vanilla extract. - Prepare the Batter:
In a small bowl, mix the red food coloring with the buttermilk. Gradually add the flour mixture and buttermilk mixture to the creamed butter, alternating between the two until combined. - Activate Baking Soda:
In a small bowl, mix the vinegar and baking soda (it will fizz). Quickly fold this mixture into the batter. - Bake:
Divide the batter evenly between the prepared cake pans. Bake for 25-30 minutes or until a toothpick inserted into the center comes out clean. Allow the cakes to cool in the pans for 10 minutes, then turn them out onto a wire rack to cool completely.
Assemble the Cake:
- Layer the Cake and Ice Cream:
Once the cake layers are completely cooled and the cheesecake ice cream is firm, place one layer of the red velvet cake on a serving plate. Spread a thick layer of cheesecake ice cream on top of the cake layer, smoothing it out evenly. - Top with Second Cake Layer:
Gently place the second red velvet cake layer on top of the ice cream layer. - Freeze:
Freeze the assembled cake for at least 2-3 hours to ensure it sets properly.
Serve:
- Before serving, let the cake sit at room temperature for 5-10 minutes to soften slightly for easier slicing.
- Optionally, decorate the top with whipped cream, cream cheese frosting, or a dusting of cocoa powder.
Notes
- Let the cake soften slightly before slicing for easier serving.
- Store leftovers in the freezer for up to a week.
- Prep Time: 30 minutes
- Cook Time: 30 minutes
- Category: Dessert
- Method: Baking
- Cuisine: American
Nutrition
- Serving Size: 1 slice
- Calories: 450
- Sugar: 30g
- Sodium: 200mg
- Fat: 25g
- Saturated Fat: 15g
- Unsaturated Fat: 10g
- Trans Fat: 0g
- Carbohydrates: 50g
- Fiber: 2g
- Protein: 5g
- Cholesterol: 80mg