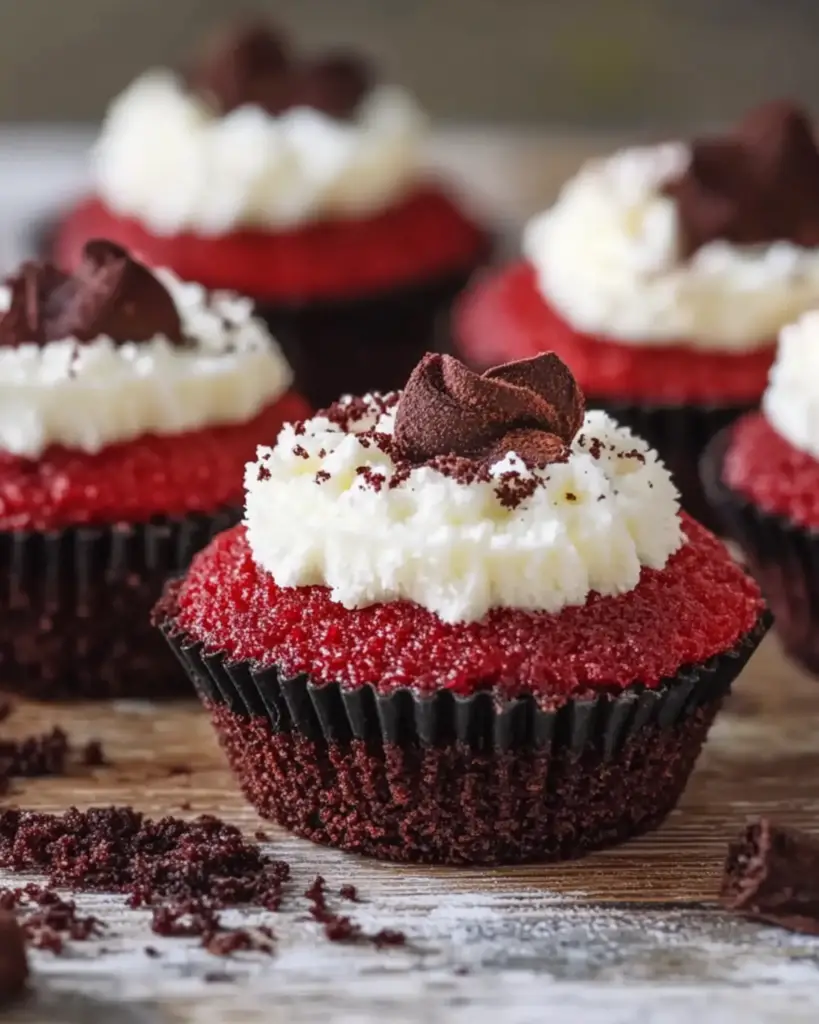
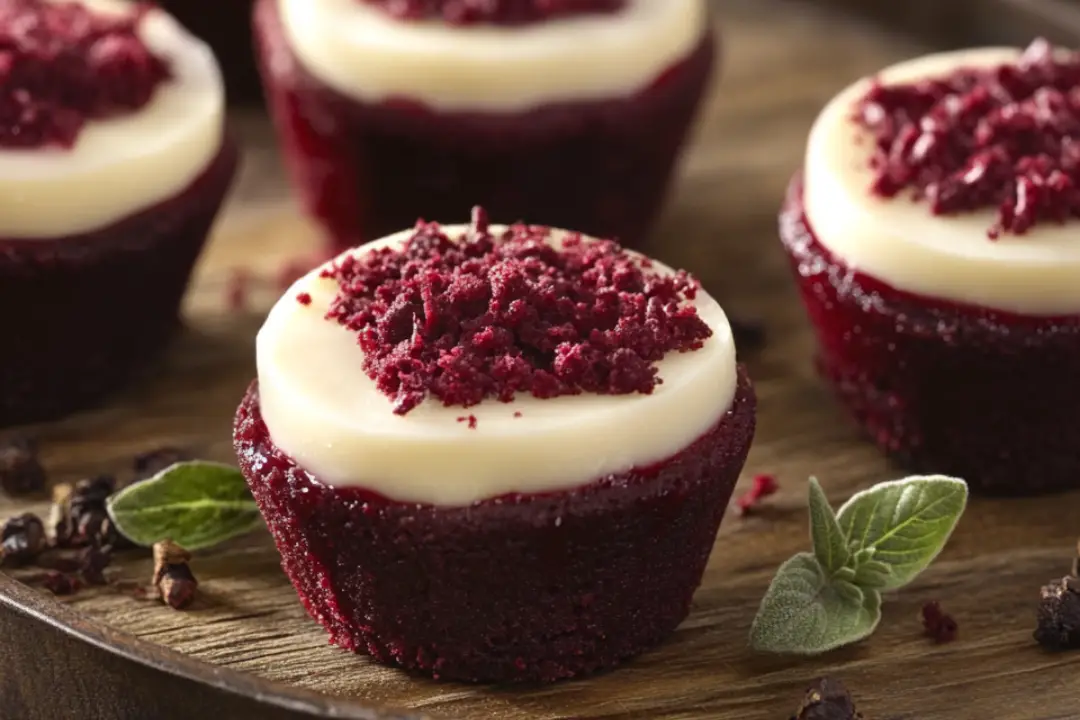
If you’re in the mood to impress, these Red Velvet Cheesecake Mini Pies are just what you need. They’re a luscious blend of two dessert favorites—rich, velvety red velvet cake and smooth, creamy cheesecake—packed into adorable, bite-sized pies. These mini treats have the perfect balance of tangy and sweet, with a buttery graham cracker crust, a dreamy cheesecake filling, and that gorgeous red velvet flavor everyone craves.
Whether you’re serving them at a Valentine’s Day party, a family get-together, or just indulging for yourself, these mini pies are guaranteed to be a showstopper. They look fancy but are surprisingly simple to make, so don’t worry about spending hours in the kitchen. Once you take a bite, you’ll understand why these little pies are about to become your new favorite dessert.
Why You’ll Love Red Velvet Cheesecake Mini Pies
Two Desserts in One
Who wouldn’t want the best of both worlds? Red velvet cake and cheesecake join forces in these mini pies to create a dessert that’s rich, decadent, and totally irresistible. You get the moist texture of red velvet and the creamy, tangy goodness of cheesecake—all in one perfect bite.
Fun and Portable
These mini pies are perfect for serving at a party or gathering. They’re individual-sized, making them easy to grab and go. No need to worry about slicing up a big cake or cheesecake—just pop one of these in your hand, and you’re ready to enjoy.
Make-Ahead-Friendly
Perfect for prepping ahead of time, these mini pies can be stored in the fridge until you’re ready to serve. Whether it’s for a special occasion or a weeknight treat, they’ll be ready when you are!
Gorgeous and Festive
The rich red color of the red velvet cake and the creamy white cheesecake filling make these mini pies an absolute stunner. They’re festive, vibrant, and eye-catching—perfect for adding a pop of color to your dessert table.

Disclosure: This post contains affiliate links.If you click and make a purchase, I may earn a small commission at no extra cost to you.
Ingredients
Red Velvet Cake Mix
The base of these mini pies is a quick and easy red velvet cake mix. It gives you that signature flavor without the hassle of making a cake from scratch.
Cream Cheese
For the cheesecake filling, you’ll need cream cheese, which creates that smooth, rich, and tangy layer that pairs perfectly with the sweet red velvet cake.
Sugar and Eggs
The sugar and eggs sweeten and set the cheesecake filling, making it firm but creamy.
Butter
Melted butter helps create a rich, buttery graham cracker crust for these mini pies.
Graham Cracker Crumbs
For the crust, you’ll need graham cracker crumbs. They add the perfect crunch and buttery texture to balance out the creamy cheesecake filling.
(Note: Full ingredient measurements are provided in the recipe card directly below.)
Instructions
Let’s get baking! Here’s how to make these mouthwatering mini pies:
Step 1: Preheat Your Oven
Preheat your oven to 350°F (175°C). This ensures that your mini pies bake evenly and come out perfectly.
Step 2: Prepare the Red Velvet Cake Base
In a large bowl, prepare the red velvet cake mix according to the instructions on the box (usually just adding water, oil, and eggs). Once it’s mixed, spoon about 2 tablespoons of the batter into each cup of a greased muffin tin. Use the back of a spoon to gently spread the batter into an even layer at the bottom of each cup.
Step 3: Prepare the Cheesecake Filling
In a separate bowl, beat the cream cheese and sugar together until smooth and creamy. Add the egg and vanilla extract, and continue mixing until the filling is well combined.
Step 4: Fill the Muffin Tin
Spoon about 2 tablespoons of the cheesecake filling on top of the red velvet cake batter in each muffin cup. Use a spoon to smooth out the top.
Step 5: Bake
Bake in the preheated oven for 18-20 minutes, or until the cheesecakes are set and a toothpick comes out clean when inserted into the center. The tops should be slightly golden and firm to the touch.
Step 6: Let Cool and Chill
Allow the mini pies to cool in the muffin tin for about 10 minutes. Then, carefully remove them and place them on a cooling rack. Let them cool completely, then refrigerate for at least 2 hours to set.
Step 7: Serve and Enjoy
Once your mini pies have chilled, they’re ready to serve! Top them with whipped cream, a drizzle of chocolate sauce, or even a few sprinkles of red velvet cake crumbs for an extra touch.
Nutrition Facts
Servings: 12
Calories per serving: 290
Total Fat: 18g
Saturated Fat: 10g
Cholesterol: 75mg
Sodium: 180mg
Carbohydrates: 28g
Fiber: 1g
Sugars: 20g
Protein: 3g
Preparation Time
- Prep Time: 15 minutes
- Cook Time: 20 minutes
- Chill Time: 2 hours
- Total Time: 2 hours 35 minutes
How to Serve Red Velvet Cheesecake Mini Pies
These mini pies are perfect for any occasion, and here are a few ways to serve them:
As a Show-Stopping Dessert
Serve them on a pretty dessert platter or cake stand to impress your guests. Their vibrant red and white colors will steal the show at any event.
With a Cup of Coffee or Hot Chocolate
These mini pies pair beautifully with a hot beverage. Serve them with coffee, hot cocoa, or even a milkshake for a dessert experience that’s extra indulgent.
For Valentine’s Day
Since these mini pies have a red velvet base, they’re especially fitting for a romantic Valentine’s Day dessert. Add a sprinkle of red sugar or heart-shaped sprinkles to make them even more festive.
With Fresh Berries
Fresh berries like raspberries or strawberries add a tart contrast to the richness of the cheesecake and red velvet. Top your pies with a few berries for an extra burst of flavor.
Additional Tips
Make-Ahead Option
You can make these mini pies a day ahead of time. Just store them in the fridge until you’re ready to serve. The flavors only get better as they chill!
Customize the Crust
If you want to get creative, you can swap out the graham cracker crust for an Oreo crust or even a chocolate cookie crust for added flavor.
Make Mini or Regular Pies
These mini pies are adorable, but if you prefer larger portions, you can make them in a regular pie dish. Just bake a little longer and slice into wedges.
Top with a Drizzle of Ganache
For an extra decadent touch, drizzle some chocolate ganache over the top of the cheesecake mini pies before serving.
FAQ Section
Q1: Can I use homemade red velvet cake instead of cake mix?
A1: Yes, you can! Just prepare your homemade red velvet cake batter and use it instead of the boxed mix. The texture and flavor will be just as amazing!
Q2: How long can I store these mini pies?
A2: You can store the mini pies in an airtight container in the fridge for up to 4 days. They stay fresh and delicious!
Q3: Can I freeze these mini pies?
A3: Yes! To freeze, wrap each mini pie individually in plastic wrap and place them in a freezer-safe container. They’ll keep for up to 2-3 months. Just thaw them in the fridge before serving.
Q4: Can I use full-fat cream cheese for the filling?
A4: Yes, full-fat cream cheese will give you a richer, creamier filling, but you can also use reduced-fat cream cheese if you prefer.
Q5: Can I add chocolate chips to the cheesecake filling?
A5: Absolutely! Chocolate chips would be a great addition to the cheesecake filling, adding a little extra texture and chocolatey goodness.
Q6: How can I make these mini pies even more festive?
A6: Add some red sprinkles, heart-shaped sprinkles, or even a drizzle of red frosting over the top for an extra touch of flair!
Q7: Can I make these in a regular pie dish?
A7: You can! If you prefer a single, larger pie, just bake the red velvet cake and cheesecake filling in a regular pie dish. You may need to adjust the baking time slightly.
Q8: Can I use non-dairy cream cheese for the filling?
A8: Yes, you can substitute non-dairy cream cheese for a dairy-free option. The flavor will be similar, and the filling will still be creamy.
Q9: What can I do if I don’t have a muffin tin?
A9: You can use a mini tart pan or individual tartlet pans. Just make sure to grease them well so the pies come out easily!
Q10: Can I make these without eggs?
A10: Yes! You can use an egg substitute like applesauce or a flax egg to replace the eggs in the cheesecake filling.
Conclusion
These Red Velvet Cheesecake Mini Pies are a dream come true for anyone who loves a decadent dessert. Combining the richness of red velvet cake with the creamy smoothness of cheesecake, these mini pies are guaranteed to impress. Whether you’re serving them for a special occasion or just treating yourself, they’re a delicious way to celebrate any day. So go ahead—treat yourself (and your loved ones) to these irresistible mini pies!
Print
Red Velvet Cheesecake Mini Pies
- Total Time: 40 minutes
- Yield: 12 servings
- Diet: Vegetarian
Description
These Red Velvet Cheesecake Mini Pies are the perfect indulgence with a smooth and creamy cheesecake filling sitting atop a delicious red velvet crust. A perfect dessert for any celebration or as a sweet treat!
Ingredients
For the crust:
- 1 ½ cups crushed graham crackers
- ¼ cup granulated sugar
- 6 tbsp unsalted butter, melted
- 2 tbsp cocoa powder
- ½ tsp vanilla extract
For the cheesecake filling:
- 8 oz cream cheese, softened
- ½ cup powdered sugar
- 1 tsp vanilla extract
- 1 ½ cups heavy cream
- 2 tbsp red velvet cake mix (for flavor and color)
For the topping (optional):
- Whipped cream
- Red velvet cake crumbs or sprinkles
Instructions
- Preheat your oven to 350°F (175°C). Grease or line a mini muffin tin with paper liners.
- Make the crust: In a bowl, combine the crushed graham crackers, sugar, melted butter, cocoa powder, and vanilla extract. Stir until the mixture is combined and resembles wet sand.
- Fill the muffin tin: Spoon about a tablespoon of the crust mixture into each muffin cup, pressing it down firmly to form a crust at the bottom.
- Bake the crusts: Place the muffin tin in the oven and bake for 8-10 minutes. Allow them to cool completely.
- Make the cheesecake filling: In a large mixing bowl, beat the softened cream cheese until smooth. Gradually add powdered sugar and vanilla extract, mixing until incorporated.
- Whip the heavy cream: In a separate bowl, beat the heavy cream until stiff peaks form. Gently fold the whipped cream into the cream cheese mixture.
- Add red velvet flavor: Fold in the red velvet cake mix until evenly distributed throughout the cheesecake filling.
- Assemble the mini pies: Spoon the cheesecake filling on top of the cooled crusts in the muffin tin, smoothing the tops with a spoon or spatula.
- Chill: Refrigerate the mini pies for at least 3 hours to set the cheesecake filling.
- Serve: Once chilled, top with whipped cream and optional red velvet cake crumbs or sprinkles for extra decoration. Serve and enjoy!
Notes
- You can use store-bought red velvet cake mix for a quicker preparation or make your own.
- For a more intense red color, add a few drops of red food coloring to the cheesecake filling.
- These mini pies can be stored in an airtight container in the refrigerator for up to 3 days.
- Prep Time: 30 minutes
- Cook Time: 10 minutes
- Category: Dessert
- Method: Baking
- Cuisine: American
Nutrition
- Serving Size: 1 mini pie
- Calories: 270
- Sugar: 21g
- Sodium: 160mg
- Fat: 19g
- Saturated Fat: 9g
- Unsaturated Fat: 9g
- Trans Fat: 0g
- Carbohydrates: 26g
- Fiber: 1g
- Protein: 3g
- Cholesterol: 55mg


