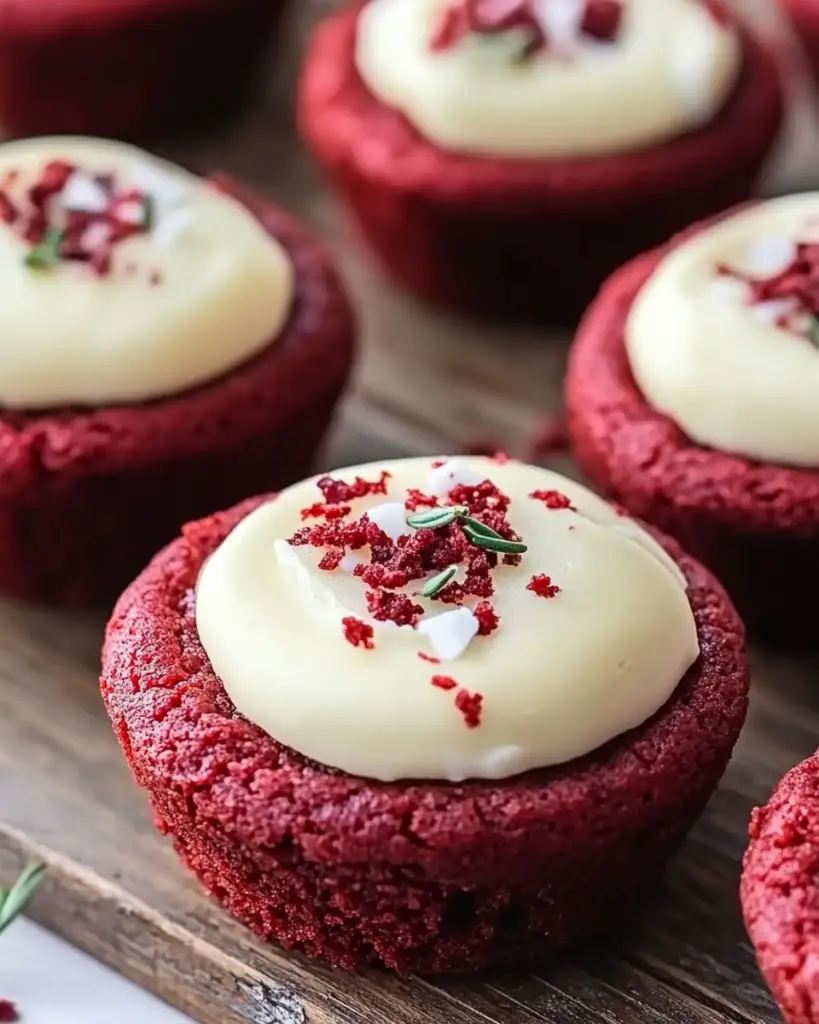
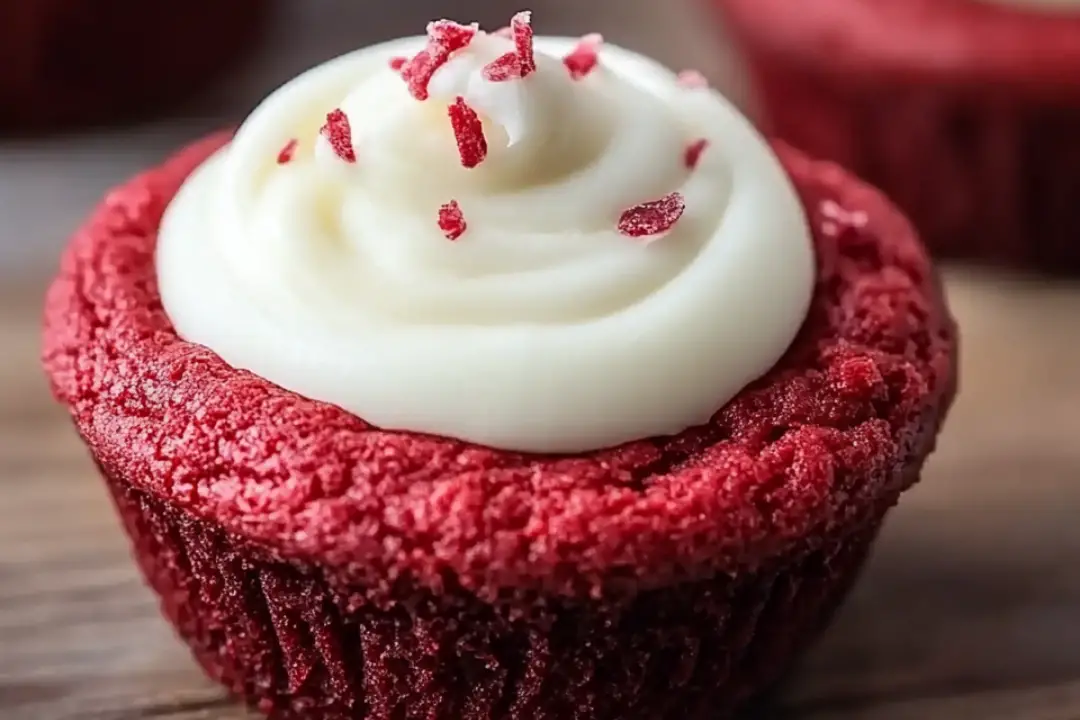
If you’re looking for a dessert that’s as gorgeous as it is delicious, Red Velvet Cookie Cups with Cream Cheese Frosting are your new best friend. These little bite-sized treats are everything you love about red velvet cake—tender, rich, and with that perfect hint of cocoa—transformed into a cookie cup that’s begging to be filled with a velvety cream cheese frosting. Each bite is like a mini celebration, and I promise they’ll steal the show at any gathering (Valentine’s Day or otherwise!).
Trust me when I say these cookie cups are as dreamy as they sound. The combination of the soft, chewy red velvet cookie and the tangy, creamy frosting will make your taste buds do a little happy dance. They’re the kind of dessert that’s both fun to make and even more fun to eat.
Why You’ll Love Red Velvet Cookie Cups with Cream Cheese Frosting
This recipe is all about bringing joy to your table, and it’s impossible not to love. Here’s why:
Visually Stunning: The vibrant red color with a dollop of creamy white frosting makes these cookie cups pop—perfect for any celebration or even a special night in.
Decadent Flavor: Red velvet is like the love child of chocolate and vanilla, and these cookie cups capture that flavor in a perfectly chewy bite-sized form.
Mini Treats, Big Impact: Small but mighty, these cookie cups are a total crowd-pleaser. They’re cute, shareable, and absolutely irresistible.
Easy to Make: If you love a homemade treat but don’t want something too complicated, these cookie cups are for you. A few simple steps, and you’re ready to impress.
Customizable: You can play with the frosting, add sprinkles, or even drizzle a little chocolate on top. There’s room to get creative, and you’ll have fun doing it!

Disclosure: This post contains affiliate links.If you click and make a purchase, I may earn a small commission at no extra cost to you.
Ingredients
Here’s what you need to whip up these stunning red velvet cookie cups with a sweet, tangy cream cheese frosting:
Butter
Butter brings richness and a soft texture to the cookie dough, making these little cups tender and irresistible.
Sugar & Brown Sugar
A combination of white and brown sugar helps create a balanced sweetness and contributes to the soft, chewy texture.
Red Velvet Cake Mix
This shortcut makes the recipe quick and easy while still delivering that perfect red velvet flavor and texture.
Eggs
Eggs bind the dough together and help it rise slightly, giving the cookie cup a nice structure.
Vanilla Extract
A touch of vanilla enhances the flavor, giving the cookies that classic dessert profile.
Cocoa Powder
A little cocoa powder gives the cookies that signature rich chocolatey flavor that pairs so perfectly with the cream cheese frosting.
Baking Powder & Baking Soda
A little bit of both helps the cookie cups rise just enough to hold their shape but stay soft in the middle.
Cream Cheese
The star of the frosting! Cream cheese gives the frosting its signature tangy richness and pairs perfectly with the sweetness of the cookies.
Powdered Sugar
For sweetness and smoothness in the frosting, powdered sugar is key.
Heavy Cream
A splash of heavy cream makes the frosting perfectly smooth and spreadable.
(Note: the full ingredients list, including measurements, is provided in the recipe card directly below.)
Instructions
Let’s get started on these delicious little cookie cups!
Preheat the Oven and Prepare the Pan
Preheat your oven to 350°F (175°C). Grease a mini muffin tin or line it with paper liners for easy removal of the cookie cups after baking.
Make the Cookie Dough
In a large bowl, cream together the butter, white sugar, and brown sugar until light and fluffy. Add the eggs and vanilla extract, mixing until well combined. Stir in the red velvet cake mix, cocoa powder, baking powder, and baking soda until the dough forms. If the dough is too sticky, you can chill it in the fridge for about 30 minutes to make it easier to handle.
Shape the Cookie Cups
Scoop out about 1 tablespoon of dough for each cookie cup and roll it into a ball. Place each ball into the mini muffin tin, then gently press the center of each ball down with your thumb to create a little well for the frosting. You don’t want to press too hard, just enough to make a nice indentation.
Bake the Cookie Cups
Bake for 10-12 minutes, or until the edges of the cookies are set and slightly golden. The centers should still be soft but firm enough to hold the frosting. Let them cool in the pan for a few minutes before transferring them to a wire rack to cool completely.
Make the Cream Cheese Frosting
While the cookies are cooling, make the frosting by beating together the cream cheese, butter, and vanilla extract until smooth and creamy. Gradually add powdered sugar and beat until fluffy. If the frosting is too thick, add a little bit of heavy cream until you get your desired consistency.
Frost and Serve
Once the cookie cups are completely cooled, scoop or pipe a generous amount of cream cheese frosting into the center of each cookie cup. You can garnish with a few sprinkles, edible glitter, or even a drizzle of melted chocolate for extra flair!
Serve and Enjoy!
These little red velvet cookie cups are best enjoyed the same day, but they’ll stay fresh for a couple of days in an airtight container. Serve them at your next gathering, or simply treat yourself to a few (or a lot!) of these sweet bites.
Nutrition Facts
Here’s a breakdown of what you can expect in each serving of these delightful cookie cups:
- Servings: 12 (one cookie cup per serving)
- Calories per serving: 240
- Total Fat: 13g
- Saturated Fat: 7g
- Cholesterol: 40mg
- Sodium: 160mg
- Total Carbohydrates: 31g
- Dietary Fiber: 1g
- Sugars: 20g
- Protein: 2g
(Note: nutritional information is an estimate and will vary based on specific ingredients used.)
Preparation Time
Here’s how long it will take to make these sweet treats:
- Prep Time: 15 minutes
- Cook Time: 12 minutes
- Total Time: 27 minutes
How to Serve Red Velvet Cookie Cups with Cream Cheese Frosting
These cookie cups are delicious on their own, but here are a few ways to elevate your serving experience:
On Their Own: Sometimes, these little cookie cups are perfect all by themselves. Just serve them on a pretty platter and let the frosting shine.
With a Glass of Milk: You can’t go wrong with a tall glass of milk to complement the richness of the red velvet and the tanginess of the cream cheese frosting.
For a Valentine’s Treat: Add a sprinkle of red and pink heart-shaped sprinkles or edible glitter for an extra festive touch.
With Fresh Berries: A few fresh raspberries or strawberries on the side are the perfect contrast to the rich, sweet flavor of the cookie cups.
Additional Tips
Here are a few tips to help make your cookie cups even more amazing:
Chill the Dough: If your dough feels a little too sticky to handle, pop it in the fridge for 30 minutes. This makes it easier to scoop and shape the cookie cups.
Frosting Variations: If you want to get extra creative, try adding some vanilla bean paste to the frosting for a richer flavor, or even a little cocoa powder to match the cookies.
Storing Leftovers: These cookies are best eaten within a few days, but you can store them in an airtight container at room temperature for up to 3 days.
Make a Double Batch: These are so popular, you might want to make a second batch. They freeze well, so you can always have a treat ready to go!
FAQ Section
Q1: Can I use regular cake mix instead of red velvet?
A1: You can, but using red velvet cake mix is what gives these cookie cups that signature red color and flavor. Regular chocolate cake mix will change the taste, but it will still be delicious.
Q2: Can I make these cookie cups ahead of time?
A2: Absolutely! You can bake the cookie cups in advance, store them in an airtight container, and frost them right before serving.
Q3: Can I freeze these cookie cups?
A3: Yes, you can freeze the cookie cups without frosting. Let them cool completely, then place them in an airtight container or freezer bag for up to a month. Frost them when you’re ready to serve.
Q4: Can I make the frosting in advance?
A4: Yes! You can make the cream cheese frosting ahead of time and store it in the fridge for up to 3 days. Just bring it to room temperature before frosting the cookie cups.
Q5: What can I use if I don’t have a mini muffin tin?
A5: You can use a regular muffin tin, but the cookie cups will be larger. Just be sure to adjust the baking time as needed.
Q6: Can I use a different frosting?
A6: Definitely! If you’re not a fan of cream cheese frosting, you can use buttercream or even a ganache for a different twist.
Q7: How do I make sure my frosting isn’t too thick?
A7: If your frosting is too thick, just add a little bit of heavy cream (or milk) a teaspoon at a time until you get the right spreadable consistency.
Q8: Can I make these cookies gluten-free?
A8: Yes, you can use a gluten-free red velvet cake mix and follow the rest of the recipe as usual.
Q9: How do I store leftovers?
A9: Store leftover cookie cups in an airtight container at room temperature for up to 3 days.
Q10: Can I decorate the cookie cups with sprinkles?
A10: Yes! Sprinkles, edible glitter, or even some mini chocolate chips would be a great way to make these cookie cups extra festive.
Conclusion
These Red Velvet Cookie Cups with Cream Cheese Frosting are a show-stopping dessert that’s as delicious as it is beautiful. Perfect for Valentine’s Day, birthdays, or any celebration, they’re sure to win over everyone who tries them. So, grab your apron and get ready to bake some love into every bite!
Print
Red Velvet Cookie Cups with Cream Cheese Frosting
- Total Time: 25 minutes
- Yield: 12 servings 1x
Description
These Red Velvet Cookie Cups are soft, chewy, and perfectly shaped to hold a generous swirl of creamy, tangy cream cheese frosting. The perfect treat for Valentine’s Day or any special occasion!
Ingredients
For the Cookie Cups:
- 1 1/2 cups all-purpose flour
- 1 tbsp cocoa powder
- 1/2 tsp baking soda
- 1/4 tsp salt
- 1/2 cup unsalted butter, softened
- 1 cup granulated sugar
- 1 large egg
- 1 tsp vanilla extract
- 2 tbsp buttermilk
- 2 tbsp red food coloring
- 1/2 tsp white vinegar
For the Cream Cheese Frosting:
- 8 oz cream cheese, softened
- 1/4 cup unsalted butter, softened
- 2 cups powdered sugar
- 1 tsp vanilla extract
- Pinch of salt
Instructions
- Preheat the Oven: Preheat your oven to 350°F (175°C). Grease a mini muffin tin or line it with cupcake liners.
- Make the Cookie Dough: In a medium bowl, whisk together the flour, cocoa powder, baking soda, and salt. Set aside. In a large mixing bowl, beat the butter and sugar together until light and fluffy, about 2-3 minutes. Add the egg, vanilla extract, and red food coloring, and mix until combined. Add the buttermilk and vinegar, then gradually add the dry ingredients, mixing until just combined.
- Shape the Cookie Cups: Scoop about 1 tablespoon of cookie dough into each muffin cup, pressing the dough down gently. Bake for 8-10 minutes, or until a toothpick inserted into the center comes out clean. Allow the cookies to cool in the pan for 5 minutes before transferring them to a wire rack to cool completely.
- Make the Cream Cheese Frosting: In a large mixing bowl, beat the softened cream cheese and butter together until smooth. Add the powdered sugar, vanilla extract, and a pinch of salt, and beat until fluffy and creamy, about 3-4 minutes.
- Assemble the Cookie Cups: Once the cookie cups have cooled completely, use a piping bag or a spoon to pipe or spread the cream cheese frosting onto each cookie cup. You can decorate with sprinkles or extra red velvet crumbs if desired.
- Serve and Enjoy: Serve immediately, or store the cookie cups in an airtight container in the refrigerator for up to 3 days.
Notes
- If you don’t have buttermilk, you can substitute with regular milk, or make a quick buttermilk substitute by adding 1 tsp of vinegar to 2 tbsp of milk.
- For an extra special touch, drizzle with a little melted white chocolate or garnish with a few fresh raspberries or heart-shaped sprinkles.
- Prep Time: 15 minutes
- Cook Time: 10 minutes
- Category: Dessert
- Method: Baking
- Cuisine: American
Nutrition
- Serving Size: 1 cookie cup
- Calories: 210
- Sugar: 10g
- Sodium: 90 mg
- Fat: 12g
- Saturated Fat: 7g
- Unsaturated Fat: 4g
- Trans Fat: 0g
- Carbohydrates: 24g
- Fiber: 1g
- Protein: 2g
- Cholesterol: 35mg


