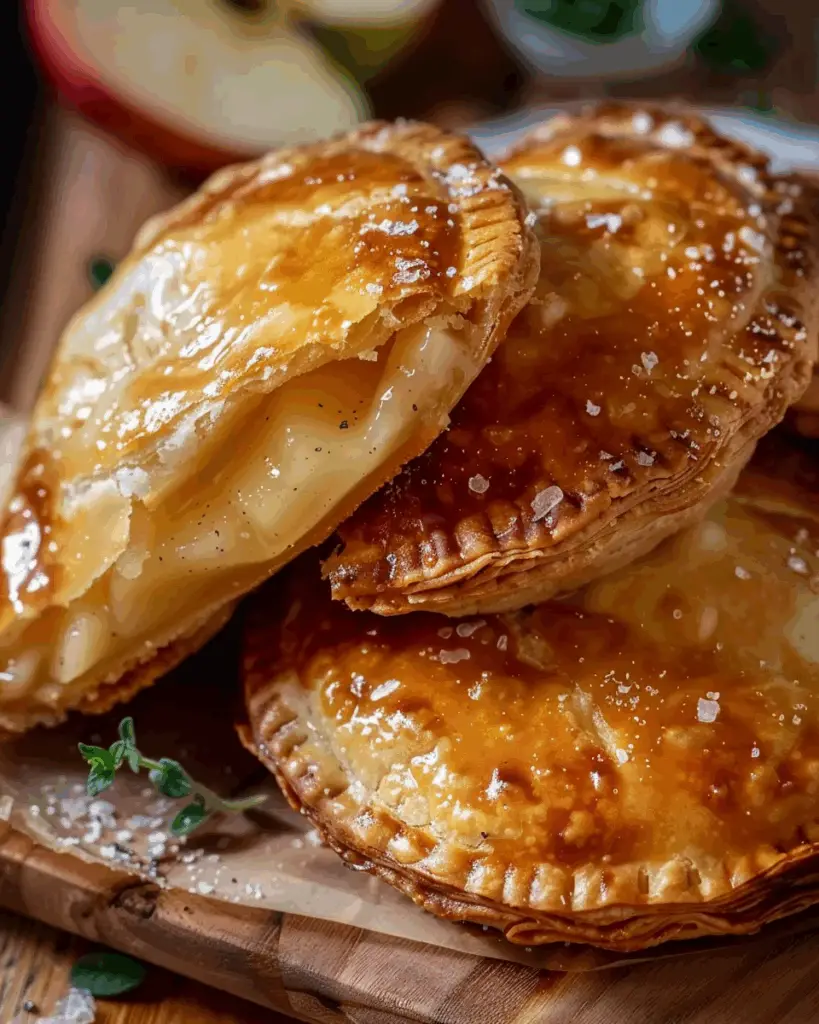
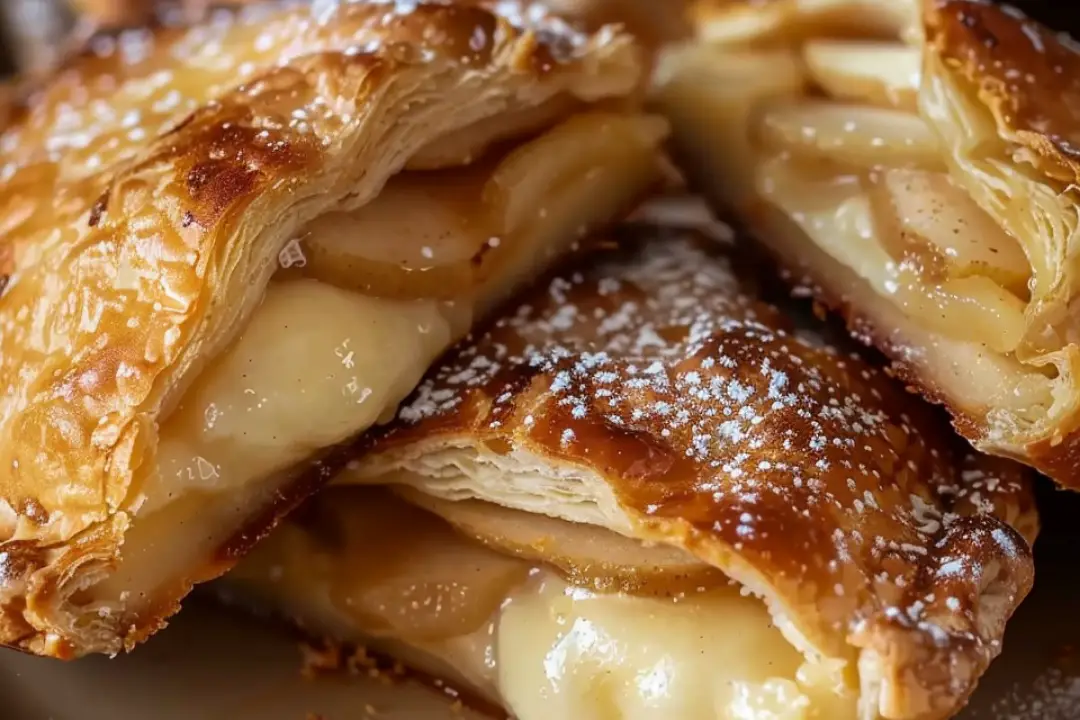
If dessert had a love child between a gooey cheesecake and a warm apple pie, this would be it—Stuffed Cheesecake Fried Apple Pies. Imagine golden, flaky pockets of bliss, stuffed with sweet apple pie filling and a creamy cheesecake center that melts into every bite. Yeah, it’s as dreamy as it sounds. These hand-held treats are what fall cravings and comfort food fantasies are made of.
Whether you’re treating yourself after a long week or whipping up something extra special for brunch or a party, trust me—this one’s a game-changer. They’re crispy on the outside, warm and creamy on the inside, and smell like your kitchen just turned into a cozy bakery. You’ll feel like a dessert wizard pulling these out of the pan. And the best part? They’re way easier to make than they look. So grab your apron, friend—let’s make something unforgettable.
Why You’ll Love Stuffed Cheesecake Fried Apple Pies
This recipe isn’t just about the ingredients—it’s about creating moments. Whether you’re cooking for a casual family dinner, hosting a get-together with friends, or simply indulging in some comforting flavors for yourself, this dish is versatile enough to fit the occasion. Here’s why it’s a favorite:
Versatile: Perfect for chilly evenings, brunch tables, or as a show-stopping dessert at your next potluck. These pies are always a good idea.
Budget-Friendly: Uses pantry staples you probably already have. Think canned apples, cream cheese, and pre-made dough—simple, cozy, and oh-so satisfying.
Quick and Easy: Minimal steps, maximum payoff. Even if you’re a dessert newbie, these pies are practically foolproof.
Customizable: Want to spice things up? Add a pinch of cinnamon, swap in pears, or drizzle with caramel sauce. You do you.
Crowd-Pleasing: These pies don’t stick around long. The combo of creamy, crunchy, and fruity hits every sweet tooth just right.

Disclosure: This post contains affiliate links.If you click and make a purchase, I may earn a small commission at no extra cost to you.
Ingredients in Stuffed Cheesecake Fried Apple Pies
Here’s the delicious lineup that makes these handheld treats so irresistible:
Pie Crust or Biscuit Dough
Your flaky, buttery outer layer. You can go homemade if you’re feeling fancy, or grab a roll from the fridge section—no judgment here.
Apple Pie Filling
Sweet, cinnamony, and loaded with tender apple chunks. This brings all the warm fall vibes in one scoop.
Cream Cheese
The creamy surprise inside. Softened cream cheese adds that signature cheesecake tang and richness.
Sugar
Just a touch, blended into the cream cheese for sweetness that balances the tart and fruity notes.
Vanilla Extract
A little splash adds a cozy, bakery-style depth to the cheesecake filling.
Cinnamon
Optional, but strongly encouraged. It gives the apples and the whole pie a warm, nostalgic flavor.
Egg Wash
To give your pies that beautiful golden brown color when fried or baked.
Oil for Frying
Go with something neutral like canola or vegetable oil—just enough to give these beauties that irresistible crisp.
Instructions
Let’s dive into the steps to create this flavorful masterpiece:
Preheat Your Equipment
If frying, heat oil in a deep skillet to 350°F. If baking, preheat your oven to 375°F. Preheating ensures your pies cook evenly and come out with that perfect golden crust.
Combine Ingredients
In a small bowl, mix cream cheese, sugar, and vanilla until smooth and creamy. This is your cheesecake filling—sweet, tangy, and silky.
Prepare Your Cooking Vessel
If baking, line a baking sheet with parchment paper or lightly grease it. For frying, make sure your skillet is deep enough to submerge the pies halfway.
Assemble the Dish
Roll out your dough and cut into circles. Spoon a dollop of the cream cheese mixture in the center, top with a scoop of apple pie filling, then fold over and seal the edges with a fork. You want a snug little pocket of happiness.
Cook to Perfection
Fry each pie for 2–3 minutes per side or until golden and crisp. If baking, brush with egg wash and bake for 18–20 minutes or until golden. Either way, your kitchen will smell amazing.
Finishing Touches
Let the pies cool for a few minutes—they’ll be piping hot inside. Then, if you’re feeling extra (and you should be), dust with powdered sugar or drizzle with caramel.
Serve and Enjoy
Serve warm, maybe with a scoop of vanilla ice cream on the side. Get ready for happy sighs all around the table.
Nutrition Facts
Servings: [Number of servings]
Calories per serving: [Calorie count per serving]
Preparation Time
Prep Time: [Time to prepare ingredients]
Cook Time: [Time to cook or bake]
Total Time: [Total time needed]
How to Serve Stuffed Cheesecake Fried Apple Pies
These little pies are as versatile as they are delicious. Here’s how to take them to the next level:
- With Ice Cream: A scoop of vanilla or butter pecan ice cream turns these into an unforgettable dessert.
- Drizzled with Caramel: For that classic caramel apple vibe.
- Topped with Whipped Cream: Light, fluffy, and just indulgent enough.
- As Part of a Brunch Spread: Pair with coffee, mimosas, and fresh fruit.
- On Their Own: Trust me, they can hold their own—no extras needed.
Additional Tips
- Chill the Filling: Let your cheesecake mixture chill for a few minutes to firm up—it’ll be easier to work with.
- Seal Tightly: Press the edges firmly with a fork to keep the filling from escaping while frying.
- Air Fry Option: Yep, you can totally air fry these! Cook at 350°F for 8–10 minutes, flipping halfway.
- Make Ahead: Assemble the pies and refrigerate them until ready to fry or bake. Great for party prep!
- Freeze for Later: Wrap unfried pies in parchment and freeze. Cook straight from frozen, adding a few extra minutes.
FAQ Section
Q1: Can I use homemade apple pie filling?
A1: Absolutely! Homemade filling adds a personal touch and lets you control the sweetness and spice.
Q2: Can I make this ahead of time?
A2: Yes—assemble them and refrigerate for up to 24 hours before cooking.
Q3: How do I store leftovers?
A3: Store in an airtight container in the fridge for up to 3 days. Reheat in the oven to keep them crisp.
Q4: Can I freeze this dish?
A4: Yes! Freeze uncooked pies and fry or bake directly from frozen. Just extend the cooking time slightly.
Q5: What’s the best way to reheat this dish?
A5: Reheat in the oven at 350°F for 10–12 minutes. Avoid the microwave—it’ll make the crust soggy.
Q6: Can I double the recipe?
A6: Definitely! Just make sure you have enough dough and filling. It’s an easy one to scale up.
Q7: Is this recipe suitable for vegetarians?
A7: Yes! As long as you use a vegetarian-friendly pie crust or biscuit dough, you’re good to go.
Q8: What side dishes go well with this recipe?
A8: These pies are usually a dessert on their own, but pairing with ice cream or fresh fruit makes for a lovely combo.
Q9: How can I make this dish healthier?
A9: Try baking instead of frying, using light cream cheese, and going easy on added sugar.
Q10: What’s the best cookware to use for this recipe?
A10: A heavy-bottomed skillet for frying or a nonstick baking sheet for oven baking works perfectly.
Conclusion
There’s just something magical about a dessert that’s warm, crispy, creamy, and fruity all at once. These Stuffed Cheesecake Fried Apple Pies are everything you want in a sweet treat—comforting, easy to make, and bursting with flavor. Whether you’re sharing them with loved ones or sneaking one (or two) for yourself, this recipe is sure to become a repeat favorite. Go ahead—make a batch, and let the cozy vibes roll.
Print
Stuffed Cheesecake Fried Apple Pies
- Total Time: 35 minutes
- Yield: 10 mini pies
- Diet: Vegetarian
Description
A mouthwatering dessert mashup that combines the warm, cinnamon-spiced flavor of fried apple pie with a rich cheesecake filling, all wrapped in golden, crispy pastry. Perfect for indulgent cravings or a festive treat!
Ingredients
- 1 package refrigerated pie crusts (2 crusts), softened
- 1 1/2 cups apple pie filling, chopped
- 4 oz cream cheese, softened
- 2 tbsp powdered sugar
- 1/2 tsp vanilla extract
- 1 tsp cinnamon
- Vegetable oil (for frying)
- 1 egg (for egg wash)
- 1 tbsp water
- Optional: cinnamon sugar (for coating)
Instructions
- In a small bowl, mix softened cream cheese, powdered sugar, and vanilla extract until smooth. Set aside.
- Roll out pie crusts on a lightly floured surface. Cut out circles using a large biscuit cutter or bowl (about 4 inches wide).
- Spoon about 1 tsp of cheesecake filling and 1 tbsp of chopped apple pie filling into the center of each circle.
- Fold over to form a half-moon shape and seal the edges by pressing with a fork. Mix egg and water for egg wash and brush edges to help seal if needed.
- Heat 2 inches of vegetable oil in a deep skillet to 350°F (175°C). Fry pies in batches for 2–3 minutes per side, or until golden brown.
- Drain on paper towels and, if desired, toss warm pies in cinnamon sugar for extra flavor.
- Serve warm or cooled, optionally drizzled with caramel sauce or dusted with powdered sugar.
Notes
- You can use homemade pie dough and fresh apple filling if preferred.
- Try baking instead of frying for a lighter version: bake at 375°F (190°C) for 18–20 minutes.
- These pies freeze well after assembly—just fry or bake from frozen, adding extra cook time.
- Prep Time: 20 minutes
- Cook Time: 15 minutes
- Category: Dessert
- Method: Frying
- Cuisine: American
Nutrition
- Serving Size: 1 pie
- Calories: 280
- Sugar: 15 g
- Sodium: 160 mg
- Fat: 16 g
- Saturated Fat: 6 g
- Unsaturated Fat: 8 g
- Trans Fat: 0 g
- Carbohydrates: 30 g
- Fiber: 1 g
- Protein: 3 g
- Cholesterol: 25 mg


