Introduction
I still remember the first time I made this vegan ice cream. It was a hot summer day, and my family was craving something sweet and refreshing. I decided to give this recipe a try, despite my initial skepticism about how a dairy-free dessert could possibly satisfy our cravings. To my delight, not only did my kids devour it, but my partner, who is a self-proclaimed ice cream aficionado, couldn’t believe it was vegan! This homemade treat quickly became a staple in our household, proving that plant-based desserts can be just as indulgent and delicious as their dairy-laden counterparts. Let me share how you can whip up this creamy, rich delight that will impress everyone, vegan or not!
Ingredients
- 1 1/4 cups raw cashews
- (2) 13.5 oz cans full-fat coconut milk
- 3/4 cup granulated sugar
- 1/4 teaspoon salt
- 1 tablespoon pure vanilla extract
Instructions
Step 1: Prepare the Ice Cream Maker Bowl
Place the bowl of your ice cream maker in the freezer the night before you plan on making the ice cream. This ensures the bowl is cold enough to churn the mixture properly.
Step 2: Soak the Cashews
Bring 3 cups of water to a boil. Pour the hot water over the raw cashews in a bowl and let them soak for at least 5 minutes, or up to 3 hours.
Step 3: Blend the Ingredients
Drain the cashews and discard the soaking water. Add the soaked cashews to a high-powered blender along with the coconut milk, granulated sugar, salt, and vanilla extract. Blend on high speed for 3-4 minutes, until the mixture is very smooth and creamy. Make sure there are no cashew pieces left.
Step 4: Chill the Mixture
Pour the blended mixture into a large bowl and place it in the freezer to chill for about 30 minutes. This step helps the mixture get cold enough for churning.
Step 5: Churn the Ice Cream
Set up your ice cream maker according to the manufacturer’s instructions. Remove the ice cream maker bowl and the chilled mixture from the freezer. Pour the mixture into the ice cream maker and churn for about 20-25 minutes, until it reaches the consistency of soft-serve ice cream. If you’re adding mix-ins (like cookie dough, brownie pieces, or fruit), add them in the last few minutes of churning.
Step 6: Freeze the Ice Cream
Transfer the soft-serve ice cream to a loaf pan and smooth the top with a spoon. Place a piece of plastic wrap directly on the surface of the ice cream to prevent ice crystals from forming. Place another layer of plastic wrap over the pan and freeze for 4-5 hours, until the ice cream is firm.
Step 7: Serve
When ready to serve, remove the ice cream from the freezer and let it sit at room temperature for a few minutes to soften slightly. Scoop and enjoy with your favorite toppings, like vegan hot fudge, whipped cream, or sprinkles!
Nutrition Facts
- Servings: Approximately 8 (based on 1/2 cup servings)
- Calories: 251 kcal per serving
Preparation Time
- Prep Time: 15 minutes (plus soaking time)
- Chilling Time: 30 minutes
- Churning Time: 20-25 minutes
- Freezing Time: 4-5 hours
How to Serve
- Scoop into bowls and serve immediately for a soft-serve experience.
- Top with:
- Vegan hot fudge
- Fresh fruit
- Chopped nuts
- Dairy-free whipped cream
- Vegan sprinkles
Additional Tips
- Ensure Equipment is Clean: Make sure your blender and ice cream maker bowl are free of any oils or residues for the best results.
- Experiment with Flavors: Add cocoa powder for chocolate ice cream or fruit purees for different flavors.
- Mix-In Ideas: Try adding cookie dough, brownie pieces, or chunks of vegan chocolate.
- Taste Before Freezing: Adjust sweetness or flavor intensity before you churn the mixture.
- Don’t Skip the Cashews: They provide the creamy texture that makes this ice cream truly indulgent.
Recipe Variations
- Chocolate Vegan Ice Cream: Add 1/2 cup unsweetened cocoa powder to the mixture before blending.
- Fruit-Infused Ice Cream: Blend in fresh or frozen fruit like strawberries, mango, or blueberries.
- Mint Chocolate Chip: Add a few drops of peppermint extract and vegan chocolate chips in the last few minutes of churning.
- Coffee Ice Cream: Mix in 1-2 tablespoons of instant coffee granules for a rich coffee flavor.
- Nutty Flavor: Incorporate almond or hazelnut extract for a different taste profile.
Serving Suggestions
- Serve alongside vegan brownies or cookies for a decadent dessert.
- Use as a filling for vegan ice cream sandwiches.
- Top with a drizzle of melted dark chocolate for extra indulgence.
Freezing and Storage
- Store the ice cream in an airtight container or a loaf pan covered with plastic wrap for up to 2 weeks.
- To maintain the best texture, let it sit at room temperature for a few minutes before scooping.
FAQ Section
1. Can I use different nuts instead of cashews?
While cashews are best for creaminess, almonds or macadamias can work, though the texture may vary.
2. Is this recipe gluten-free?
Yes, all ingredients are gluten-free, making this a great option for those with gluten sensitivities.
3. Can I make this without an ice cream maker?
You can, but the texture may not be as creamy. Simply freeze the blended mixture and stir every 30 minutes until firm.
4. How long does it take to make?
Including soaking and freezing time, plan for about 5-6 hours from start to finish.
5. What can I use instead of coconut milk?
You can use vegan creamers, but the ice cream may be less creamy.
6. How do I know when the ice cream is done churning?
It should be thick and have a soft-serve consistency.
7. Can I reduce the sugar?
Yes, you can adjust the sugar to your taste, but it may affect the texture.
8. What should I do if my ice cream is too hard after freezing?
Let it sit at room temperature for a few minutes before scooping.
9. Can I add alcohol to the ice cream?
Yes, a tablespoon or two of vodka can help keep it softer due to its lower freezing point.
10. How do I make a vegan sundae?
Scoop the ice cream into a bowl and top with your favorite toppings like nuts, syrup, and whipped cream!
Conclusion
Making homemade vegan ice cream is a delightful way to indulge in a rich, creamy dessert without any dairy. This recipe is not only simple but also incredibly versatile, allowing you to customize it to your taste preferences. Whether you’re enjoying it on a hot summer day or as a sweet treat after dinner, this vegan ice cream is sure to impress everyone around you. So gather your ingredients, fire up your blender, and treat yourself to this delicious, guilt-free dessert that proves vegan doesn’t mean compromising on flavor!
Print
The Best Vegan Ice Cream 🍨
- Total Time: 0 hours
- Yield: 6–8 Serving 1x
- Diet: Gluten Free
Description
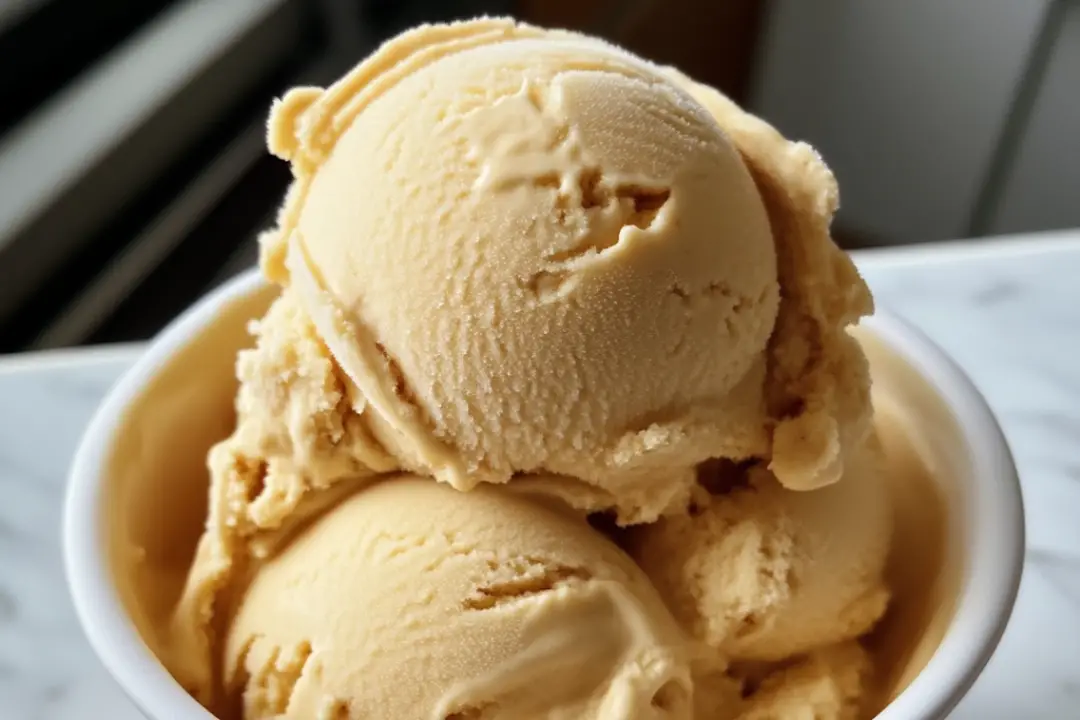
This homemade vegan ice cream is creamy, rich, and incredibly easy to make with just 5 simple ingredients. It’s a perfect dairy-free dessert that no one will believe is vegan! Customize it with your favorite add-ins like cookie dough, brownie pieces, or fresh fruit for a truly indulgent treat.
Ingredients
- 1 1/4 cups raw cashews
- (2) 13.5 oz cans full-fat coconut milk
- 3/4 cup granulated sugar
- 1/4 teaspoon salt
- 1 tablespoon pure vanilla extract
Instructions
- Prepare the Ice Cream Maker Bowl: Place the bowl of your ice cream maker in the freezer the night before you plan on making the ice cream.
- Soak the Cashews: Bring 3 cups of water to a boil. Pour the hot water over the raw cashews in a bowl and let them soak for at least 5 minutes, or up to 3 hours.
- Blend the Ingredients: Drain the cashews and discard the soaking water. Add the soaked cashews to a high-powered blender along with the coconut milk, granulated sugar, salt, and vanilla extract. Blend on high speed for 3-4 minutes, until the mixture is very smooth and creamy.
- Chill the Mixture: Pour the blended mixture into a large bowl and place it in the freezer to chill for about 30 minutes.
- Churn the Ice Cream: Set up your ice cream maker according to the manufacturer’s instructions. Pour the mixture into the ice cream maker and churn for about 20-25 minutes, until it reaches the consistency of soft-serve ice cream. Add mix-ins in the last few minutes of churning if desired.
- Freeze the Ice Cream: Transfer the soft serve ice cream to a loaf pan, smooth the top, and cover with plastic wrap. Freeze for 4-5 hours until firm.
- Serve: Remove the ice cream from the freezer and let it sit at room temperature for a few minutes to soften slightly. Scoop and enjoy with your favorite toppings.
Notes
- This recipe is designed for an ice cream maker. Without one, the texture may not be as creamy.
- For a coconut-free version, use 2 1/2 cups of vegan creamer, but the ice cream may be less creamy.
- Do not skip the cashews, as they are essential for the creamy texture.
- Prep Time: 15 mins
- Cook Time: 20-25 minutes
- Category: Dessert
- Method: Churning
- Cuisine: American
Nutrition
- Serving Size: 1/2 cup
- Calories: 251
- Sugar: 18g
- Sodium: 59mg
- Fat: 19g
- Saturated Fat: 13g
- Unsaturated Fat: 0g
- Trans Fat: 0g
- Carbohydrates: 18g
- Fiber: 1g
- Protein: 4g
- Cholesterol: 0mg