Introduction:
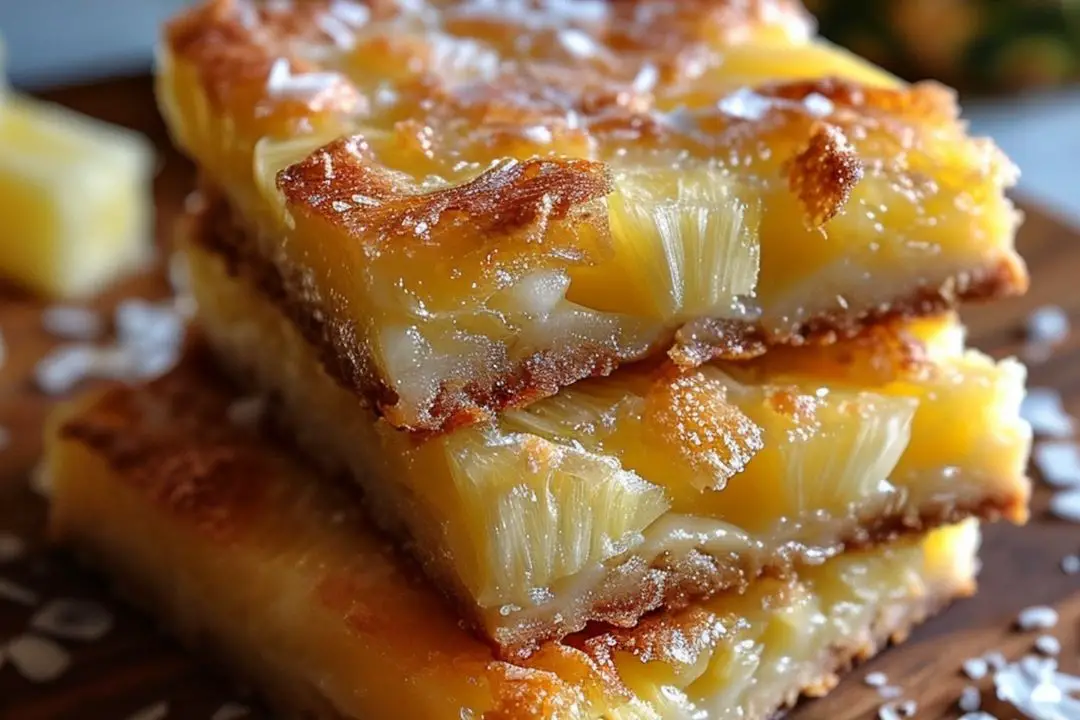
Transport yourself to a sun-drenched island paradise with every bite of these delightful Pineapple Bliss Bars. Bursting with tropical flavors and a hint of sweetness, these bars are the perfect treat to enjoy any time of year. Whether you’re hosting a summer barbecue, craving a taste of the tropics in the midst of winter, or simply looking for a delicious dessert to satisfy your sweet tooth, these bars are sure to impress. In this article, we’ll explore what makes Pineapple Bliss Bars so irresistible and share a simple yet mouthwatering recipe for you to try at home.
Why Pineapple Bliss Bars? Pineapple is not only delicious but also packed with nutrients. It’s rich in vitamin C, manganese, and antioxidants, making it a healthy addition to your diet. When combined with the buttery goodness of a shortbread crust and the creamy sweetness of condensed milk, pineapple takes center stage in these delectable bars. The tangy-sweet flavor of pineapple pairs perfectly with the rich, buttery crust, creating a harmonious blend of flavors that will leave your taste buds dancing with delight.
Ingredients:
- 1 ½ cups all-purpose flour
- ½ cup powdered sugar
- ¾ cup unsalted butter, softened
- 1 can (14 ounces) sweetened condensed milk
- 1 cup crushed pineapple, drained
- ½ cup shredded coconut
- ½ cup chopped macadamia nuts (optional)
- Maraschino cherries for garnish (optional)
Instructions:
- Preheat your oven to 350°F (175°C). Grease a 9×9-inch baking dish and set aside.
- In a mixing bowl, combine the flour, powdered sugar, and softened butter. Mix until crumbly.
- Press the mixture into the bottom of the prepared baking dish to form an even crust.
- Bake the crust in the preheated oven for 15 minutes, or until lightly golden brown.
- While the crust is baking, mix together the sweetened condensed milk, crushed pineapple, shredded coconut, and chopped macadamia nuts (if using) in a separate bowl.
- Once the crust is done baking, pour the pineapple mixture evenly over the hot crust.
- Return the baking dish to the oven and bake for an additional 25-30 minutes, or until the edges are golden brown and the center is set.
- Remove the bars from the oven and allow them to cool completely in the baking dish.
- Once cooled, cut into bars and garnish each bar with a maraschino cherry, if desired.
- Serve and enjoy!
Serving and Storage Tips:
- Serving: Pineapple Bliss Bars are best served chilled or at room temperature. Allow them to cool completely in the baking dish before cutting into bars for clean slices. For an extra touch, you can dust the bars with powdered sugar or drizzle with a simple glaze made of powdered sugar and pineapple juice before serving.
- Storage: To keep your Pineapple Bliss Bars fresh and delicious, store them in an airtight container in the refrigerator for up to 3-4 days. Layer parchment paper between the bars to prevent sticking and maintain their shape. Alternatively, you can freeze the bars for longer storage. Wrap individual bars or stack them in a freezer-safe container with parchment paper between layers. They can be stored in the freezer for up to 2-3 months. Before serving, thaw the bars in the refrigerator overnight or at room temperature for a few hours. Avoid storing the bars at room temperature for extended periods, as they may become too soft or lose their freshness.
Variations of Pineapple Bliss Bars Recipe:
- Tropical Coconut Pineapple Bars:
- Add an extra layer of coconut flavor by incorporating coconut extract into the shortbread crust or the pineapple filling.
- Sprinkle shredded coconut on top of the bars before baking for added texture and visual appeal.
- Pineapple Macadamia Nut Bars:
- Enhance the tropical flavor by doubling the amount of chopped macadamia nuts in the recipe.
- For an extra crunch, toast the macadamia nuts before adding them to the filling mixture.
- Pineapple Mango Bars:
- Substitute half of the crushed pineapple with mashed ripe mango for a tropical twist.
- Garnish each bar with a slice of fresh mango for an eye-catching presentation.
- Pineapple Upside-Down Bars:
- Arrange pineapple slices and maraschino cherries on the bottom of the baking dish before pouring the shortbread crust mixture over them.
- Once baked and cooled, invert the bars onto a serving platter to reveal the caramelized pineapple topping.
- Pineapple Coconut Cream Bars:
- Layer the pineapple filling over a baked shortbread crust, then top with a layer of whipped coconut cream.
- Garnish with toasted coconut flakes for an extra burst of coconut flavor and texture.
- Pineapple Lime Bars:
- Add freshly grated lime zest to the shortbread crust for a zesty kick.
- Substitute lime juice for a portion of the pineapple juice in the filling mixture to brighten the flavor profile.
- Pineapple Ginger Bars:
- Infuse the shortbread crust with ground ginger for a warm and spicy undertone.
- Add finely chopped crystallized ginger to the pineapple filling for a burst of sweet and spicy flavor.
- Pineapple Rum Bars:
- Spike the pineapple filling with a splash of dark rum for a boozy twist.
- Sprinkle the baked bars with rum-infused whipped cream or a rum glaze before serving for an extra indulgent treat.
With their irresistible combination of tropical flavors and buttery goodness, Pineapple Bliss Bars are sure to become a favorite among family and friends. Whether you’re craving a taste of the tropics or simply looking for a delicious dessert to enjoy, these bars are the perfect choice. Give the recipe a try and treat yourself to a slice of tropical paradise today!

