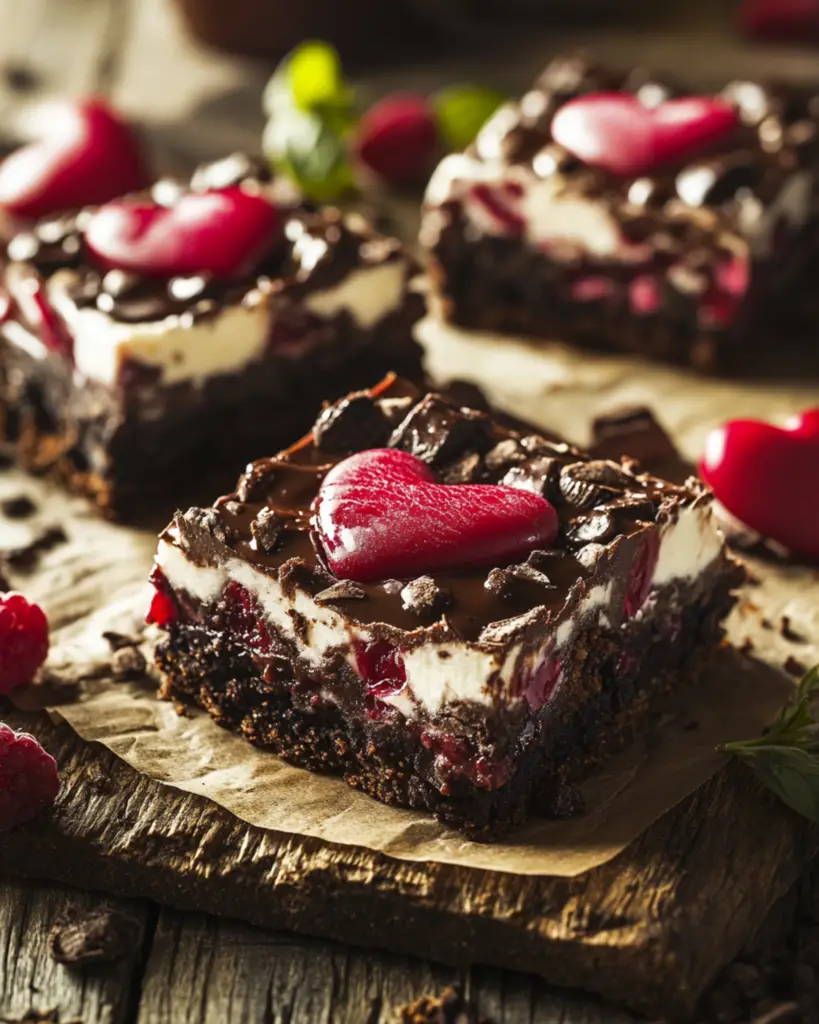
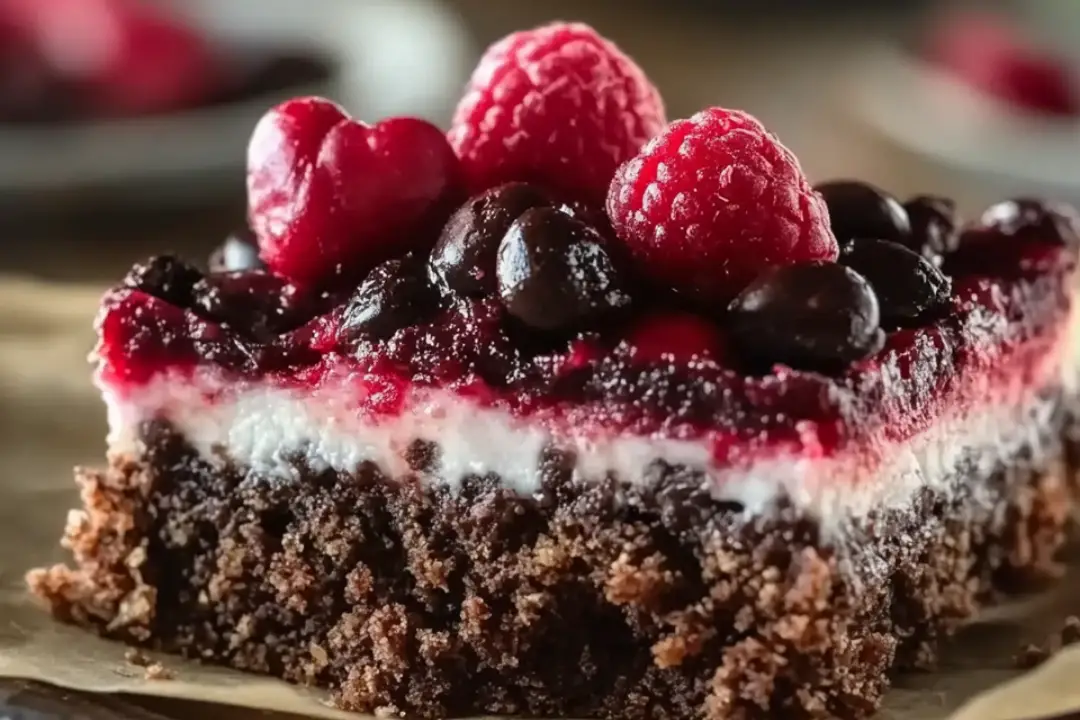
Looking to wow your Valentine with a dessert that’s as dreamy as it is delicious? These Valentine’s Black Forest Dream Bars are the perfect treat to spread some love this season. Imagine layers of rich, fudgy chocolate, sweet cherries, and creamy whipped topping all packed into one decadent, irresistible bar. You’ll get all the indulgence of a Black Forest cake, but in a convenient, easy-to-serve bar form that’s perfect for sharing. Trust me, these are the kind of bars that will have everyone falling head over heels—whether it’s for your Valentine, your friends, or just yourself (no judgment here!).
With that perfect combination of chocolate and cherries, plus a touch of whipped cream, every bite is like a little slice of heaven. These bars are soft, decadent, and just the right amount of sweet to make any occasion feel extra special. So, get your ingredients ready, because these Valentine’s Black Forest Dream Bars are about to steal the show!
Why You’ll Love Valentine’s Black Forest Dream Bars
A Sweet Twist on a Classic
These bars take the traditional Black Forest cake to a new level. Instead of layering and frosting, we’re making them easy and convenient—without sacrificing any of the flavor. Think of it as Black Forest cake, but in bite-sized, bar form!
Perfect for Sharing
Whether you’re hosting a Valentine’s Day party, bringing a treat to a friend’s house, or just surprising your partner with something sweet, these bars are easy to serve and share. Everyone will love the combination of chocolate, cherries, and whipped cream, making them a crowd favorite.
Simple Ingredients, Big Flavor
You won’t need any special tools or complicated steps to make these dream bars. With just a few simple ingredients, you can create something that looks (and tastes!) like it came straight from a bakery.
Versatile and Customizable
Feel free to adjust the flavors and add-ins. If you want to give it a little extra flair, try using dark chocolate for a richer taste, or add some shaved chocolate on top for texture. The possibilities are endless!
Quick to Make
These bars come together quickly, and the best part? You don’t have to bake them for long, so you can have a sweet treat ready in no time. They’re perfect when you need something special without the hassle.

Disclosure: This post contains affiliate links.If you click and make a purchase, I may earn a small commission at no extra cost to you.
Ingredients
Here’s everything you need to make these Valentine’s Black Forest Dream Bars:
Chocolate Crust
The rich, fudgy chocolate crust is the base for this dessert. It gives the bars that deep chocolate flavor and holds everything together.
Sweetened Condensed Milk
The creamy, luscious layer that binds all the ingredients together and gives the bars that melt-in-your-mouth texture.
Cherries (Fresh or Canned)
You can use either fresh cherries or canned cherry pie filling. The cherries add a burst of sweetness and tartness that balances out the rich chocolate perfectly.
Whipped Cream
A smooth and creamy topping to finish off the bars. Whipped cream adds a light, fluffy contrast to the dense layers of chocolate and cherries.
Semi-Sweet Chocolate Chips
For extra chocolatey goodness, these chips are melted into the mixture for that signature Black Forest flavor.
Cocoa Powder
Used to enhance the chocolatey flavor and create that perfect depth of taste in the crust.
Butter
Butter helps to give the crust a smooth and rich texture that blends all the ingredients beautifully.
(Note: Full ingredient measurements are provided in the recipe card directly below.)
Instructions
Let’s bring these delicious bars to life:
Step 1: Prepare the Crust
Preheat your oven to 350°F (175°C) and line a 9×9-inch baking pan with parchment paper for easy removal. In a bowl, melt the butter and stir in the cocoa powder, sweetened condensed milk, and a few semi-sweet chocolate chips. Stir until the mixture is smooth and everything is combined.
Step 2: Make the Crust
Pour the chocolate mixture into the prepared pan and spread it out evenly. Press it down gently with a spatula to form an even base. Bake for 10-12 minutes, or until the crust is set and slightly firm.
Step 3: Add the Cherries
Once the crust has cooled slightly, spread a layer of cherries (or cherry pie filling) on top of the chocolate base. Be sure to spread them evenly to get a sweet, fruity layer in every bite.
Step 4: Add the Chocolate and Whipped Cream Layers
Next, melt the remaining semi-sweet chocolate chips in a microwave-safe bowl or over a double boiler. Drizzle the melted chocolate over the cherry layer and spread it out gently with a spoon or spatula.
Top everything off with a layer of freshly whipped cream. You can either whip up some heavy cream yourself or use store-bought whipped cream for convenience. Spread it evenly over the bars for a light, fluffy texture that contrasts beautifully with the dense, chocolatey base.
Step 5: Chill and Serve
Refrigerate the bars for at least 2-3 hours to allow them to set and firm up. Once chilled, cut them into squares and serve. These bars are perfect for sharing with your loved ones—or for indulging on your own.
Nutrition Facts
Servings: 12
Calories per serving: 310
Total Fat: 19g
Saturated Fat: 11g
Cholesterol: 35mg
Sodium: 90mg
Carbohydrates: 35g
Fiber: 2g
Sugars: 23g
Protein: 3g
Preparation Time
- Prep Time: 15 minutes
- Chill Time: 2-3 hours
- Total Time: 3 hours
How to Serve Valentine’s Black Forest Dream Bars
These decadent bars are perfect for all sorts of occasions. Here’s how you can serve them:
On a Dessert Table
Perfect for sharing with friends and family, these bars are an eye-catching addition to any dessert spread. They’ll look beautiful on a Valentine’s Day-themed table, surrounded by other sweet treats.
With a Glass of Milk or Coffee
Pair these bars with a cold glass of milk or a hot cup of coffee for a perfect dessert experience. The combination of rich chocolate, cherries, and whipped cream will make every bite even more indulgent.
As a Gift
Wrap these bars up in cute packaging and give them as a sweet Valentine’s gift. Your loved ones will appreciate the thought and effort you put into making these delicious, homemade treats.
Additional Tips
Use Fresh or Frozen Cherries
If you have fresh cherries on hand, go ahead and use them! Just be sure to pit and chop them before adding them to the bars. If you’re using canned cherry pie filling, make sure to drain it well before adding it to avoid excess liquid.
Add a Cherry Garnish
For an extra special touch, top each bar with a whole cherry or a few extra cherry pieces before serving. It adds a little pop of color and flavor that’s sure to impress.
Store in the Fridge
These bars need to be chilled for the best texture, so make sure to store them in the fridge. They’ll stay fresh for up to 4 days.
Make It Gluten-Free
If you need to make these bars gluten-free, simply use a gluten-free cookie crust or substitute the crust with gluten-free graham crackers. Just check that your chocolate chips and whipped cream are also gluten-free!
FAQ Section
Q1: Can I use a different type of fruit?
A1: Absolutely! If you’re not a fan of cherries, you can use raspberries, strawberries, or even blueberries. Just keep in mind that the flavors might change slightly, but it will still be delicious.
Q2: Can I make these bars ahead of time?
A2: Yes! These bars actually taste even better after they’ve had a chance to chill and set, so feel free to make them a day or two ahead of time. Just keep them stored in the fridge until you’re ready to serve.
Q3: Can I freeze these bars?
A3: You can freeze these bars! Just be sure to wrap them tightly in plastic wrap and store them in an airtight container. Thaw them in the fridge before serving.
Q4: Can I use milk chocolate instead of semi-sweet?
A4: Yes! If you prefer a sweeter flavor, feel free to use milk chocolate instead of semi-sweet chocolate. The bars will be a little sweeter, but still delicious.
Q5: How long do these bars last?
A5: These bars will stay fresh in the fridge for about 4 days. After that, the whipped cream may start to lose its texture, so it’s best to enjoy them sooner rather than later.
Q6: Can I use whipped topping instead of homemade whipped cream?
A6: Yes, you can! Store-bought whipped topping works well in place of homemade whipped cream. It’s a convenient option if you’re short on time.
Q7: Can I make these bars dairy-free?
A7: Yes! You can use dairy-free whipped topping, dairy-free chocolate chips, and substitute the condensed milk with a dairy-free option like coconut condensed milk to make this dessert dairy-free.
Q8: How do I cut these bars neatly?
A8: To cut the bars neatly, use a sharp knife and wipe it clean between each cut. This will help prevent the whipped cream from smearing and keep the layers intact.
Q9: Can I add alcohol to the bars?
A9: If you’d like to add an extra kick, you can mix a little kirsch (cherry brandy) into the cherry filling or drizzle it over the chocolate layer. Just keep in mind it will alter the flavor profile.
Q10: Can I make these bars in a different pan size?
A10: Yes, you can! If you want to make smaller or larger bars, feel free to adjust the pan size. Just be sure to adjust the cooking and chilling times as needed.
Conclusion
These Valentine’s Black Forest Dream Bars are the perfect way to show someone just how much you care this Valentine’s Day. With layers of rich chocolate, tart cherries, and creamy whipped topping, these bars are as indulgent as they are sweet. Whether you’re celebrating with your partner, friends, or just treating yourself, these bars will make your heart skip a beat. So grab your ingredients, whip up these dream bars, and get ready to spread some love—one delicious bite at a time!
Print
Valentine’s Black Forest Dream Bars
- Total Time: 35 minutes
- Yield: 9–12 bars (depending on how large you cut them) 1x
Description
These Valentine’s Black Forest Dream Bars combine the classic flavors of a black forest cake with a decadent, easy-to-make bar form. A rich chocolate base topped with a cherry filling and creamy whipped topping makes these bars the ultimate indulgence for your Valentine. Perfect for sharing with someone special!
Ingredients
For the Chocolate Base:
- 1 cup all-purpose flour
- 1/2 cup cocoa powder
- 1/2 cup granulated sugar
- 1 teaspoon baking powder
- 1/2 teaspoon salt
- 1/4 cup unsalted butter, melted
- 1/2 cup milk
- 1 large egg
- 1 teaspoon vanilla extract
For the Cherry Layer:
- 1 cup canned cherry pie filling (or fresh cherries, pitted and chopped)
- 2 tablespoons sugar (optional, depending on sweetness of cherries)
For the Whipped Topping:
- 1 cup heavy whipping cream
- 2 tablespoons powdered sugar
- 1/2 teaspoon vanilla extract
For Garnish (optional):
- Dark chocolate shavings or curls
- Maraschino cherries (for decoration)
Instructions
- Preheat Oven & Prepare Pan: Preheat your oven to 350°F (175°C). Grease or line a 9×9-inch baking pan with parchment paper for easy removal.
- Make the Chocolate Base: In a medium-sized bowl, whisk together the flour, cocoa powder, sugar, baking powder, and salt. Add in the melted butter, milk, egg, and vanilla extract. Stir until well combined and smooth.
- Bake the Base: Pour the chocolate batter into the prepared pan and spread it out evenly. Bake for 18-20 minutes, or until a toothpick inserted into the center comes out clean. Let the base cool completely before adding the cherry layer.
- Prepare the Cherry Layer: Once the base has cooled, spread the cherry pie filling (or fresh cherries mixed with sugar) evenly over the top of the chocolate base.
- Make the Whipped Topping: In a separate bowl, whip the heavy cream, powdered sugar, and vanilla extract with an electric mixer on medium-high speed until stiff peaks form.
- Assemble the Bars: Spread the whipped topping over the cherry layer, smoothing it out with a spatula.
- Garnish: Optional – sprinkle with dark chocolate shavings or curls and top with maraschino cherries for a festive touch.
- Chill & Serve: Refrigerate the bars for at least 1-2 hours to allow the layers to set. Slice into squares or bars and serve chilled.
Notes
- These bars can be made a day ahead for easy entertaining. Just make sure to keep them in the fridge until ready to serve.
- You can use a variety of fruit fillings, like raspberries or strawberries, if you’re not a fan of cherries.
- For a more indulgent treat, drizzle with a bit of chocolate ganache before serving.
- Prep Time: 15 minutes
- Cook Time: 20 minutes
- Category: Dessert
- Method: Baking
- Cuisine: American
Nutrition
- Serving Size: 1 bar
- Calories: 290
- Sugar: 26g
- Sodium: 80mg
- Fat: 16g
- Saturated Fat: 9g
- Unsaturated Fat: 6g
- Trans Fat: 0g
- Carbohydrates: 33g
- Fiber: 2g
- Protein: 3g
- Cholesterol: 35mg


